Remote API
System development inevitably involves making HTTP requests to call data from the server or perform some asynchronous operations. Yida provides a remote API function for asynchronous interface calls.
Creating a Remote Data Source
Users can add remote API configurations through the data source panel:
 Remote data sources include the following configuration information:
-
Name- Unique identifier for the remote API, which needs to follow JS variable definition rules;
-
Description- Defines the description information of the remote API, which will be displayed when variable binding occurs;
-
Auto Load- Data sources with "Auto Load" enabled will request the remote interface before page rendering and directly assign the returned data to a global variable named after the remote API. Page rendering begins only after all auto-loaded data sources have finished loading;
-
Load Method- Yida provides two different loading methods (default is parallel loading):
- Serial - All serial data sources will execute from top to bottom. If there are dependencies, the dependent data source needs to be listed first;
- Parallel - All parallel data sources execute simultaneously;
-
Request URL- The access address of the remote API. If using Yida-provided openAPI, relative paths can be used. If using third-party service interfaces, cross-domain access needs to be supported;
-
Request Method- Yida provides general asynchronous request methods: JSONP, GET, POST, PUT, DELETE;
-
Request Parameters- Used to set request parameters for asynchronous requests, supporting static configuration or variable binding;
-
Send Request- Supports passing in a boolean value to determine whether this request should be sent. This input field can also accept variable expressions to decide whether a request needs to be sent;
-
Data Processing- Yida provides four types of data processing functions for slice processing at different stages:
- willFetch- Function to process before sending request. willFetch allows users to modify various parameters of the request before sending. Example:
function willFetch(vars, config) {
  // vars.data can be used to change query parameters
  // config.header can be used to change headers
  // config.url can be used to change the url
  vars.data.a = 1; // Change the parameter 'a' in the request to 1
  config.url = 'https://www.taobao.com'; // Change the request url to Taobao
  config.header['Content-Type'] = 'application/json'; // Change Content-Type
  console.log(vars, config); // Can check what other parameters can be modified.
}- fit- Data adaptation when the request returns, fit can modify the original Response of the request to adapt to the corresponding data request format. Example:
// Yida only handles the following data format by default, if the asynchronous interface return structure does not meet requirements, it needs to be converted through fit
//{
//    content: [], // content field is used to carry data, the data structure corresponding to content is not restricted.
//    success: true, // success is used to indicate whether this request was successful
//}
function fit(response) {
  const content = (response.content !== undefined) ? response.content : response;
  const error = {
    message: response.errorMsg ||
      (response.errors && response.errors[0] && response.errors[0].msg) ||
      response.content || 'Remote data source request error, success is false',
  };
  let success = true;
  if (response.success !== undefined) {
    success = response.success;
  } else if (response.hasError !== undefined) {
    success = !response.hasError;
  }
  return {
    content,
    success,
    error,
  };
}- didFetch- Request completion callback function, didFetch allows users to modify received data. Different from fit, it only executes when the interface returns success as true. Example:
function didFetch(content) {
    content.b = 1; // Change the 'b' field in the returned data structure to 1
    return content; // Important, needs to return content
}- onError- Request error handling function, onError is used to capture interface exceptions in remote data sources, executing when the interface returns success as false. Example:
function onError(error) {
  console.log(error);
} -
Default Data- Specifies default data for the interface. If the interface does not return data or the request fails, default data will be returned;
API
Yida remote API provides the following two APIs:
this.dataSourceMap.xxx.load()
Manually call the specified remote API, where xxx is the data source name set in the data source panel. It also supports passing in request parameters. The request parameters passed when calling the API will be merged with the request parameters in the data source configuration and sent in the request. The load method returns a Promise.
Example:
export function fetchData() {
  // Request the remote API named getDataList configured in the data source and pass in pageSize and page parameters. If the request is successful, print the result in the console. If the request fails, show a pop-up reminder
  this.dataSourceMap.getDataList.load({
    pageSize: 10,
    page: this.state.currentPage
  }).then((res) => {
    if (res) {
      console.log('fetchData', res);
    }
  }).catch((err) => {
    this.utils.toast({
      type: 'error',
      title: 'Request failed!'
    });
  });
}
this.reloadDataSource()
Re-request all remote APIs with auto-load set to true.
Example:
export function reload() {
  // Re-request all initial data source requests
  this.reloadDataSource();
}
Usage Scenarios
Remote data sources are very common in system development as they serve as the bridge between frontend pages and backend services. In the Yida platform, we have the following two most common scenarios for using remote data sources:
Auto Load Data Source
Sometimes we need to automatically load data when users enter the page and display this data on the page, for example in a to-do list scenario.
- We load to-do tasks by configuring an auto load data source (auto load data sources will automatically mount the results to global variables after the request completes, the corresponding variable name is the data source name), as shown below:
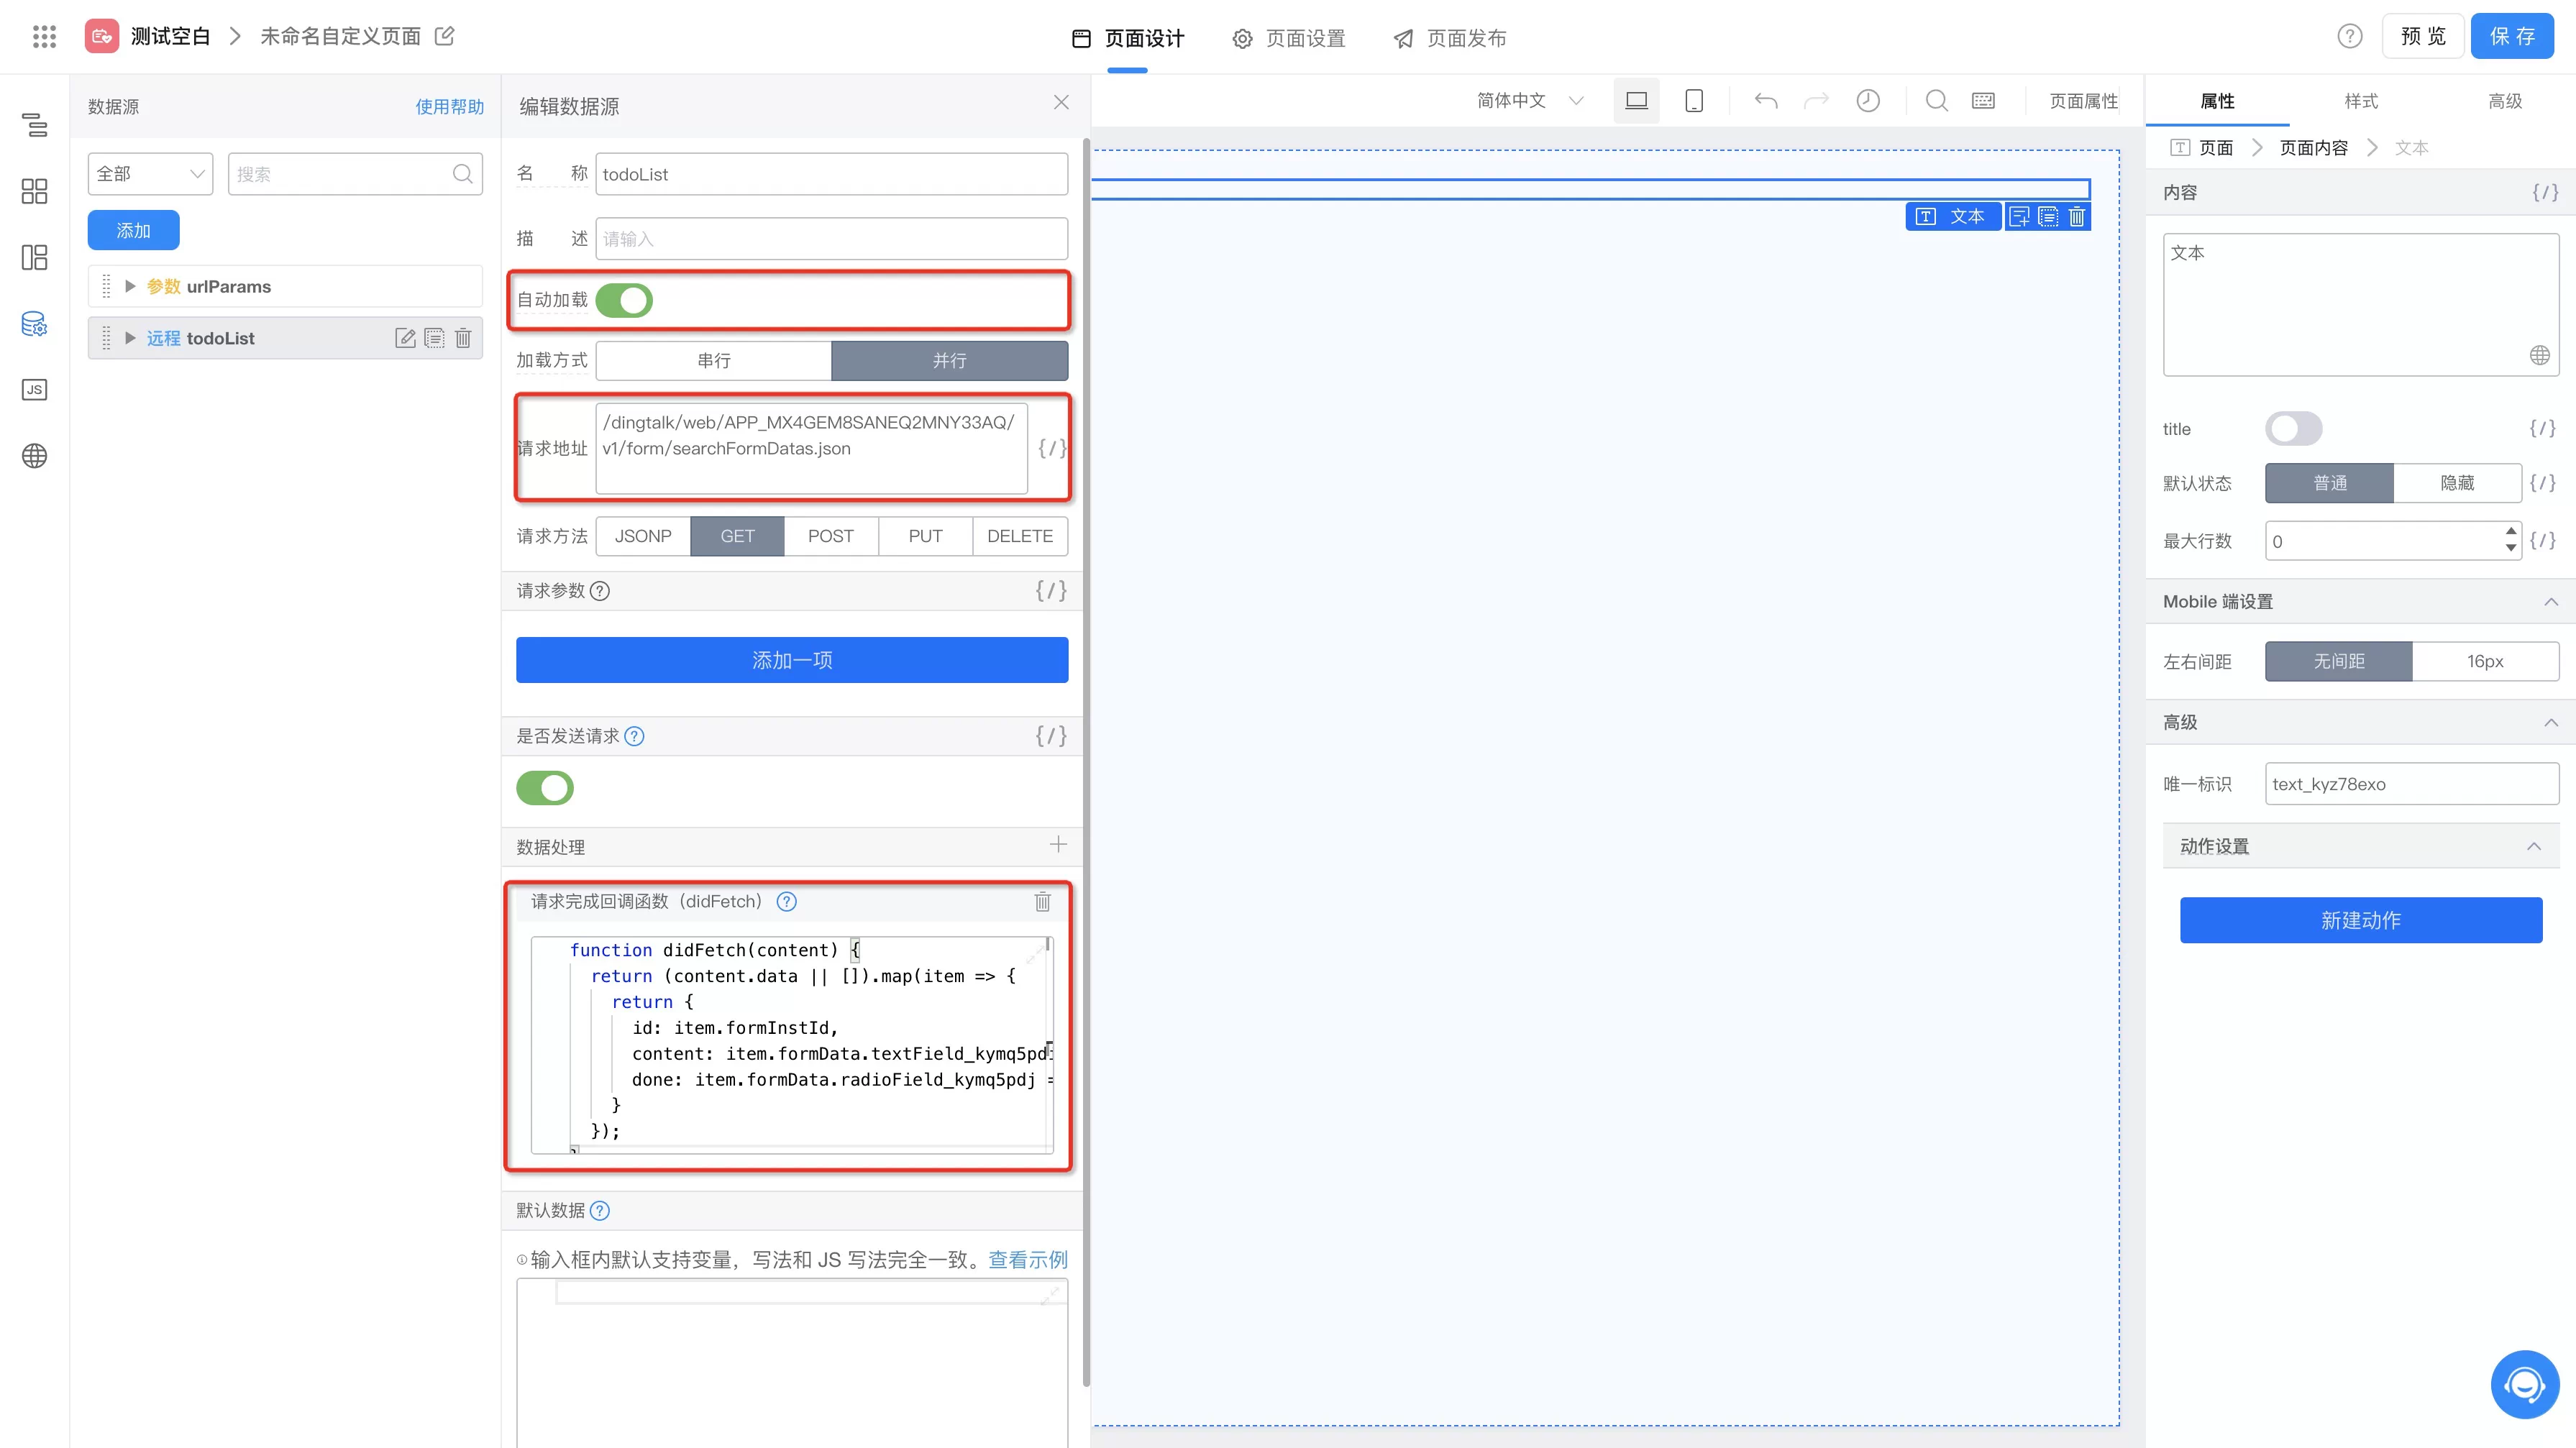
Of course, we also configured a didFetch data processing function to convert the returned data into a more semantic structure:
function didFetch(content) {
  return (content.data || []).map(item => {
    return {
      id: item.formInstId,
      content: item.formData.textField_kymq5pdi,
      done: item.formData.radioField_kymq5pdj
    }
  });
}
-
Then we need to use a table component to display our auto-loaded to-do data, as shown below:
- Set the table's data source variable binding to state.todoList;

- Set the table's field mapping fields and their corresponding types;
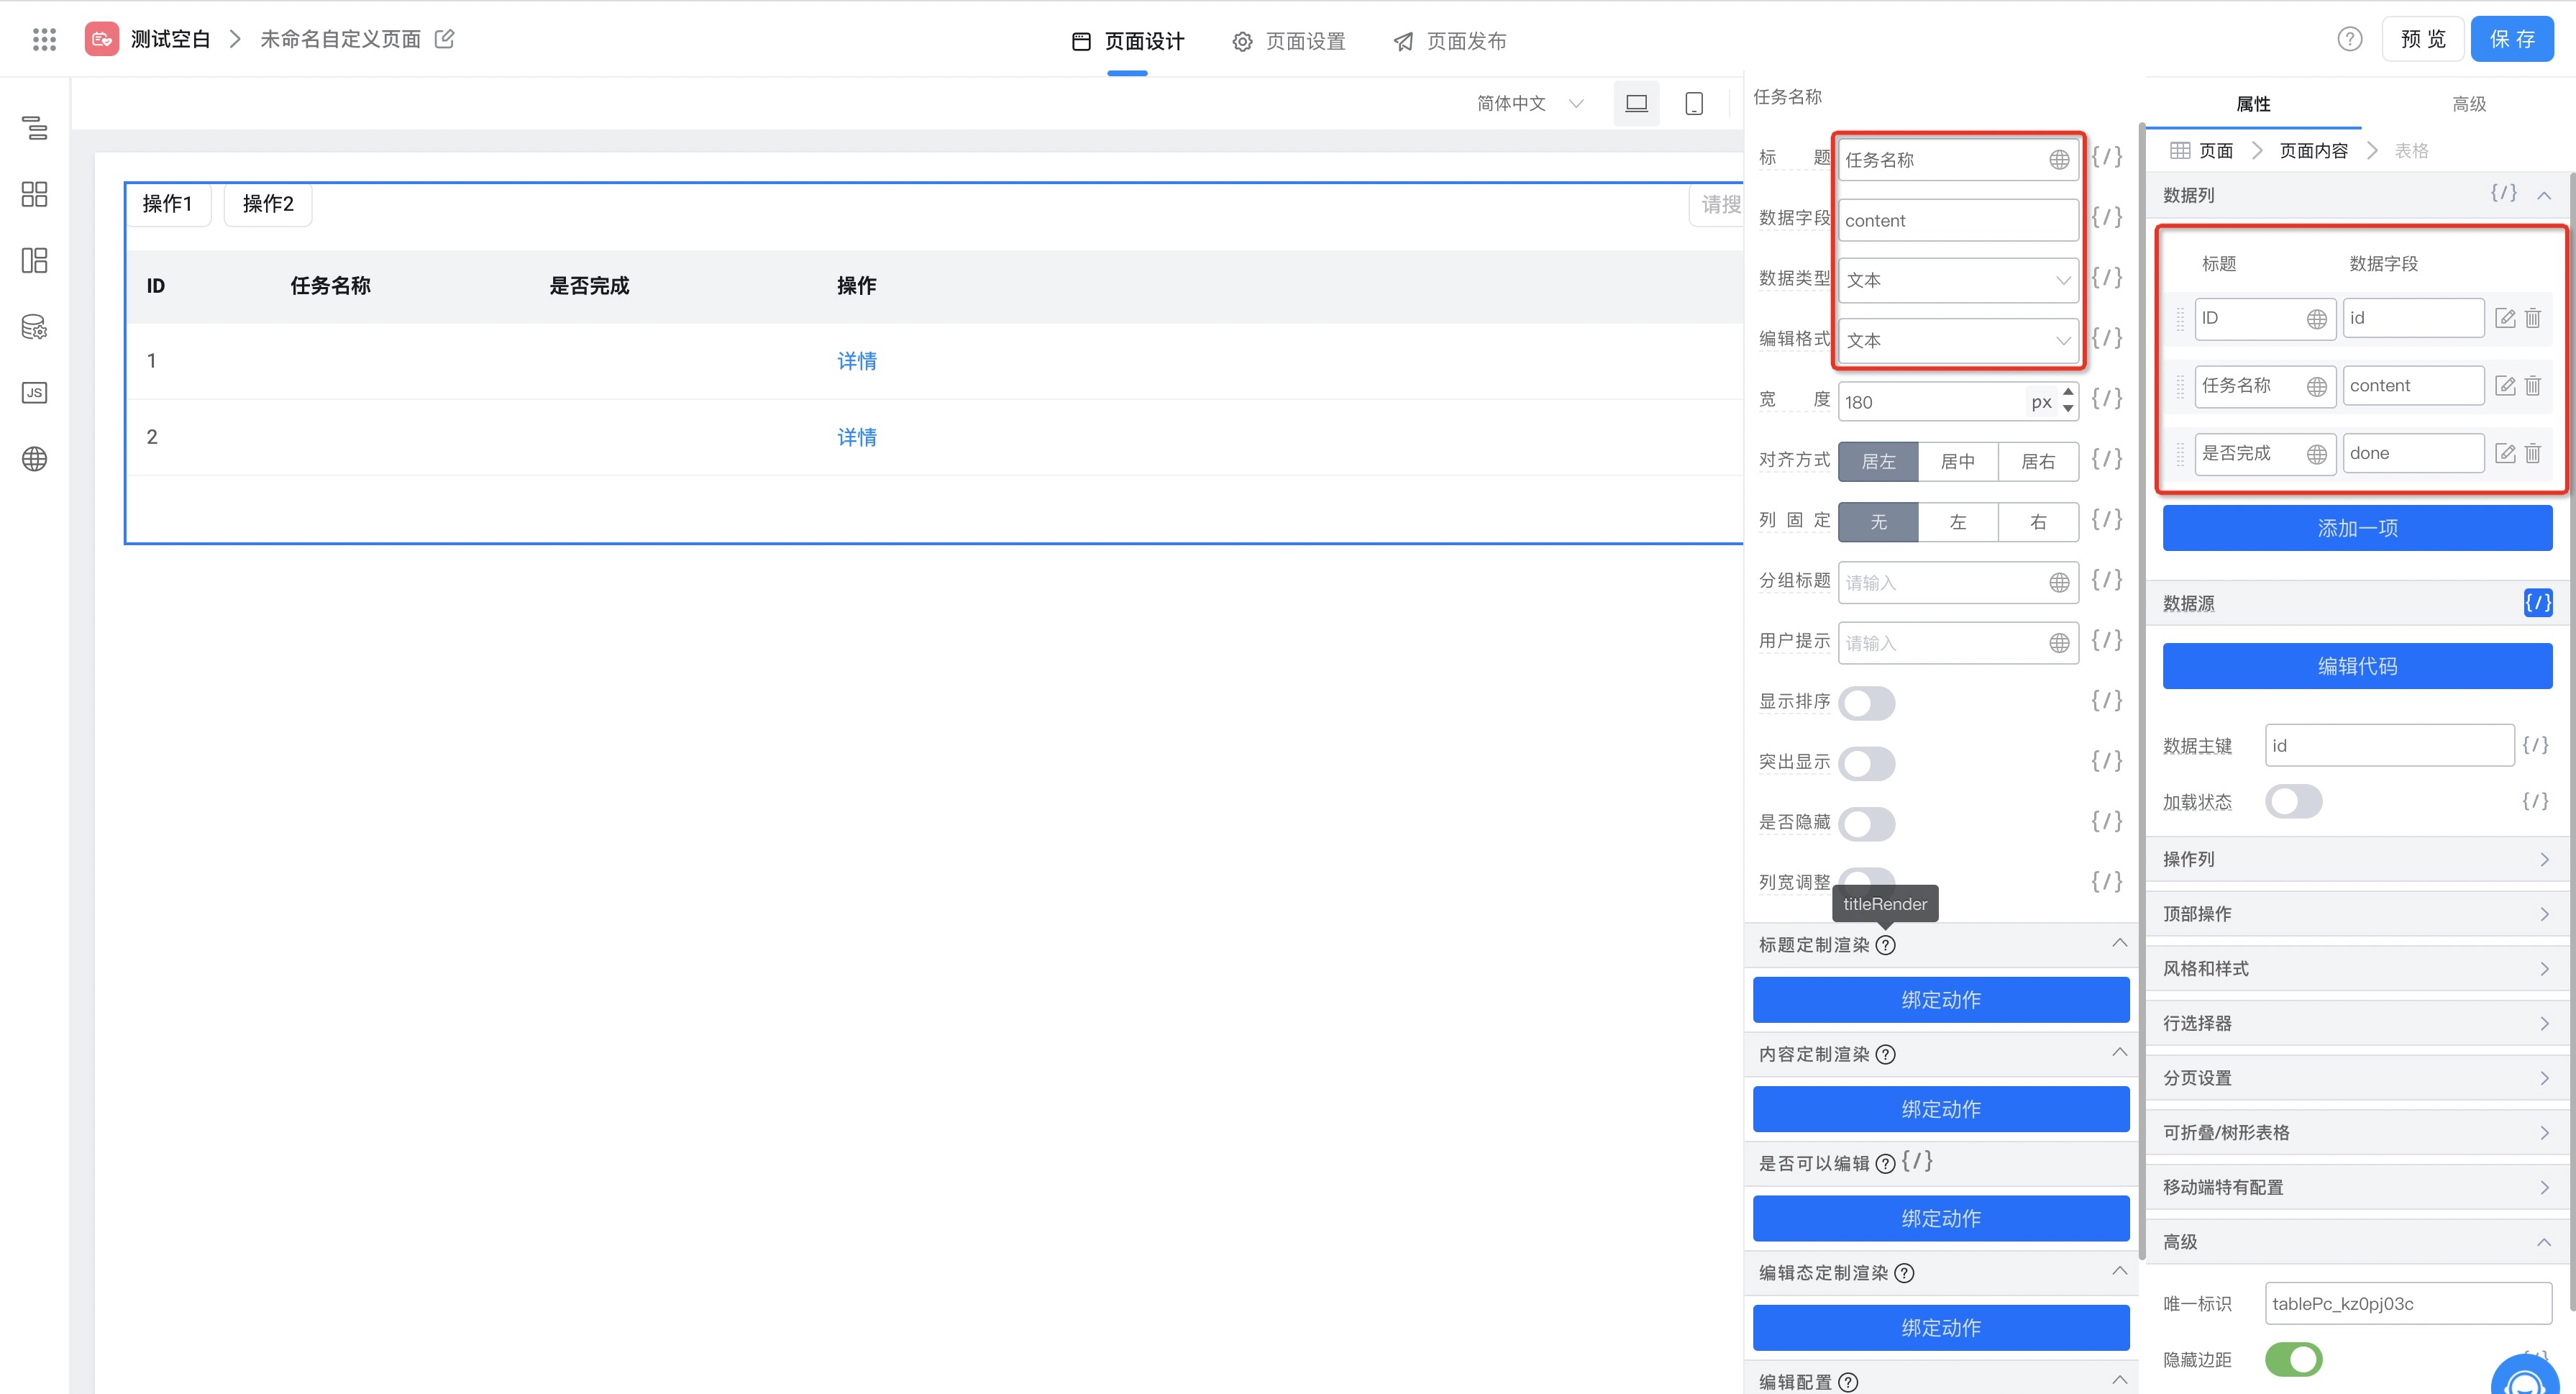
- Set the table's data source variable binding to state.todoList;
-
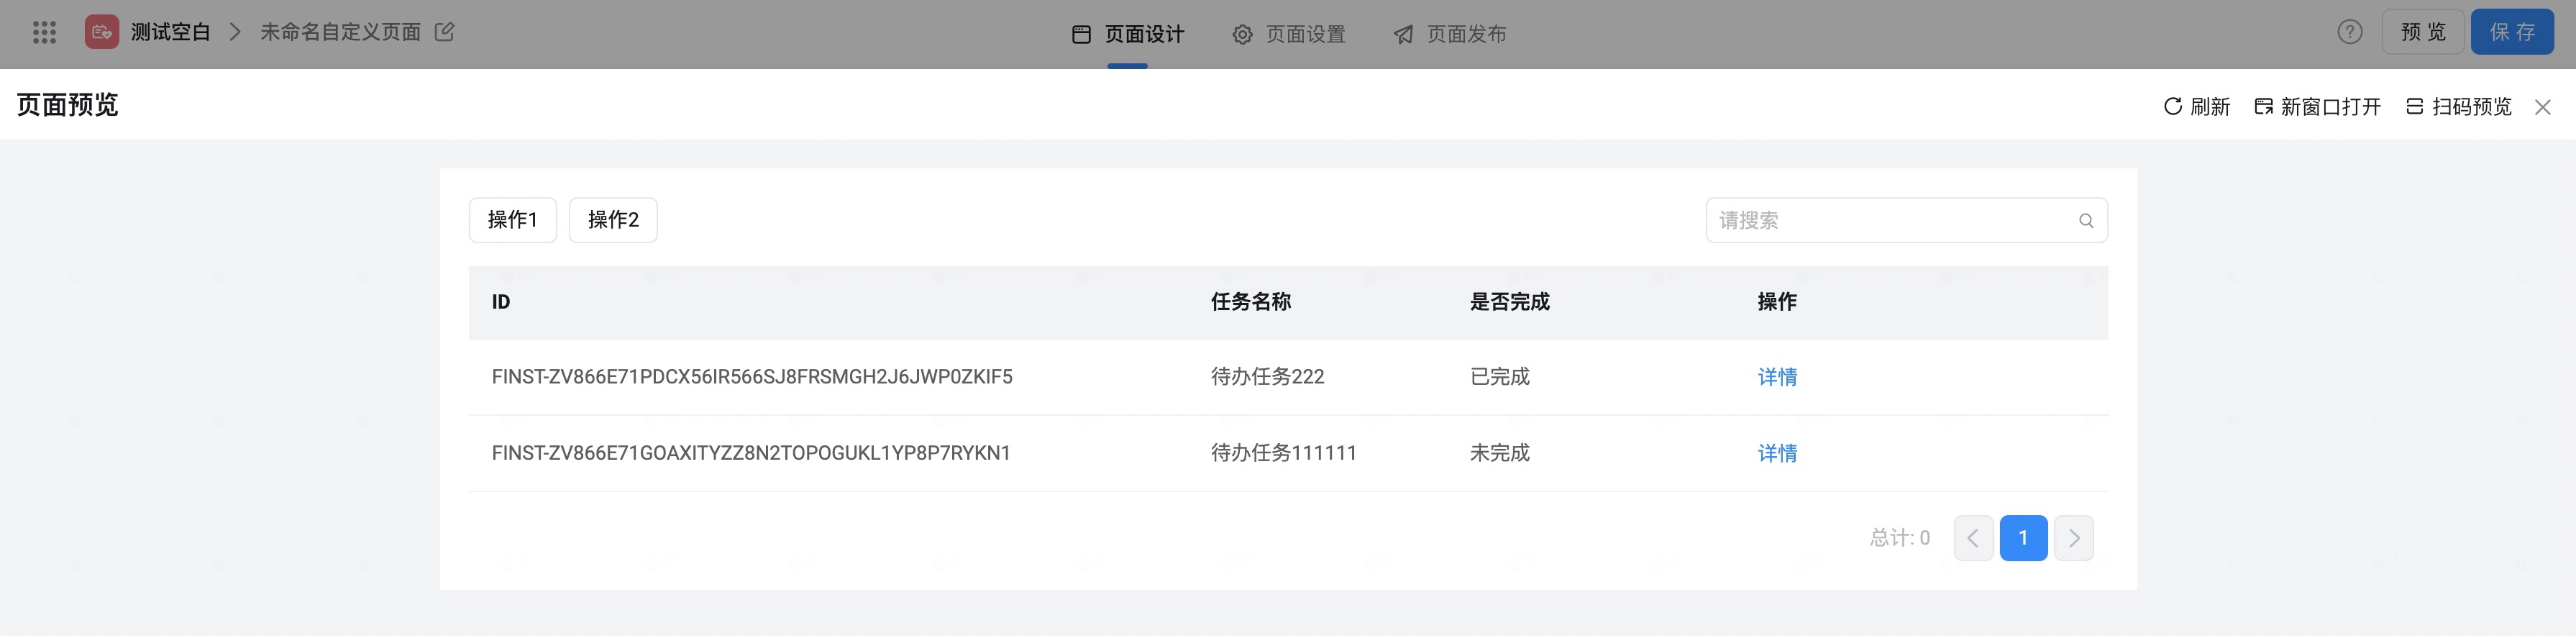
Finally, we click the preview button in the designer and can see that the to-do task data is displayed in the table;
Manual Load Data Source
Sometimes we need to manually call data sources for some operations during user interactions, for example calling a remote API to delete a to-do task when the user clicks the delete button.
- We first configure a remote API to delete tasks, as shown below:
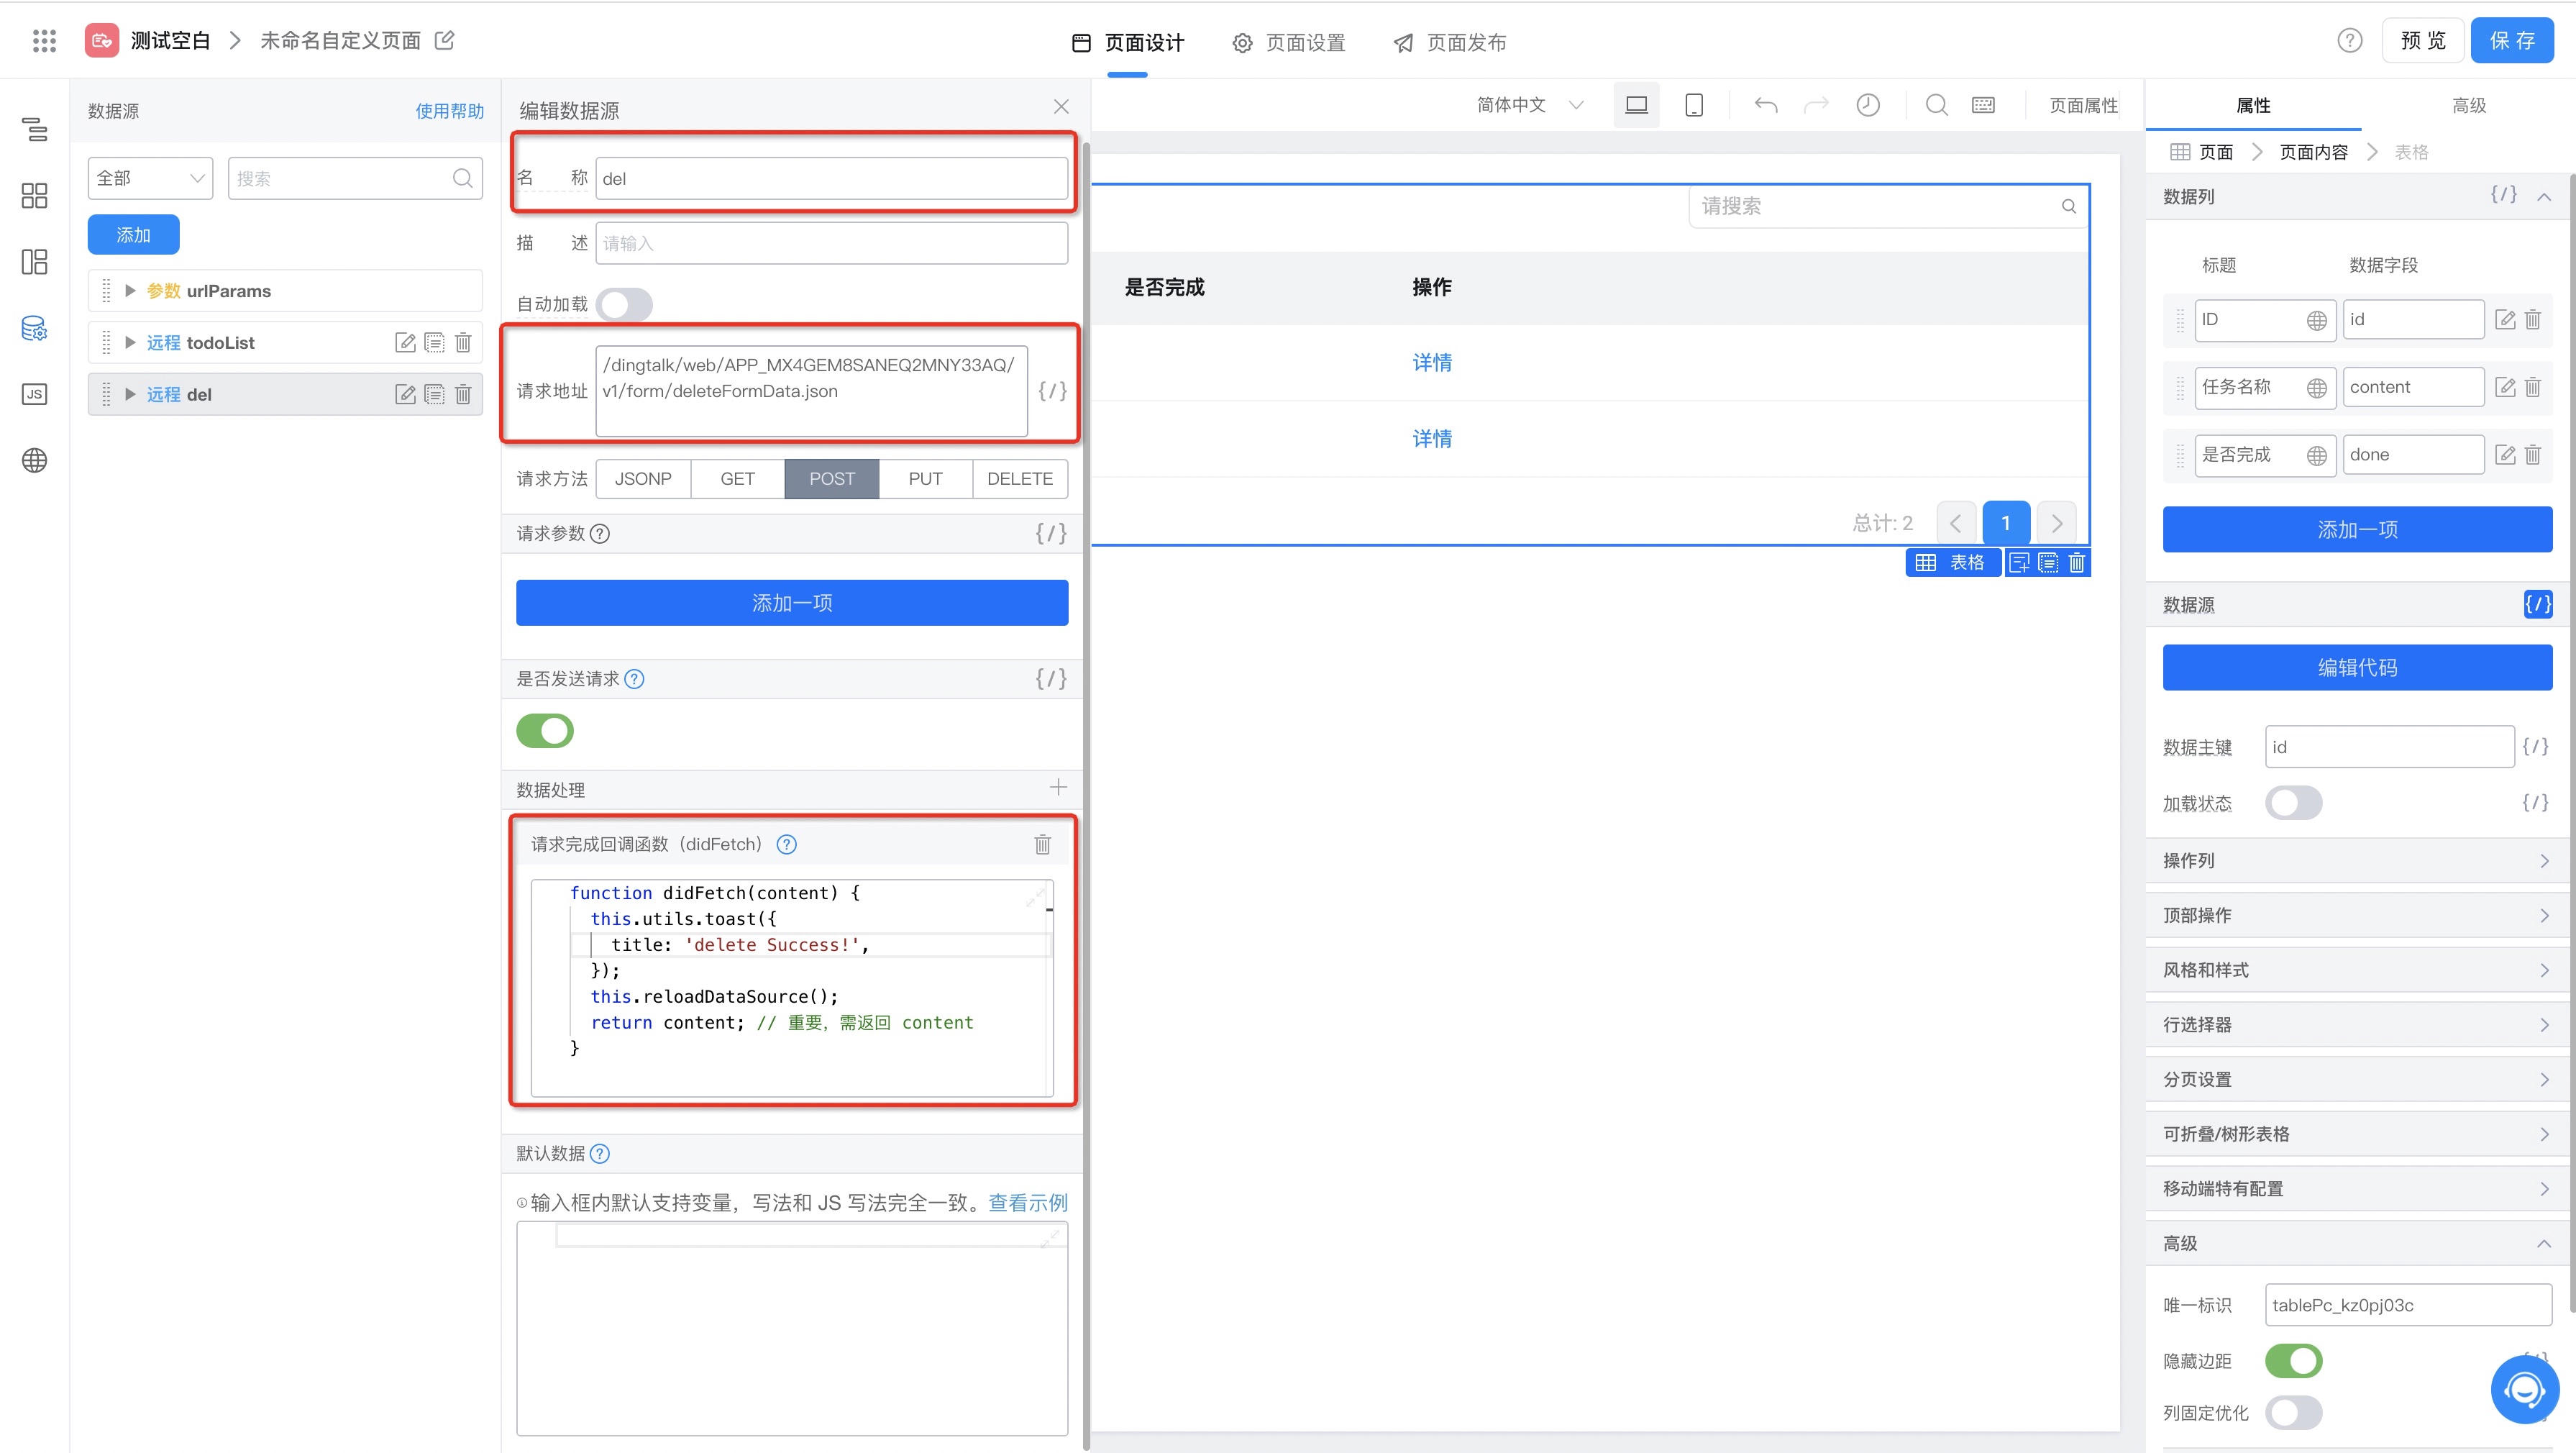
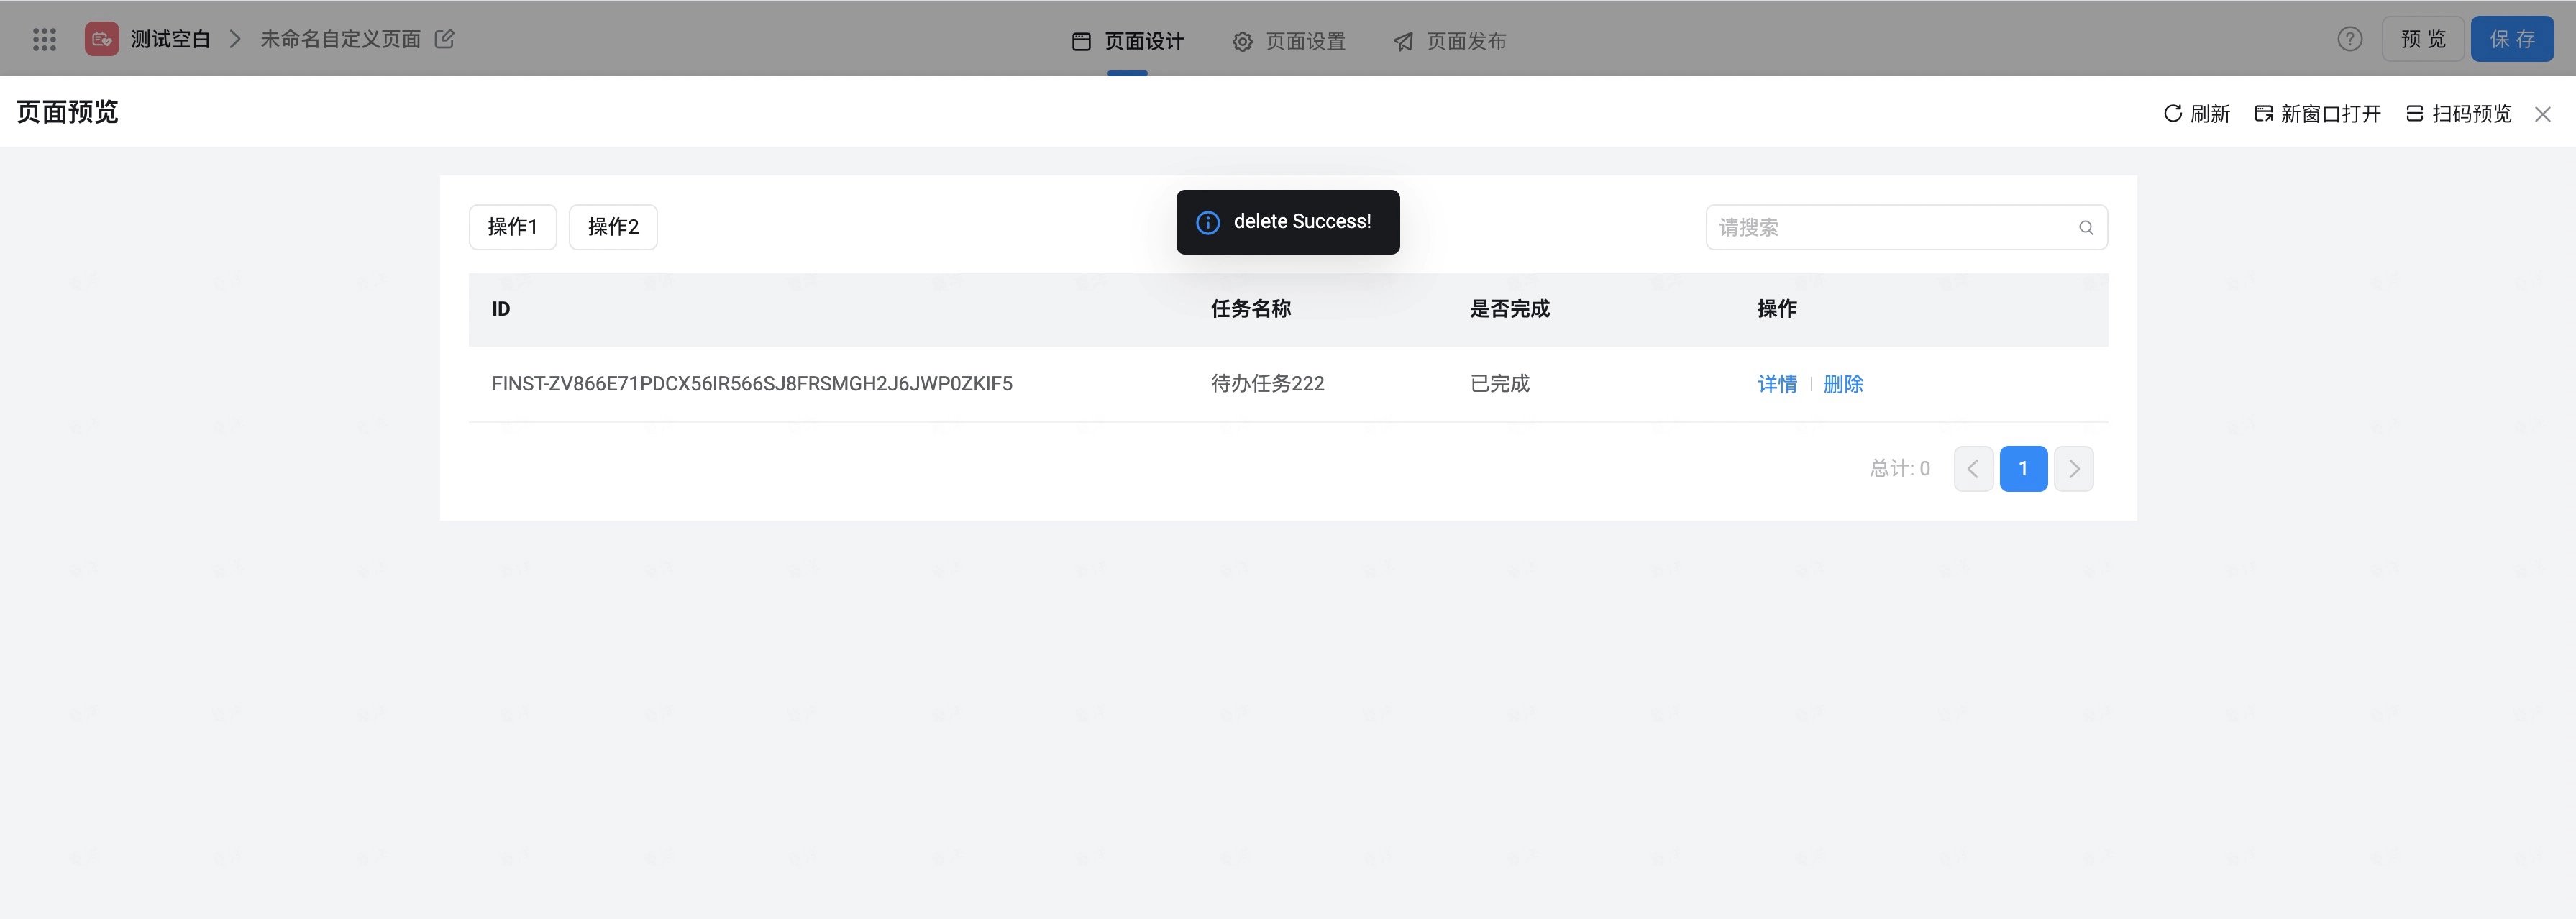
We also configured a didFetch data processing function for this interface. When the interface request is successful, we will notify the user of successful deletion through a message and refresh the task list by re-requesting auto-load requests via the reloadDataSource API:
function didFetch(content) {
  // Notify the user of successful deletion through a message
  this.utils.toast({
    title: 'delete Success!',
  });
  // Reload auto requests to refresh the task list
  this.reloadDataSource();
  return content; // Important, needs to return content
}
- Next we need to add a delete operation item to the table and manually call the remote API to complete the deletion operation when the user clicks the delete item, as shown below:
- Set the table's operation column properties:
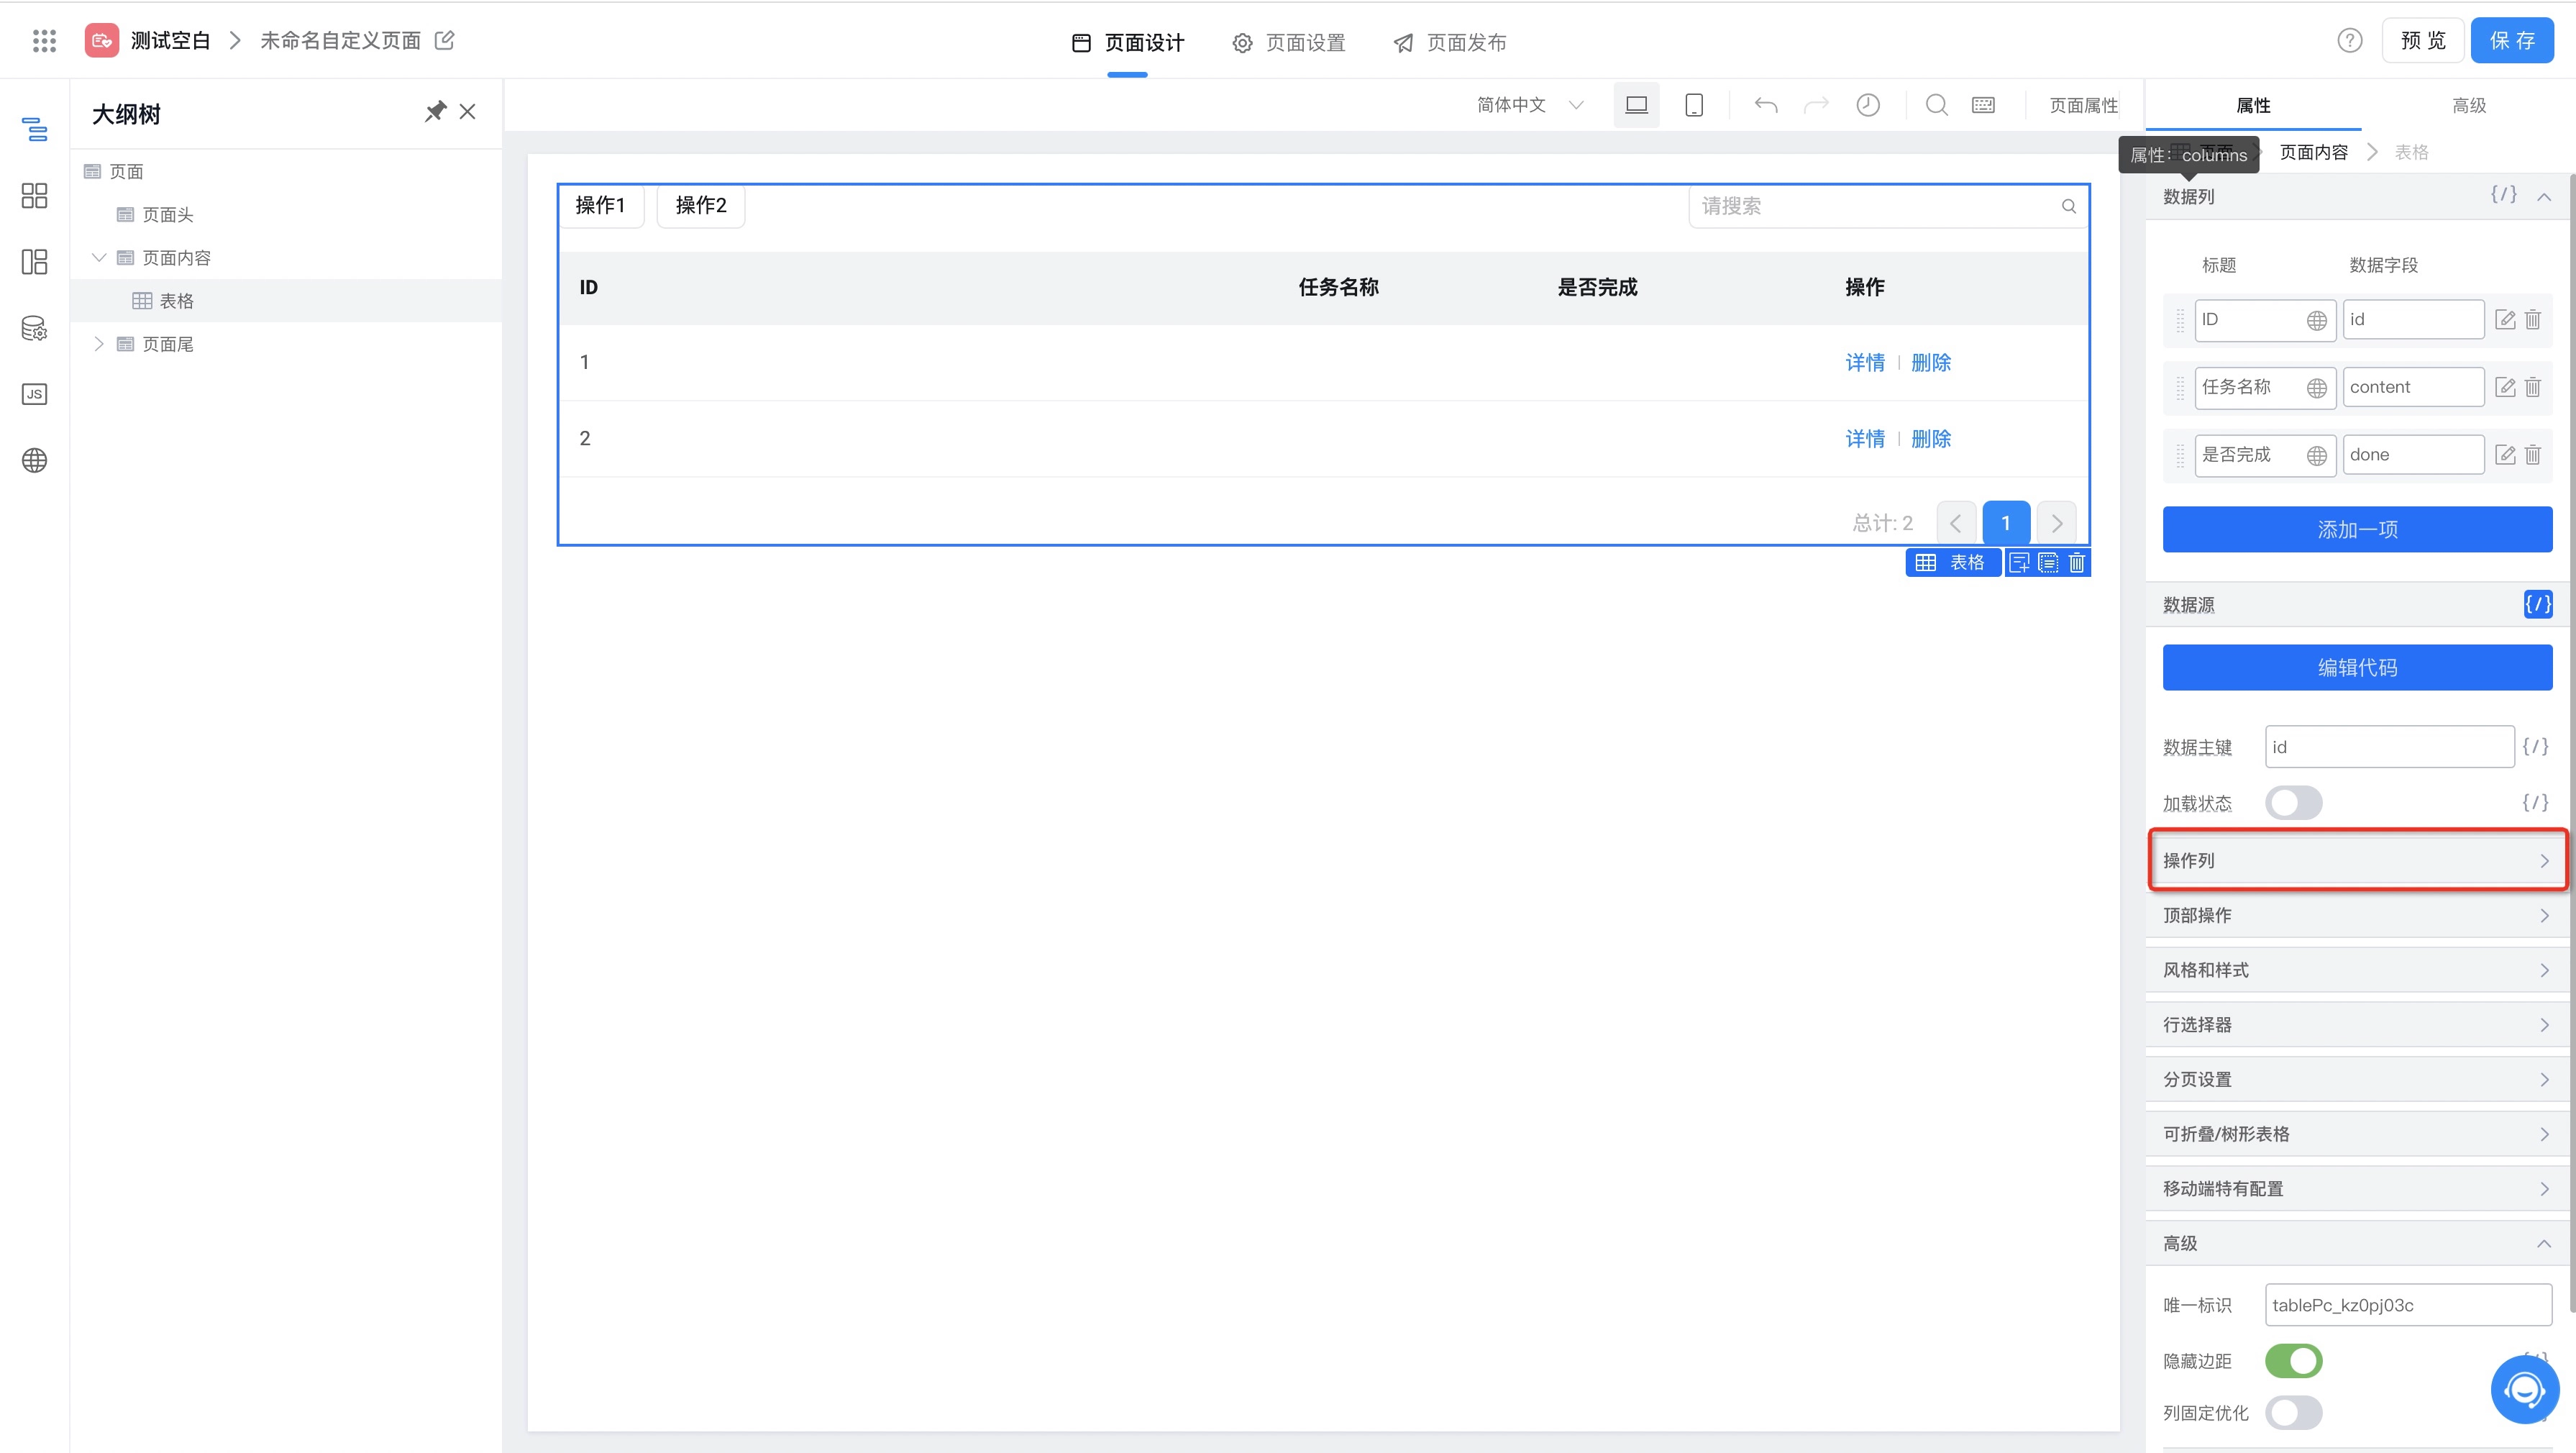
- Add an operation item:

- Set the operation item title and bind an action to this operation item in the callback function:

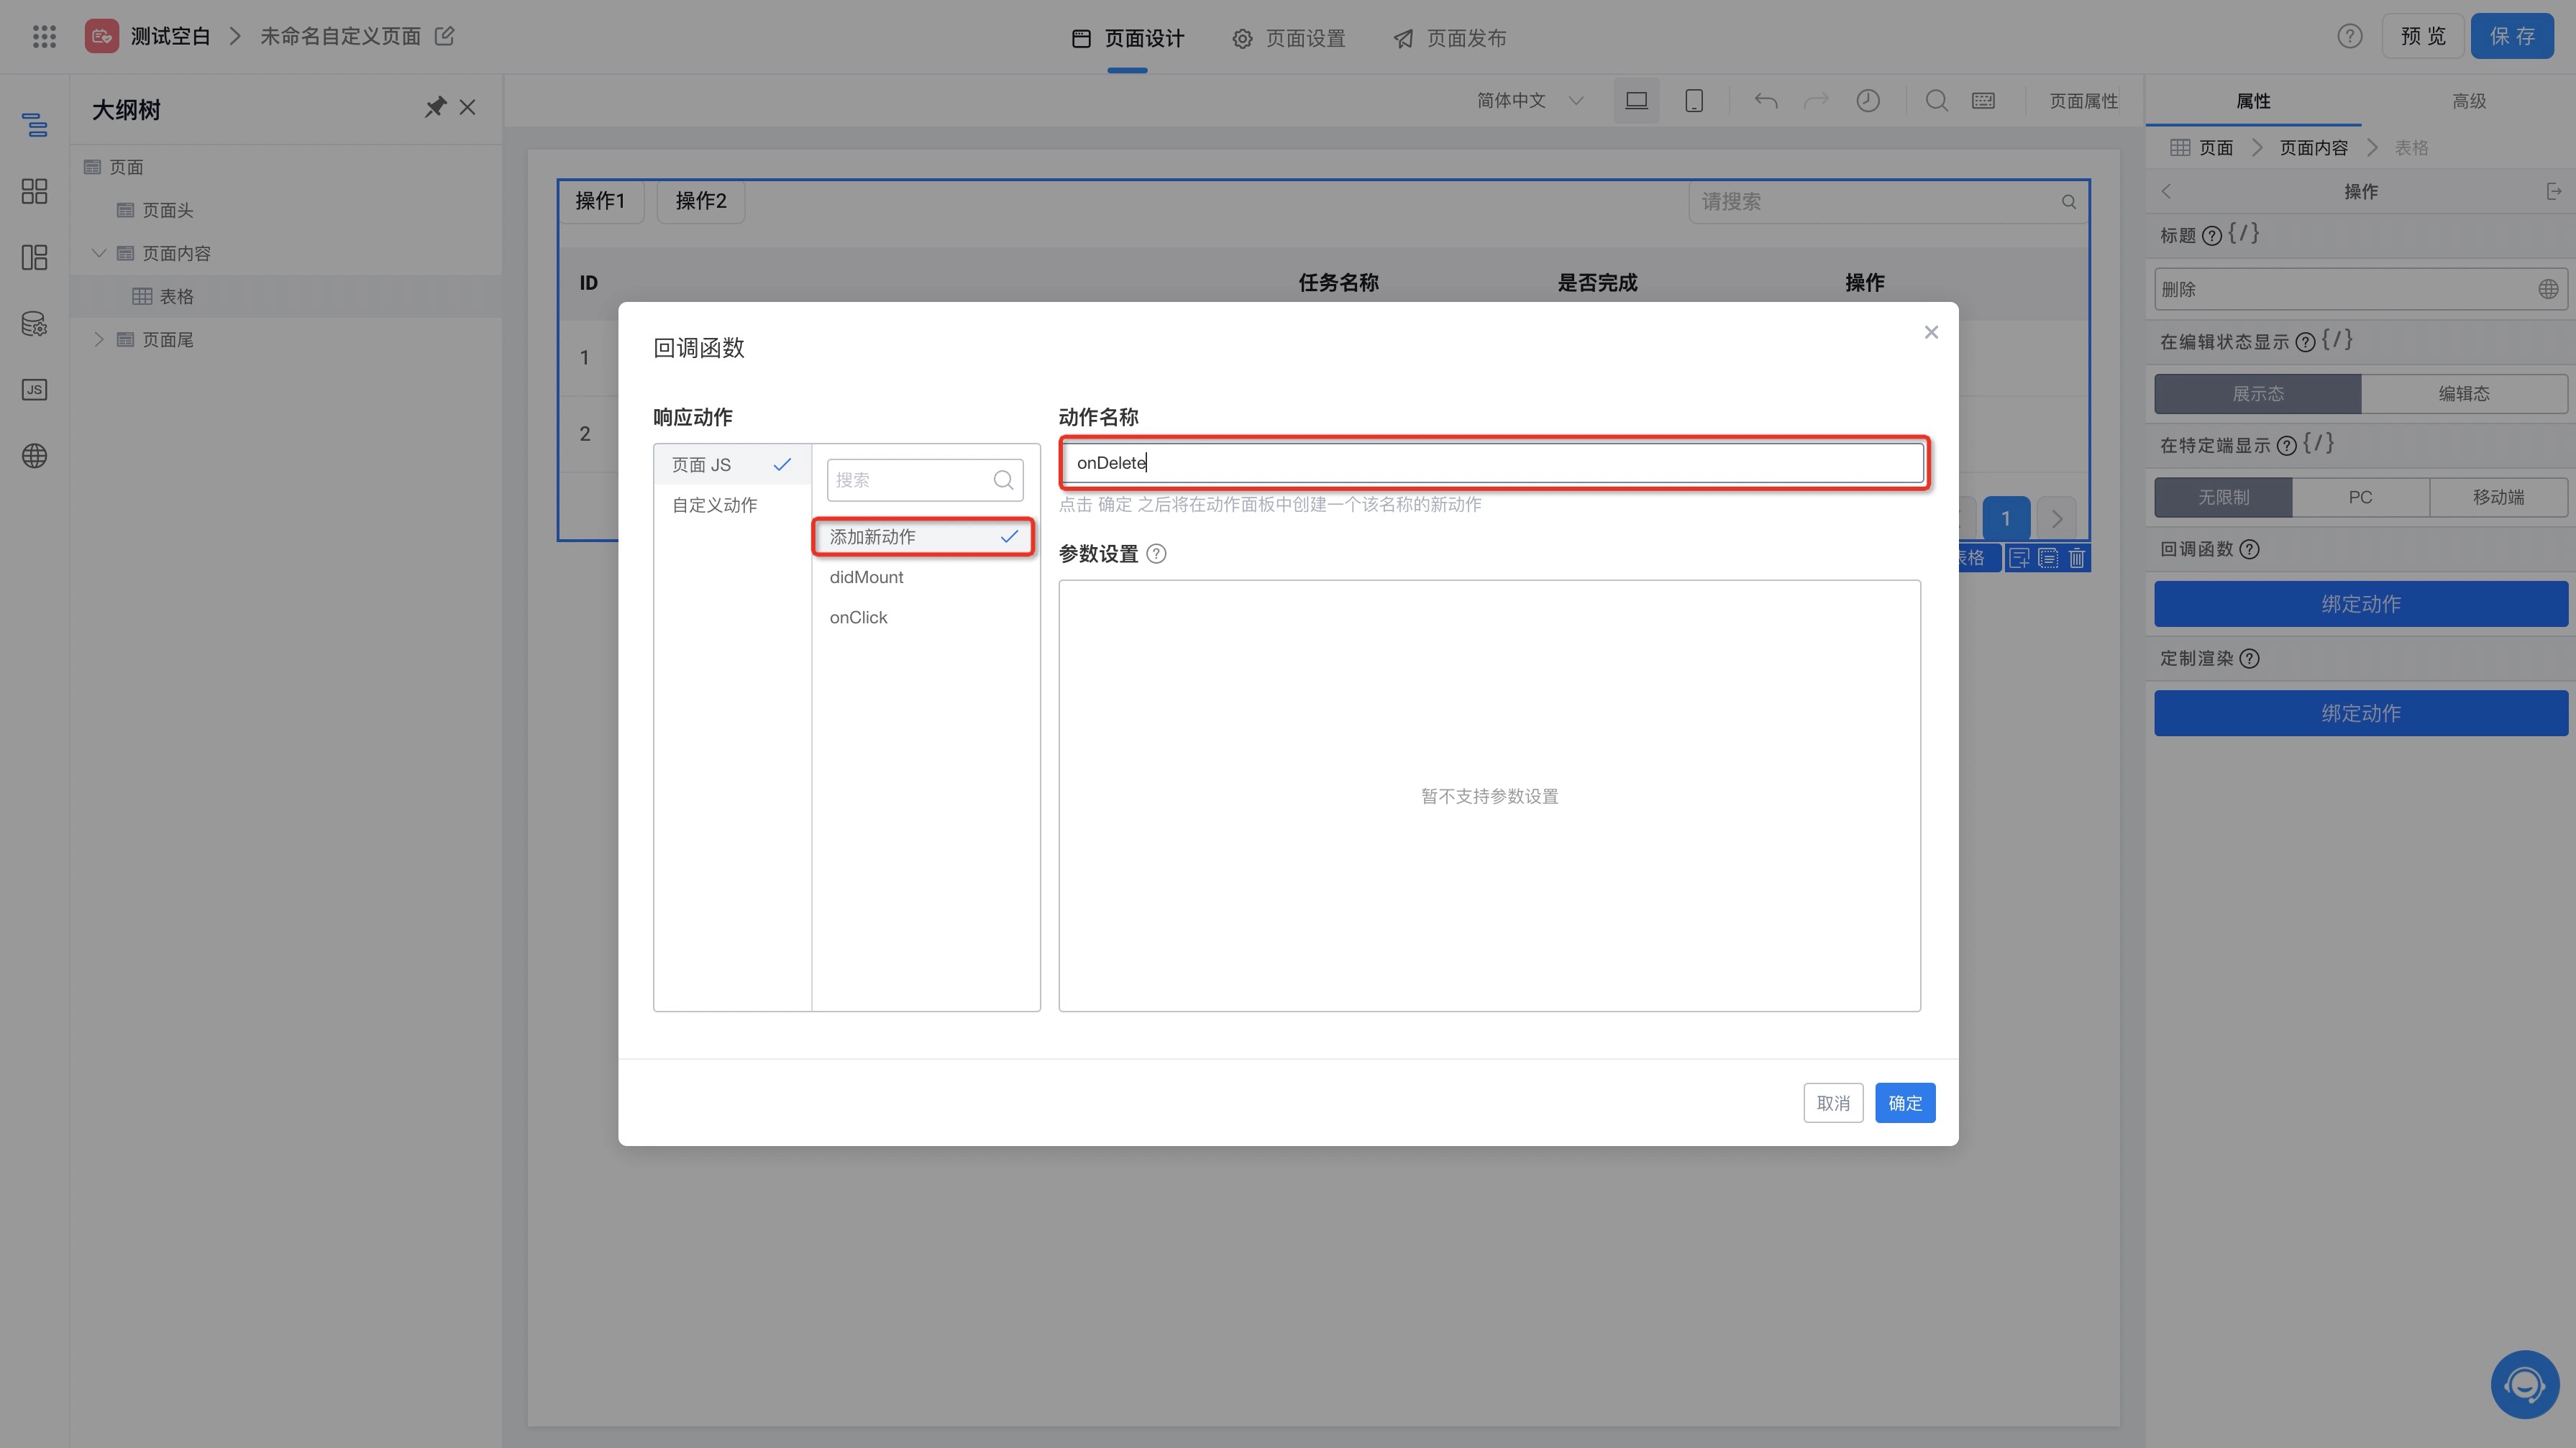
- Implement the onDelete function, manually load data source, to implement the delete operation:

- Set the table's operation column properties:
export function onDelete(rowData) {
  this.dataSourceMap.del.load({
    formInstId: rowData.id
  });
}
- Finally, we click the preview button in the designer and can see that a delete operation item appears in the table's operation column. Clicking the corresponding delete button will execute the delete operation and refresh the list;
The above examples use several open interfaces provided by the Yida platform for data query and deletion operations. For more Yida open interfaces, see the OpenAPI documentation.