Quick Start
This document will guide everyone to quickly build a simple Demo and publish it online using Yida's custom page capabilities. The Demo effect is as follows:

From the above effect, we can see that when users input their name in the input box and click the generate button, the program will automatically generate a greeting and print it below the button. We will explain each step in as much detail as possible. If users have any questions about Yida's product features during this process, please refer to Yida User Manual for reference. Below, we will start from scratch to implement the above Demo effect.
Users can access Hello Example to view the real effect. At the same time, users can also access Custom Component Designer to view the specific implementation.
Step 1: Create a Yida Application
Firstly, we need to create an application in the Yida workspace (see User Manual for details). If you already have an available application, you can skip this step. As shown below, we create a blank application named demo example:

Step 2: Create a Custom Page
Next, we need to create a custom page to implement the Demo's functionality. As shown below, we don't need page templates at the moment, so in the template selection step, you can click the Skip button to directly enter the custom page designer:

The Yida custom page designer is shown below. For specific function introductions, see Designer Documentation. Developers can modify the current page name after entering the designer:
![]()
Step 3: Drag Components and Configure Properties
Our Demo example is very simple, containing a total of three components. Developers can drag components from the component library panel to the canvas first. Users can also visit Component Documentation to view more component configuration capabilities:
- Input Box- Used to input names. We set the component's
Titleproperty to "Name"; - Button- Used to get user input name and generate greeting. We set the button component's
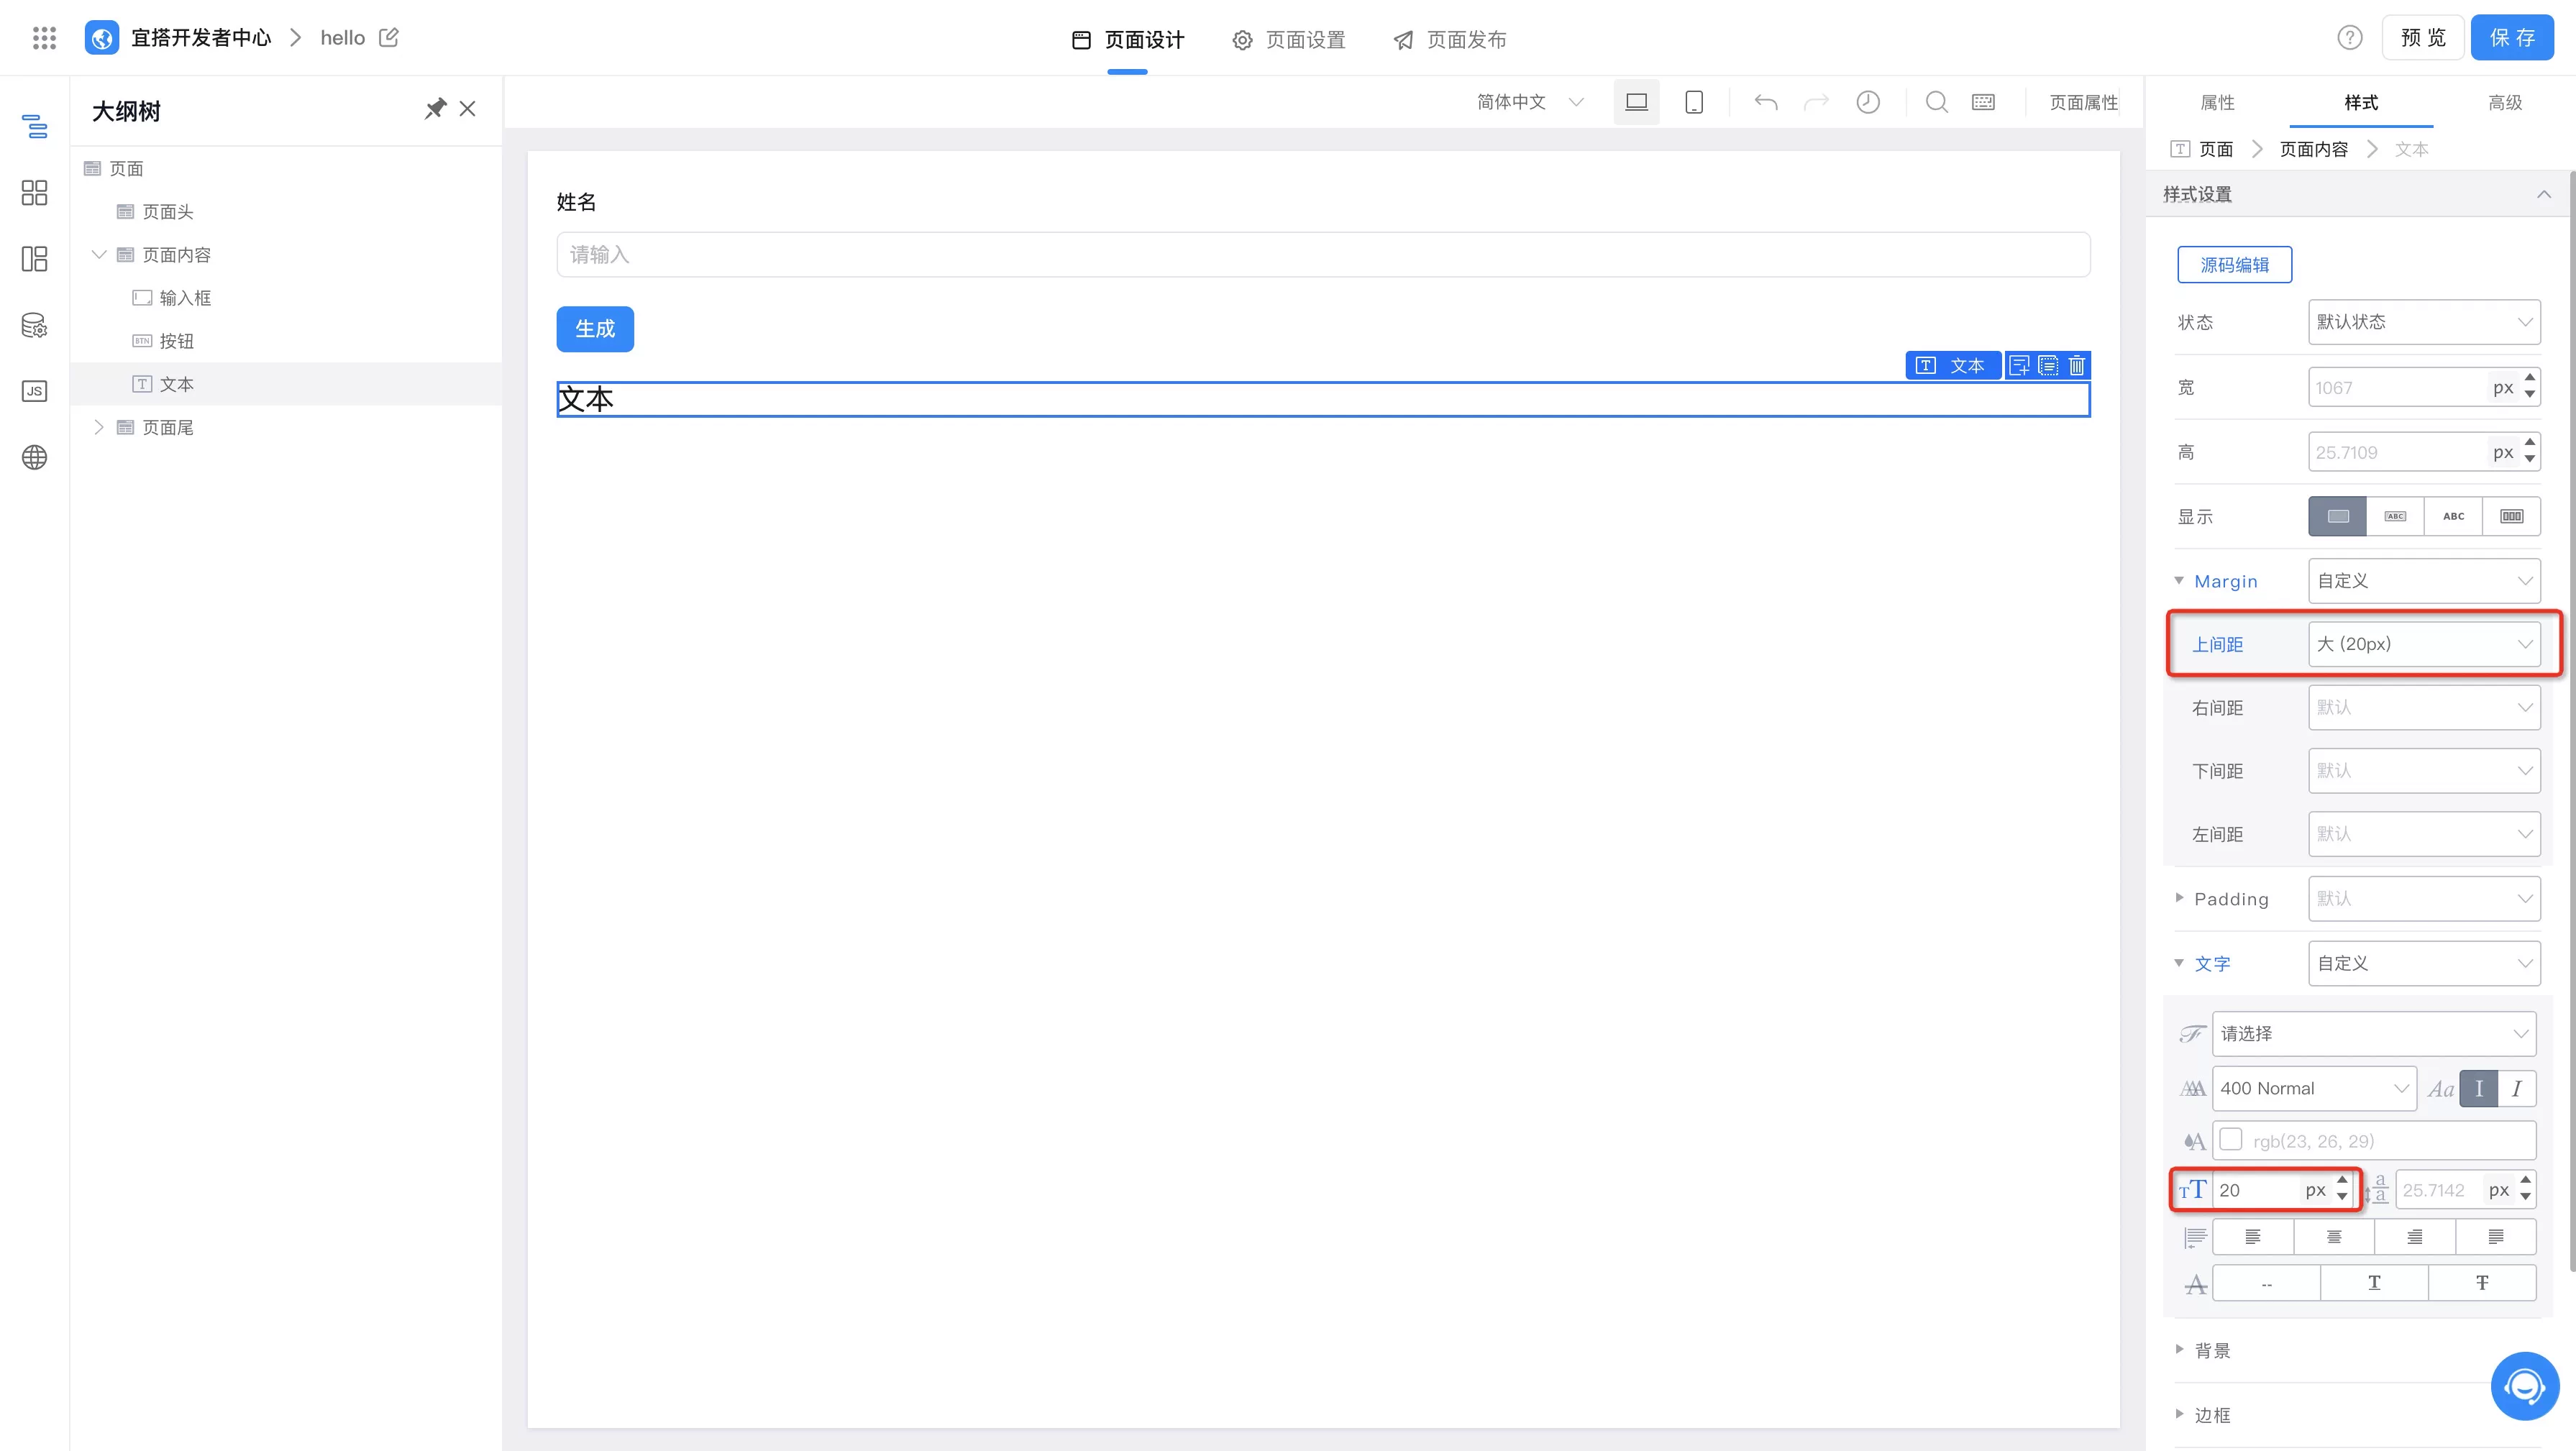
Titleproperty to "Generate"; - Text- Used to display greeting. For aesthetics, we set the top margin: 20px, font size: 20px in the style panel, as shown below;
Step 4: Create Global Variables
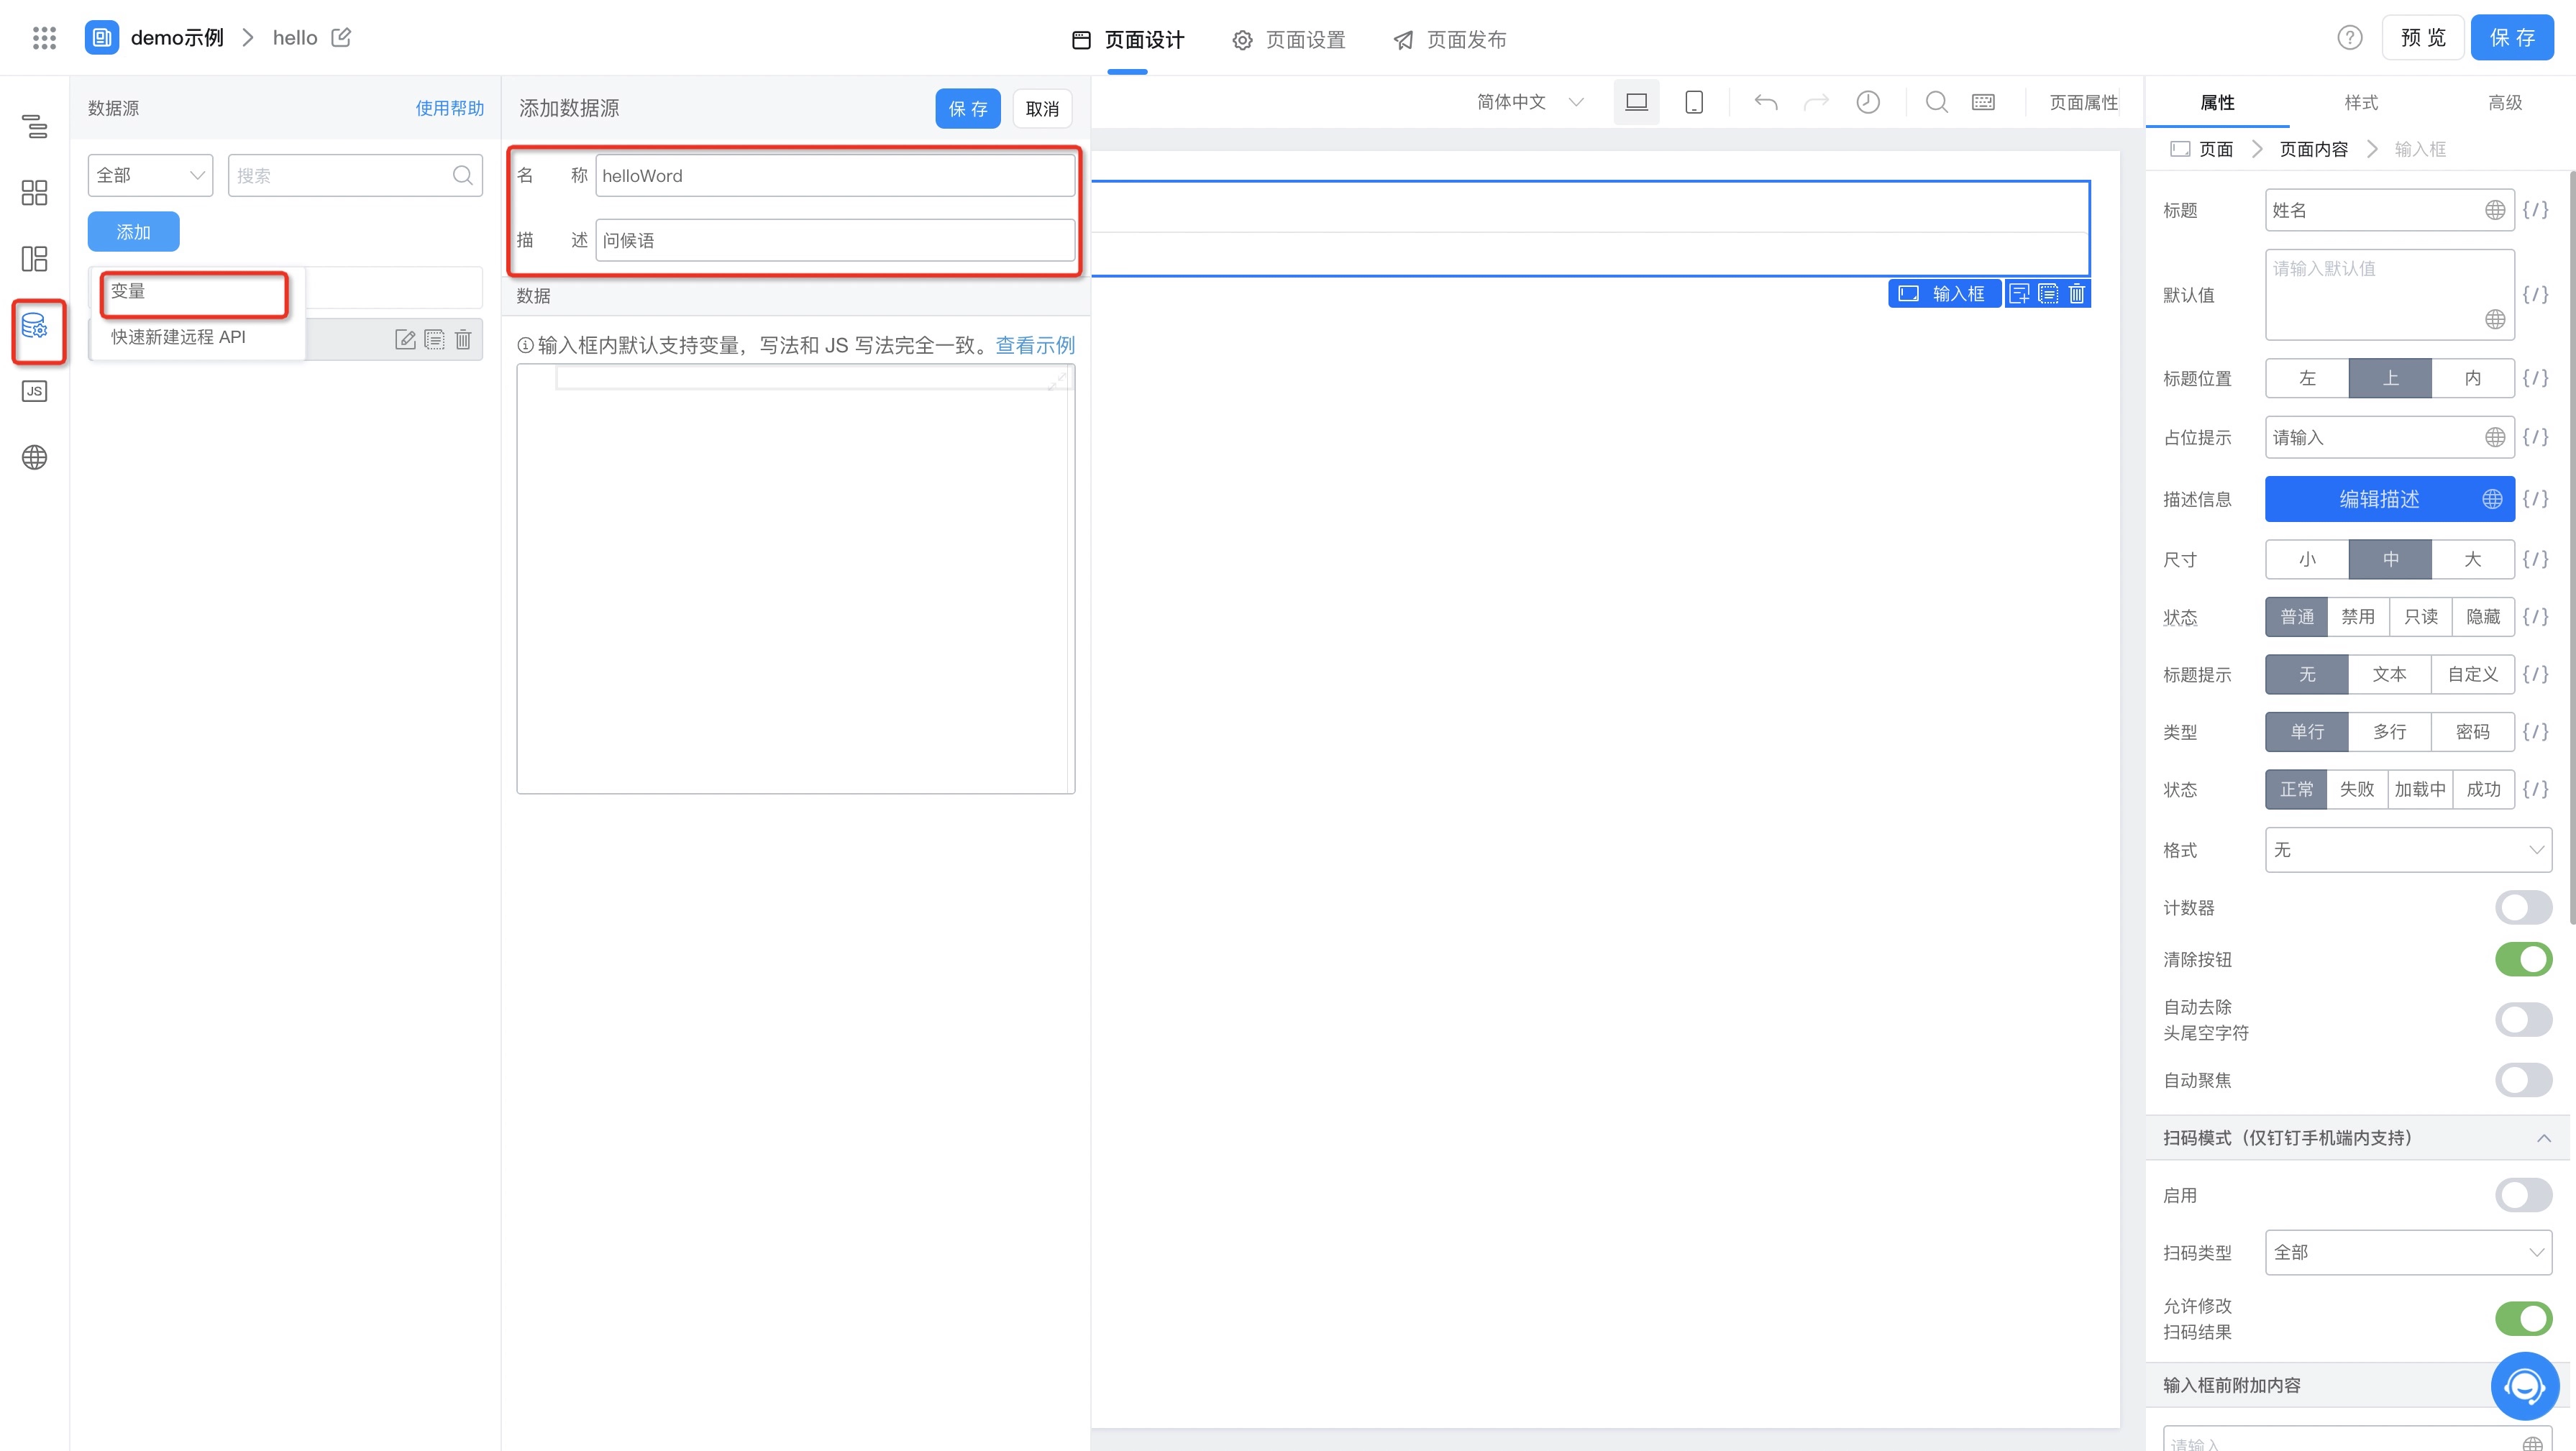
From this step, we will start implementing the logic part. First, we need to create a global variable to store the greeting (for detailed usage of global variables, see Global Variables Documentation). As shown below, we create a global variable named helloWord:
Step 5: Bind Button Click Event
We need to get the content of the input box when users click the button and generate a greeting to print below. Next, we will explain how to bind events and generate greetings:
1. Bind click event to the button. As shown below, after binding, we will automatically generate a JS function in the action panel (users can also customize function names);

2. Use the getValue API to get the content of the input box. Yida provides a wealth of Yida JSAPI. As shown below, we get the user input content based on the unique identifier of the input box component:

3. Construct greeting and use setState API to update the content of the global variable and trigger page re-rendering. Below is the complete onClick code:
export function onClick() {
  // Get name input box content
  const name = this.$('textField_kzdxqcod').getValue();

  // Update global variable
  this.setState({
    helloWord: `Hello ${name} !`,
  });
}
Step 6: Bind Text Content to Data Source Variable
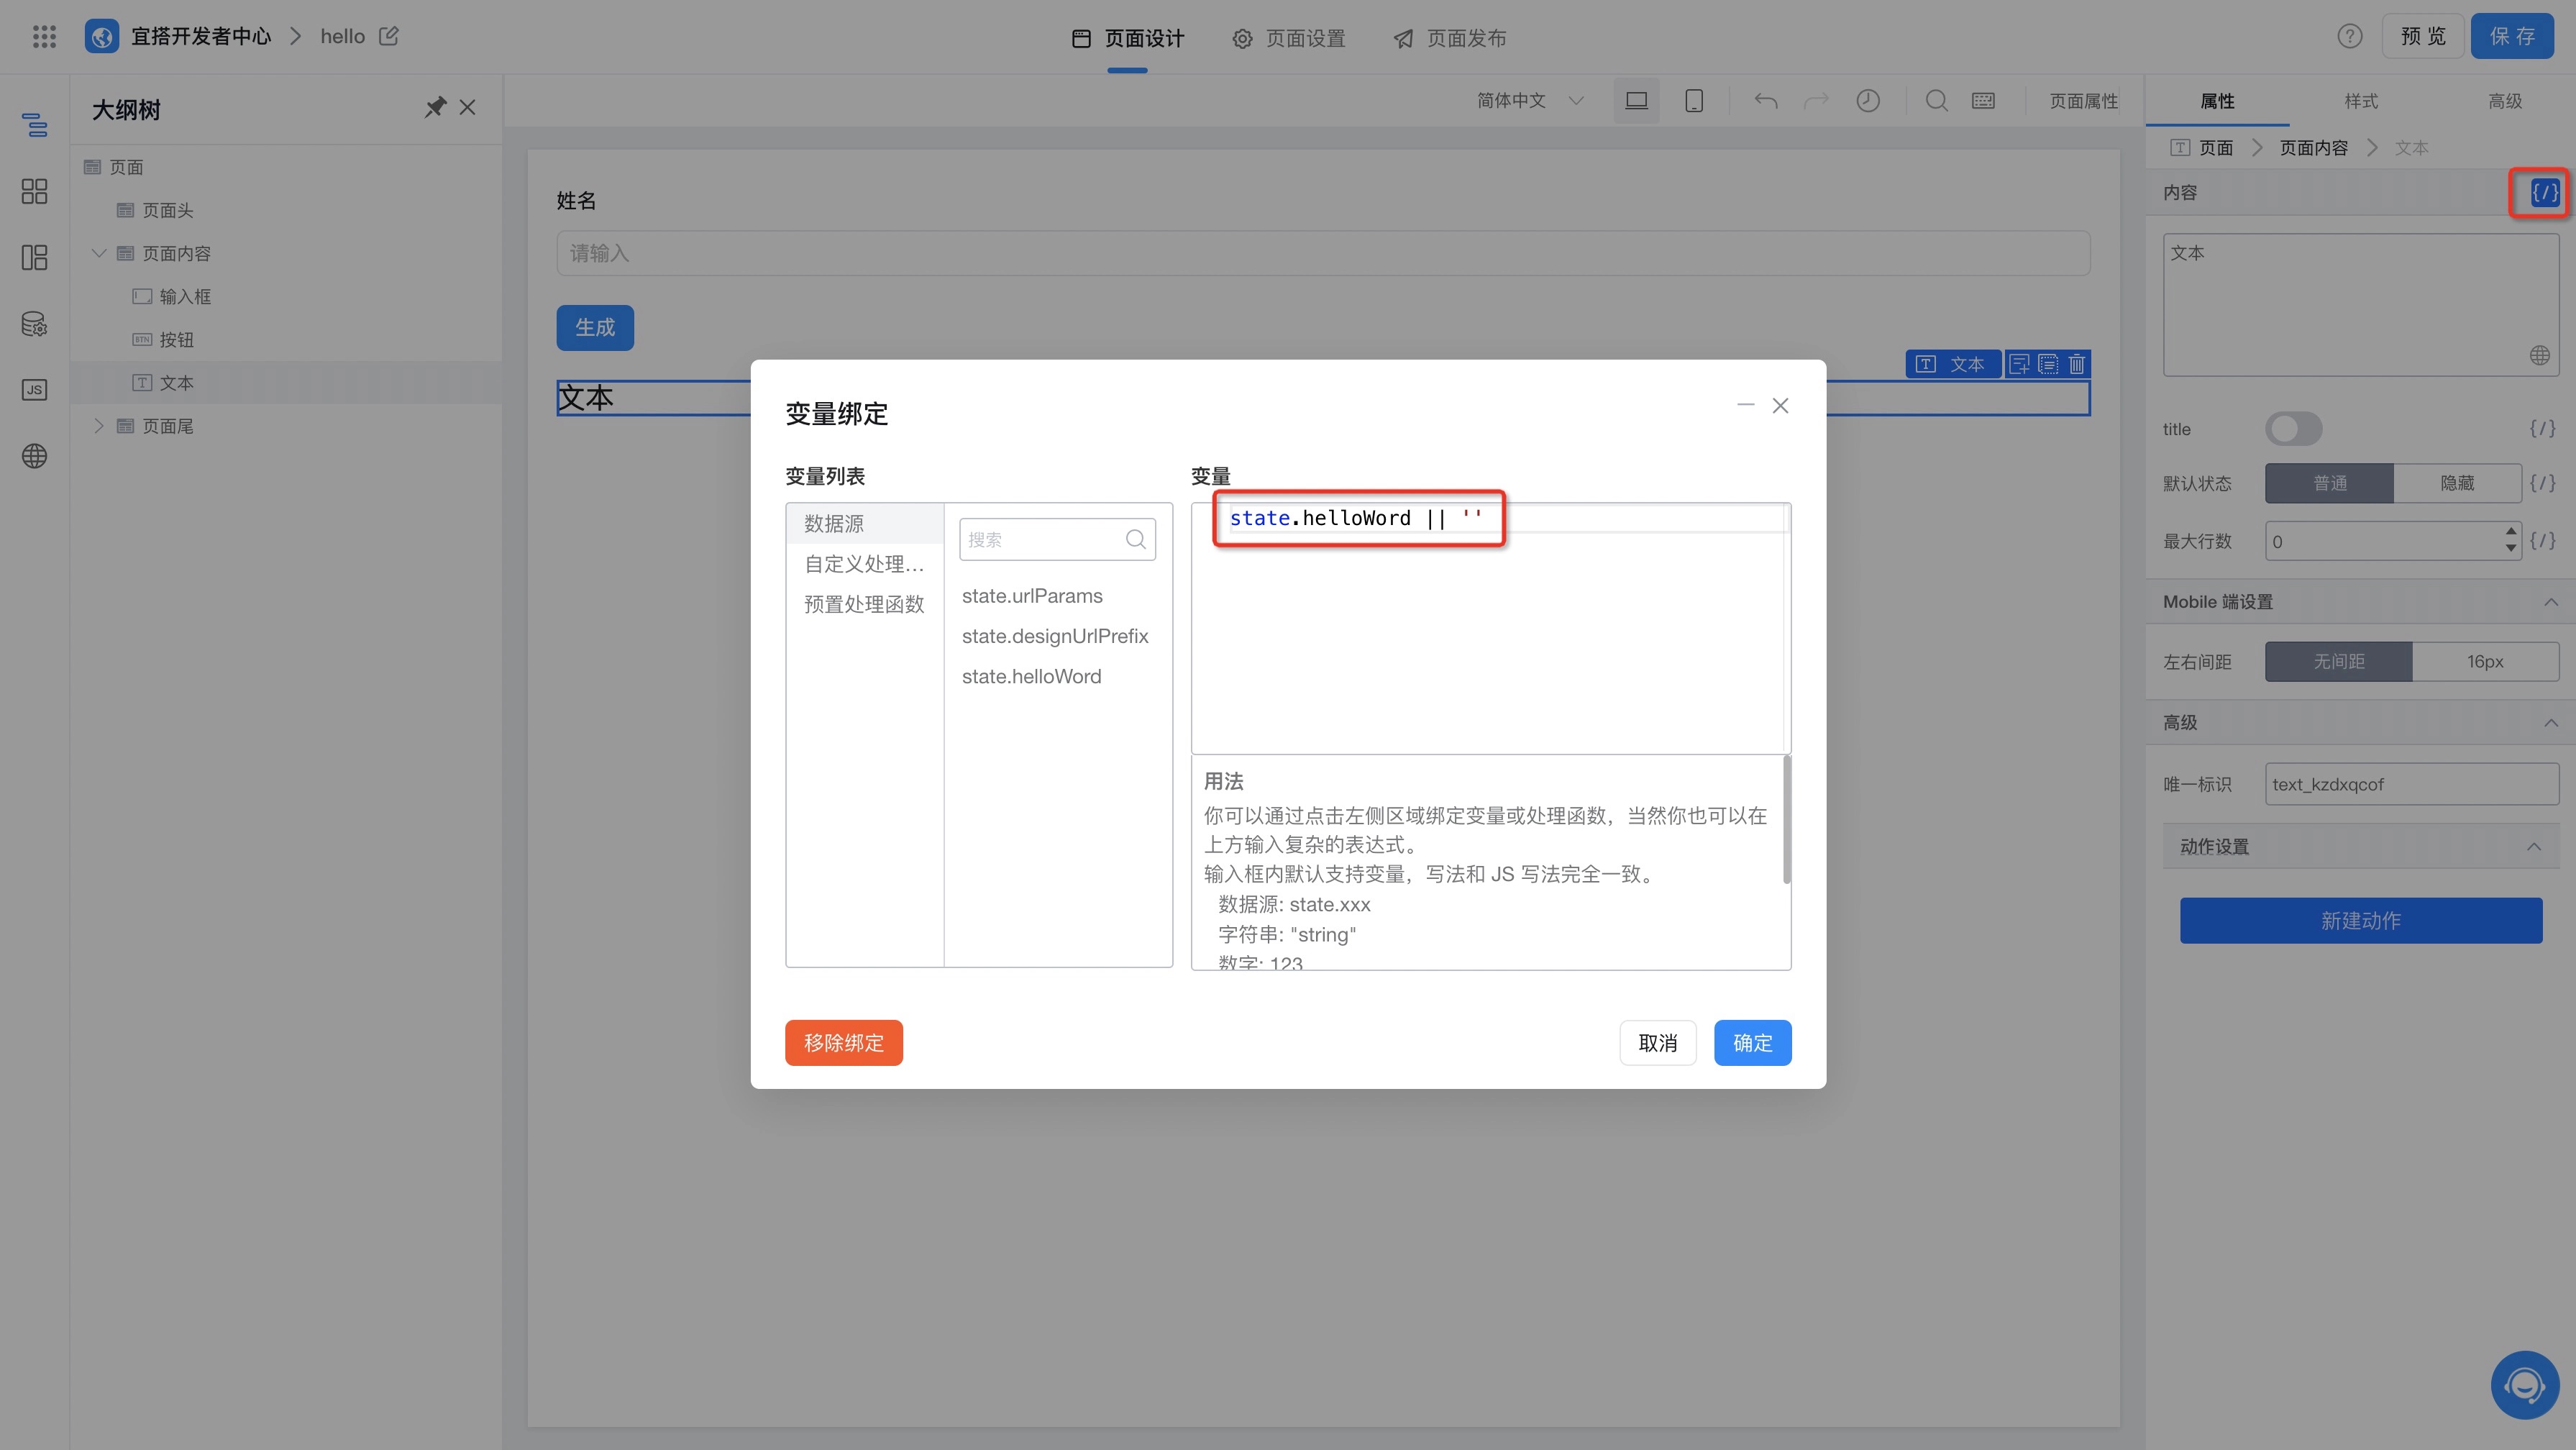
In the final step, we need to bind the global variable to the Content property of the text component for display, as shown below:
Step 7: Preview & Publish
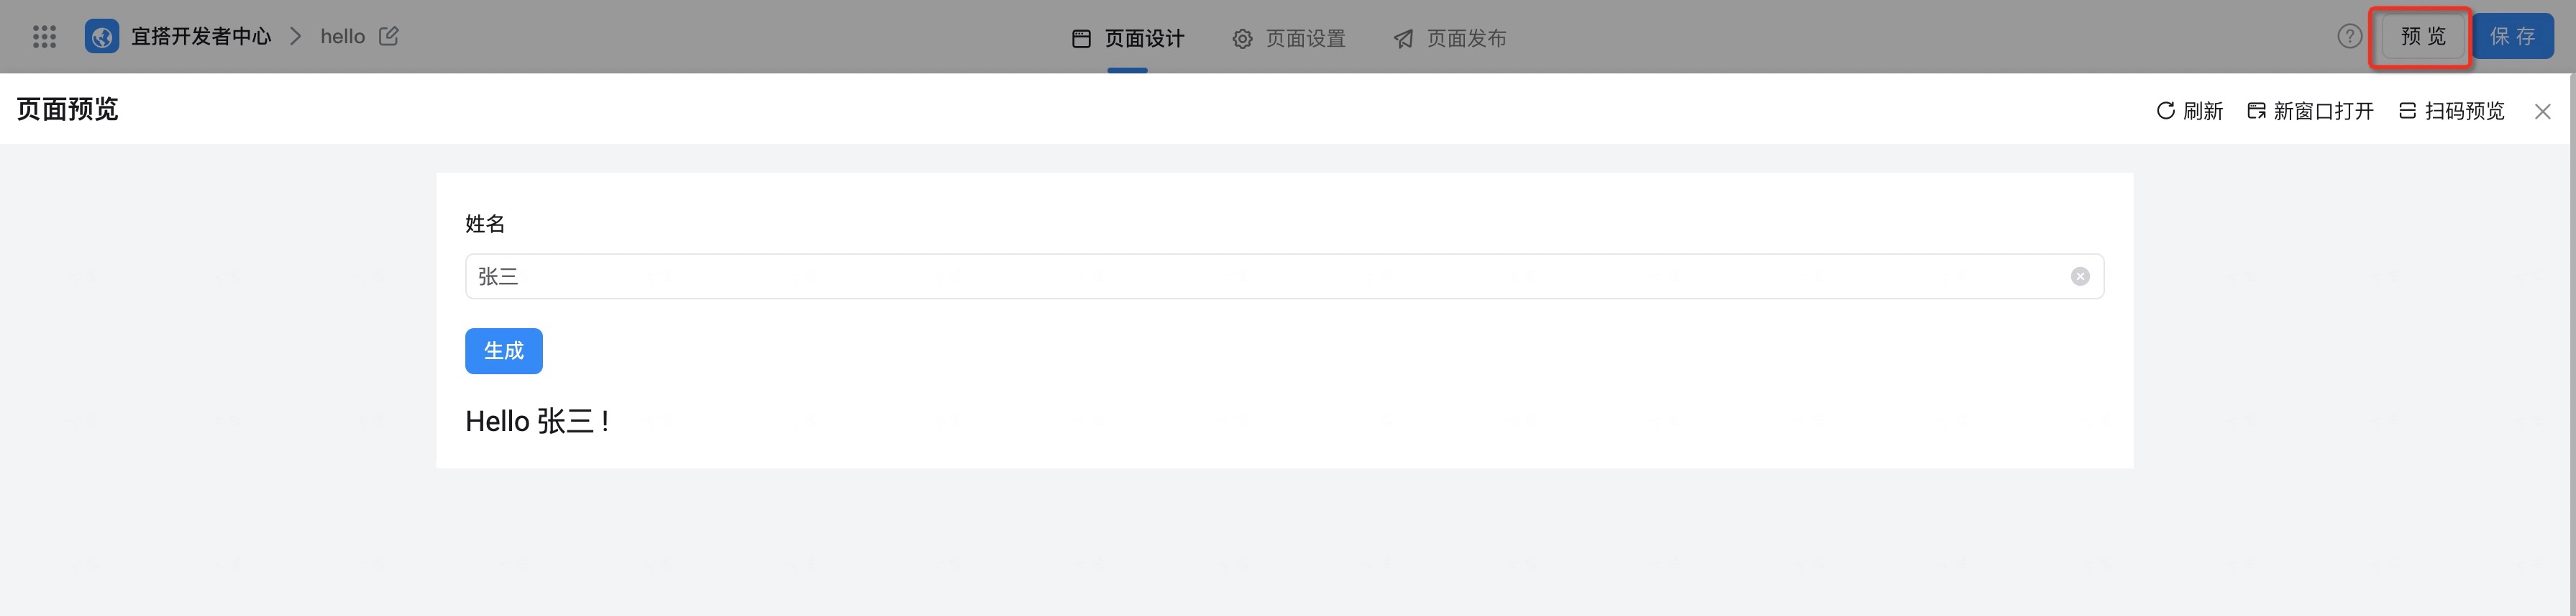
So far, our Demo example has been completed. Users can click the Preview button in the top right corner of the designer to preview:
After completing the preview, click the Save button to save the page. Next, you can access our built Demo page by clicking the access button in the top right corner of the application:

Final
So far, we have completed the creation of the Quick Start Demo example. Users can access Hello Example to view the effect. Through this example, users can initially understand the basic usage process of Yida custom pages. If you want to learn about more complex example tutorials, you can move to TodoMVC Tutorial for reference.