Customer Connect quick start
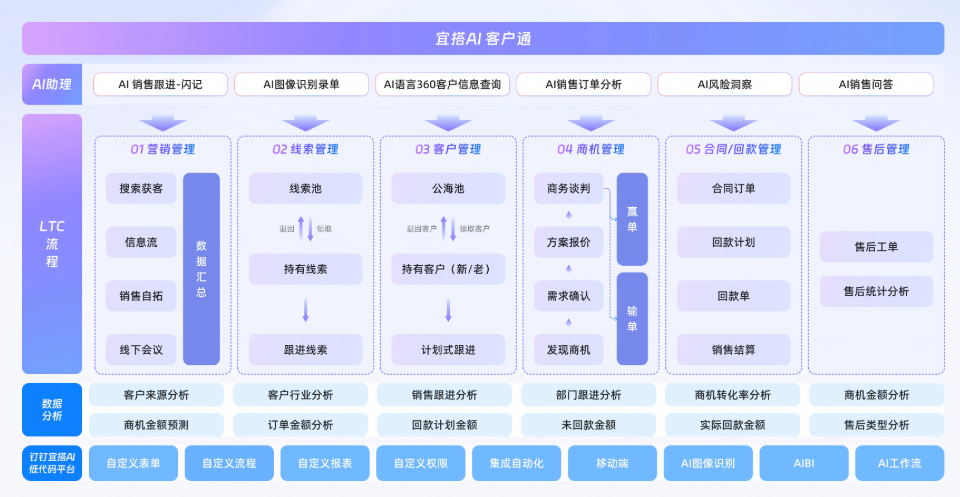
Customer pass is a boutique application officially launched YIDA,Help enterprises achieve clues-customers-business opportunities-contracts-win orders full lifecycle management, AI drives full-drive sales growth.
Next, we will use the quick start guide to help you quickly complete the landing use of customer connect.
I. Information initialization
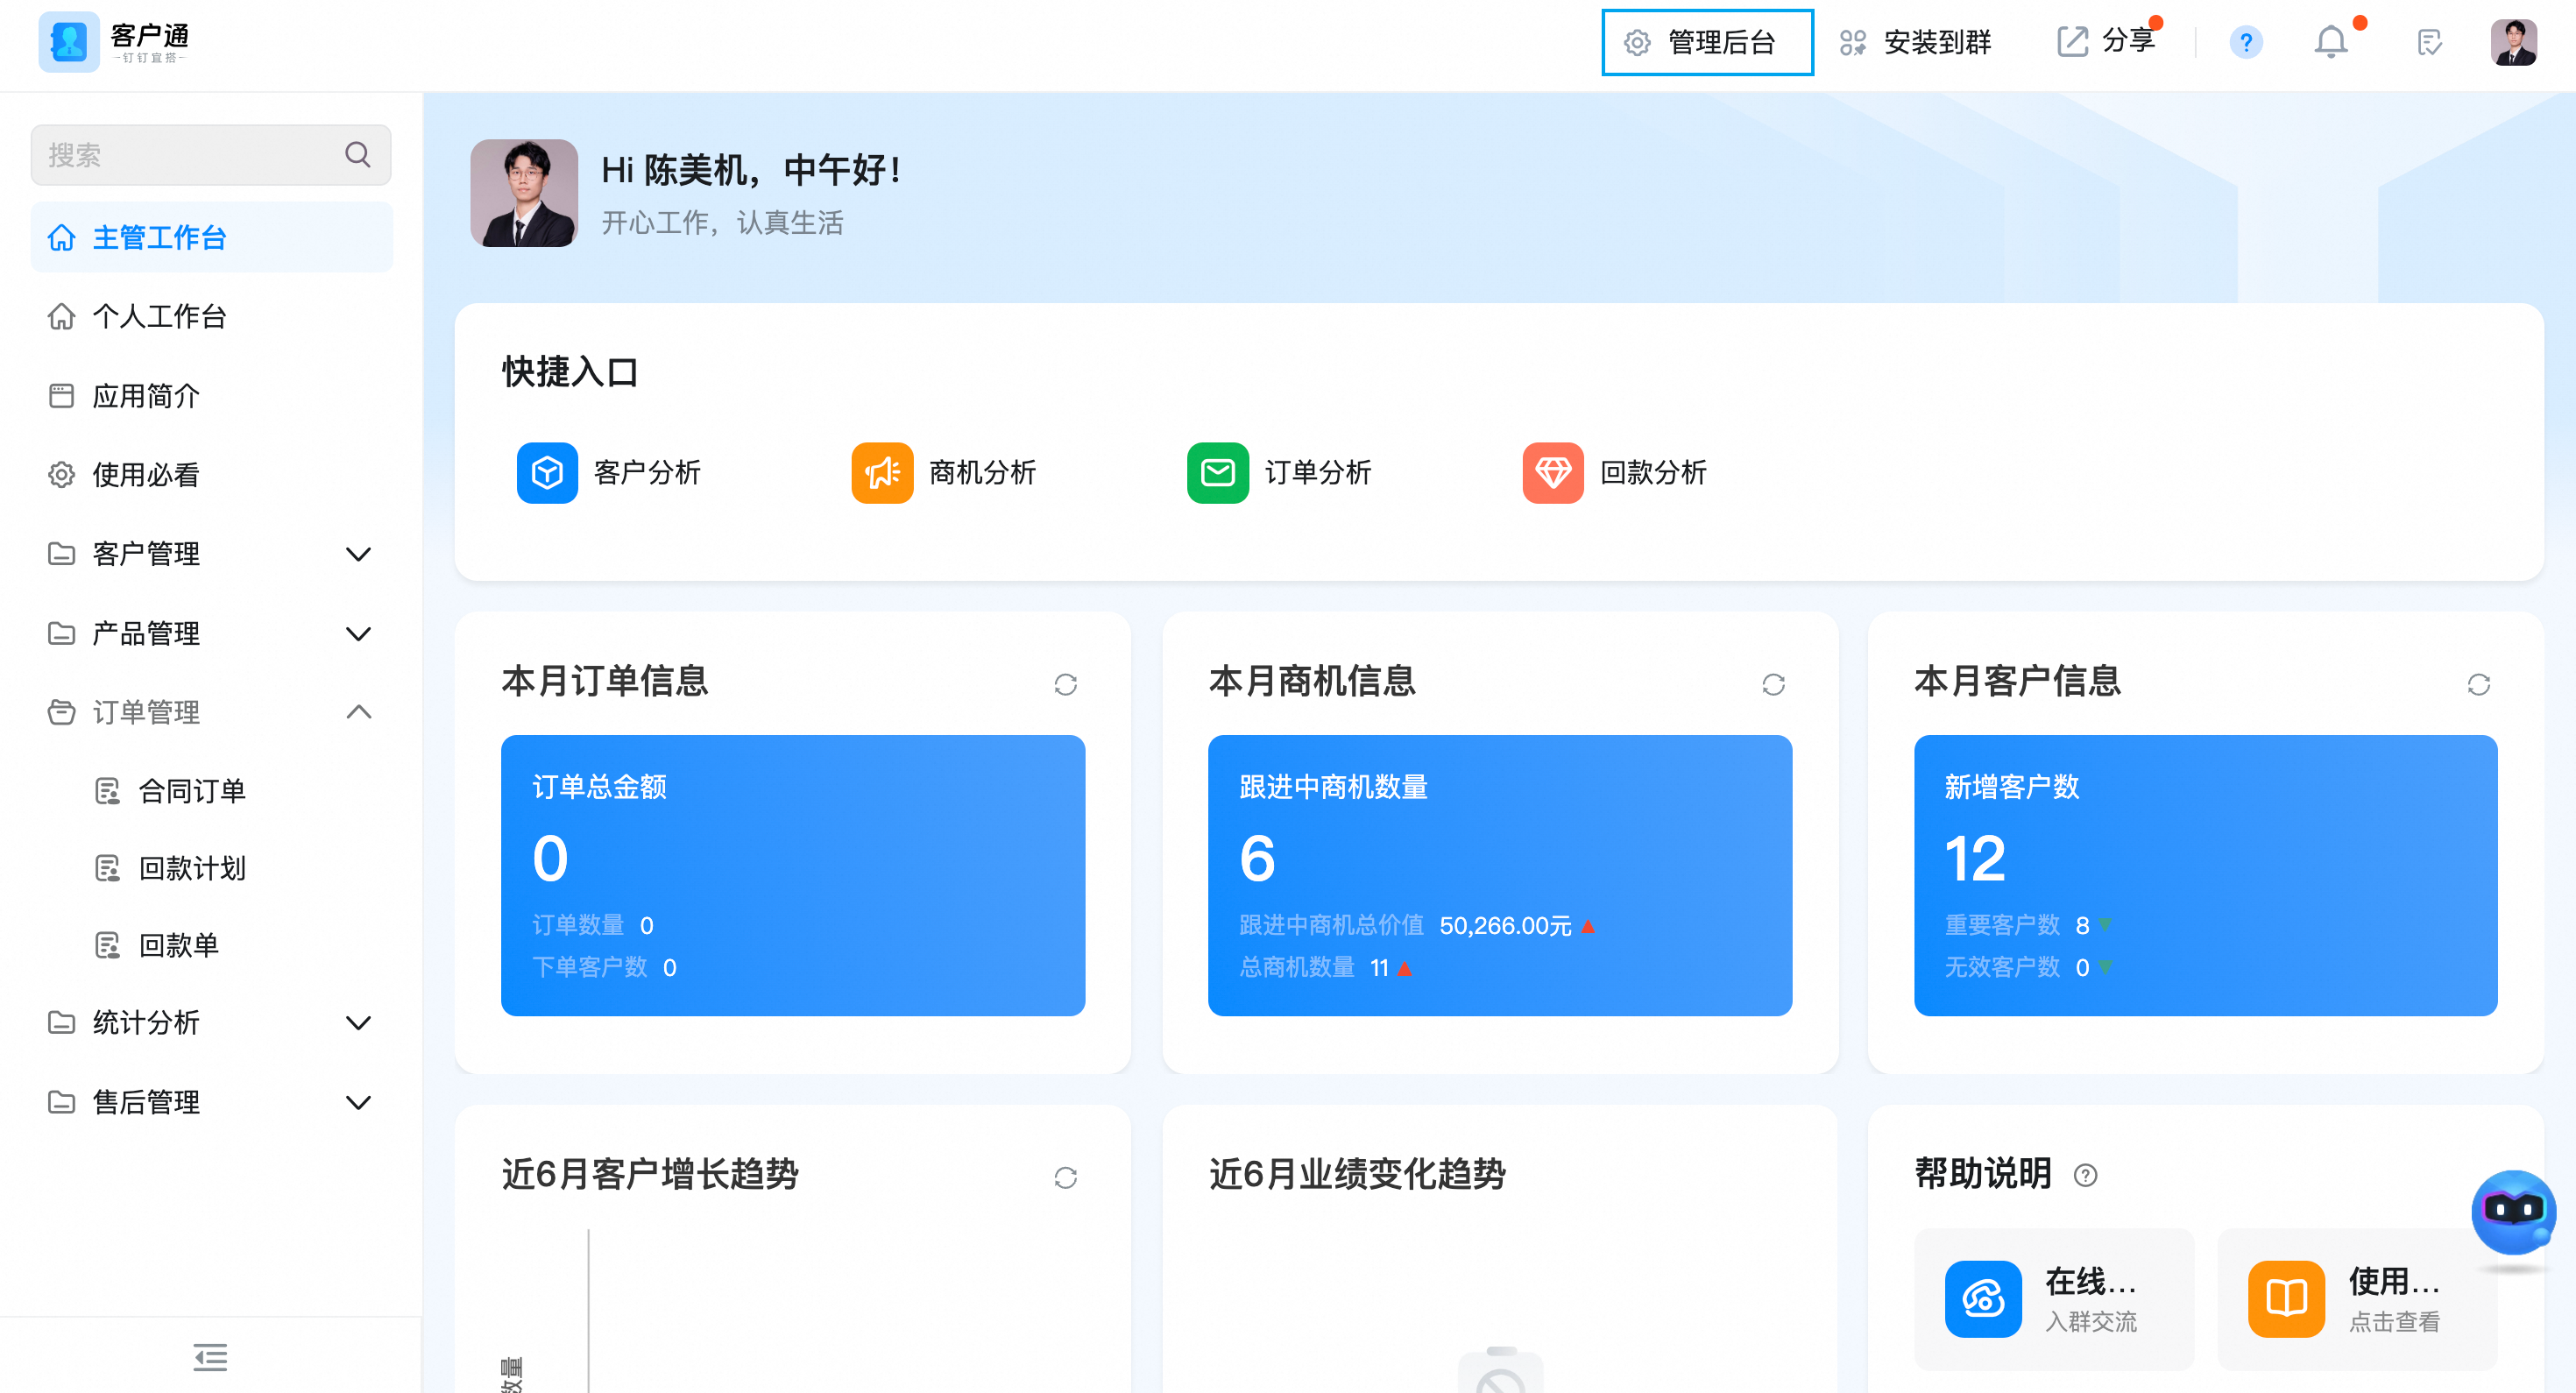
1. Enter the management background
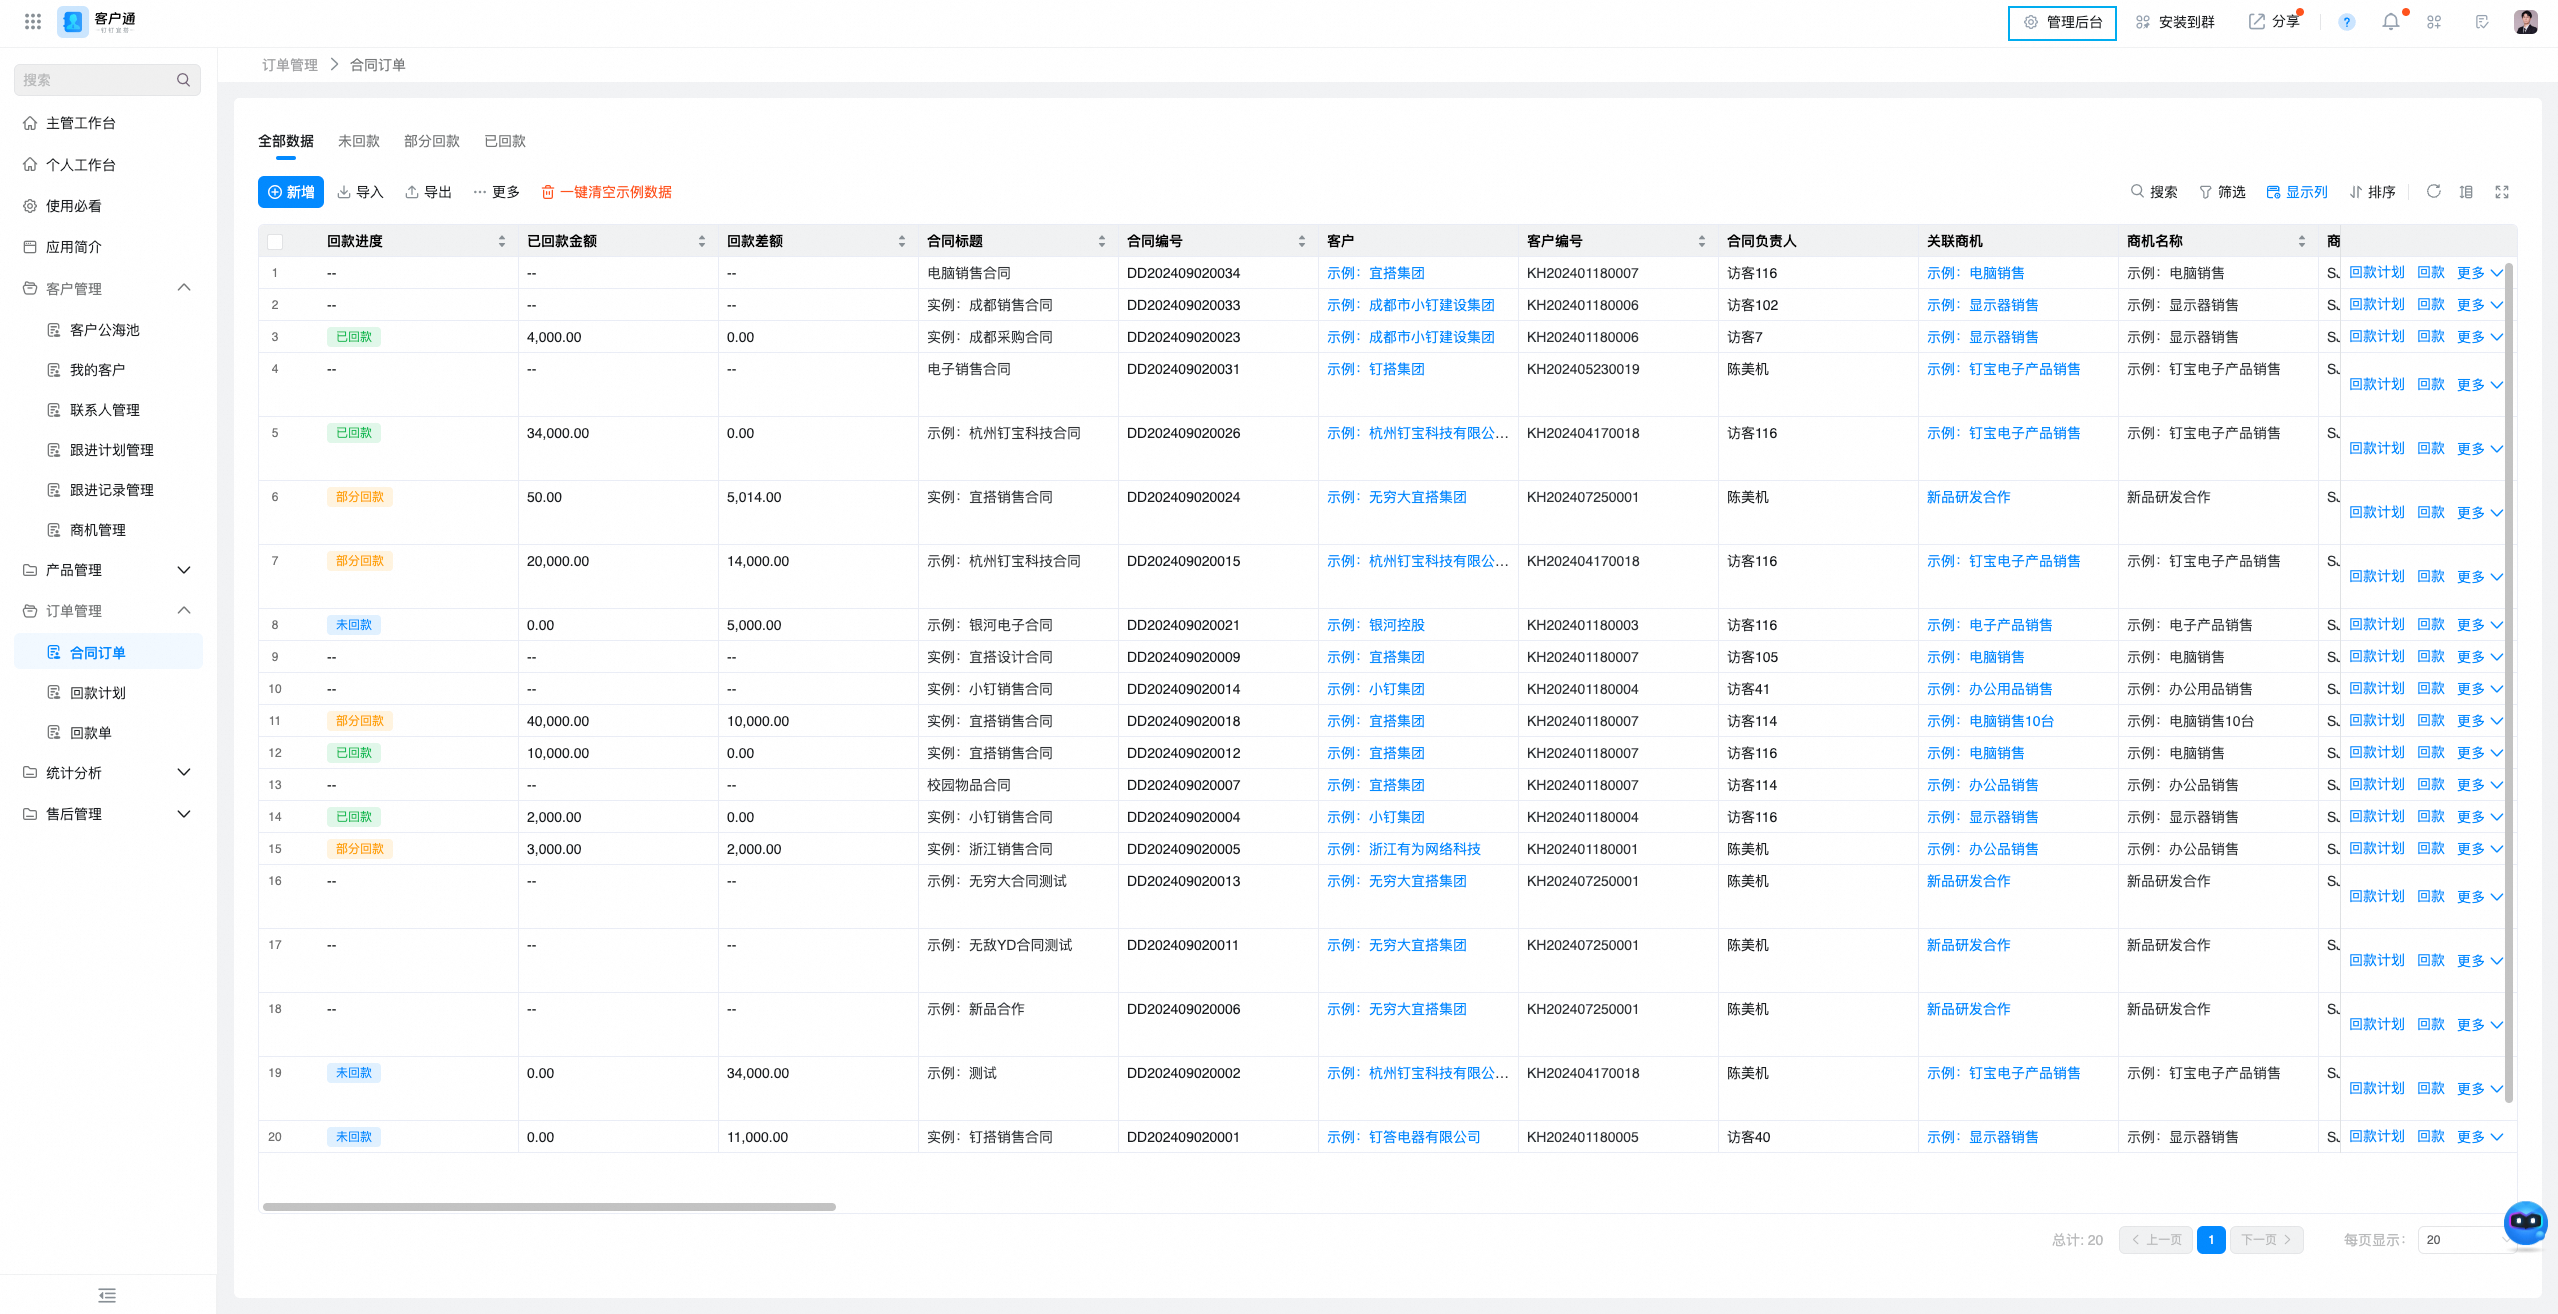
Click the management background in the upper-right corner to enter the management configuration background of the system. Here, our system administrator can complete basic configurations such as data, permissions, and processes, and can also implement custom system construction.
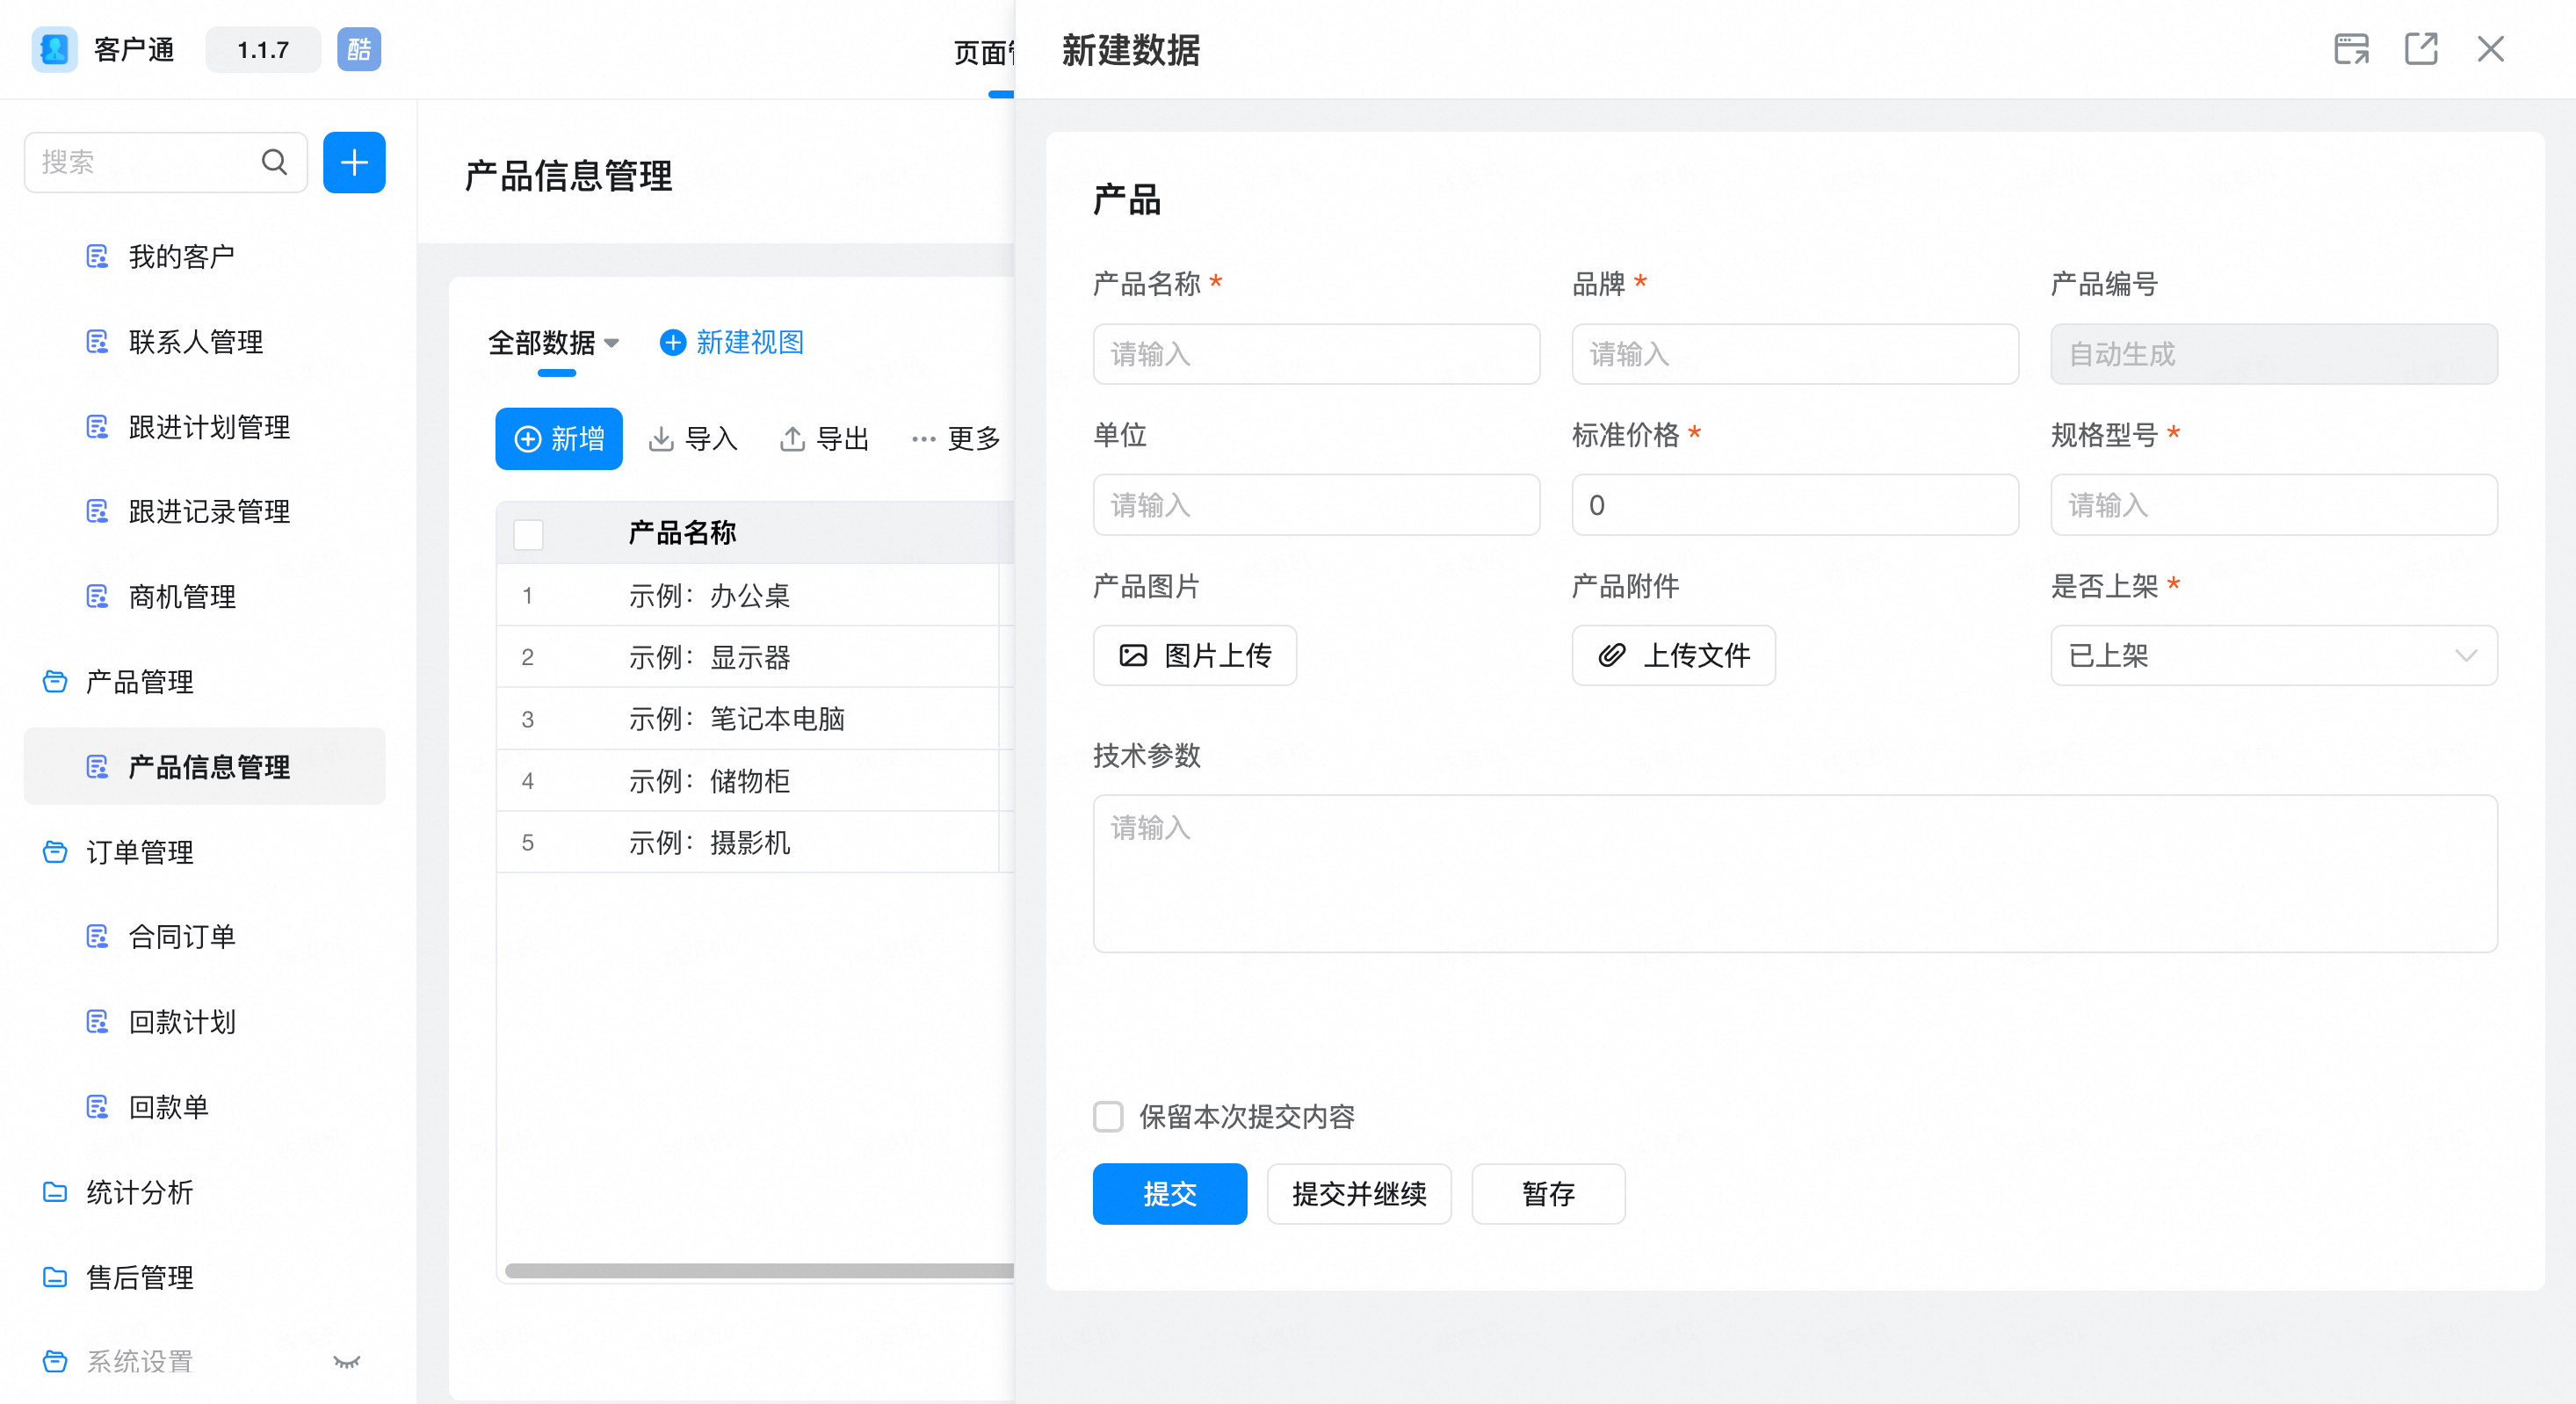
2,Product information entry
- Click product management and click Product Information Management. On this page, we can manage the basic information of products that can be sold by all enterprises.
- Input methods include new input and batch import
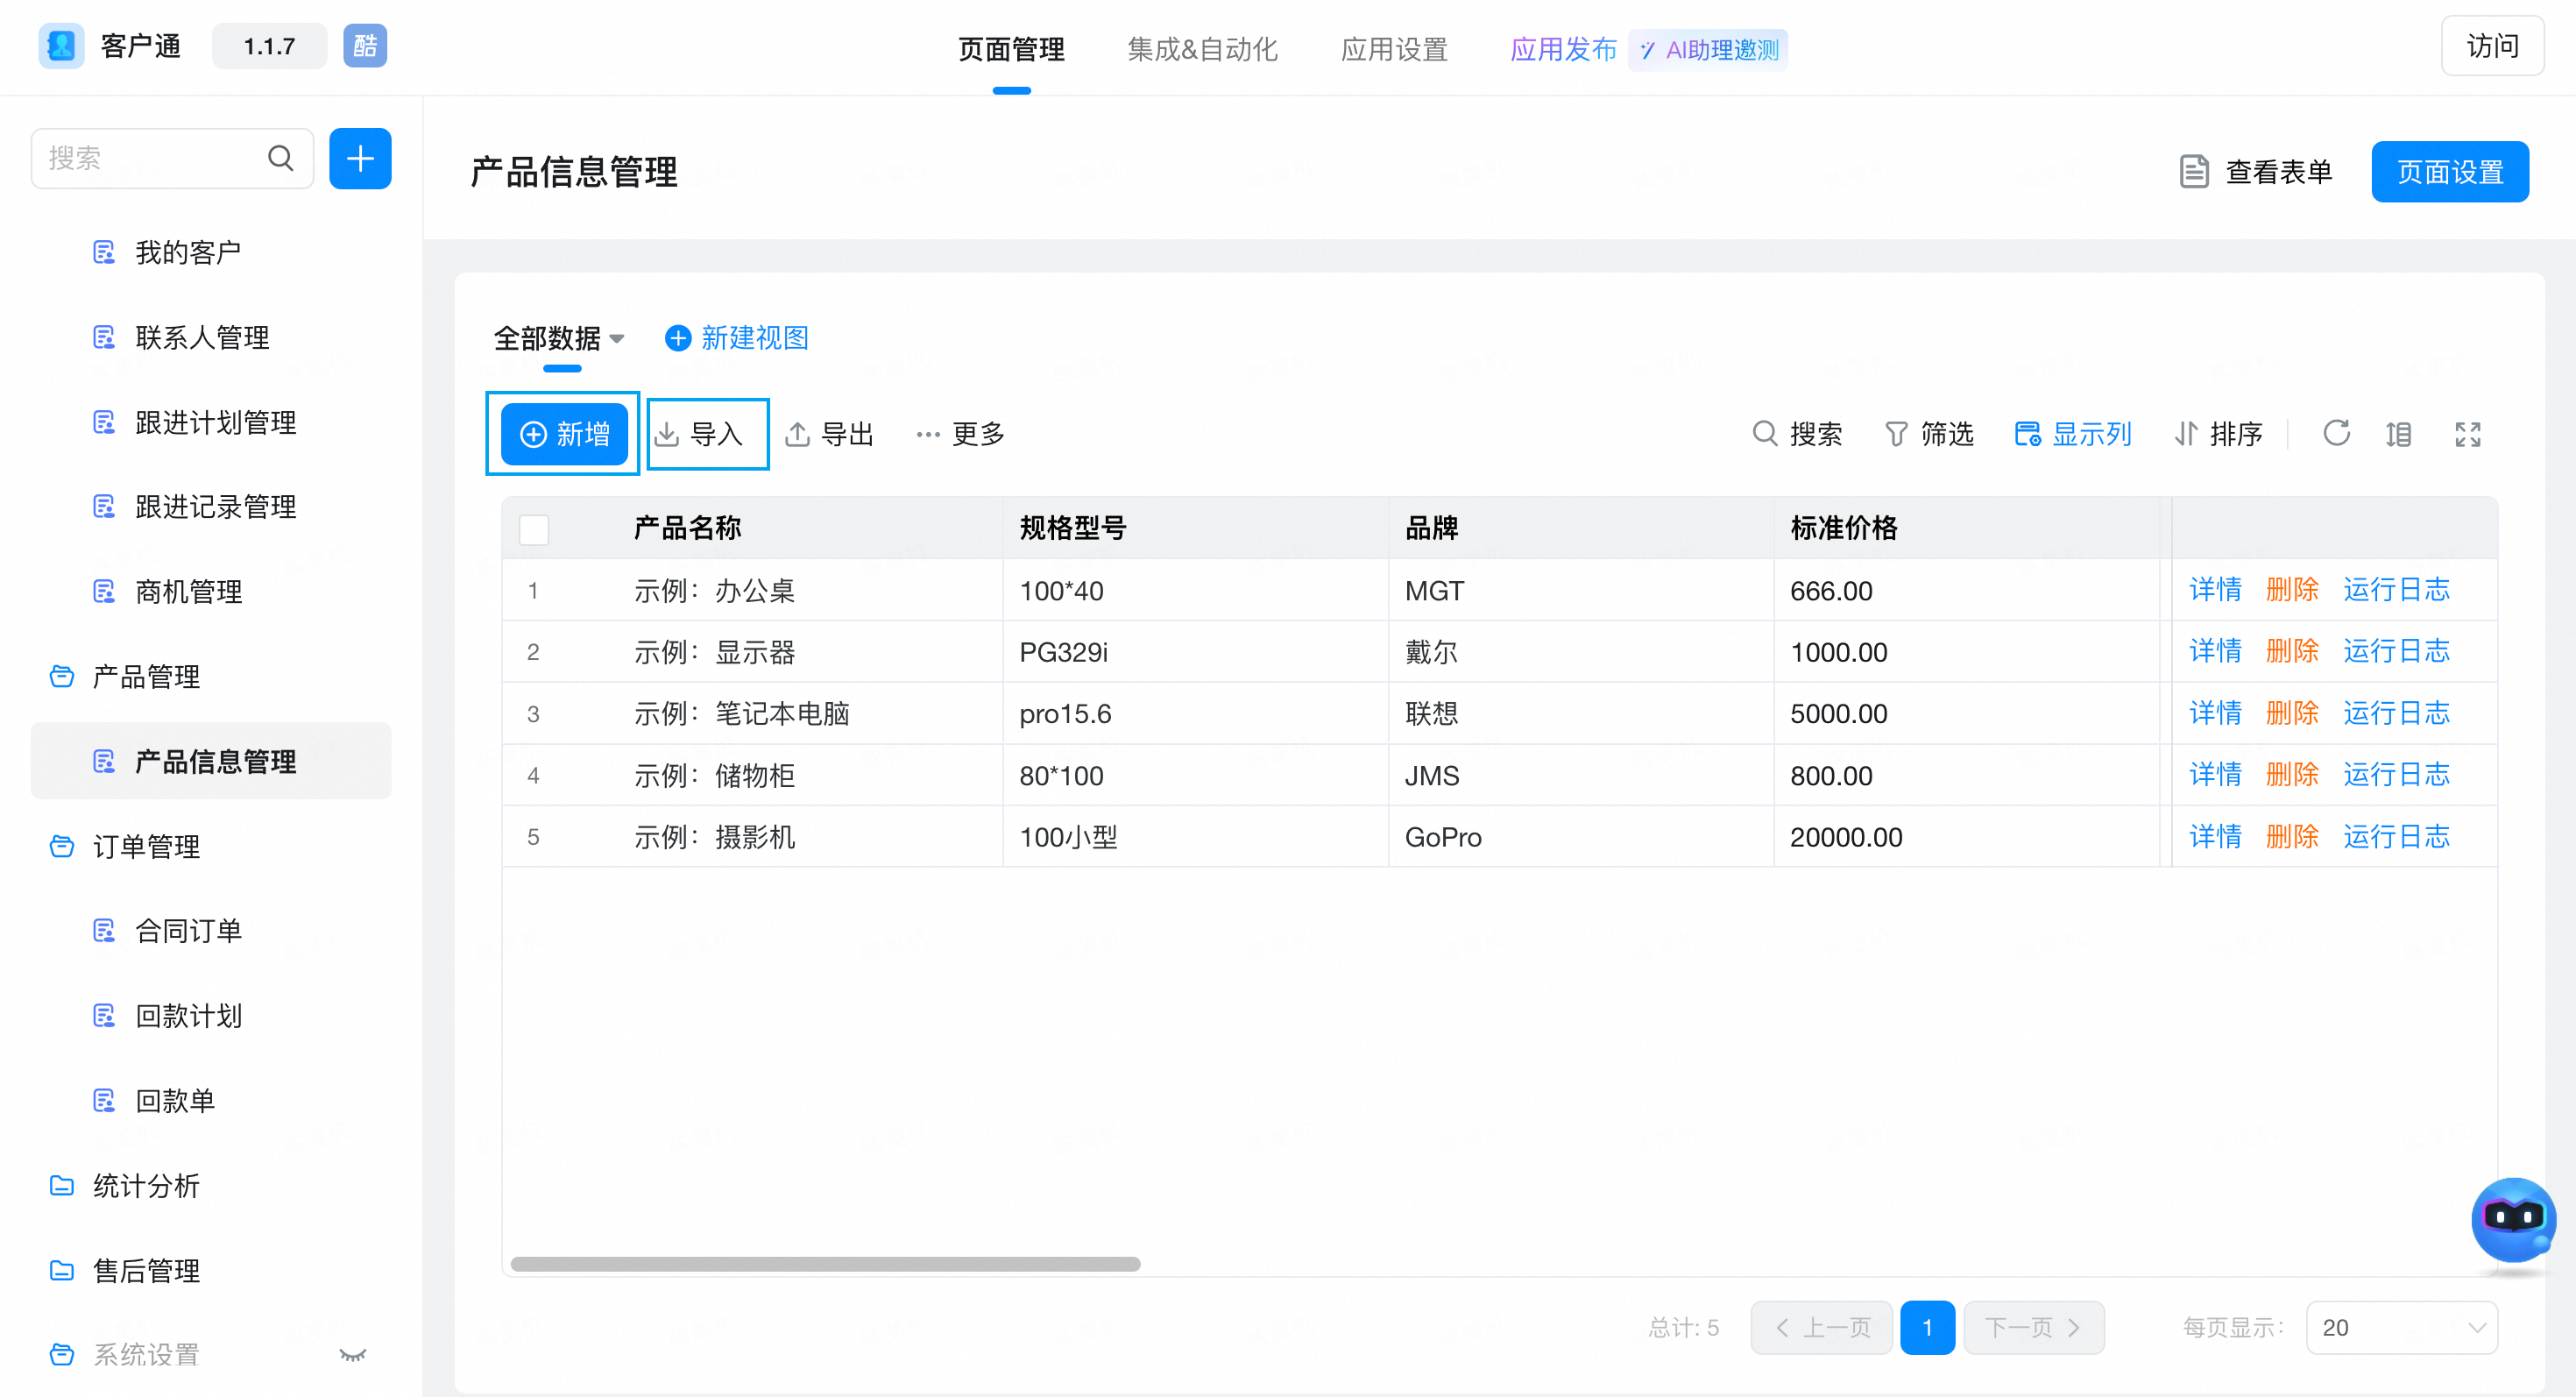
- Add input, click the Add button to add input
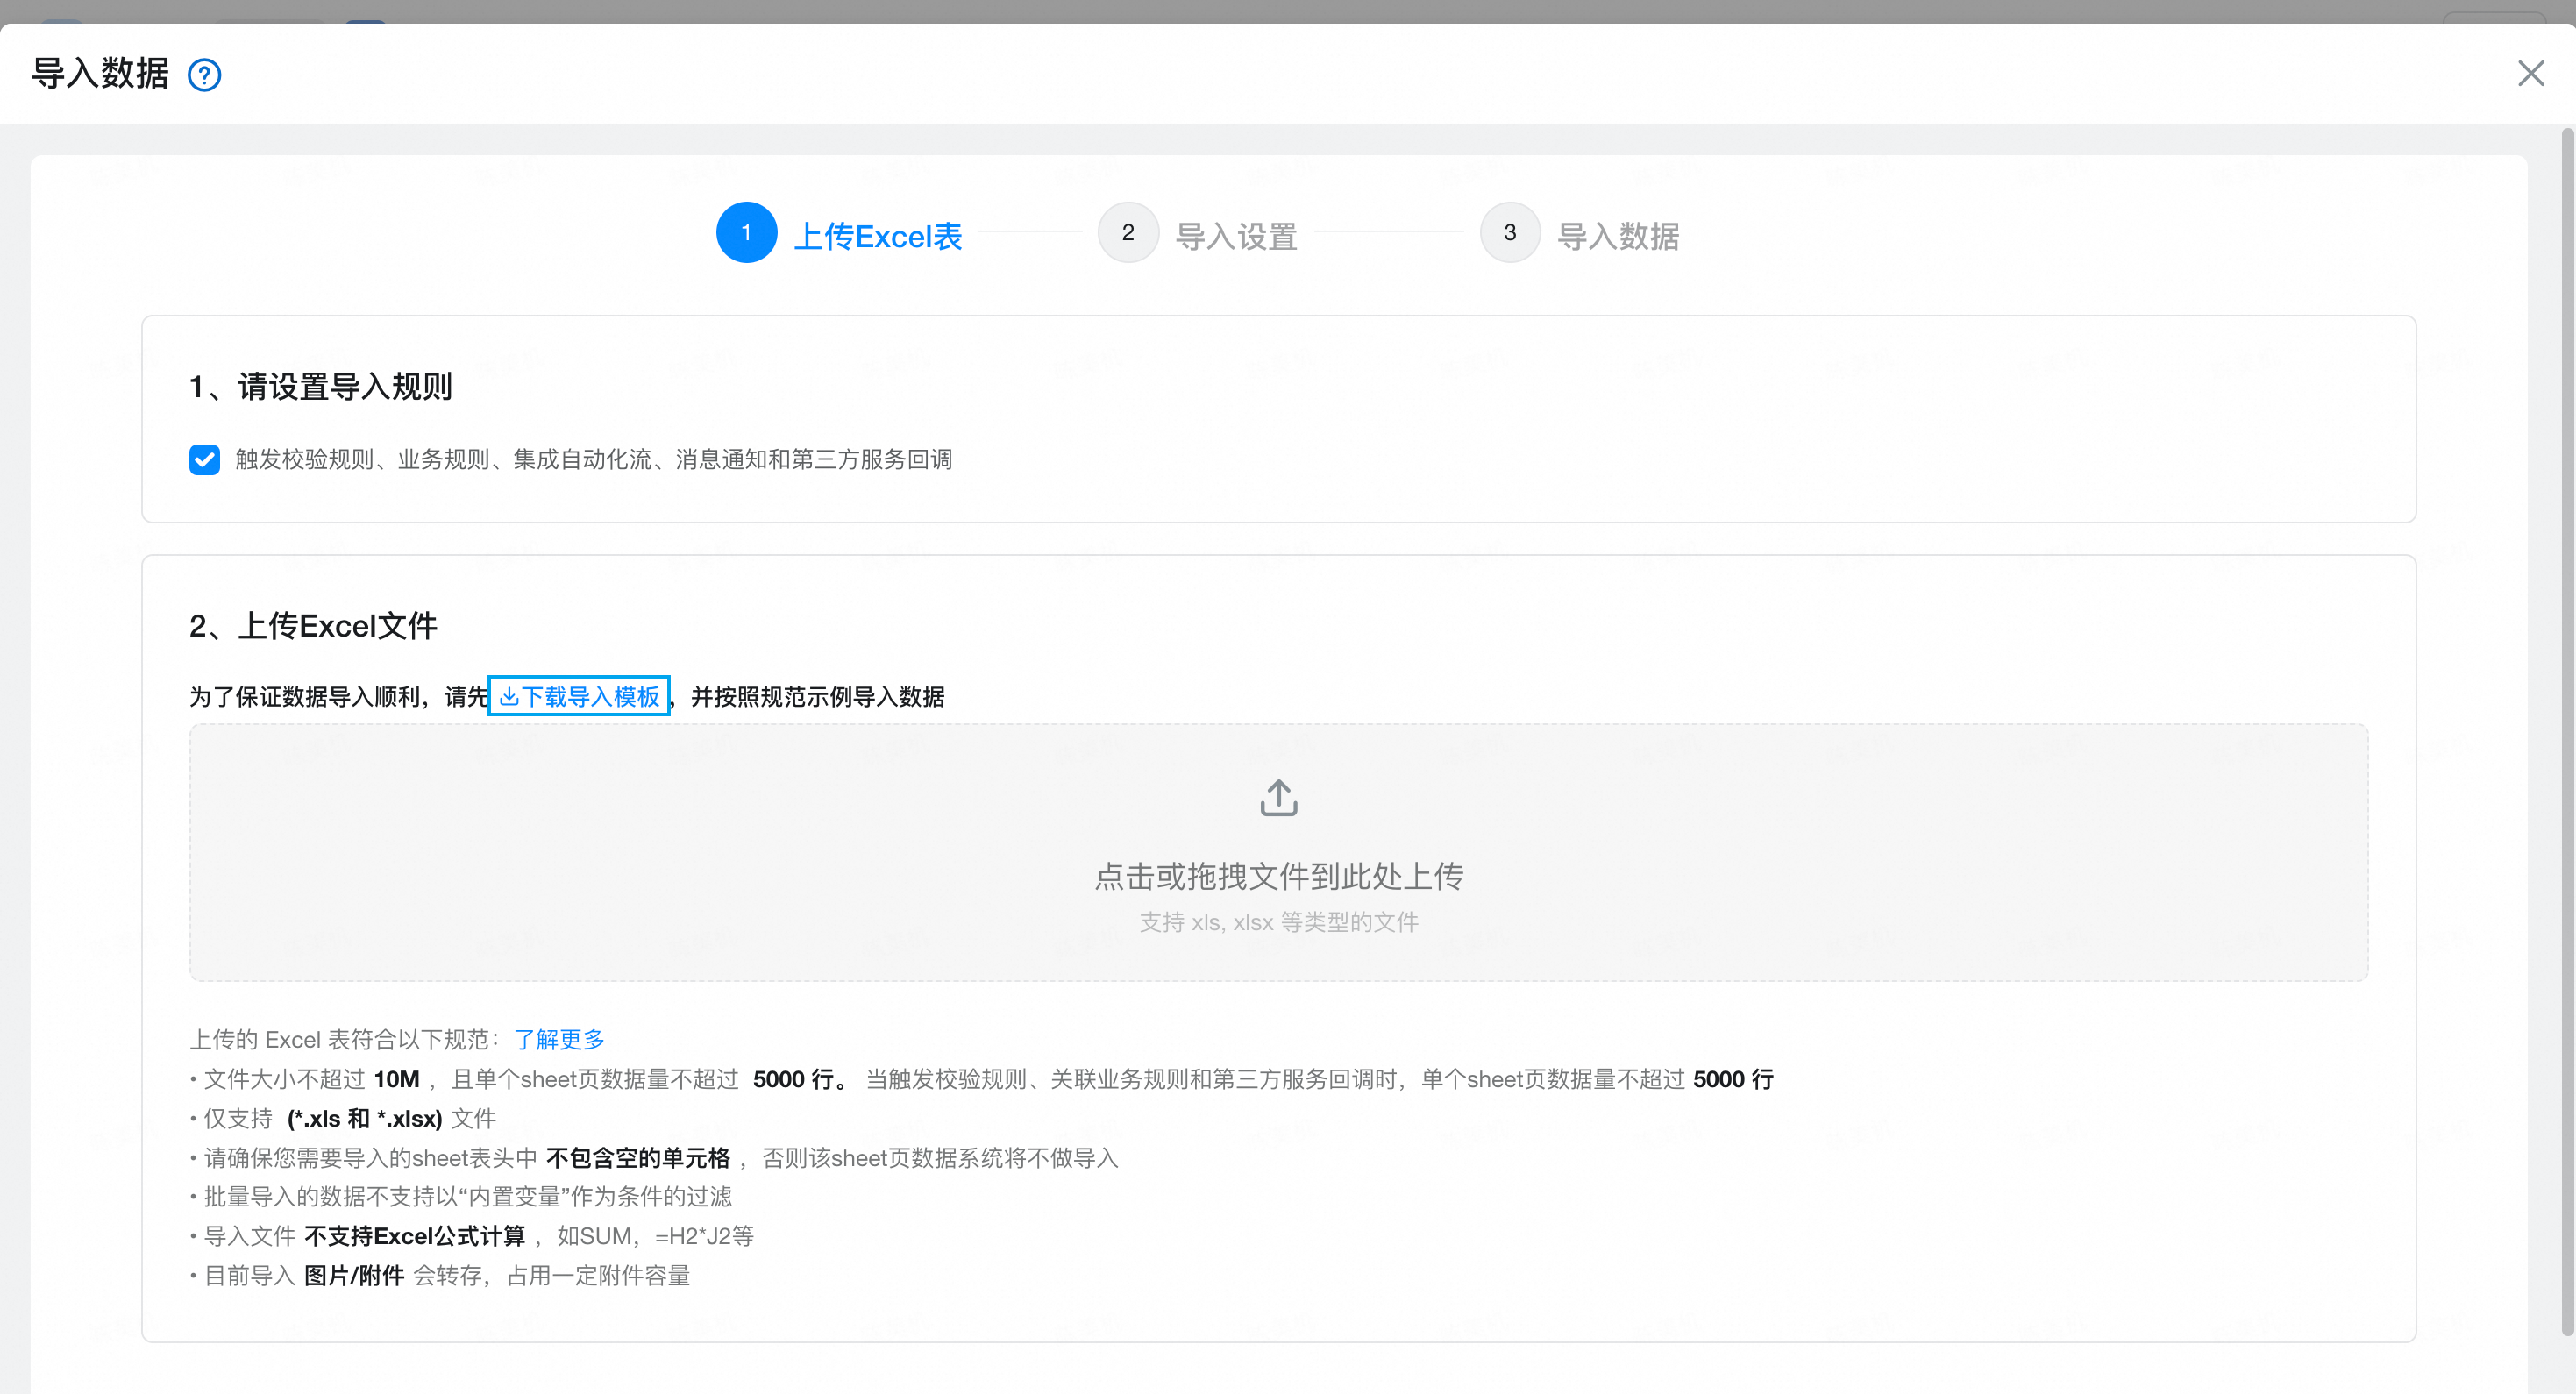
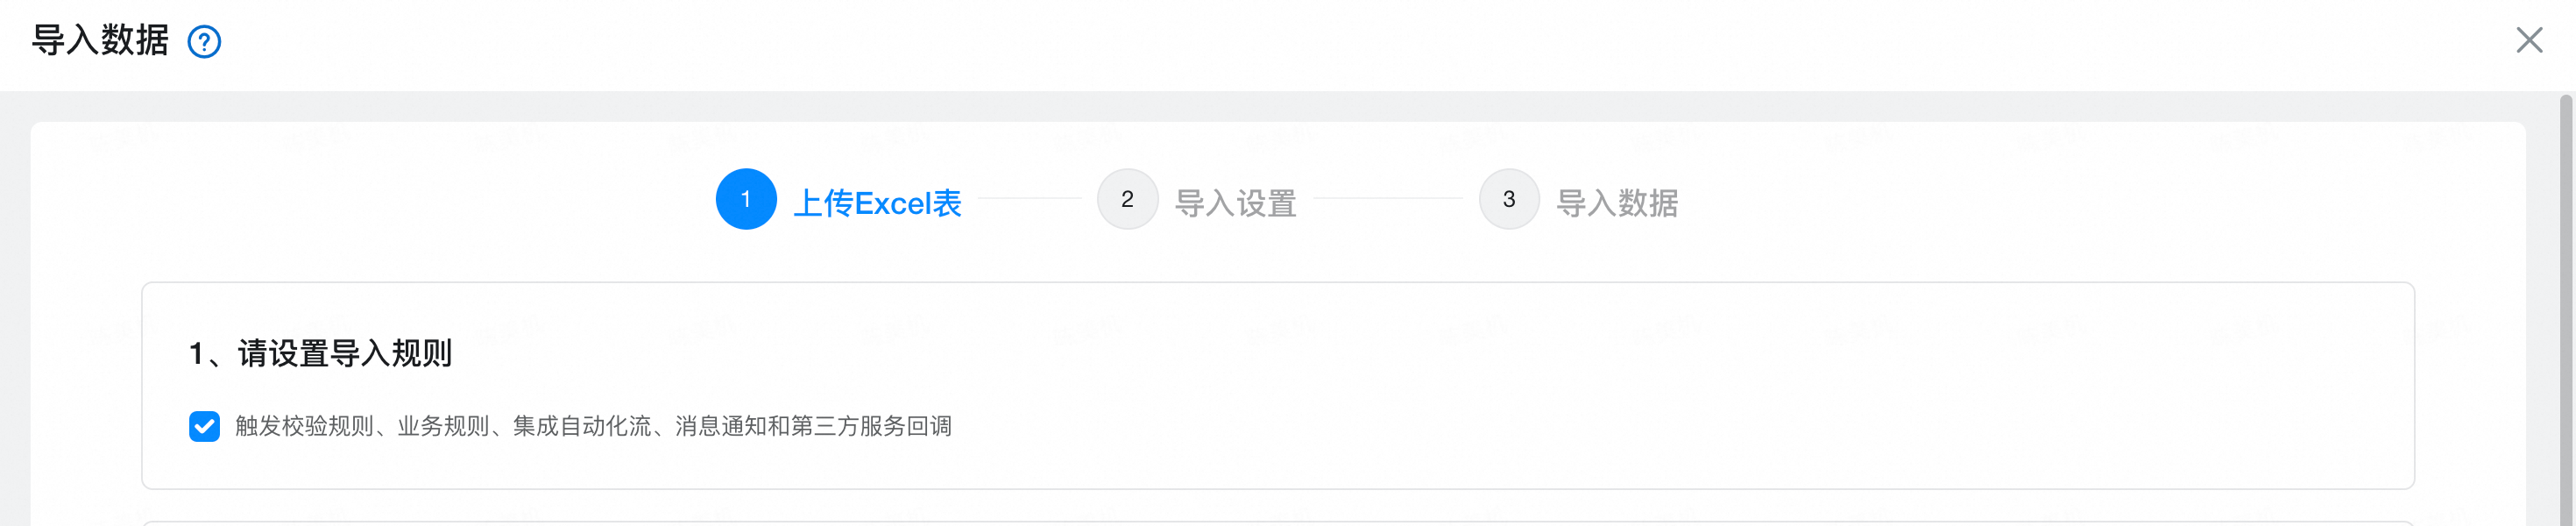
- Batch import, click batch import, download the import template of the system, and import it according to the import template format.
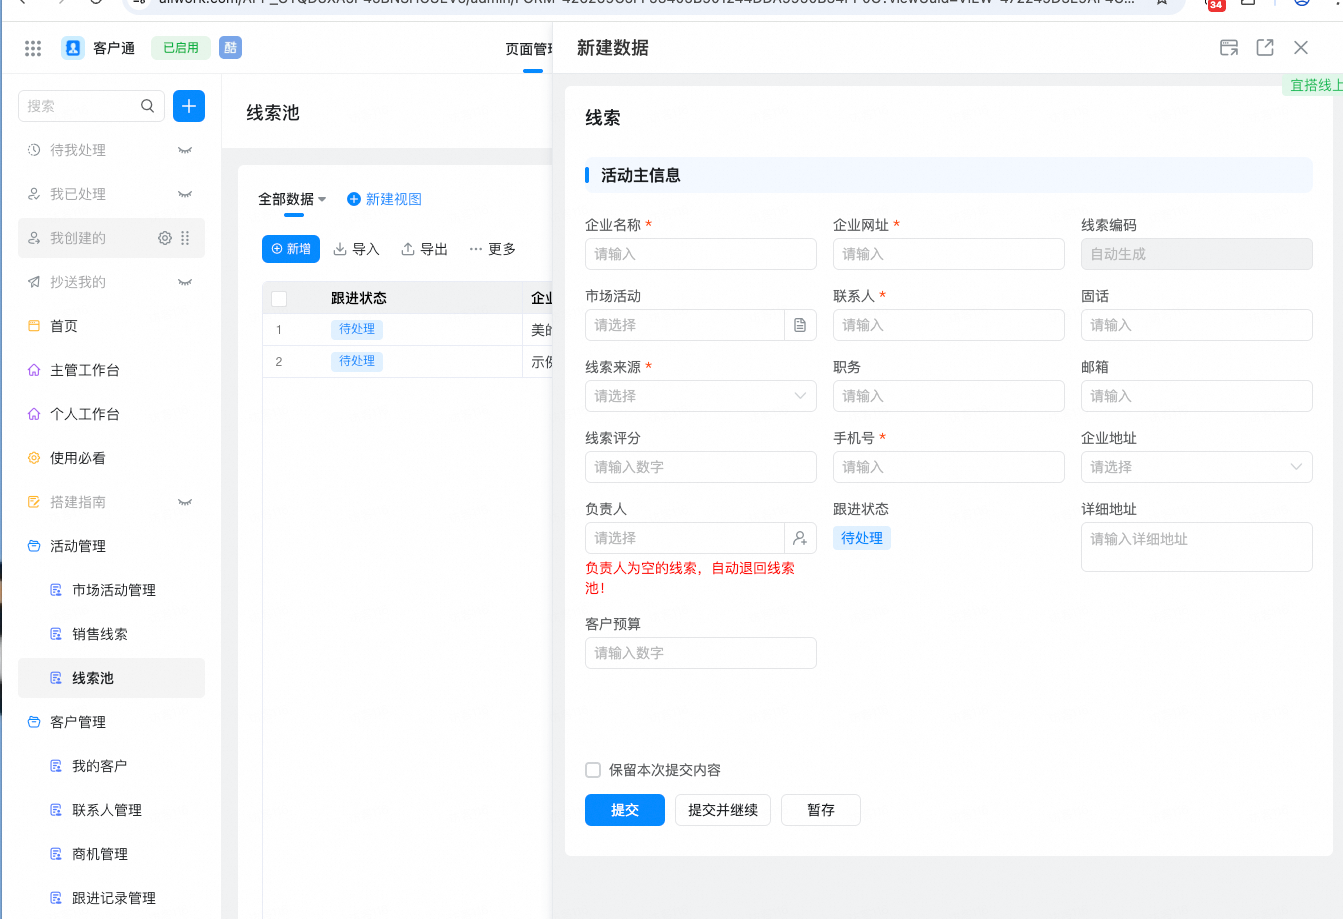
3. Clue pool entry
- Click activity management and click "clue pool". This page is the enterprise's high seas pool clue management page, which can manage all unassigned clues of the enterprise, including receiving private sea, operations such as allocation
- Input methods include new input and batch import
- Add an entry. Click the Add button to add an entry.
Note: the clue pool does not have any clues that are responsible for sales, so there is no need to enter the person in charge here. If there is a person in charge, it belongs to private sea-sales leads.
4. Customer high seas pool entry
- Click customer management and click customer high seas pool. This page is the enterprise's customer high seas pool management page, which can manage all unassigned customers of the enterprise, including receiving private seas, operations such as allocation
- Input methods include new input and batch import
- Add an entry. Click the Add button to add an entry.
- Note: The customer high seas pool does not have customer information responsible for sales, so there is no need to enter the person in charge here. If there is a person in charge of sales, it belongs to private sea-my customer

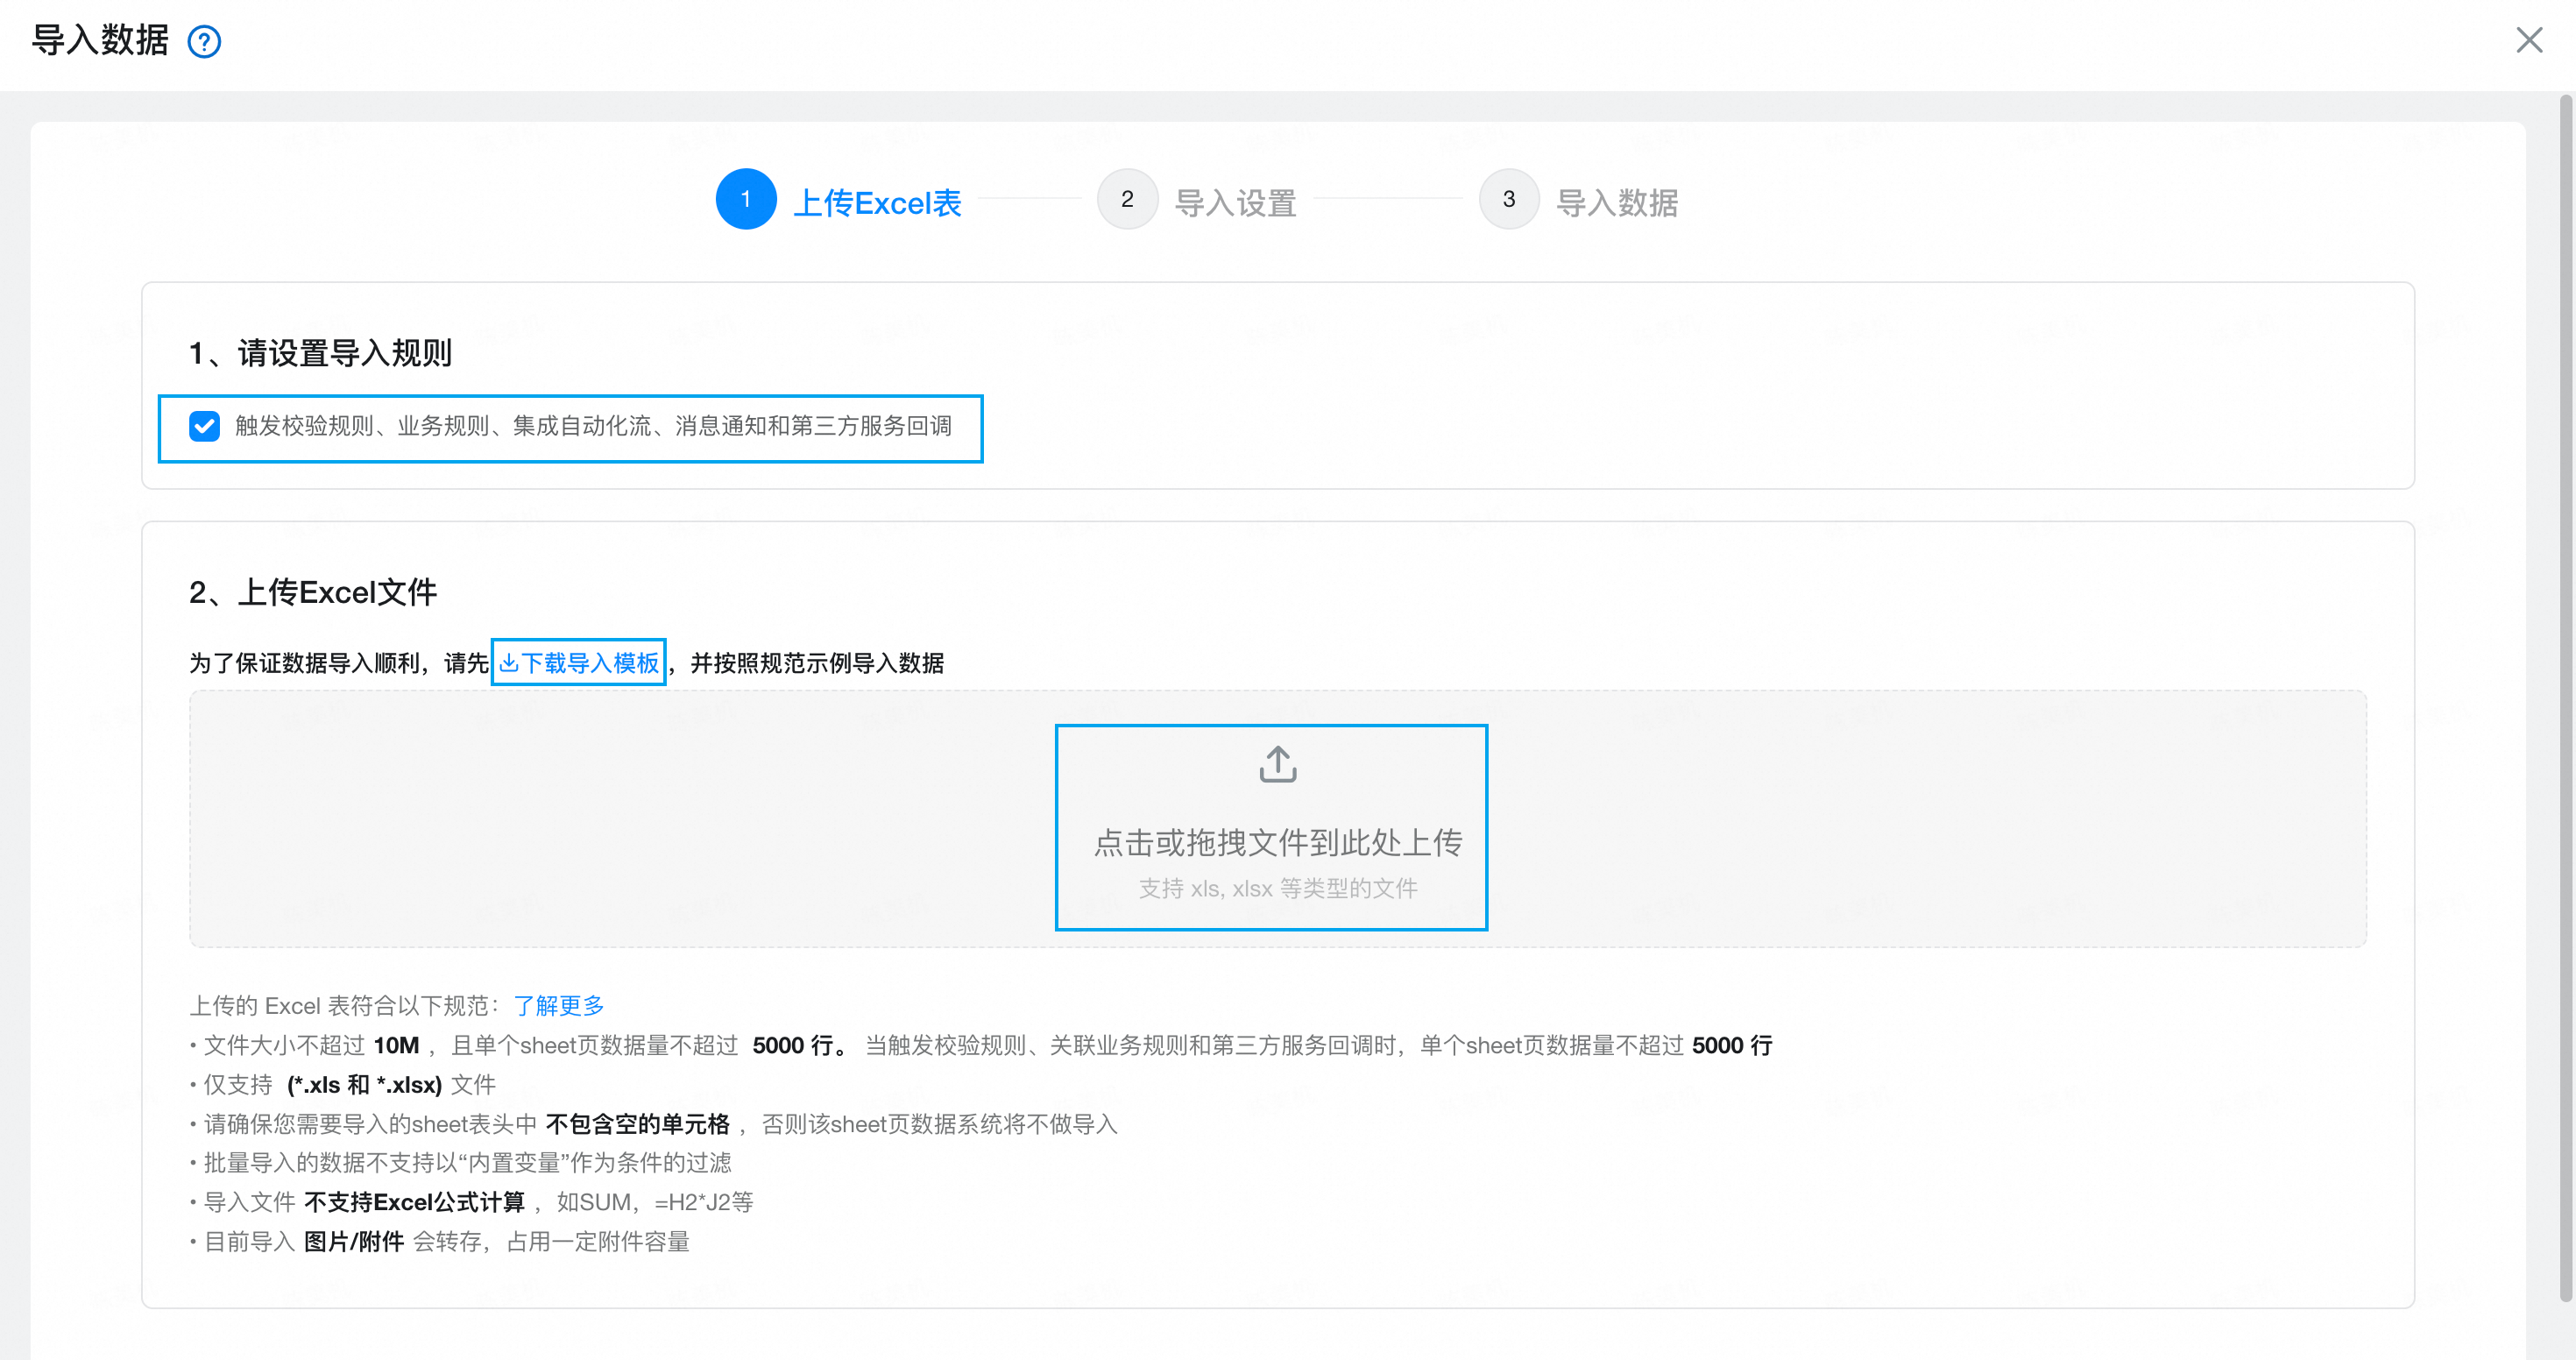
- Batch import, click batch import, download the import template of the system, and import it according to the import template format.
- Note: Select import rules when importing
5,Customer information entry
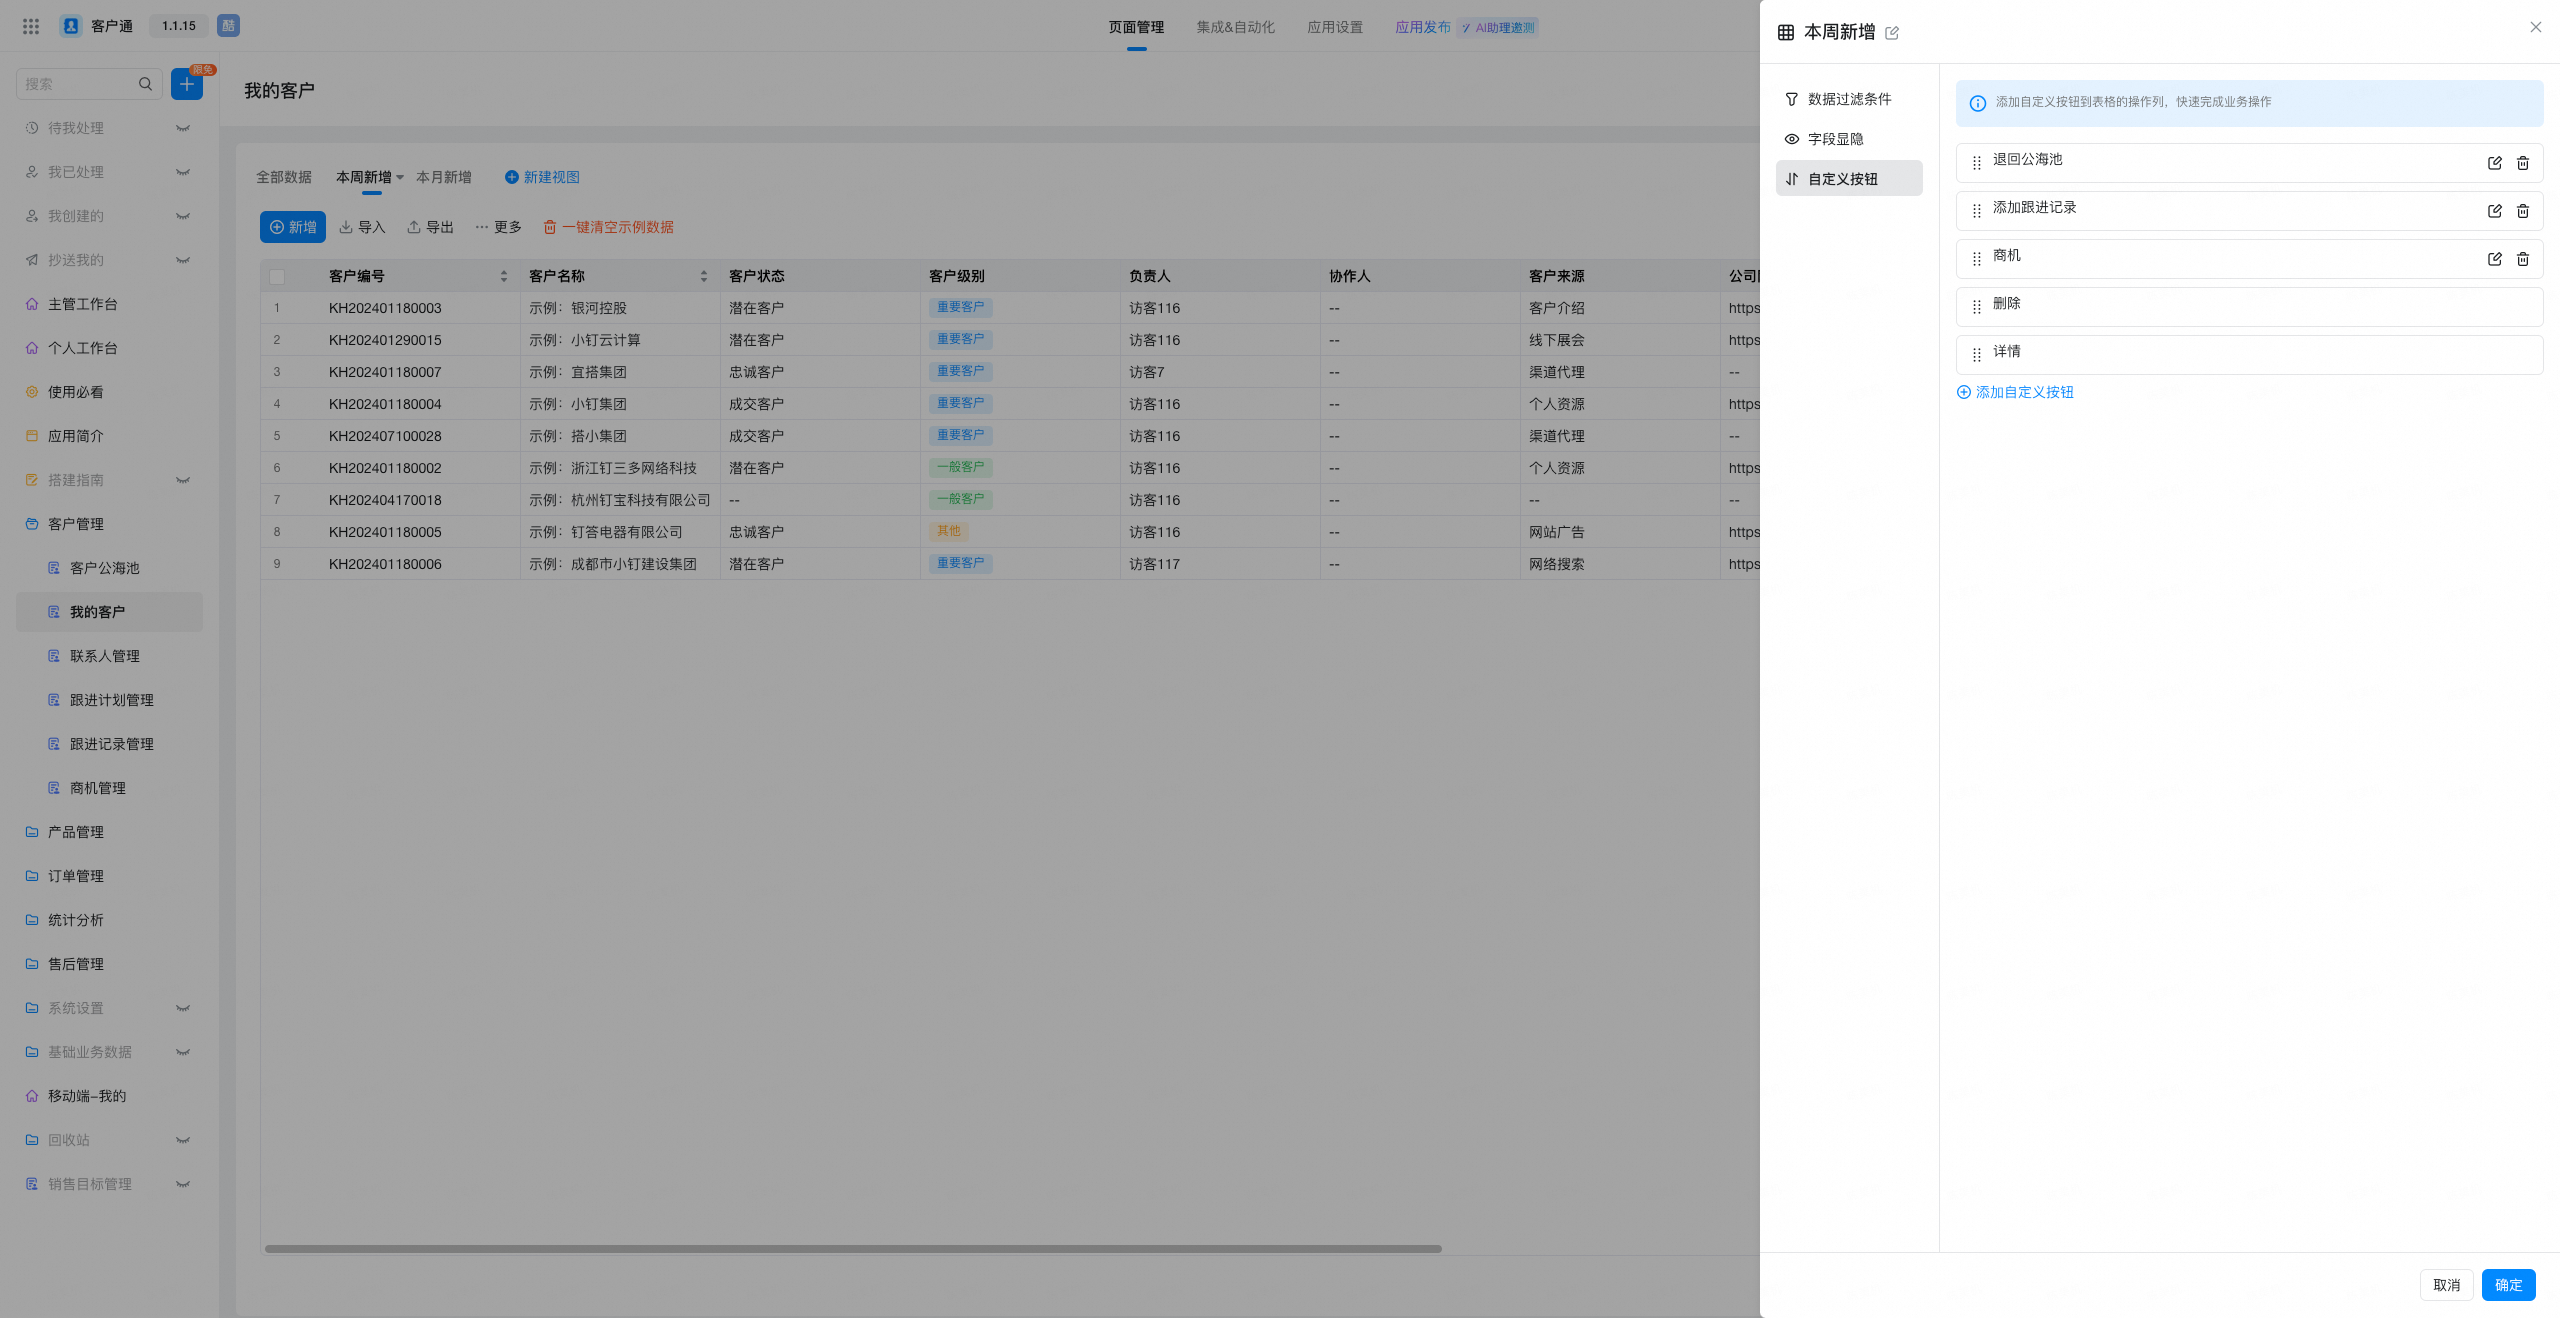
- Click customer management and click "My customers". This page is the private sea of customers, that is, each customer is assigned and has a corresponding sales owner, each sales can manage its own responsible customers on this page.
- Input methods include new input and batch import
- Add an entry. Click the Add button to add an entry.
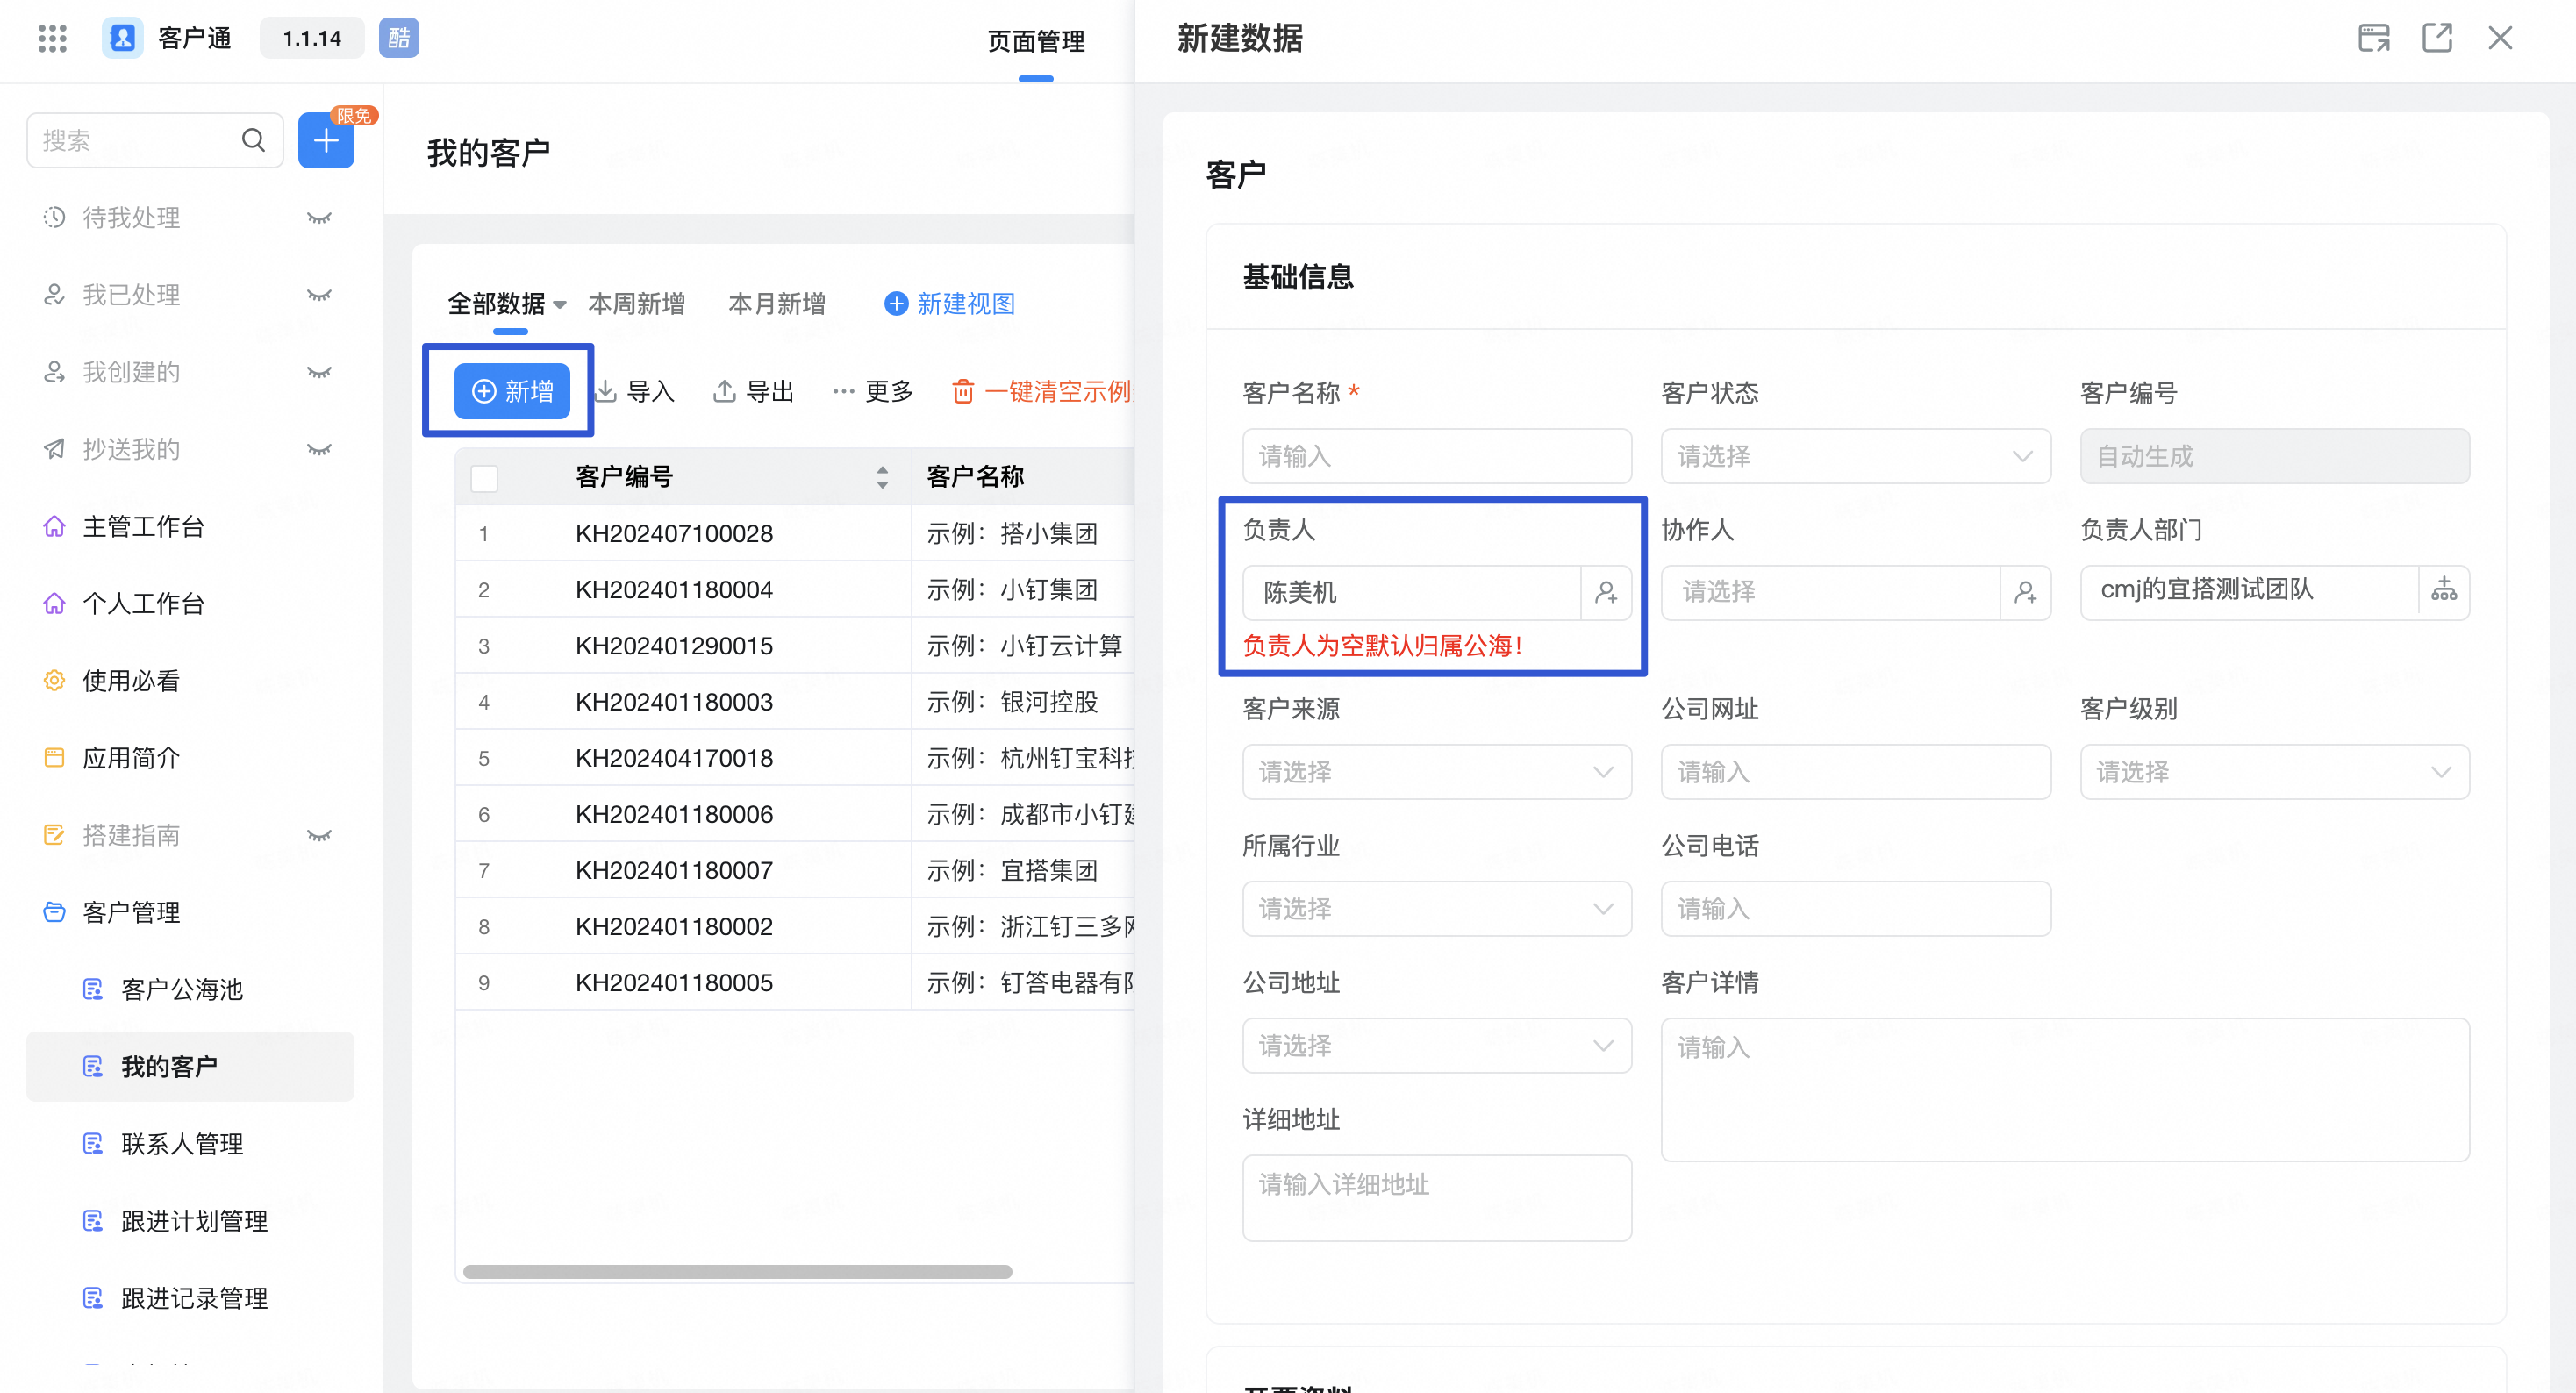
- Note: when entering, you must enter the person in charge. Only customer clues with the person in charge can be seen in my customers.
- Batch import, click batch import, download the import template of the system, and import it according to the import template format.

- Note: When importing, you need to select the import rule and remember the import owner. If the owner is empty, import it to the public sea pool.
2. Permission configuration
After data initialization, we can configure permissions to enable different personnel to operate different functions and data.
1. Quickly configure permissions through roles
- Go to the management background> Application Settings> Application roles and add corresponding role members
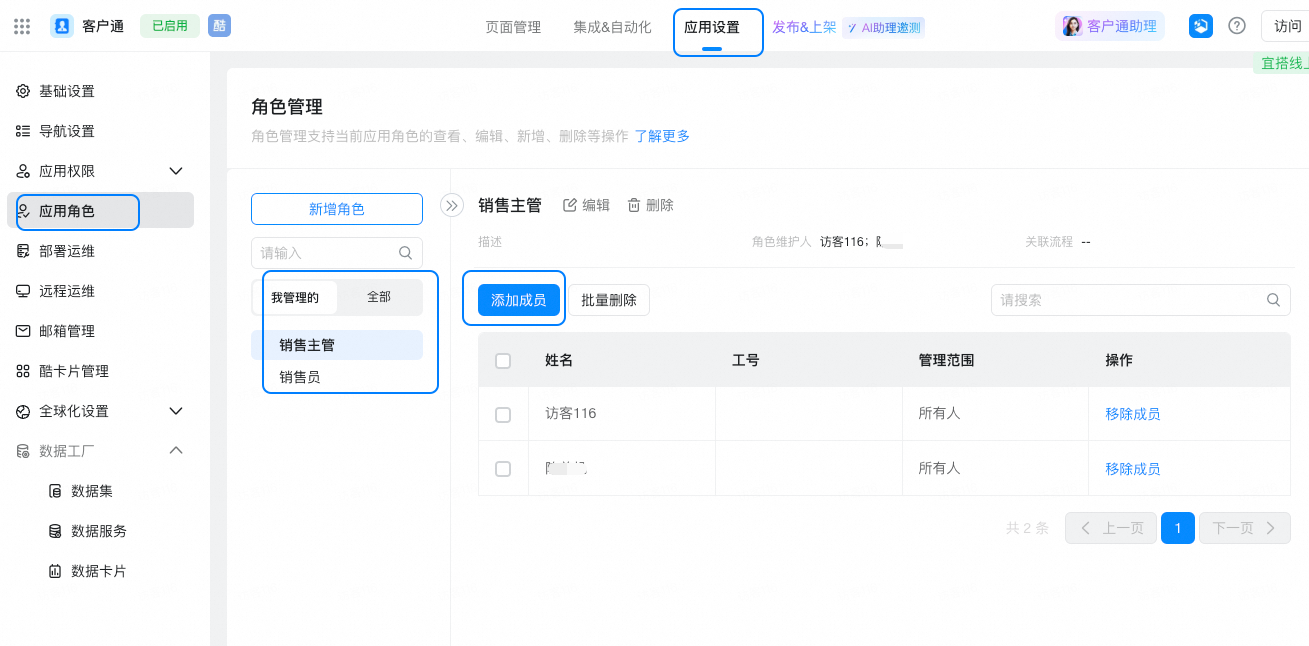
- You can have the permissions of the corresponding role after the addition is successful.
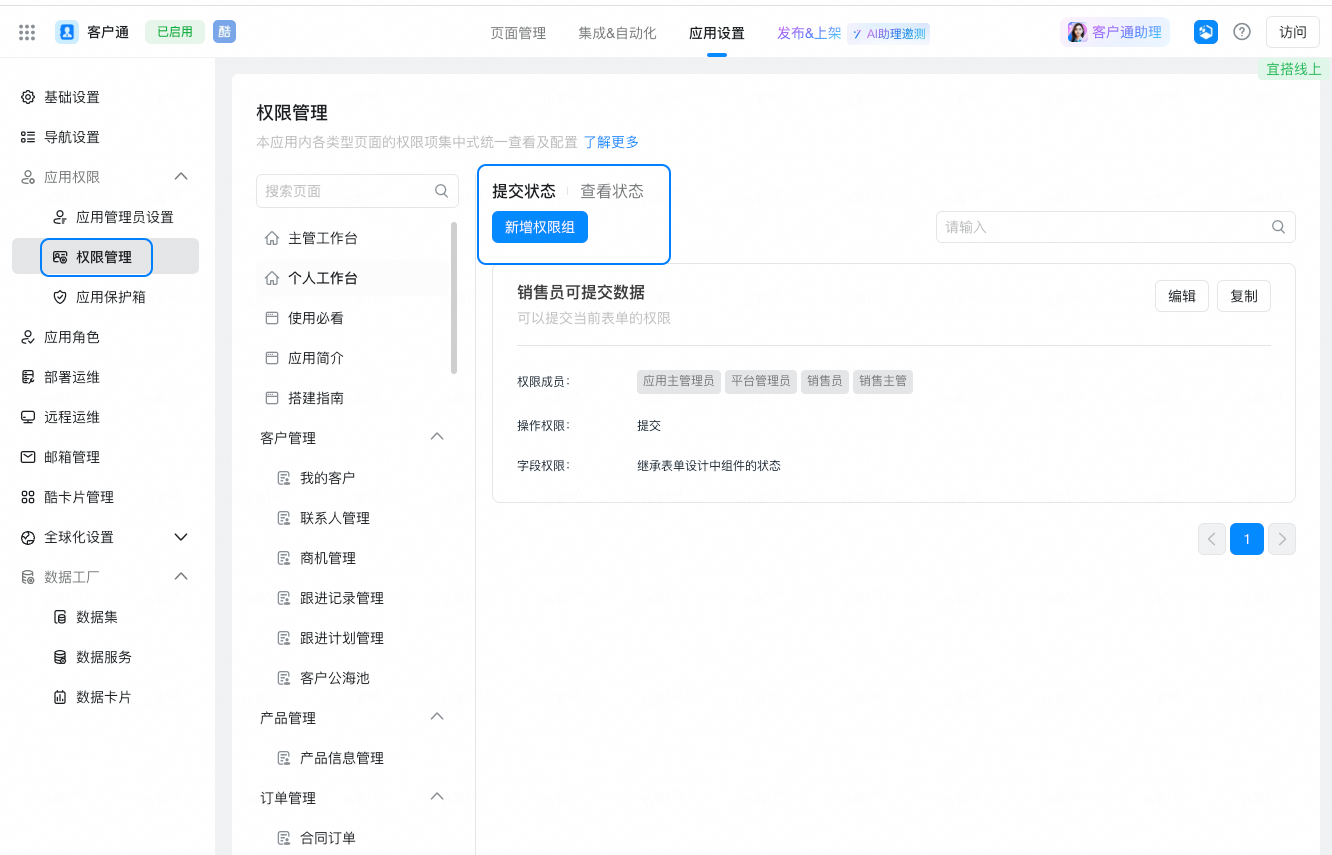
2. Configure permissions for viewing data on a single page

III. Process configuration
In daily business, each enterprise has different approval processes due to its own business. YIDA provides professional process management capabilities. Next, we take sales orders as an example to implement custom process configuration.
- Enter the management background
- Click edit form in the upper-right corner and click process design.
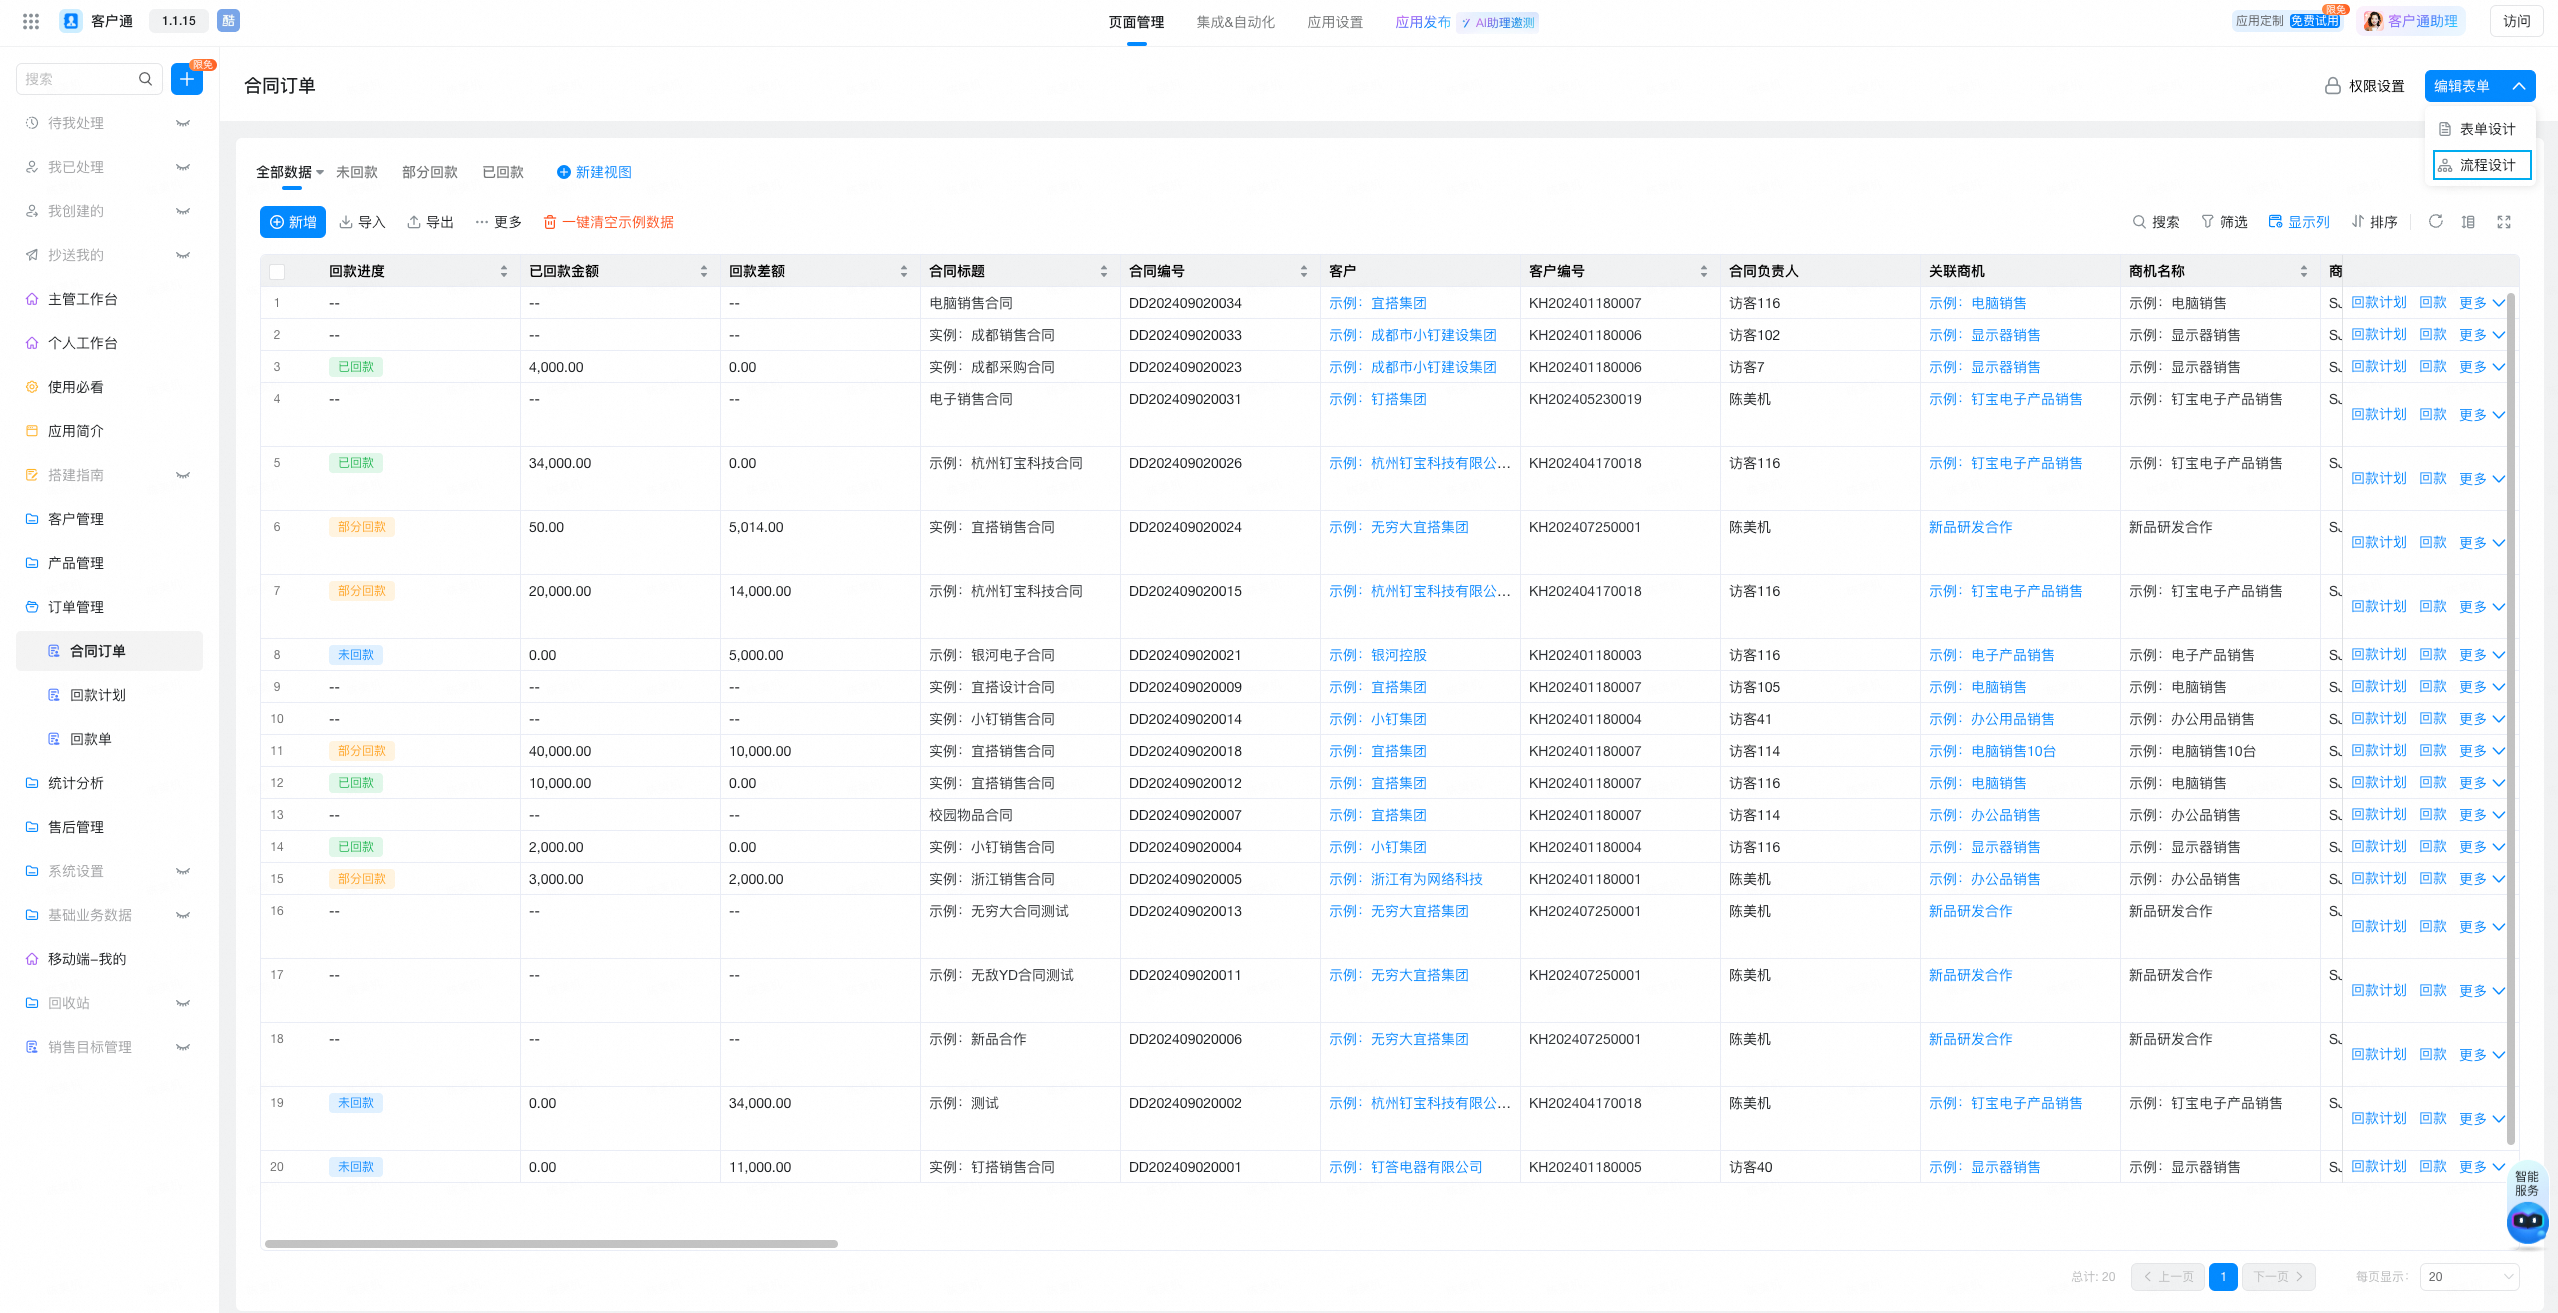
- Click Create New process on the right.

- At this point, we go to the process Editing page of contract order, where we can customize the build process, such as adding process nodes and configuring the person in charge of each node, for example, here we set up sales to transfer to business for order approval after submitting contract orders.

- Finally, click Publish process. At this point, we have completed a custom configuration of the contract order process.
Four, Business Rule configuration
1. Automatic recovery rules for high seas pools
- In order to prevent sales from receiving a large number of clues but not following up, we can configure recycling rules for high seas pools. For example, if there is no follow-up for more than several days or business opportunities are established, the private sea (my customer) will be automatically released. The clues are transferred to the high seas pool, thus improving the follow-up enthusiasm of the clues.
- High seas pool rule settings: manage background-system settings Group-high seas pool rule management-add high seas pool rules and configure automatic recovery rules for high seas pools
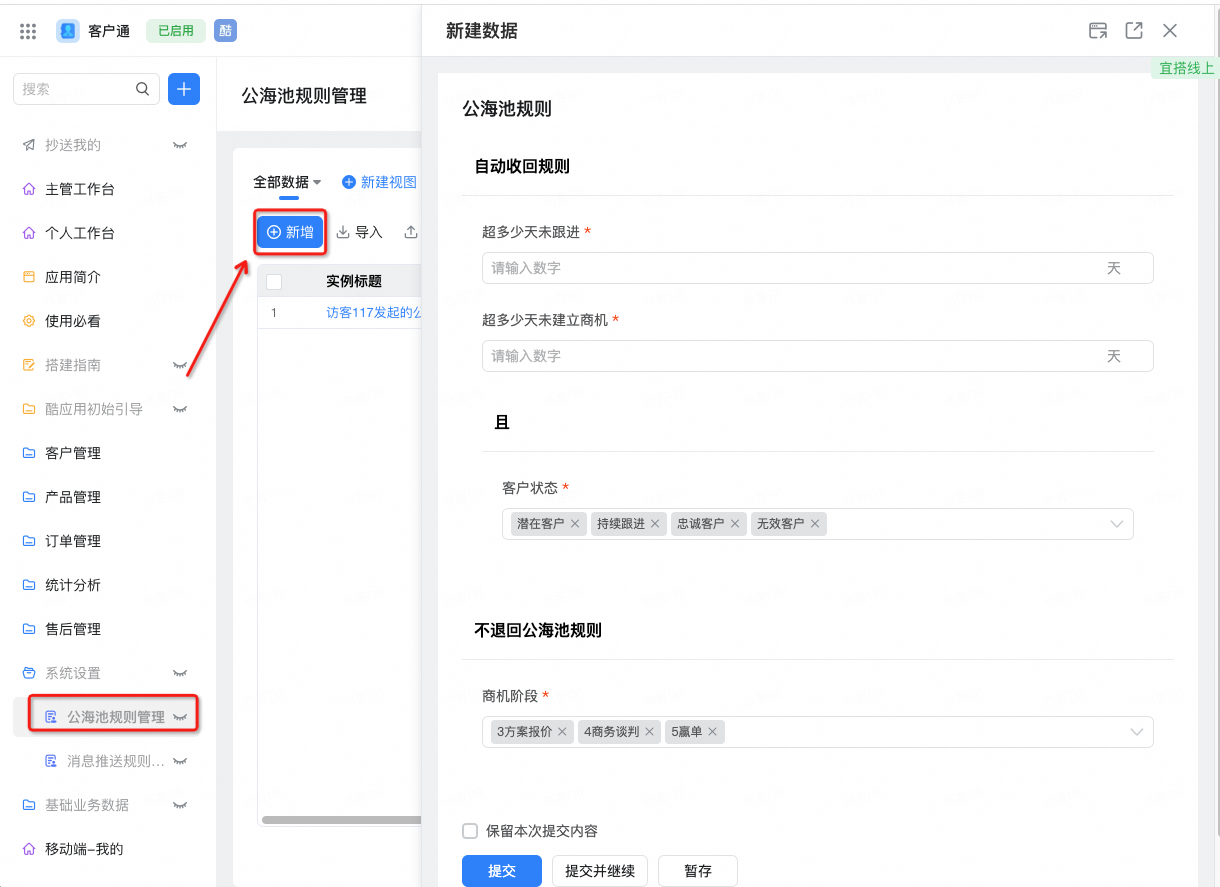
- Note: administrator configuration is required. The data under the application will be executed according to the latest rule.
- And enable the integration execution logic


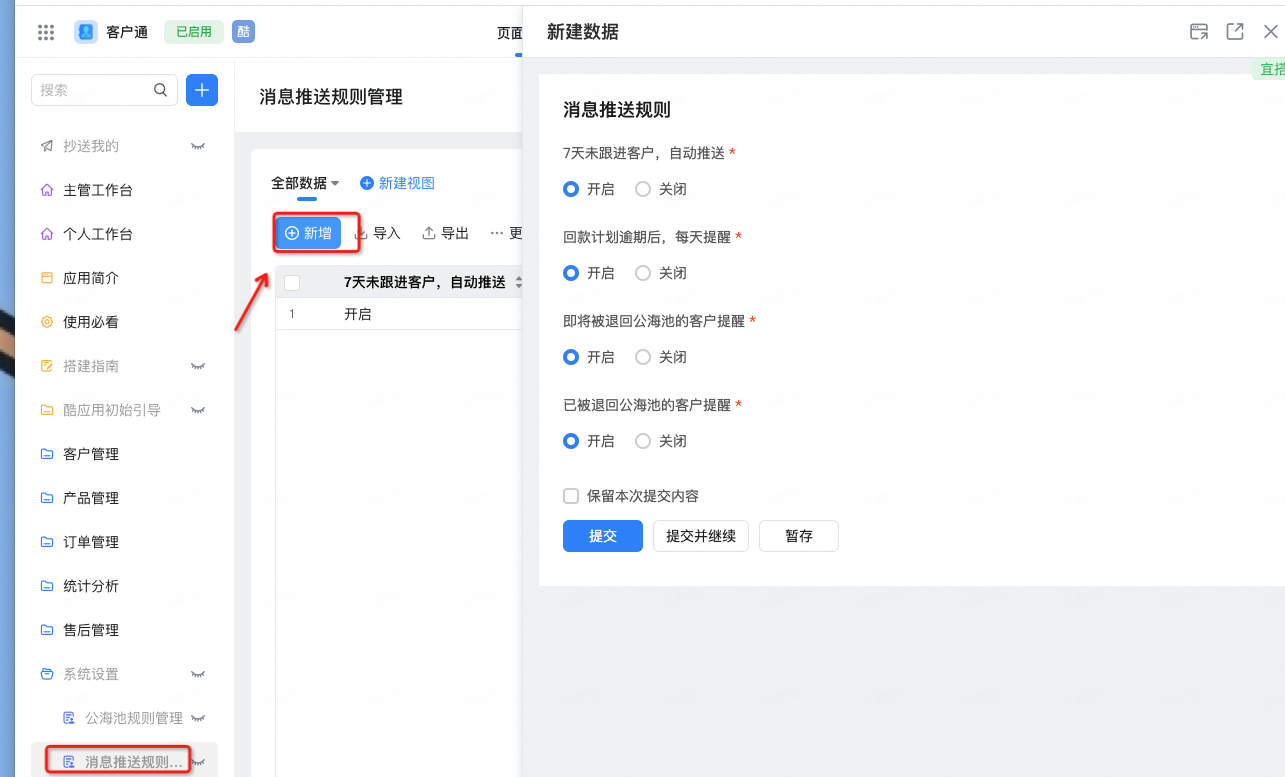
2. Message push rule settings
- Message push rule settings: click message push rule management to add a message push rule that specifies the rules and conditions for receiving and sending messages.
Five. Publish to the DingTalk workbench and DingTalk Group
1. Release to DingTalk Workbench
- Go to the management background, click Application publishing, and click Publish to workbench
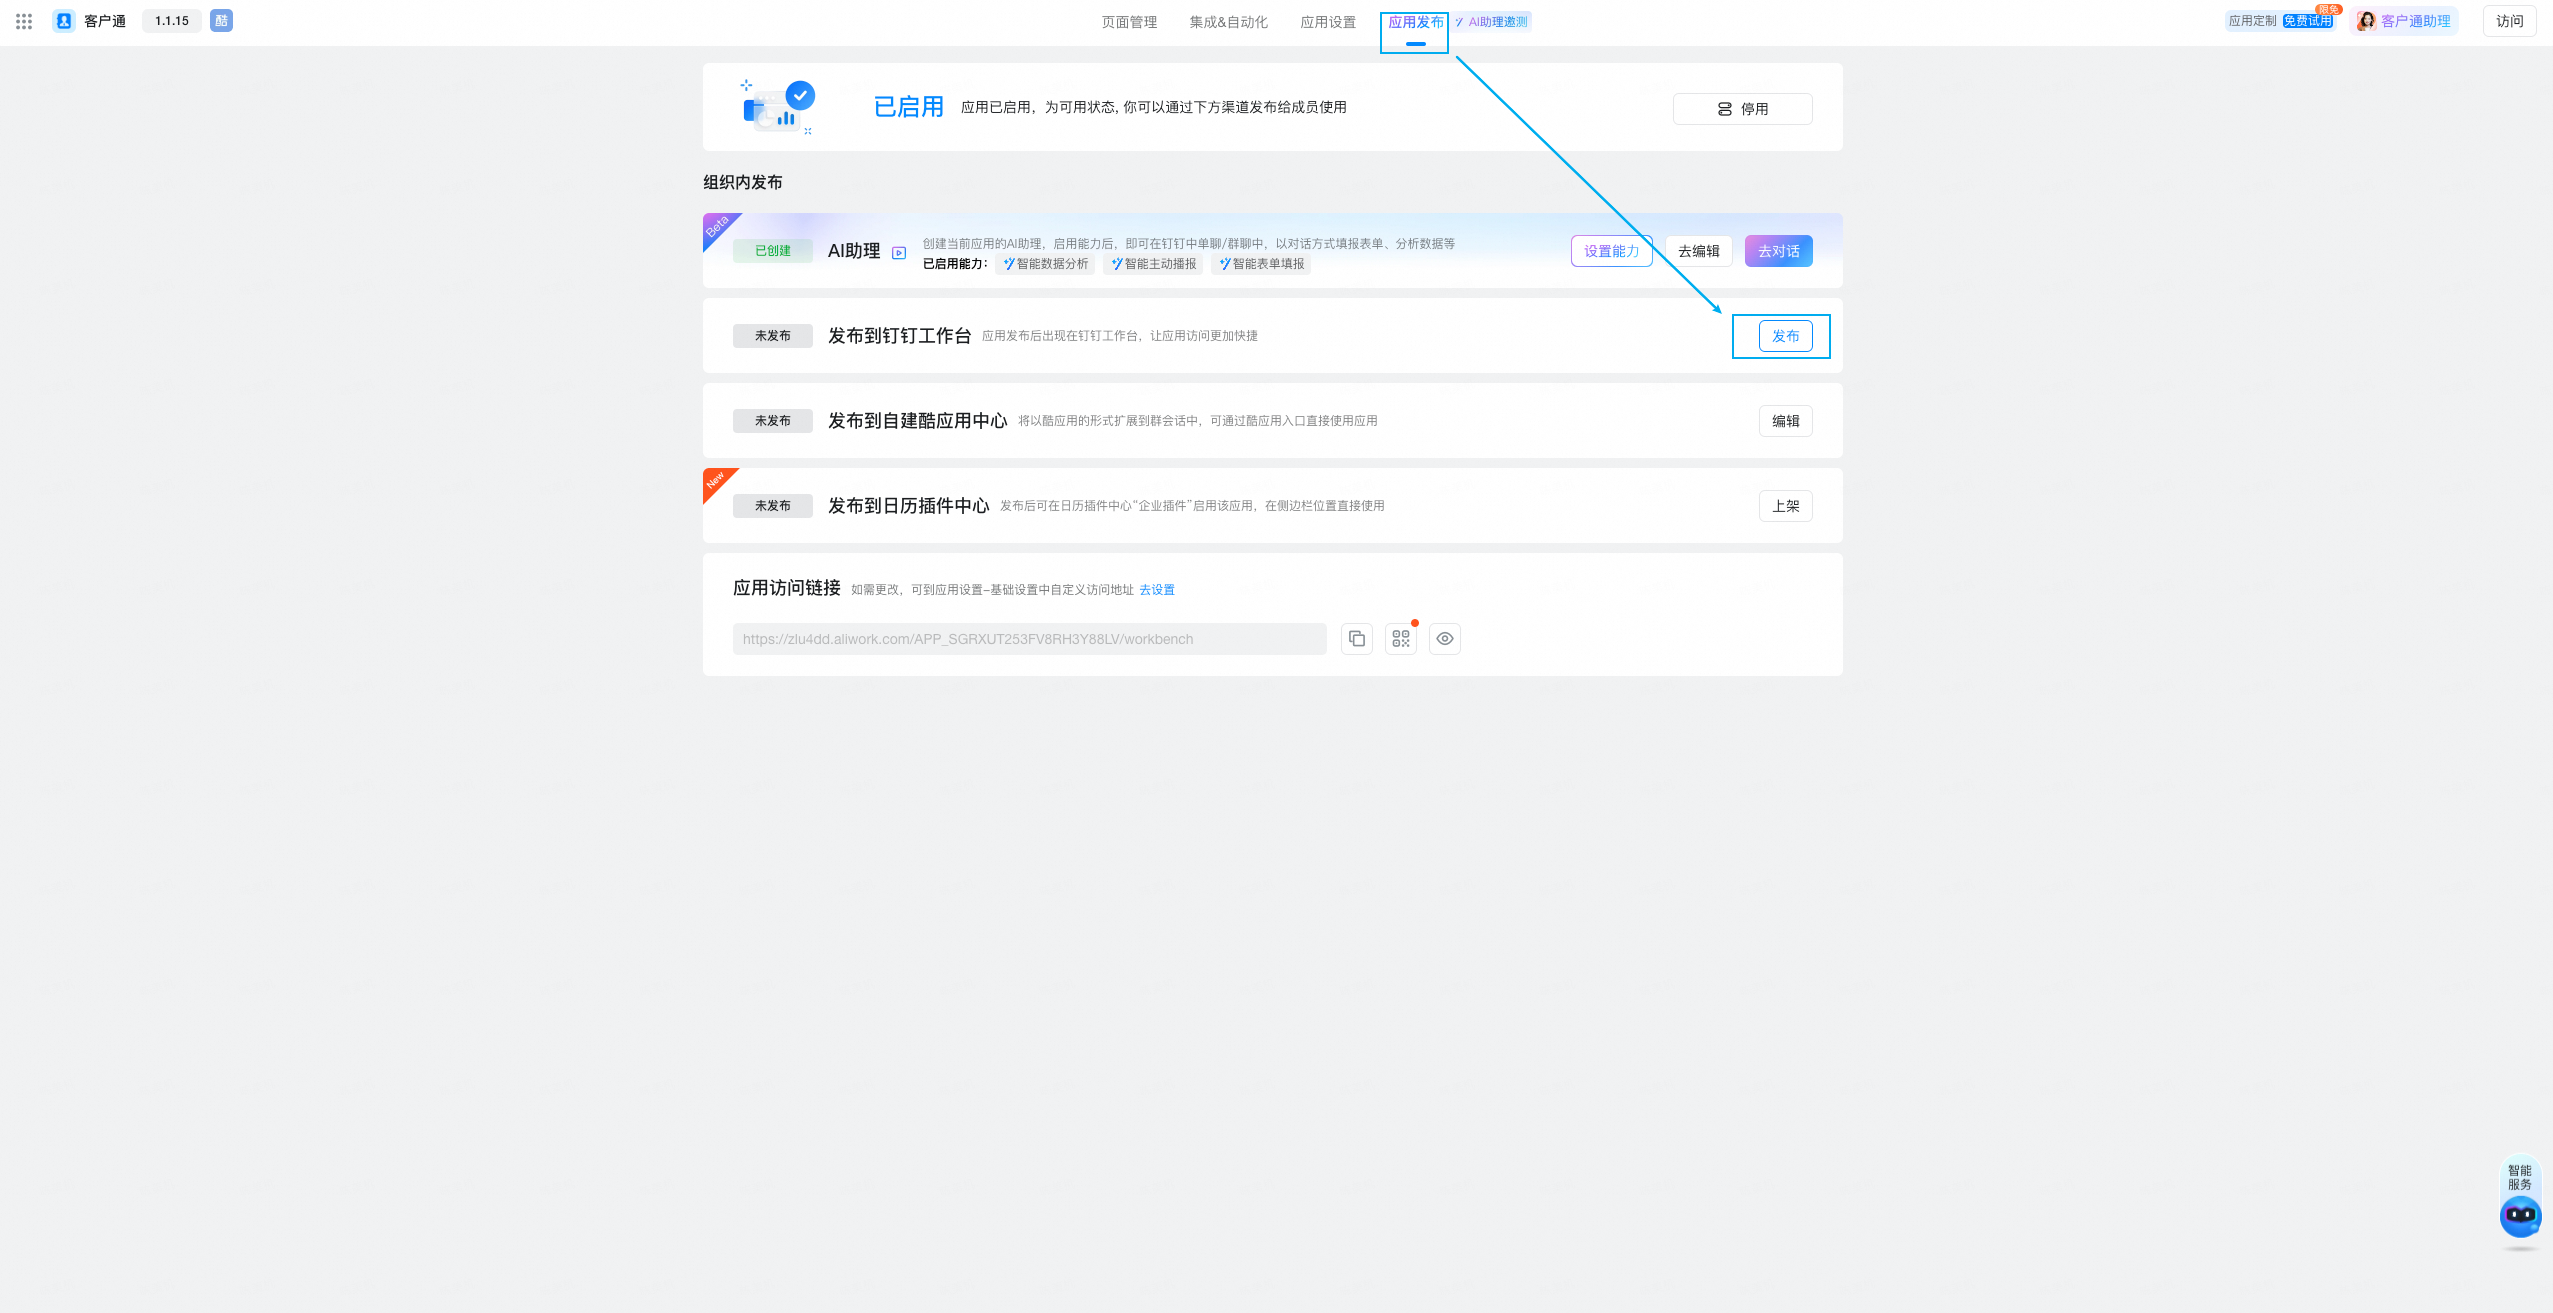
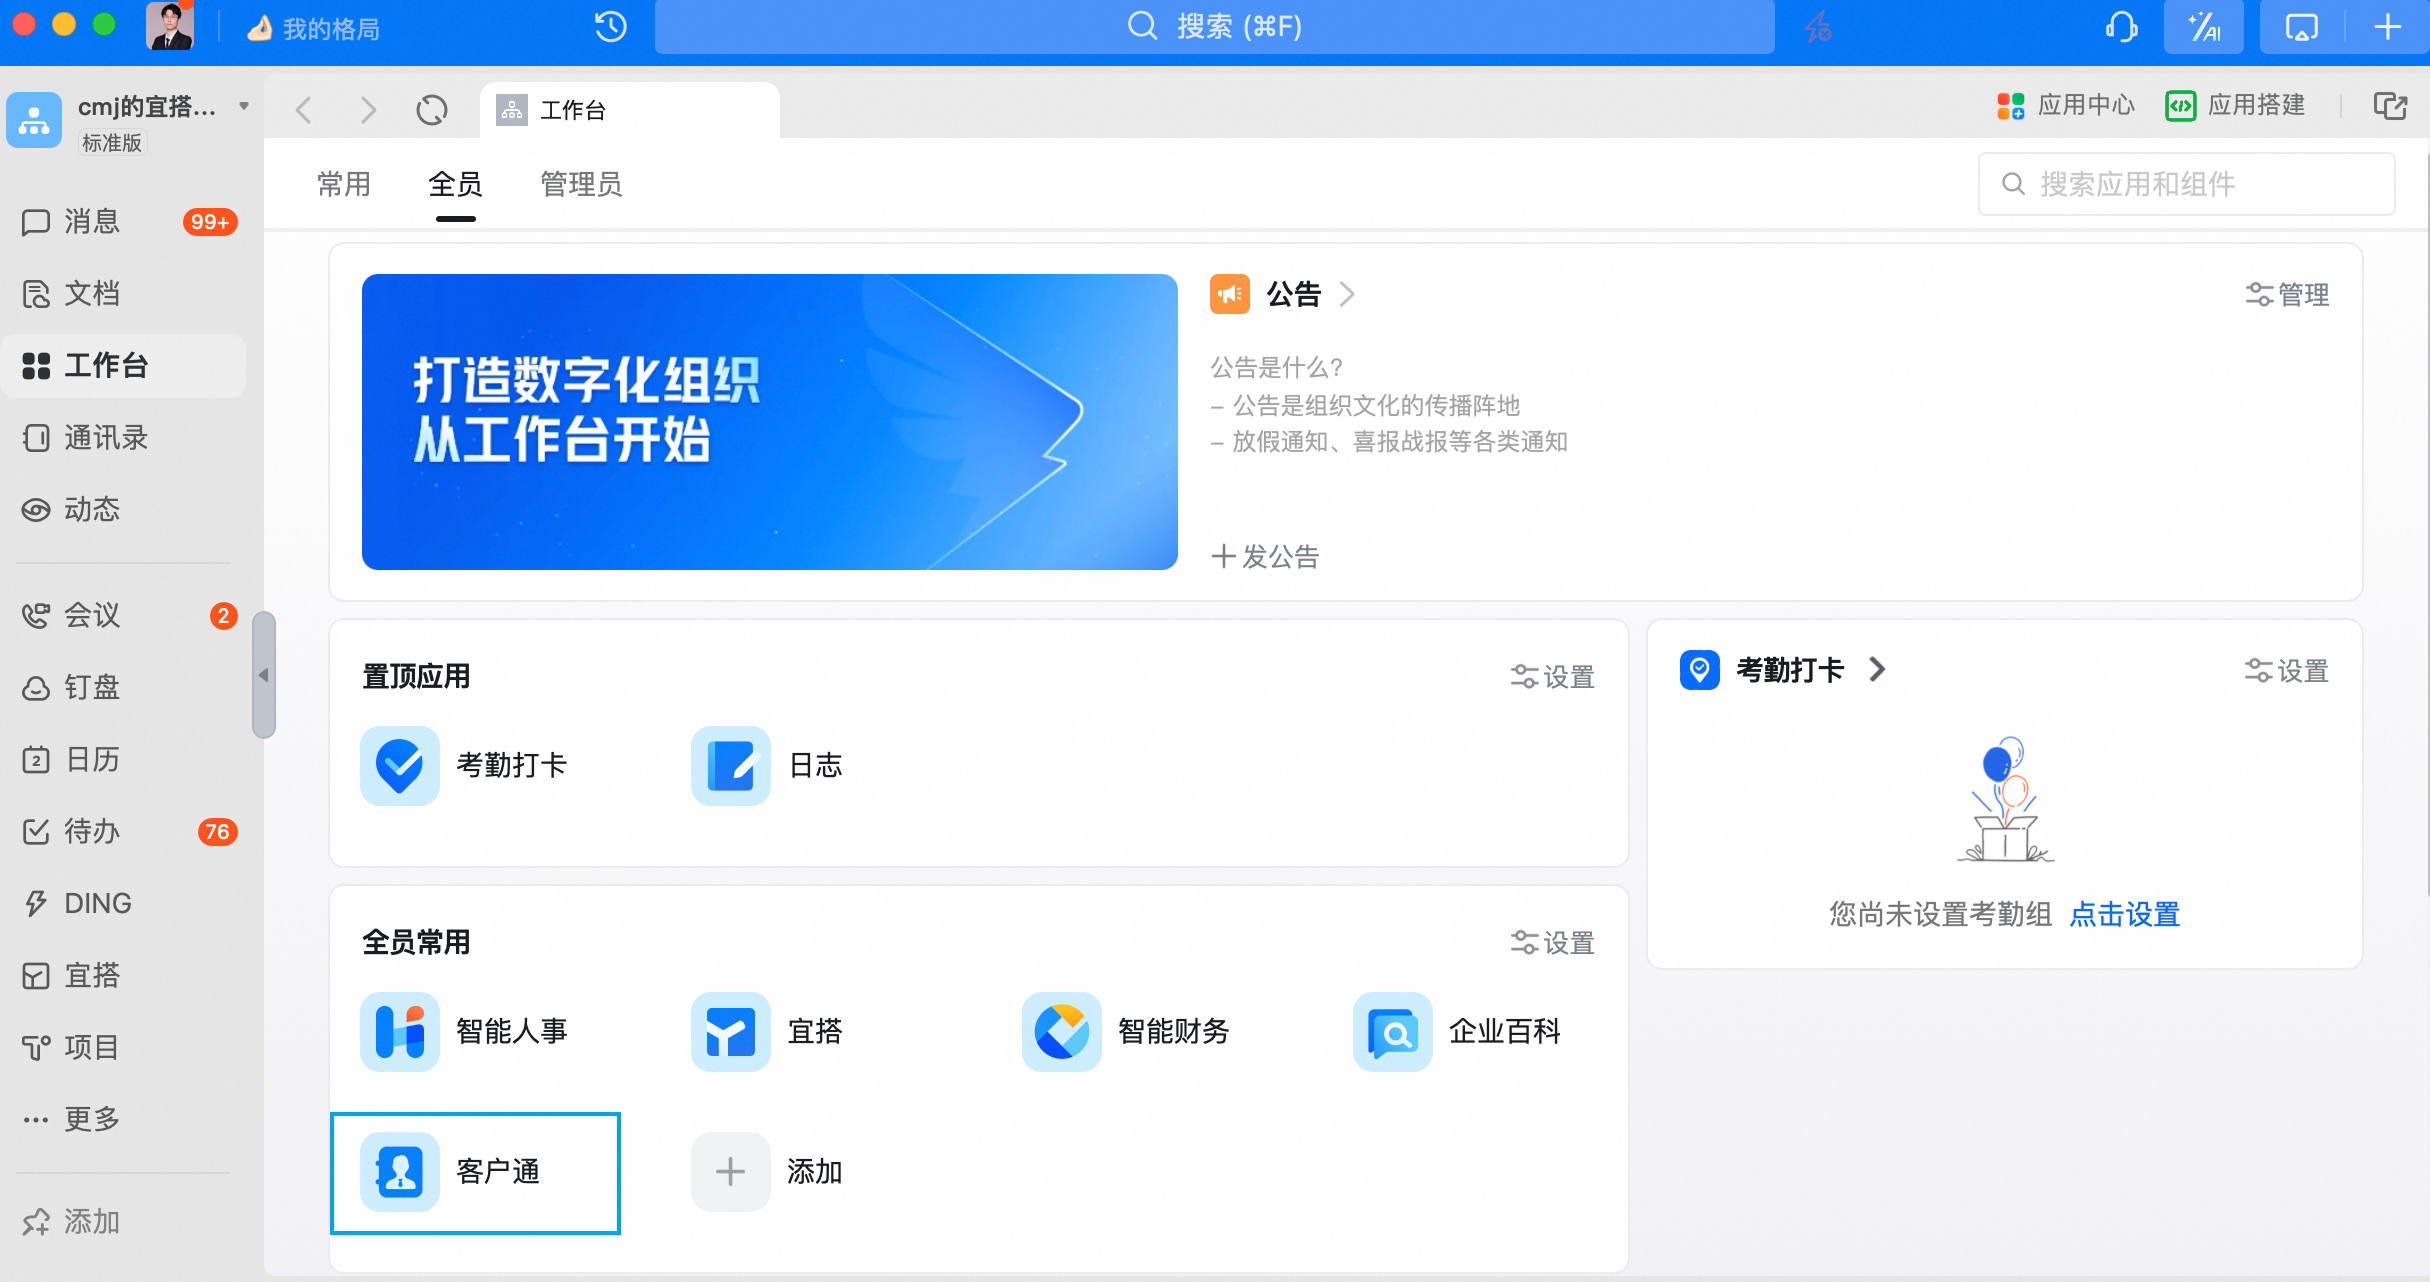
- After the release is successful, team members can quickly use customer connect on the DingTalk workbench.
2. Publish to DingTalk Group
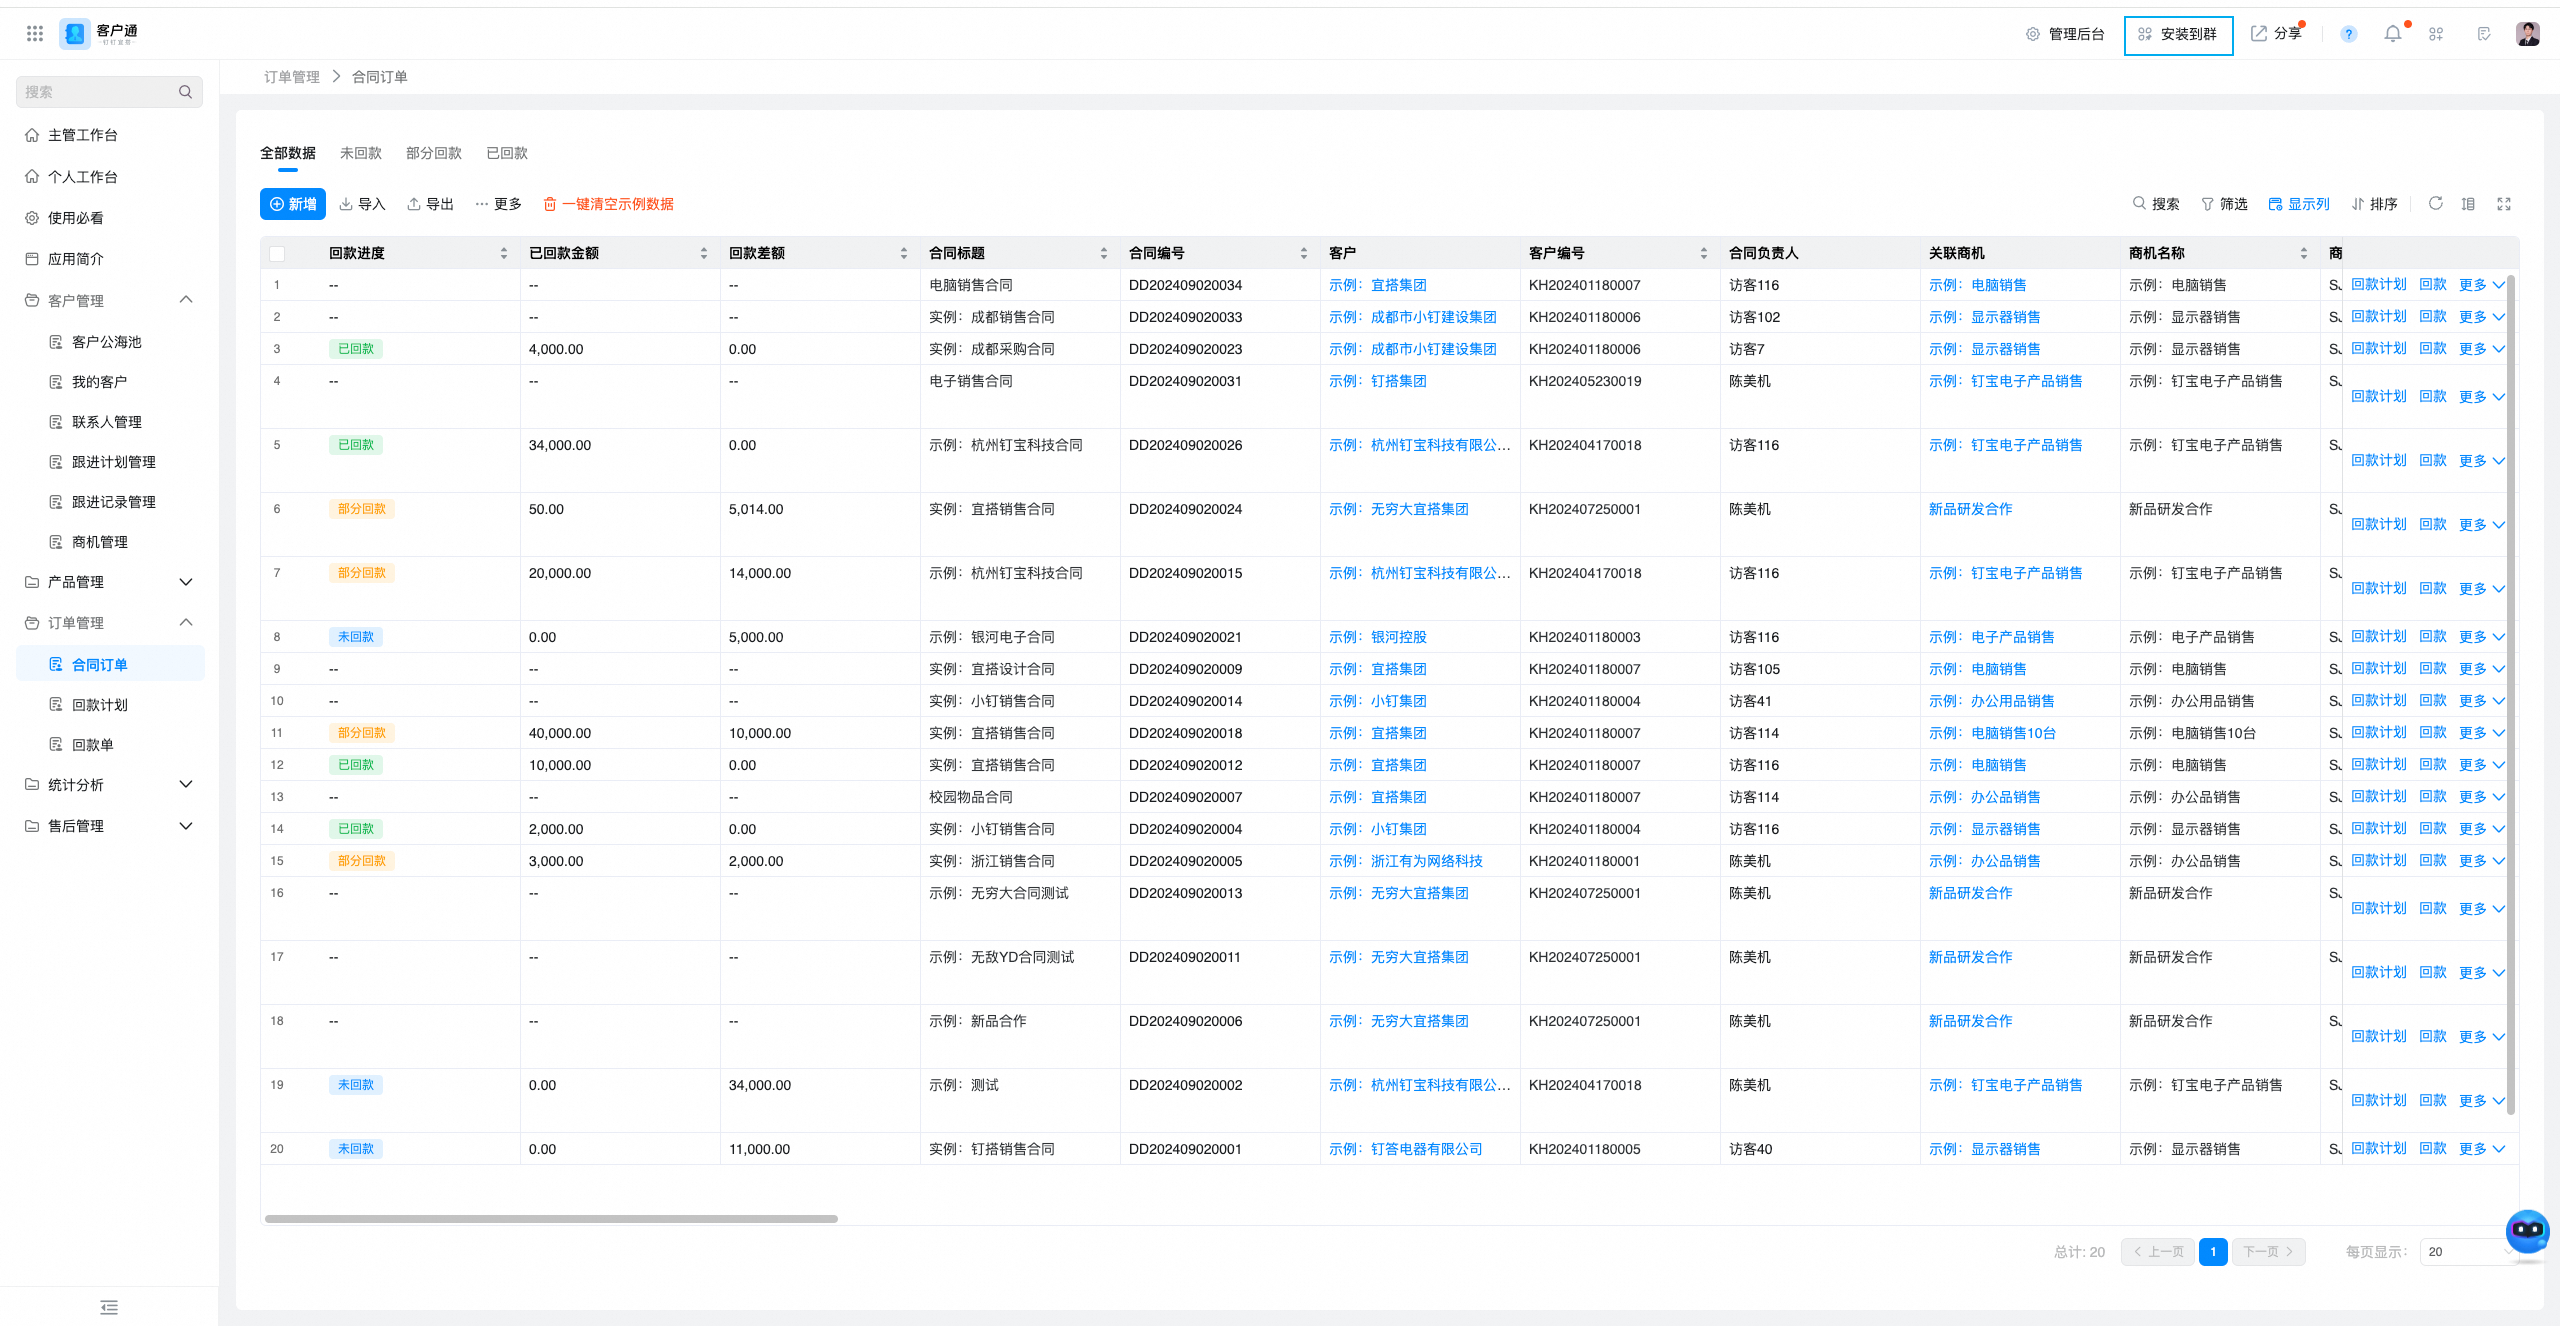
- In addition to publishing to the DingTalk workbench, you can also directly publish to the sales team DingTalk group. On the access interface, click install to group in the upper-right corner.
- Enter the sales group within the organization in the search box, and click add and confirm.

- We install customers to the DingTalk Group
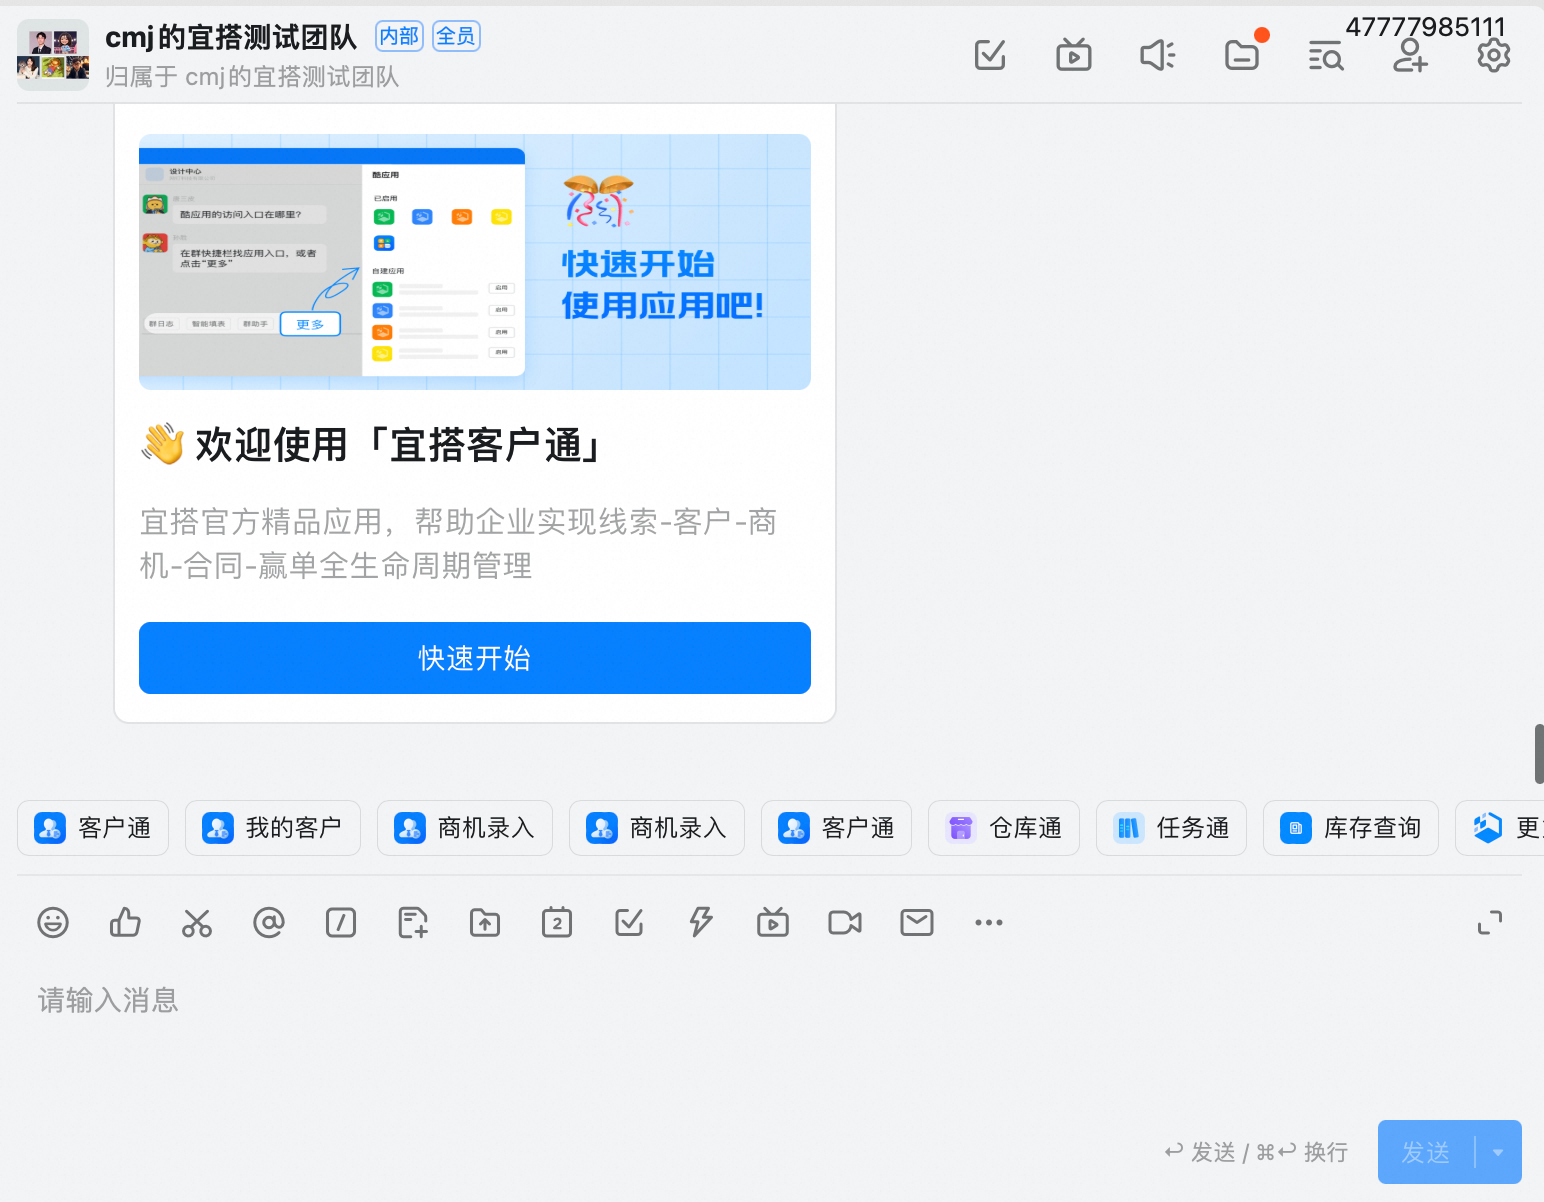
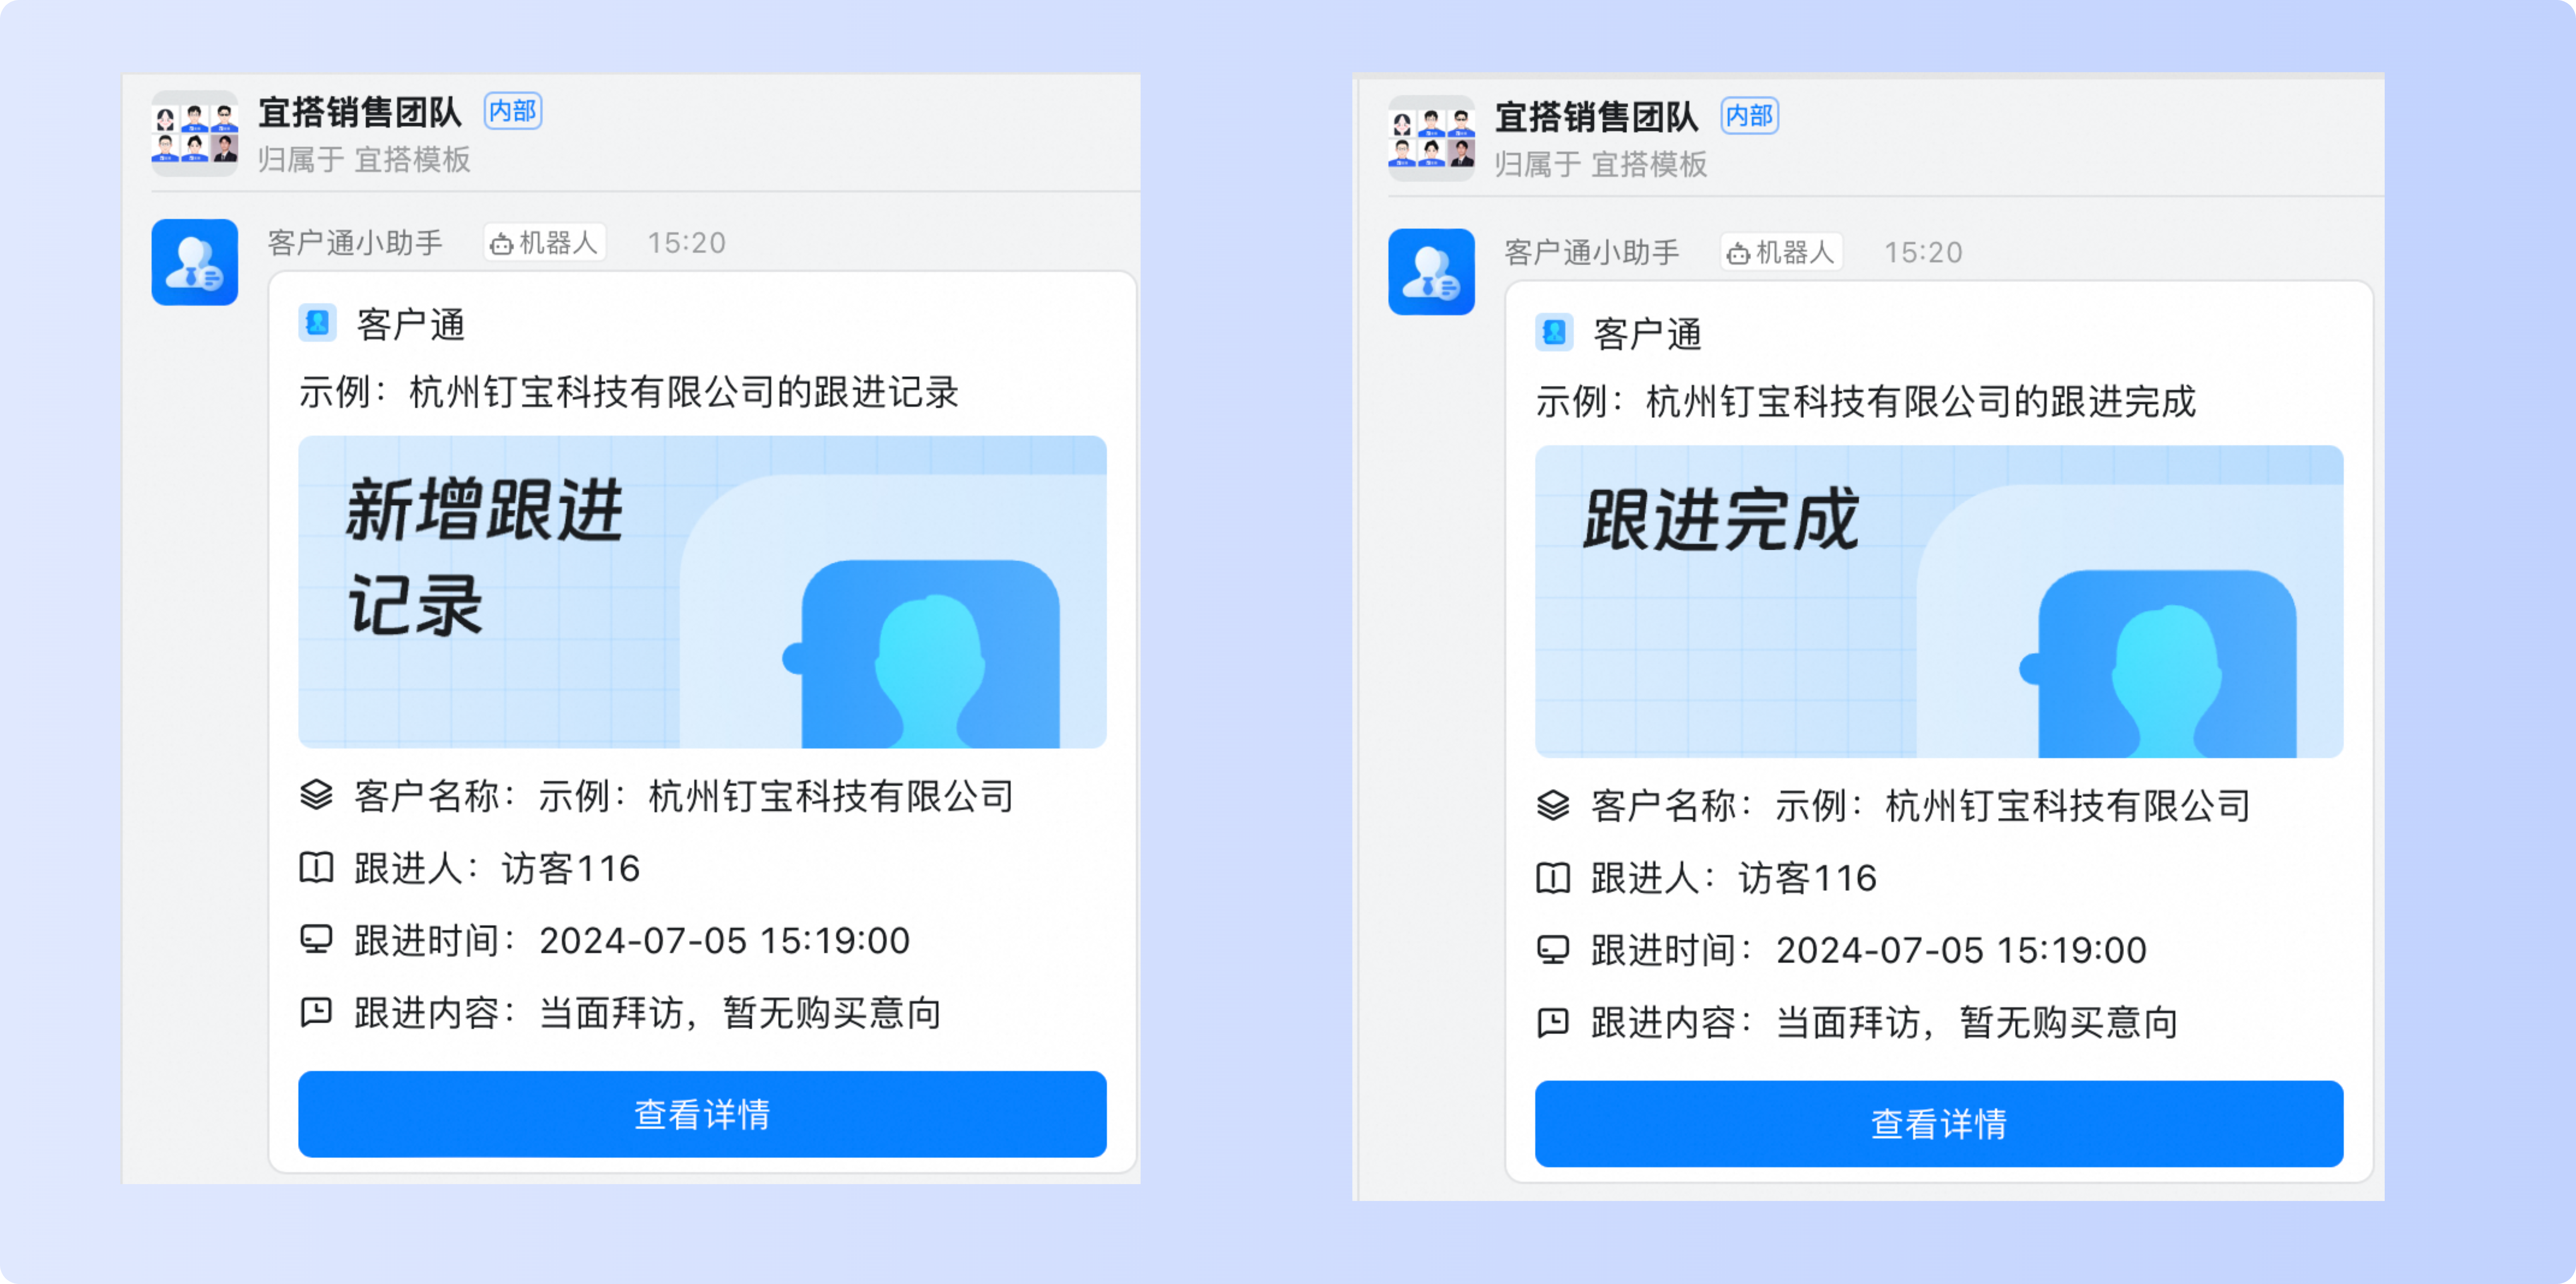
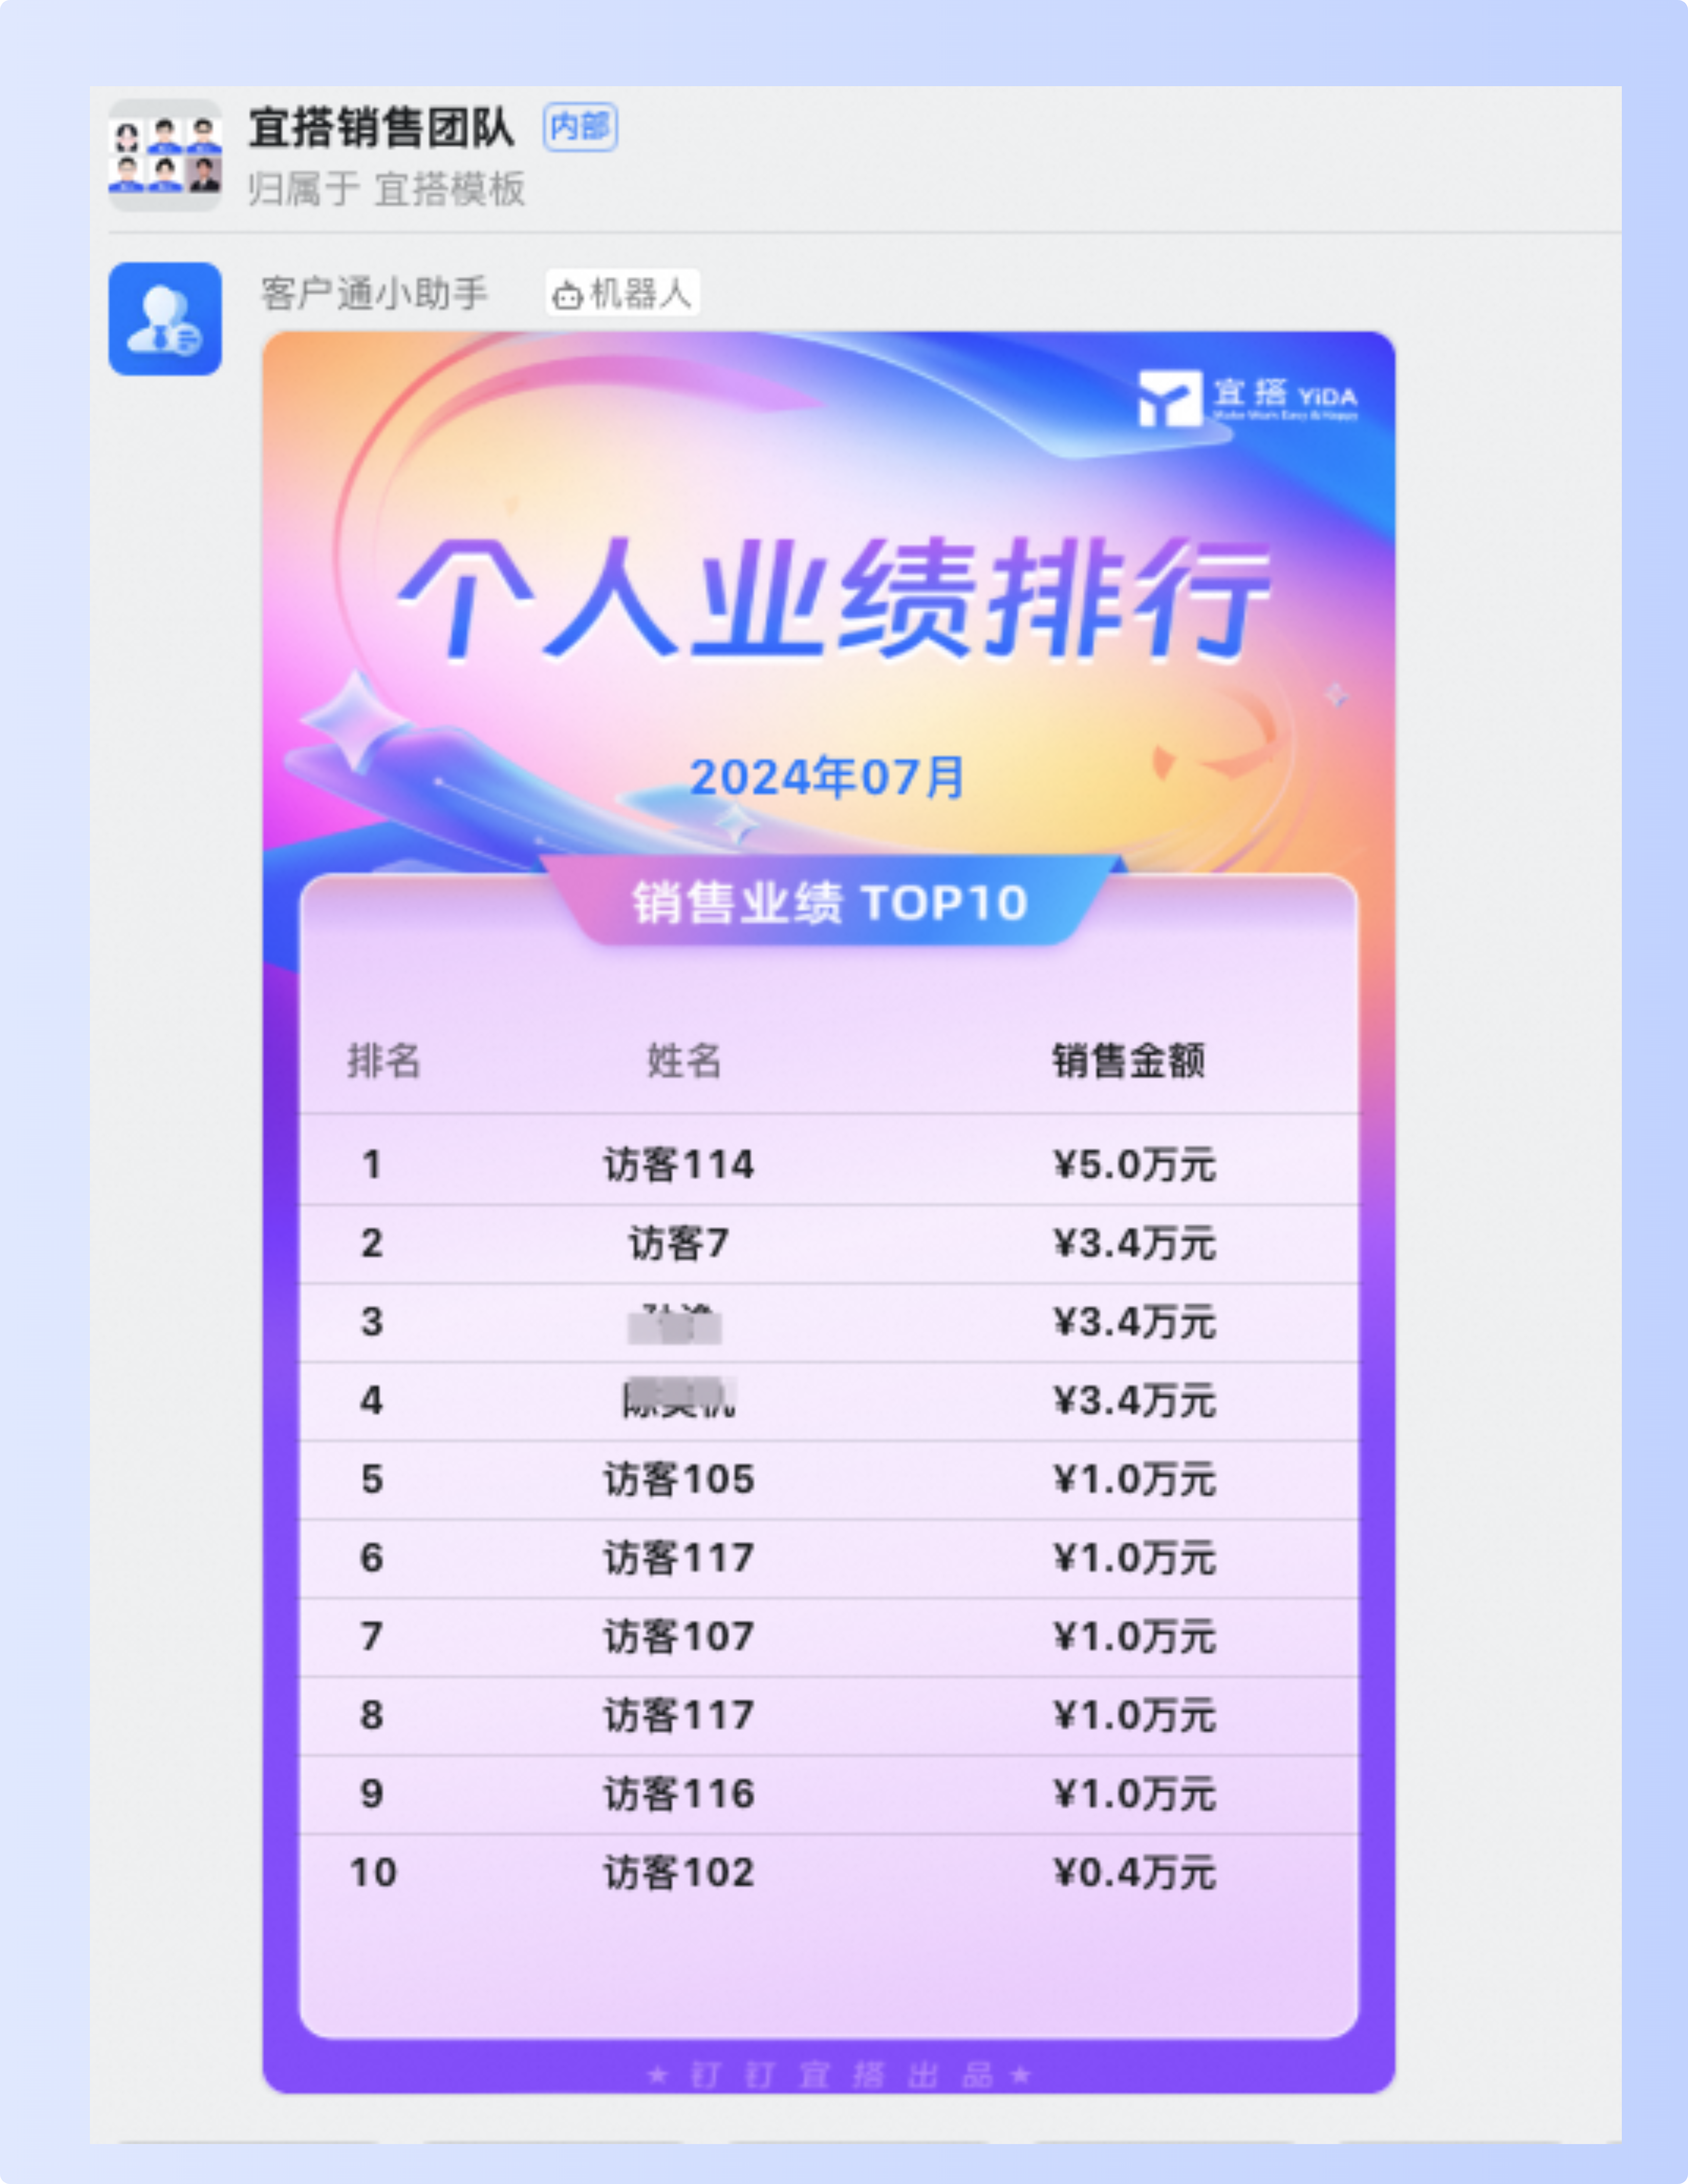
- You can quickly enter business opportunities in the DingTalk group, automatically synchronize sales follow-up records to the group, and push sales contracts.
6. Advanced use-custom build to build enterprise-specific CRM
It not only works out of the box, but also supports personalized building. Based on the code-free base capability of YIDA, Customer Connect can carry out unlimited custom building, and each enterprise can build its own dedicated CRM.
Common build capabilities are as follows
- Form customization: click manage background-click any form-click edit form to enter the form customization page, where you can add, modify, and delete any form information.

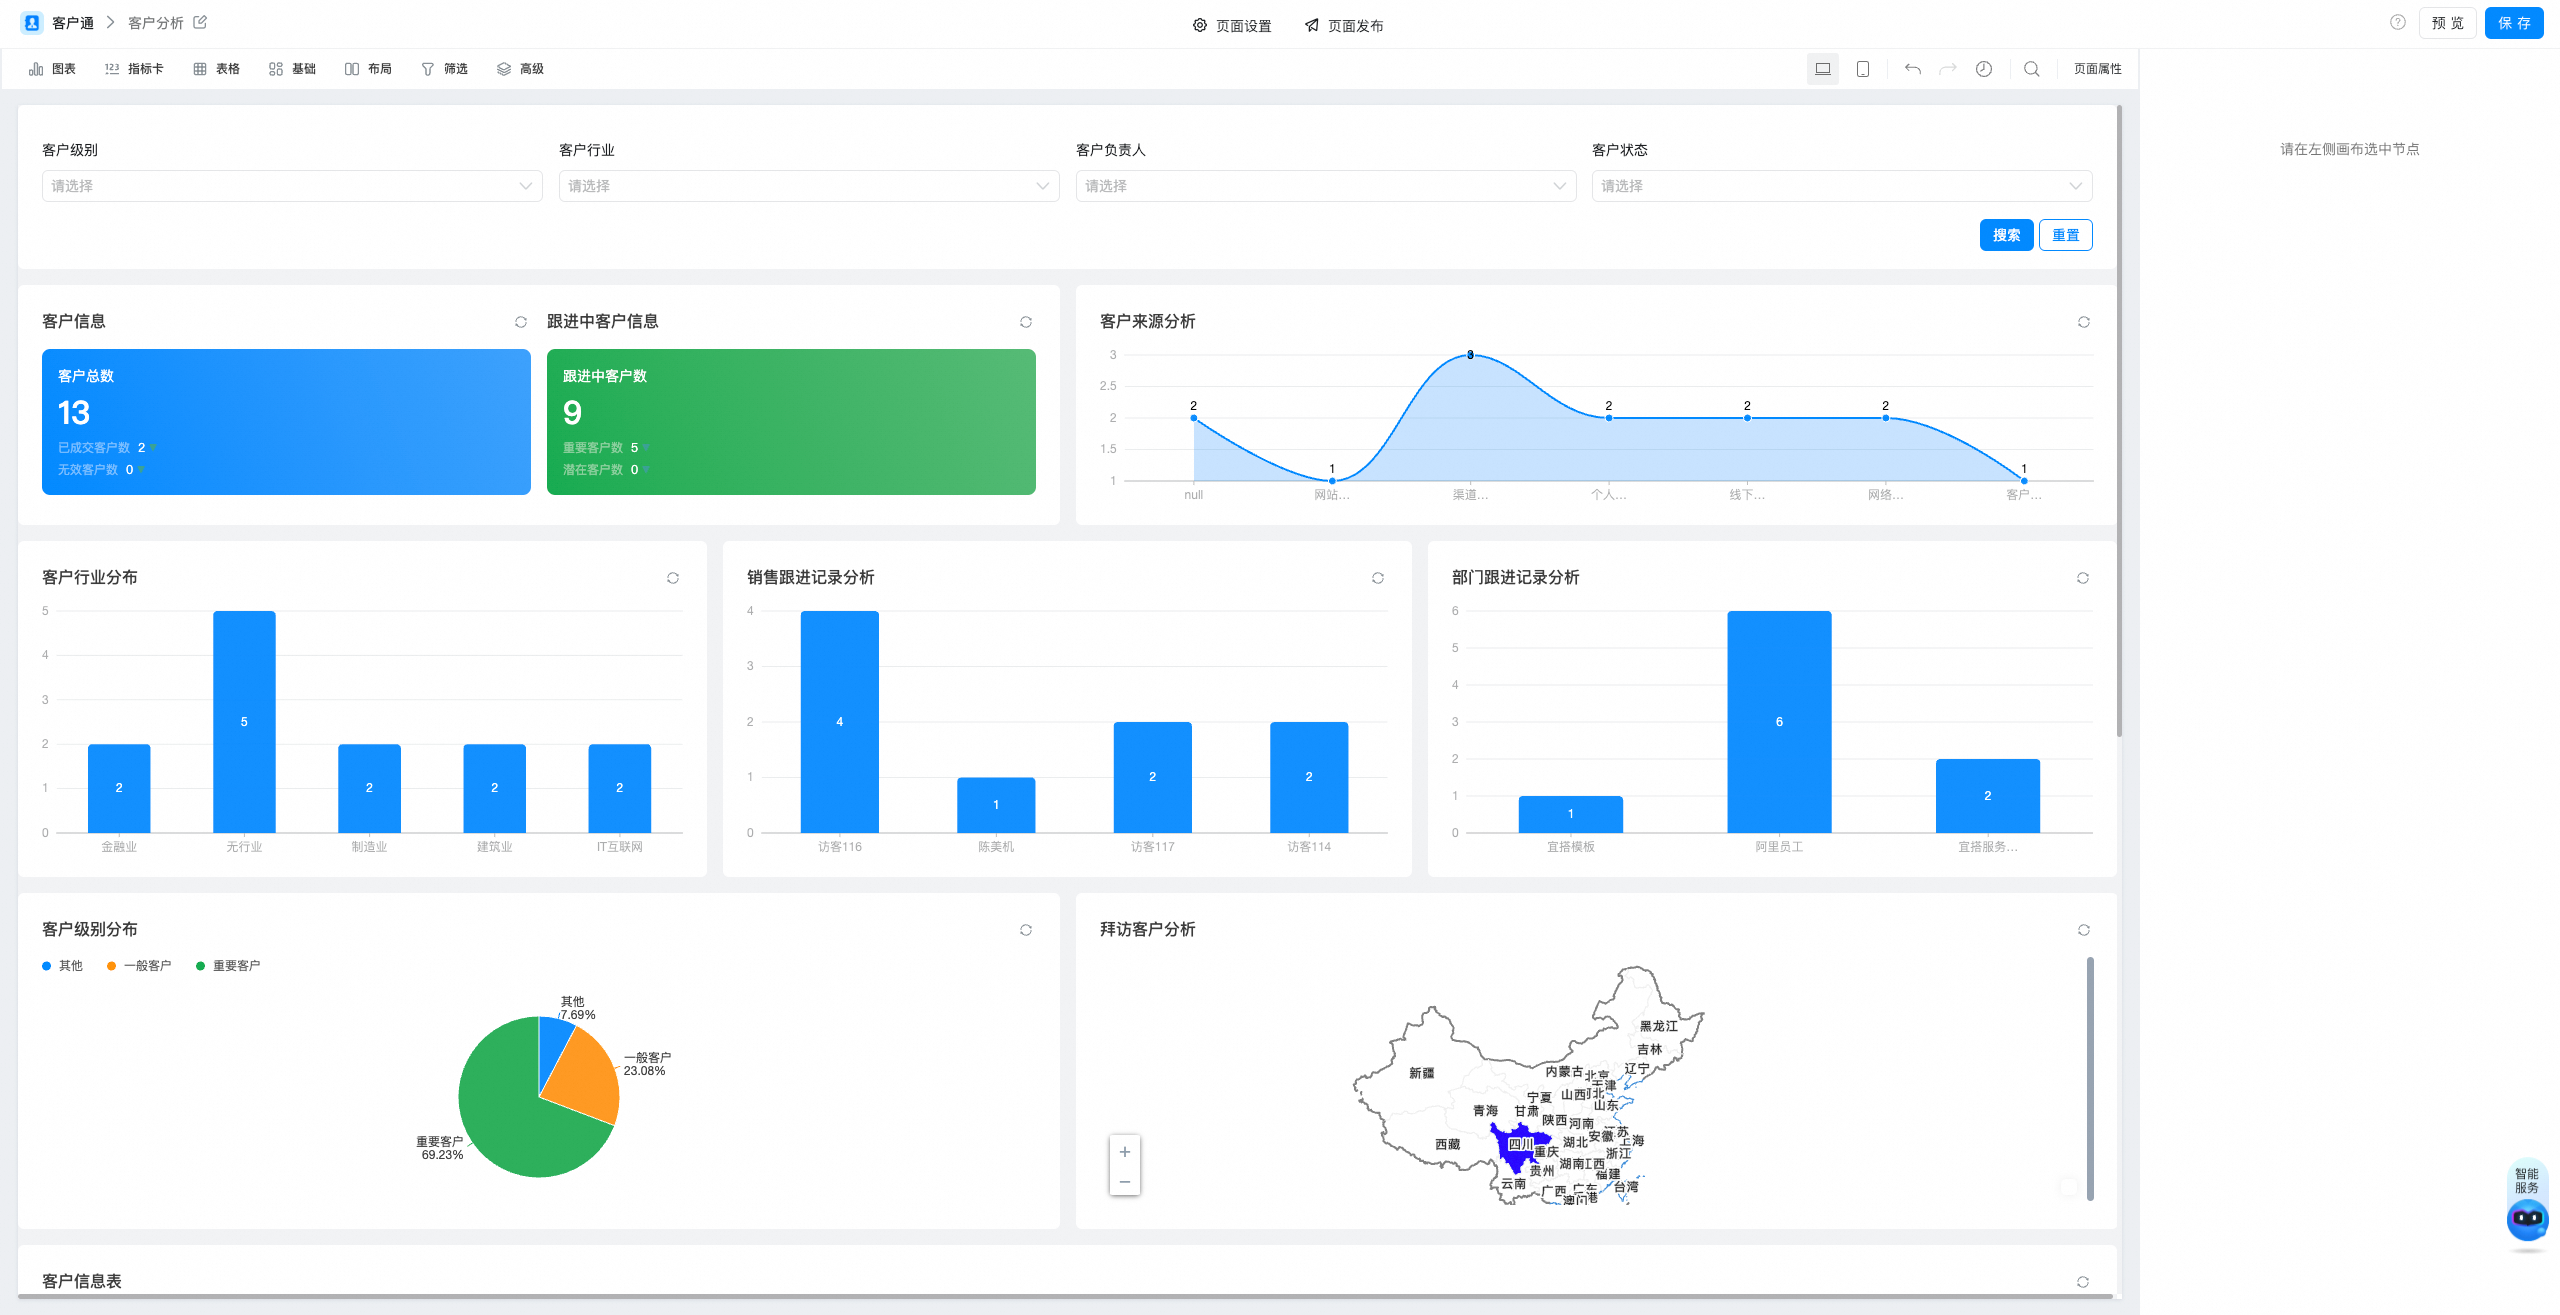
- Report customization: click manage background-click any form-click edit report to enter the report customization page. On this page, you can add analysis charts and modify and delete any analysis charts.
- Integrated automation customization: click manage background, and click integrated automation. On this page, you can automatically add, delete, modify, and search one or more form data through automated streams.
- View customization: Enter the management background. Click View Settings to customize the filter conditions, field display, and button of the view. You can also click Create view.
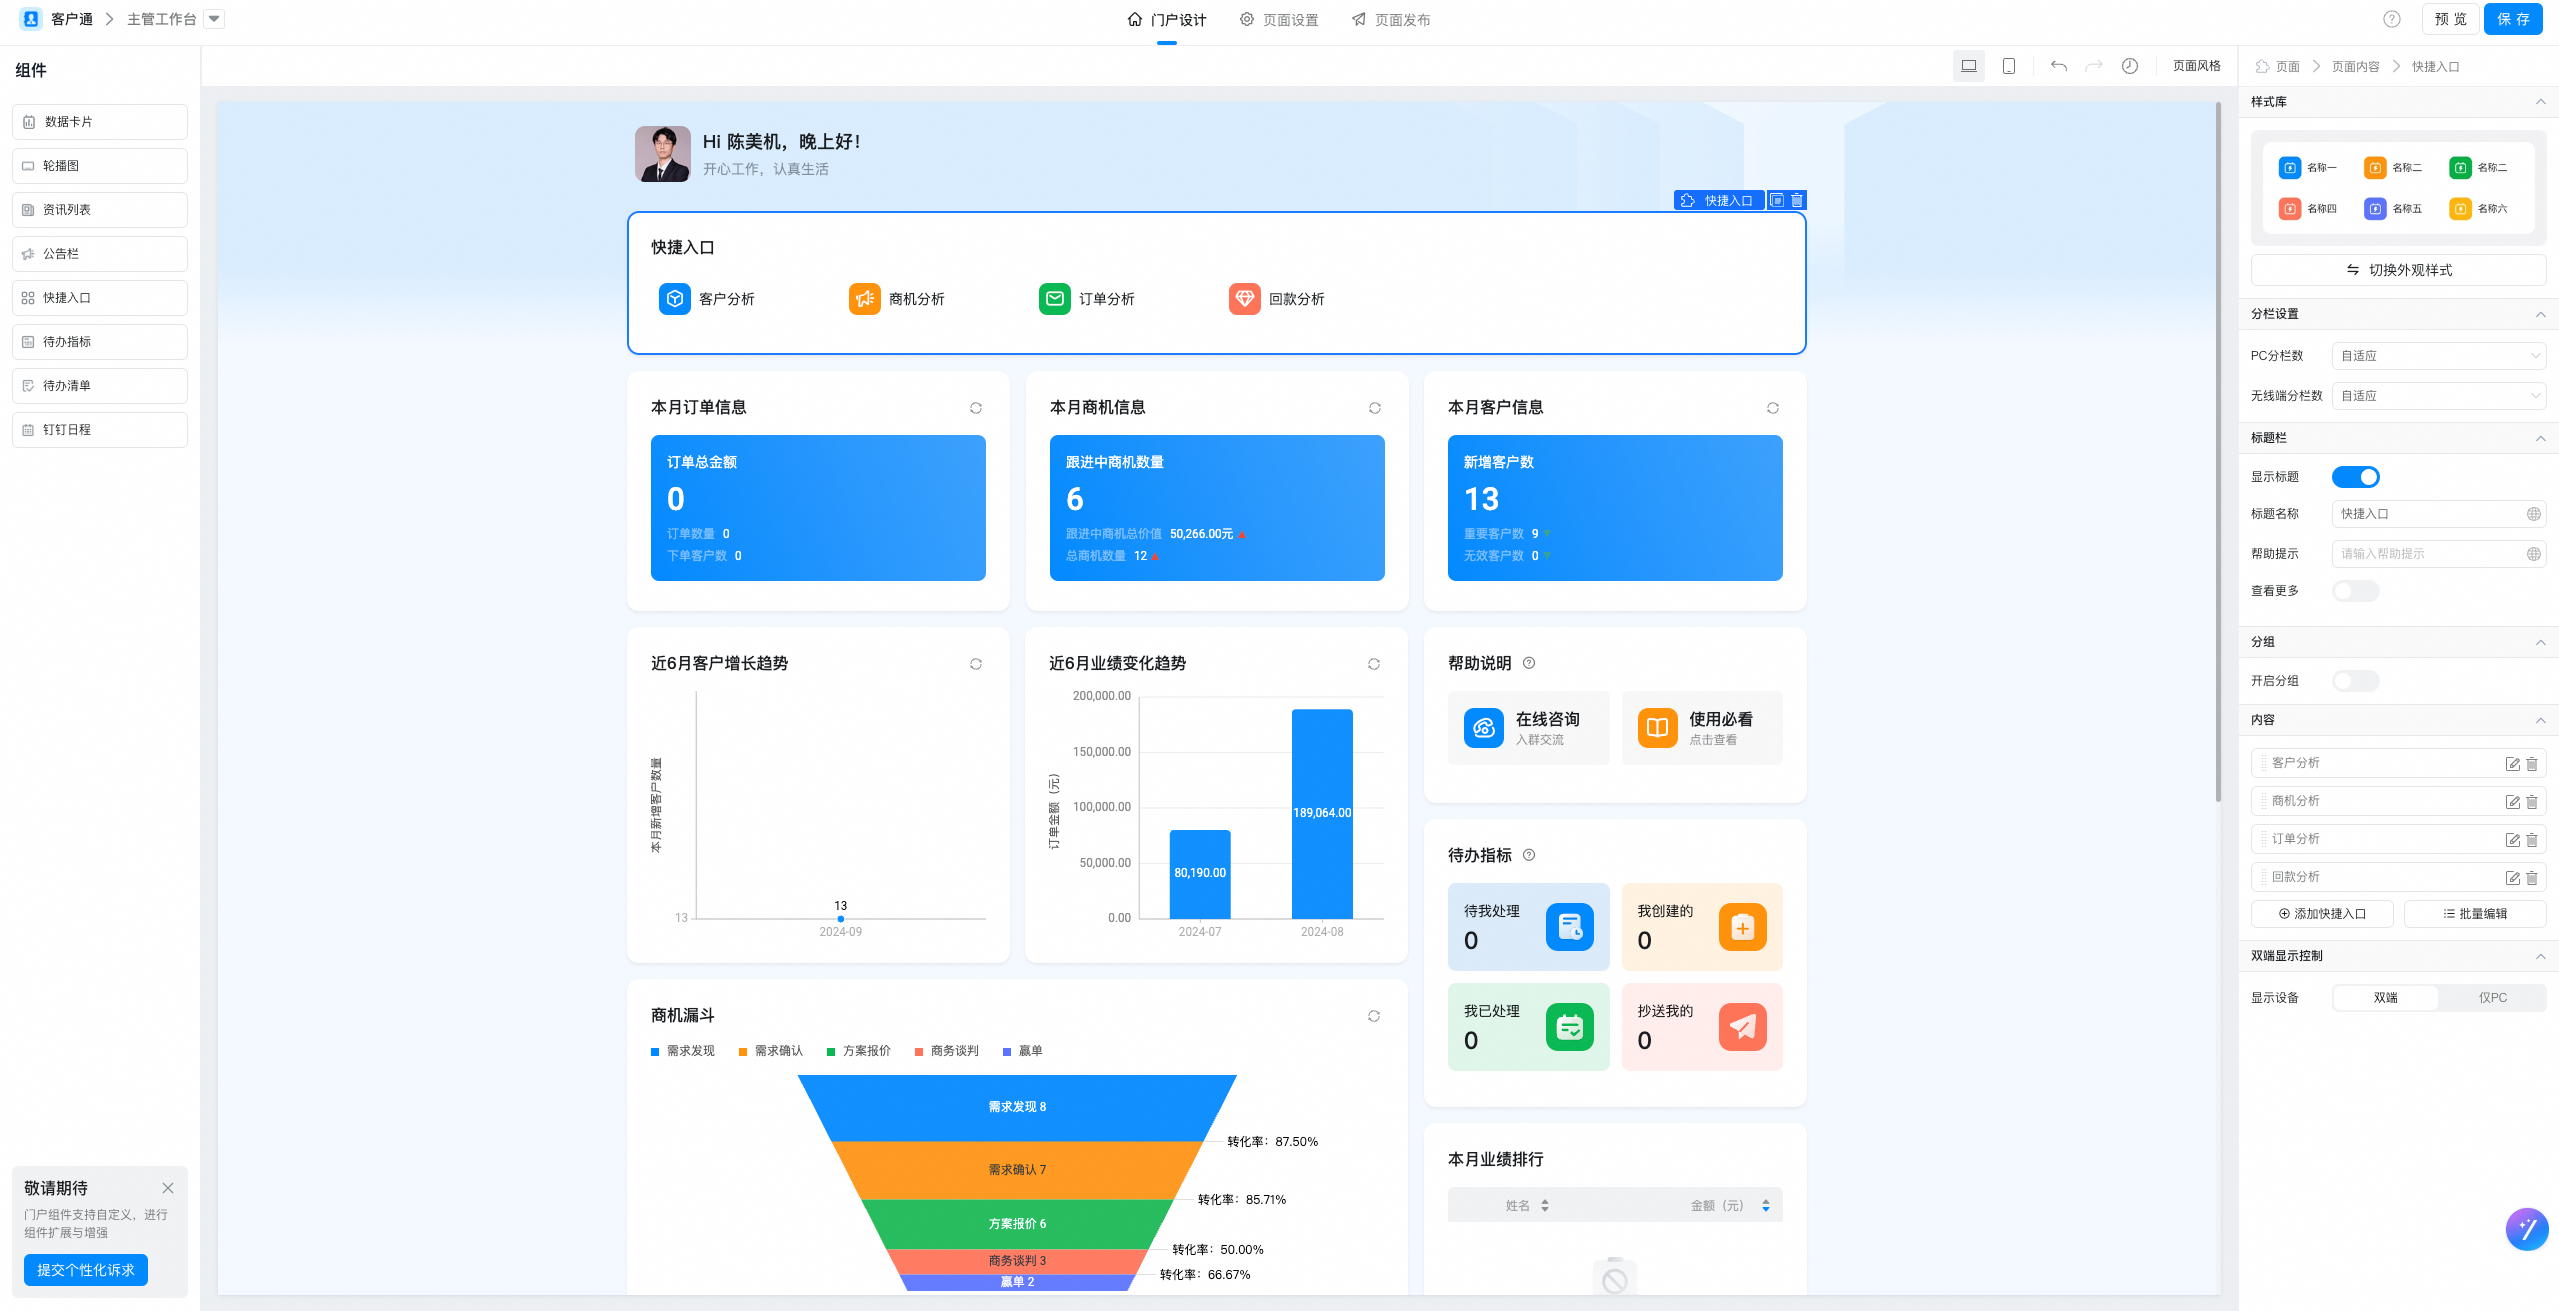
- Custom Portal: Enter the management background and click Edit Portal to customize the portal.