自定义页面实现移动端底部导航栏
1. 使用场景
在移动端底部需要一个 TabBar 标签栏的情况。
2. 实现步骤
2.1 新建自定义页面
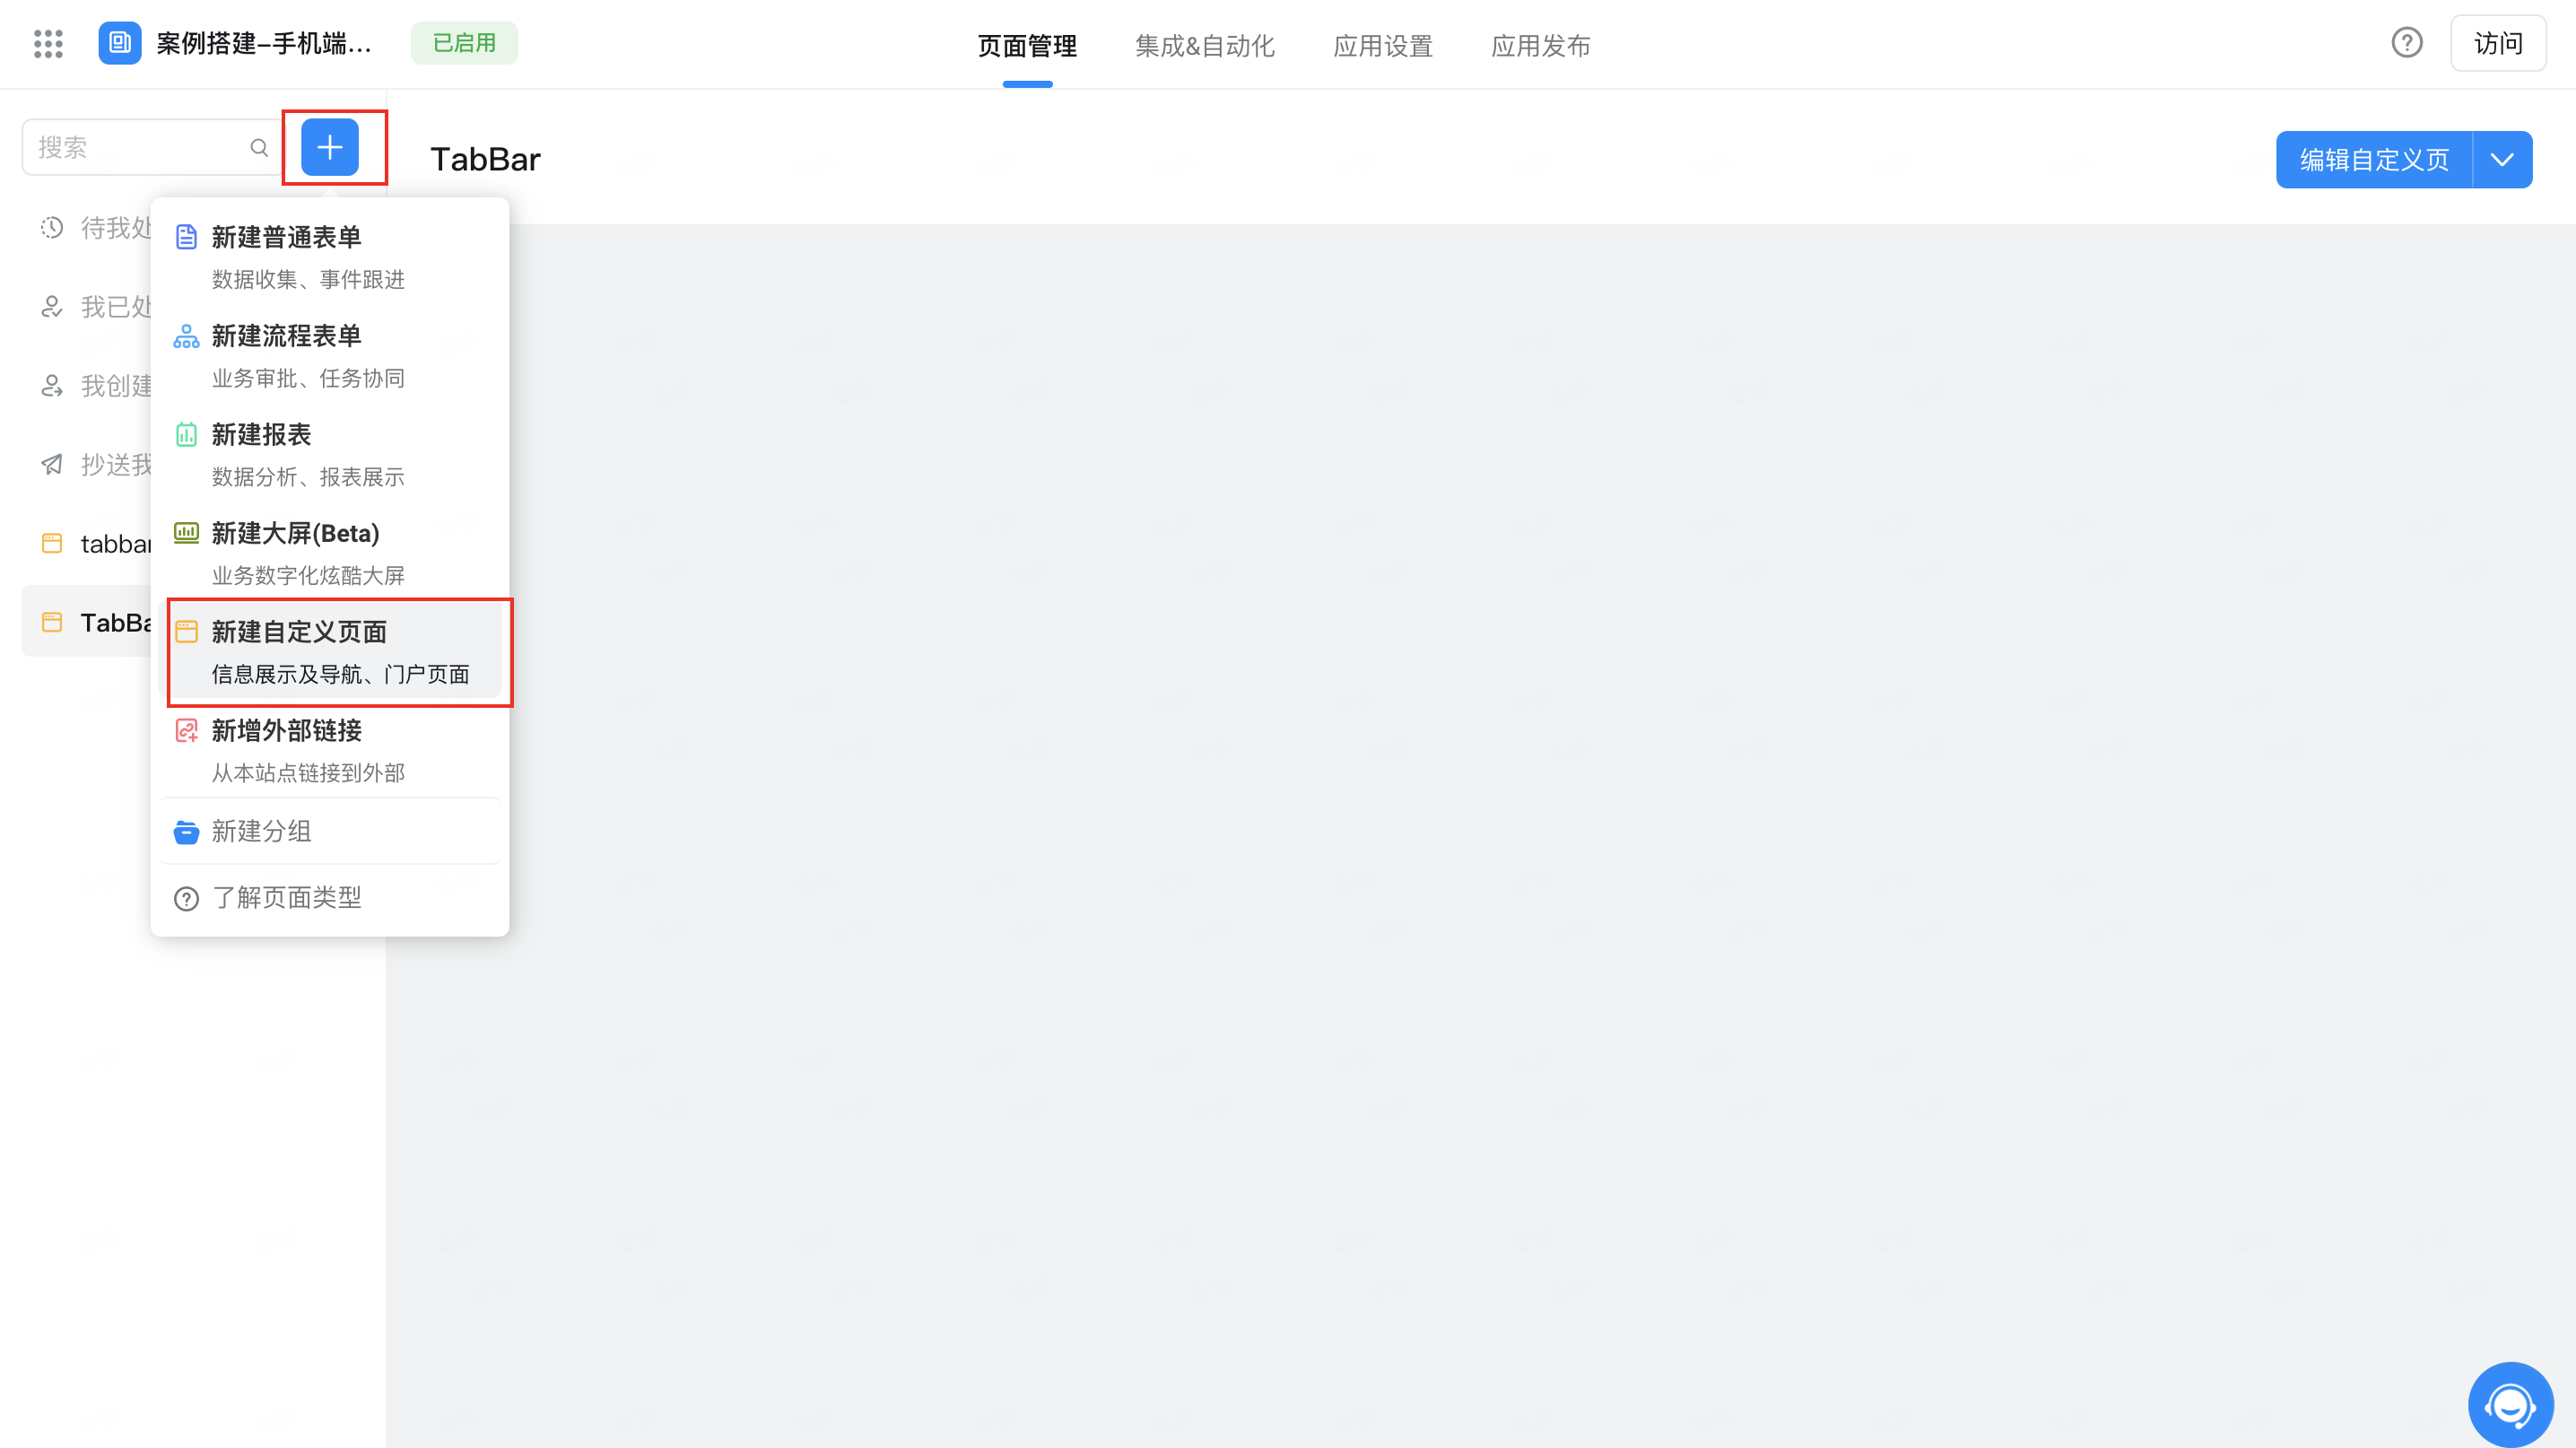
新建自定义页面
2.2 配置选项卡组件
拖入选项卡组件,将选项卡「形态」设为「包裹型」,「导航选项卡的位置」设为「下」
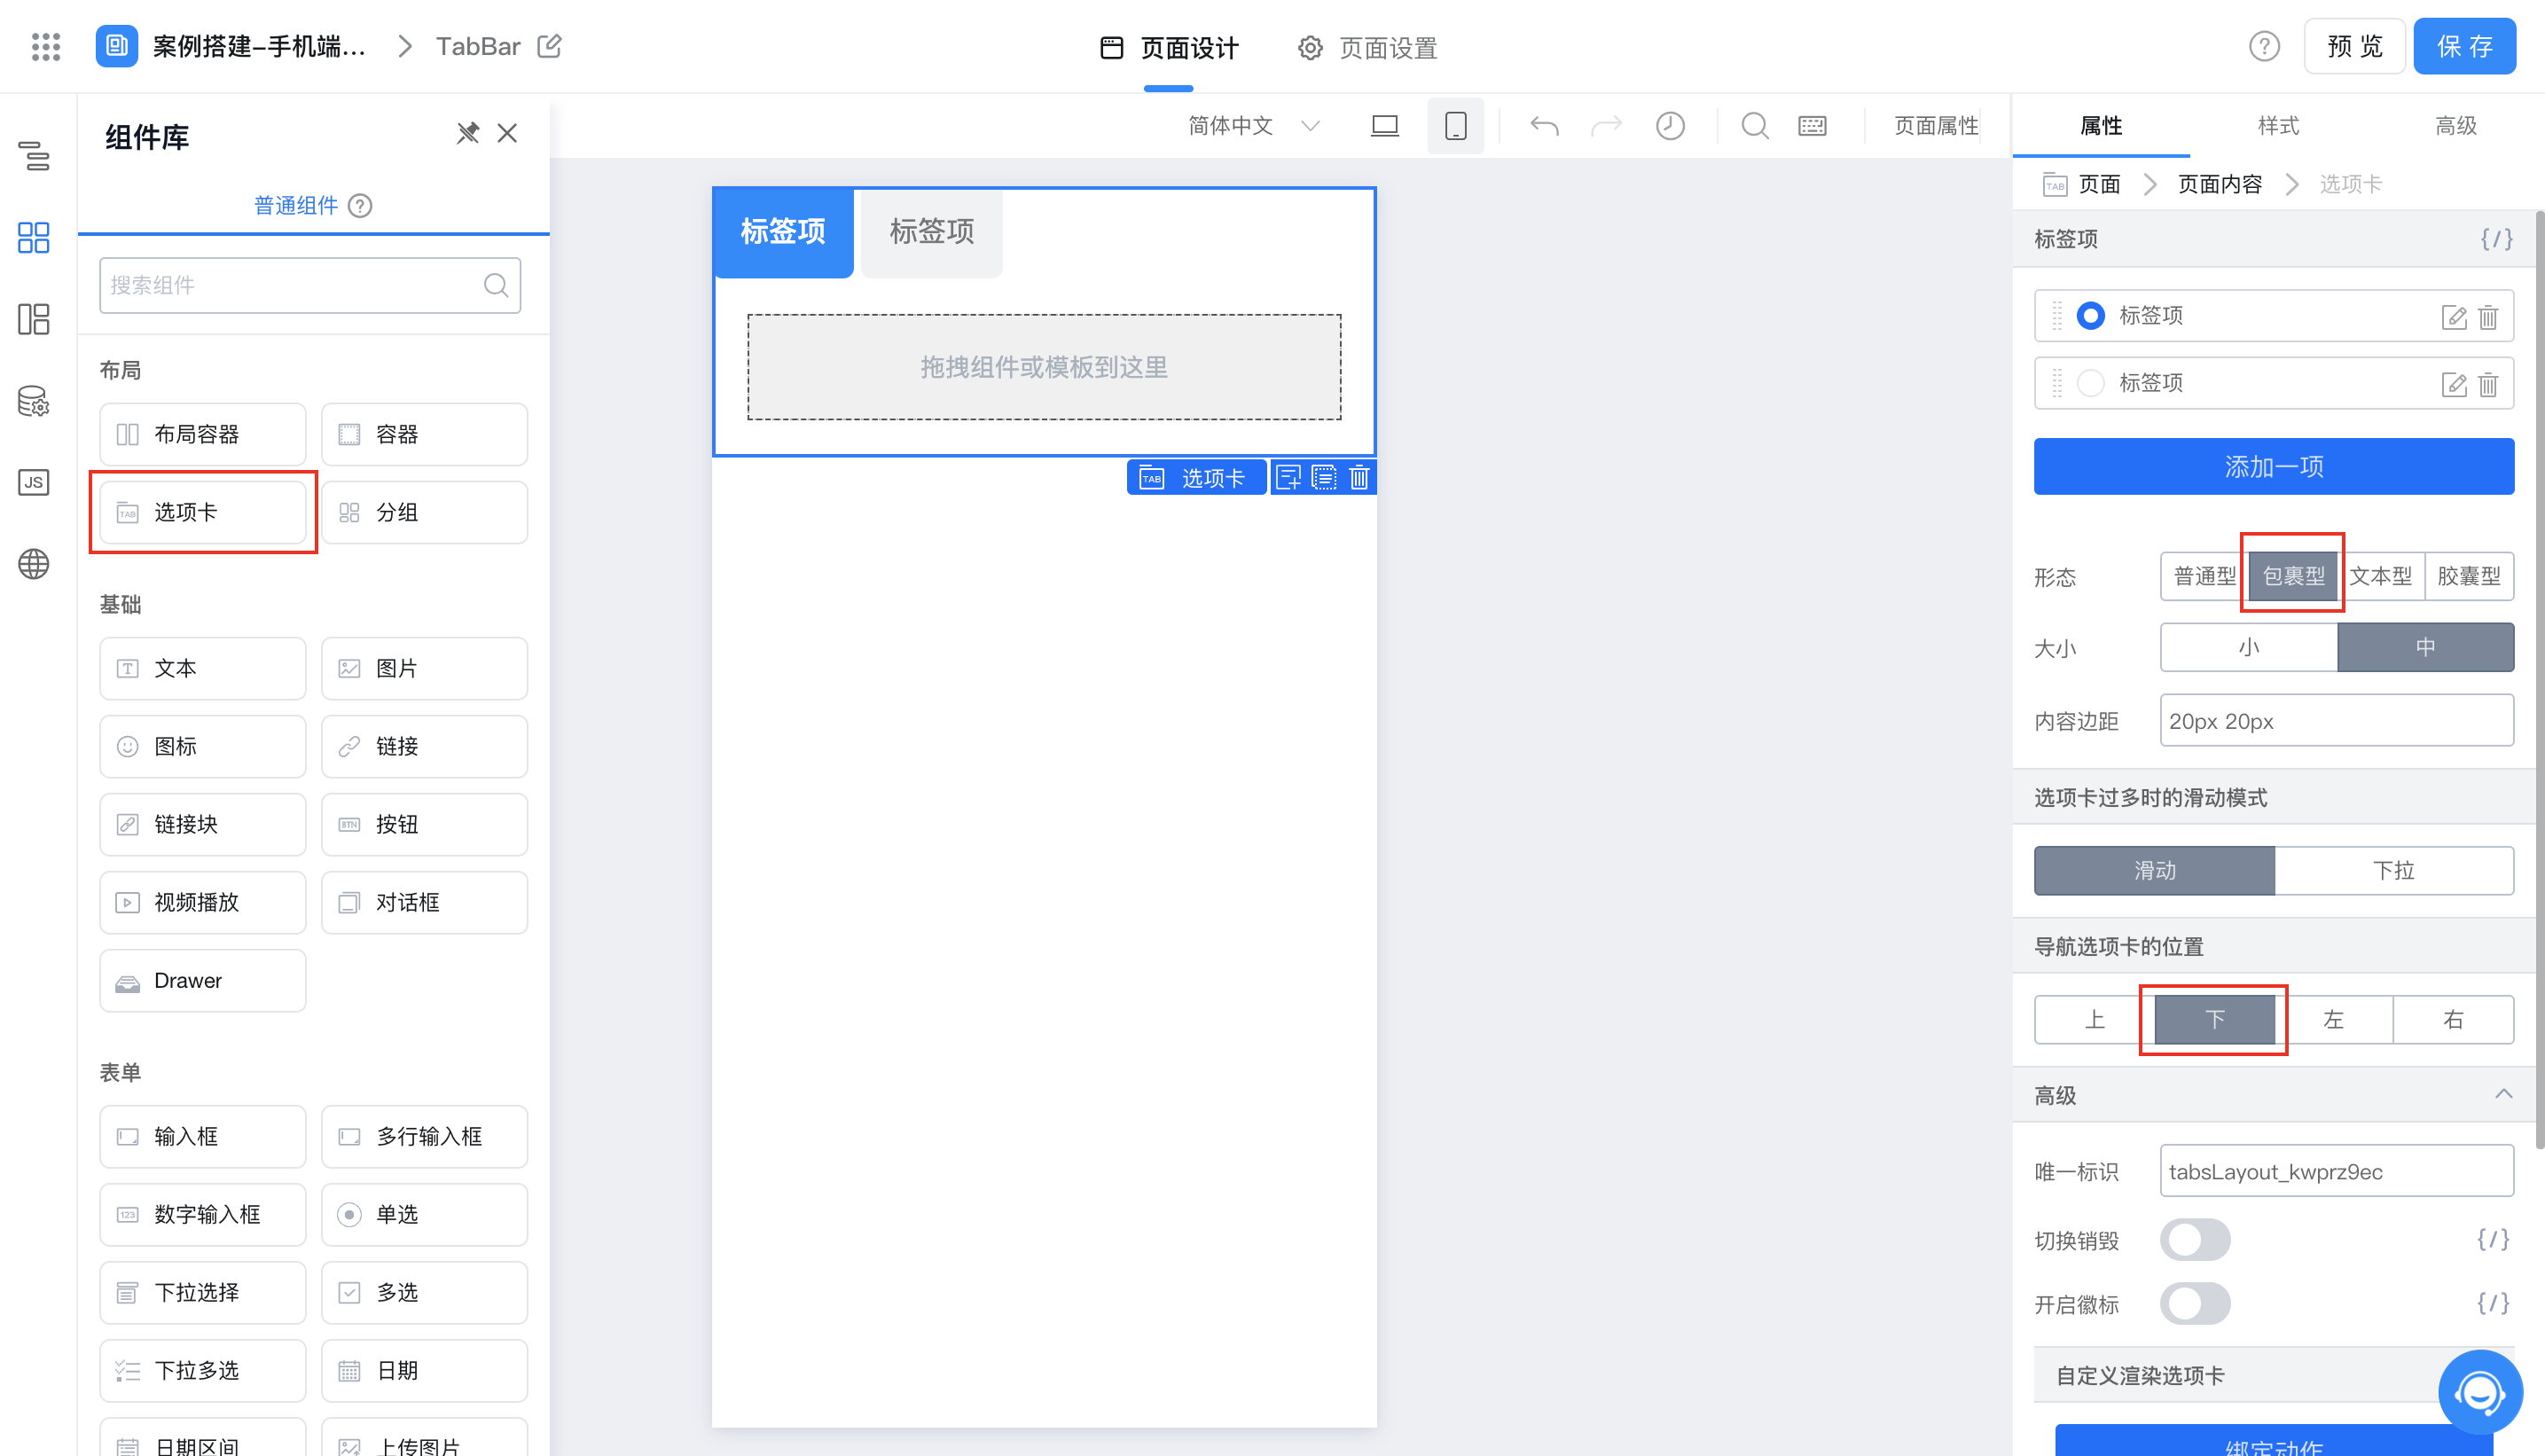
拖入选项卡
2.3 设置选项卡样式
选中「选项卡」组件,在「样式」的「源码编辑」中添加如下代码
:root {
position: absolute;
bottom: 0;
}
.next-tabs-nav {
  display: flex;
  justify-content: space-evenly;
}
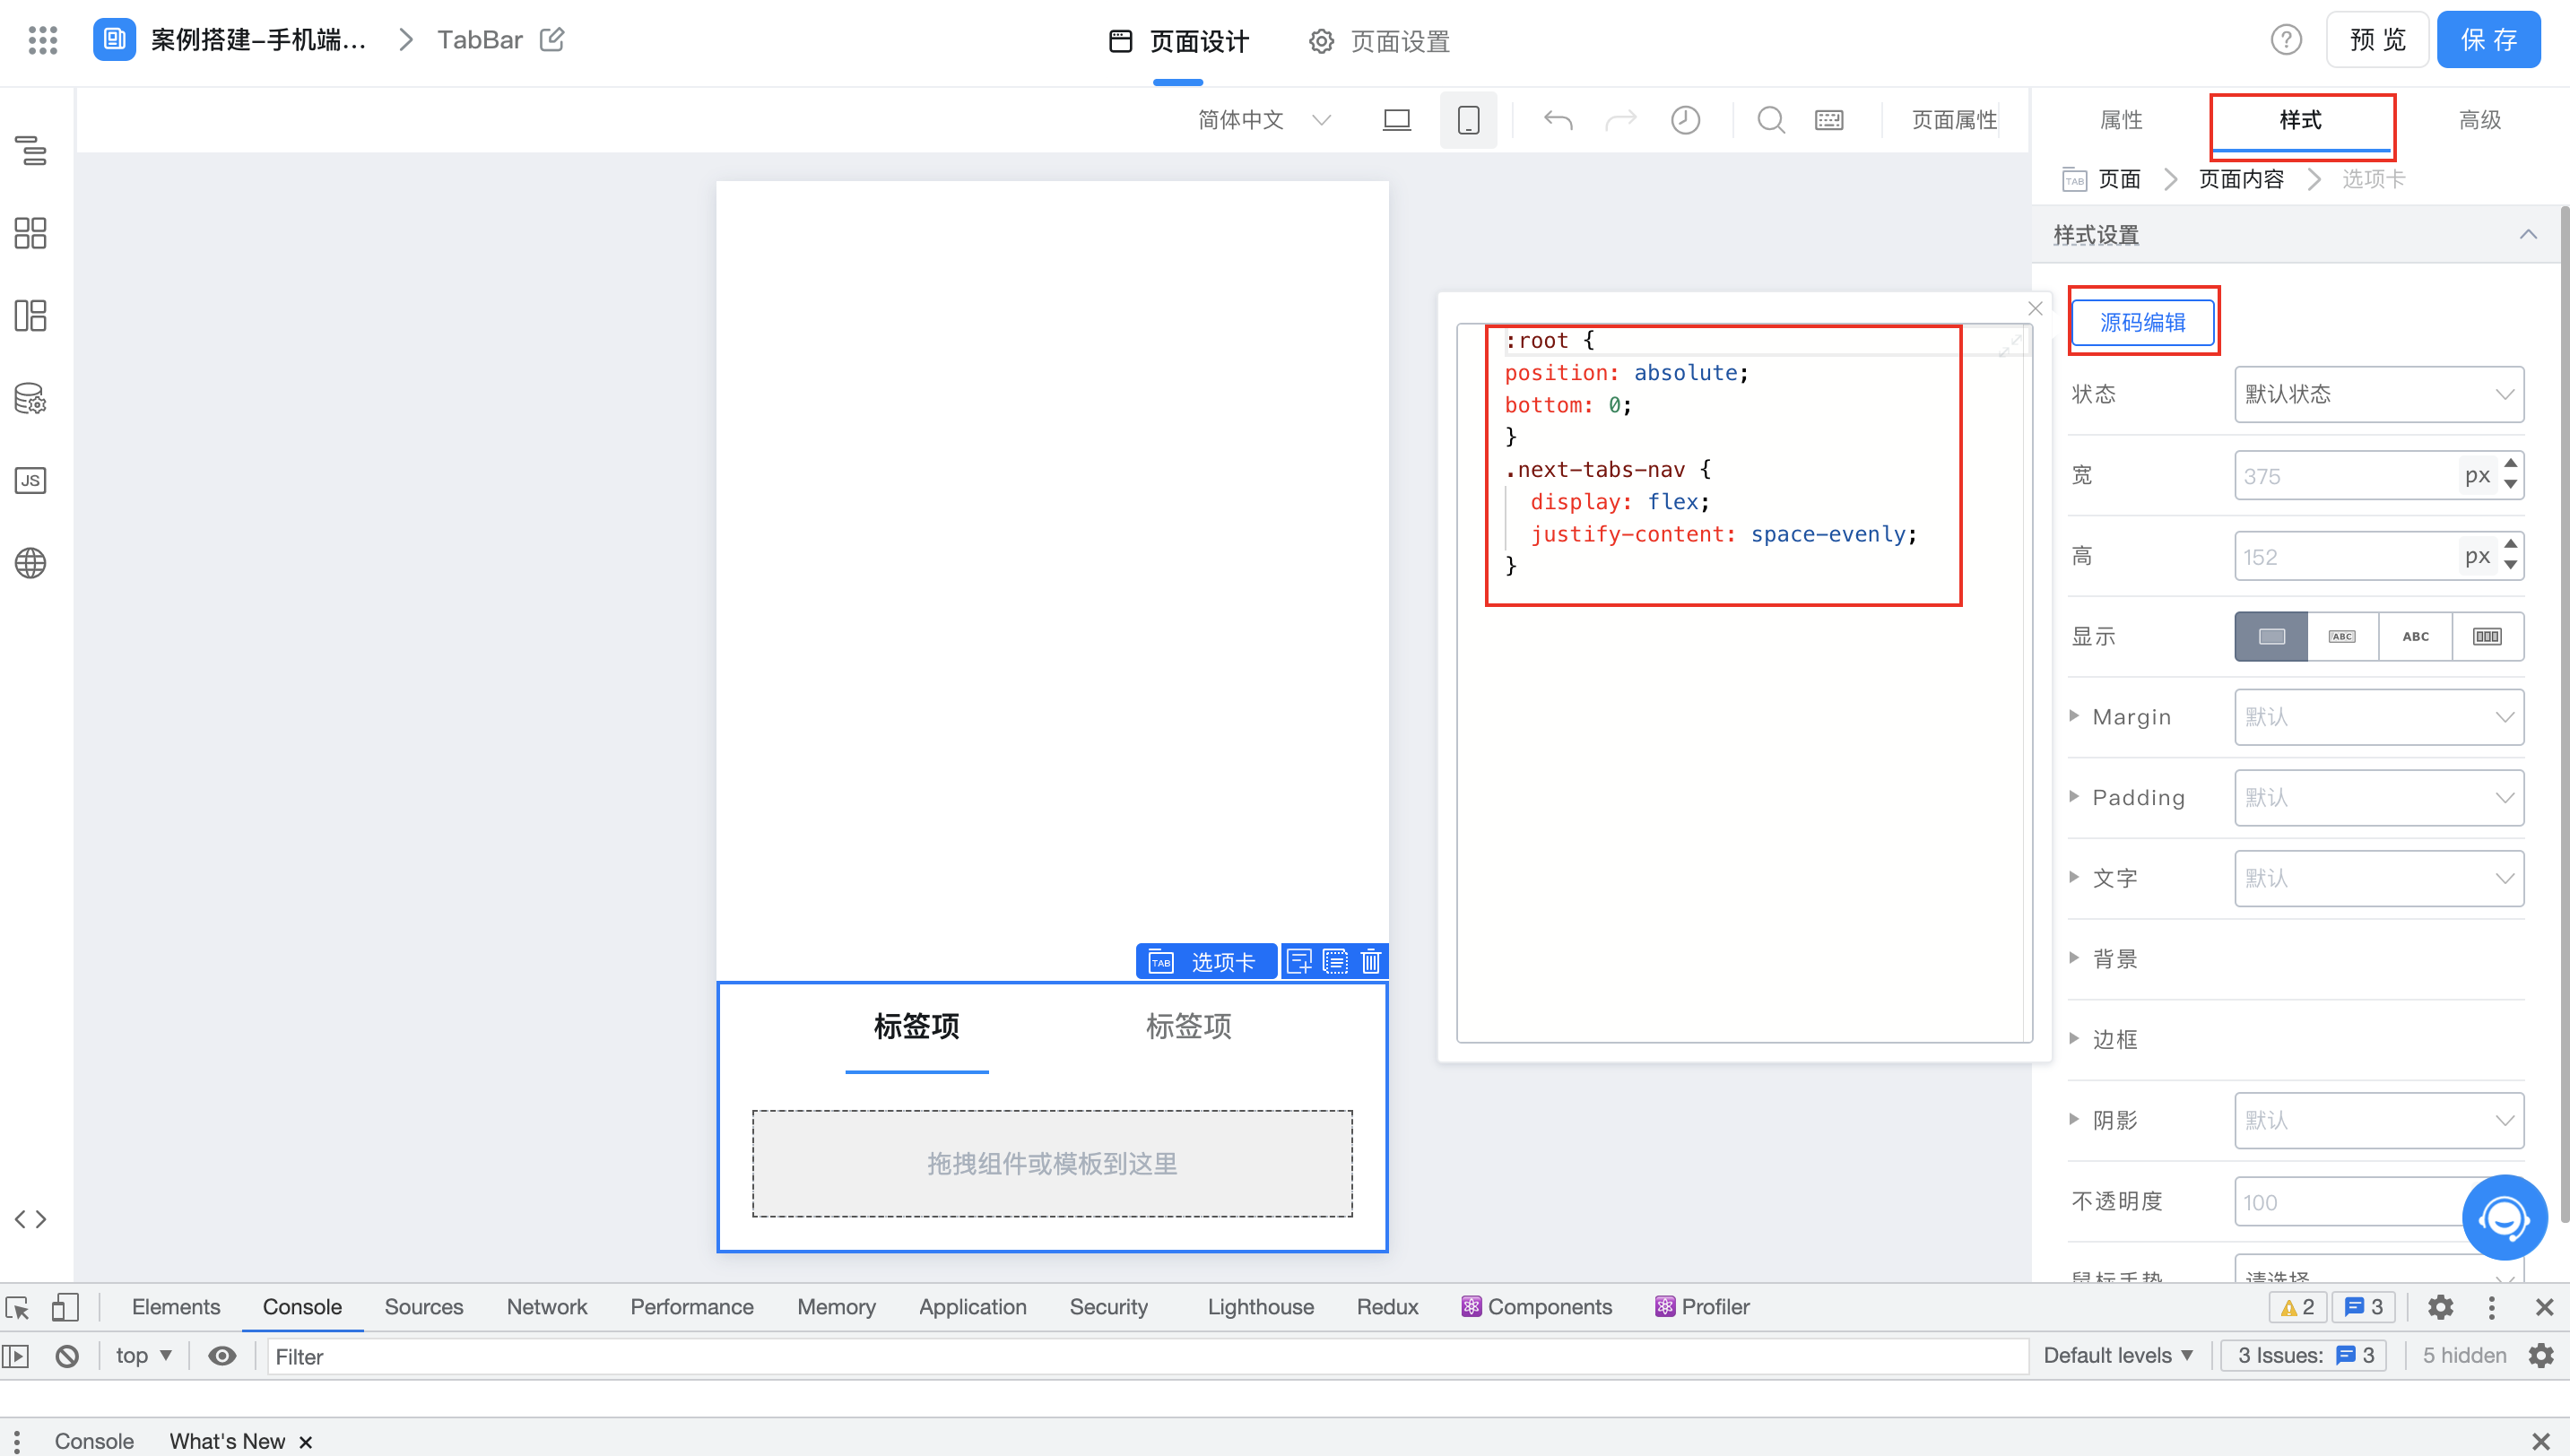
固定底部
2.4 拖入容器组件并设置宽高
在「选项卡」中拖入一个「容器」组件
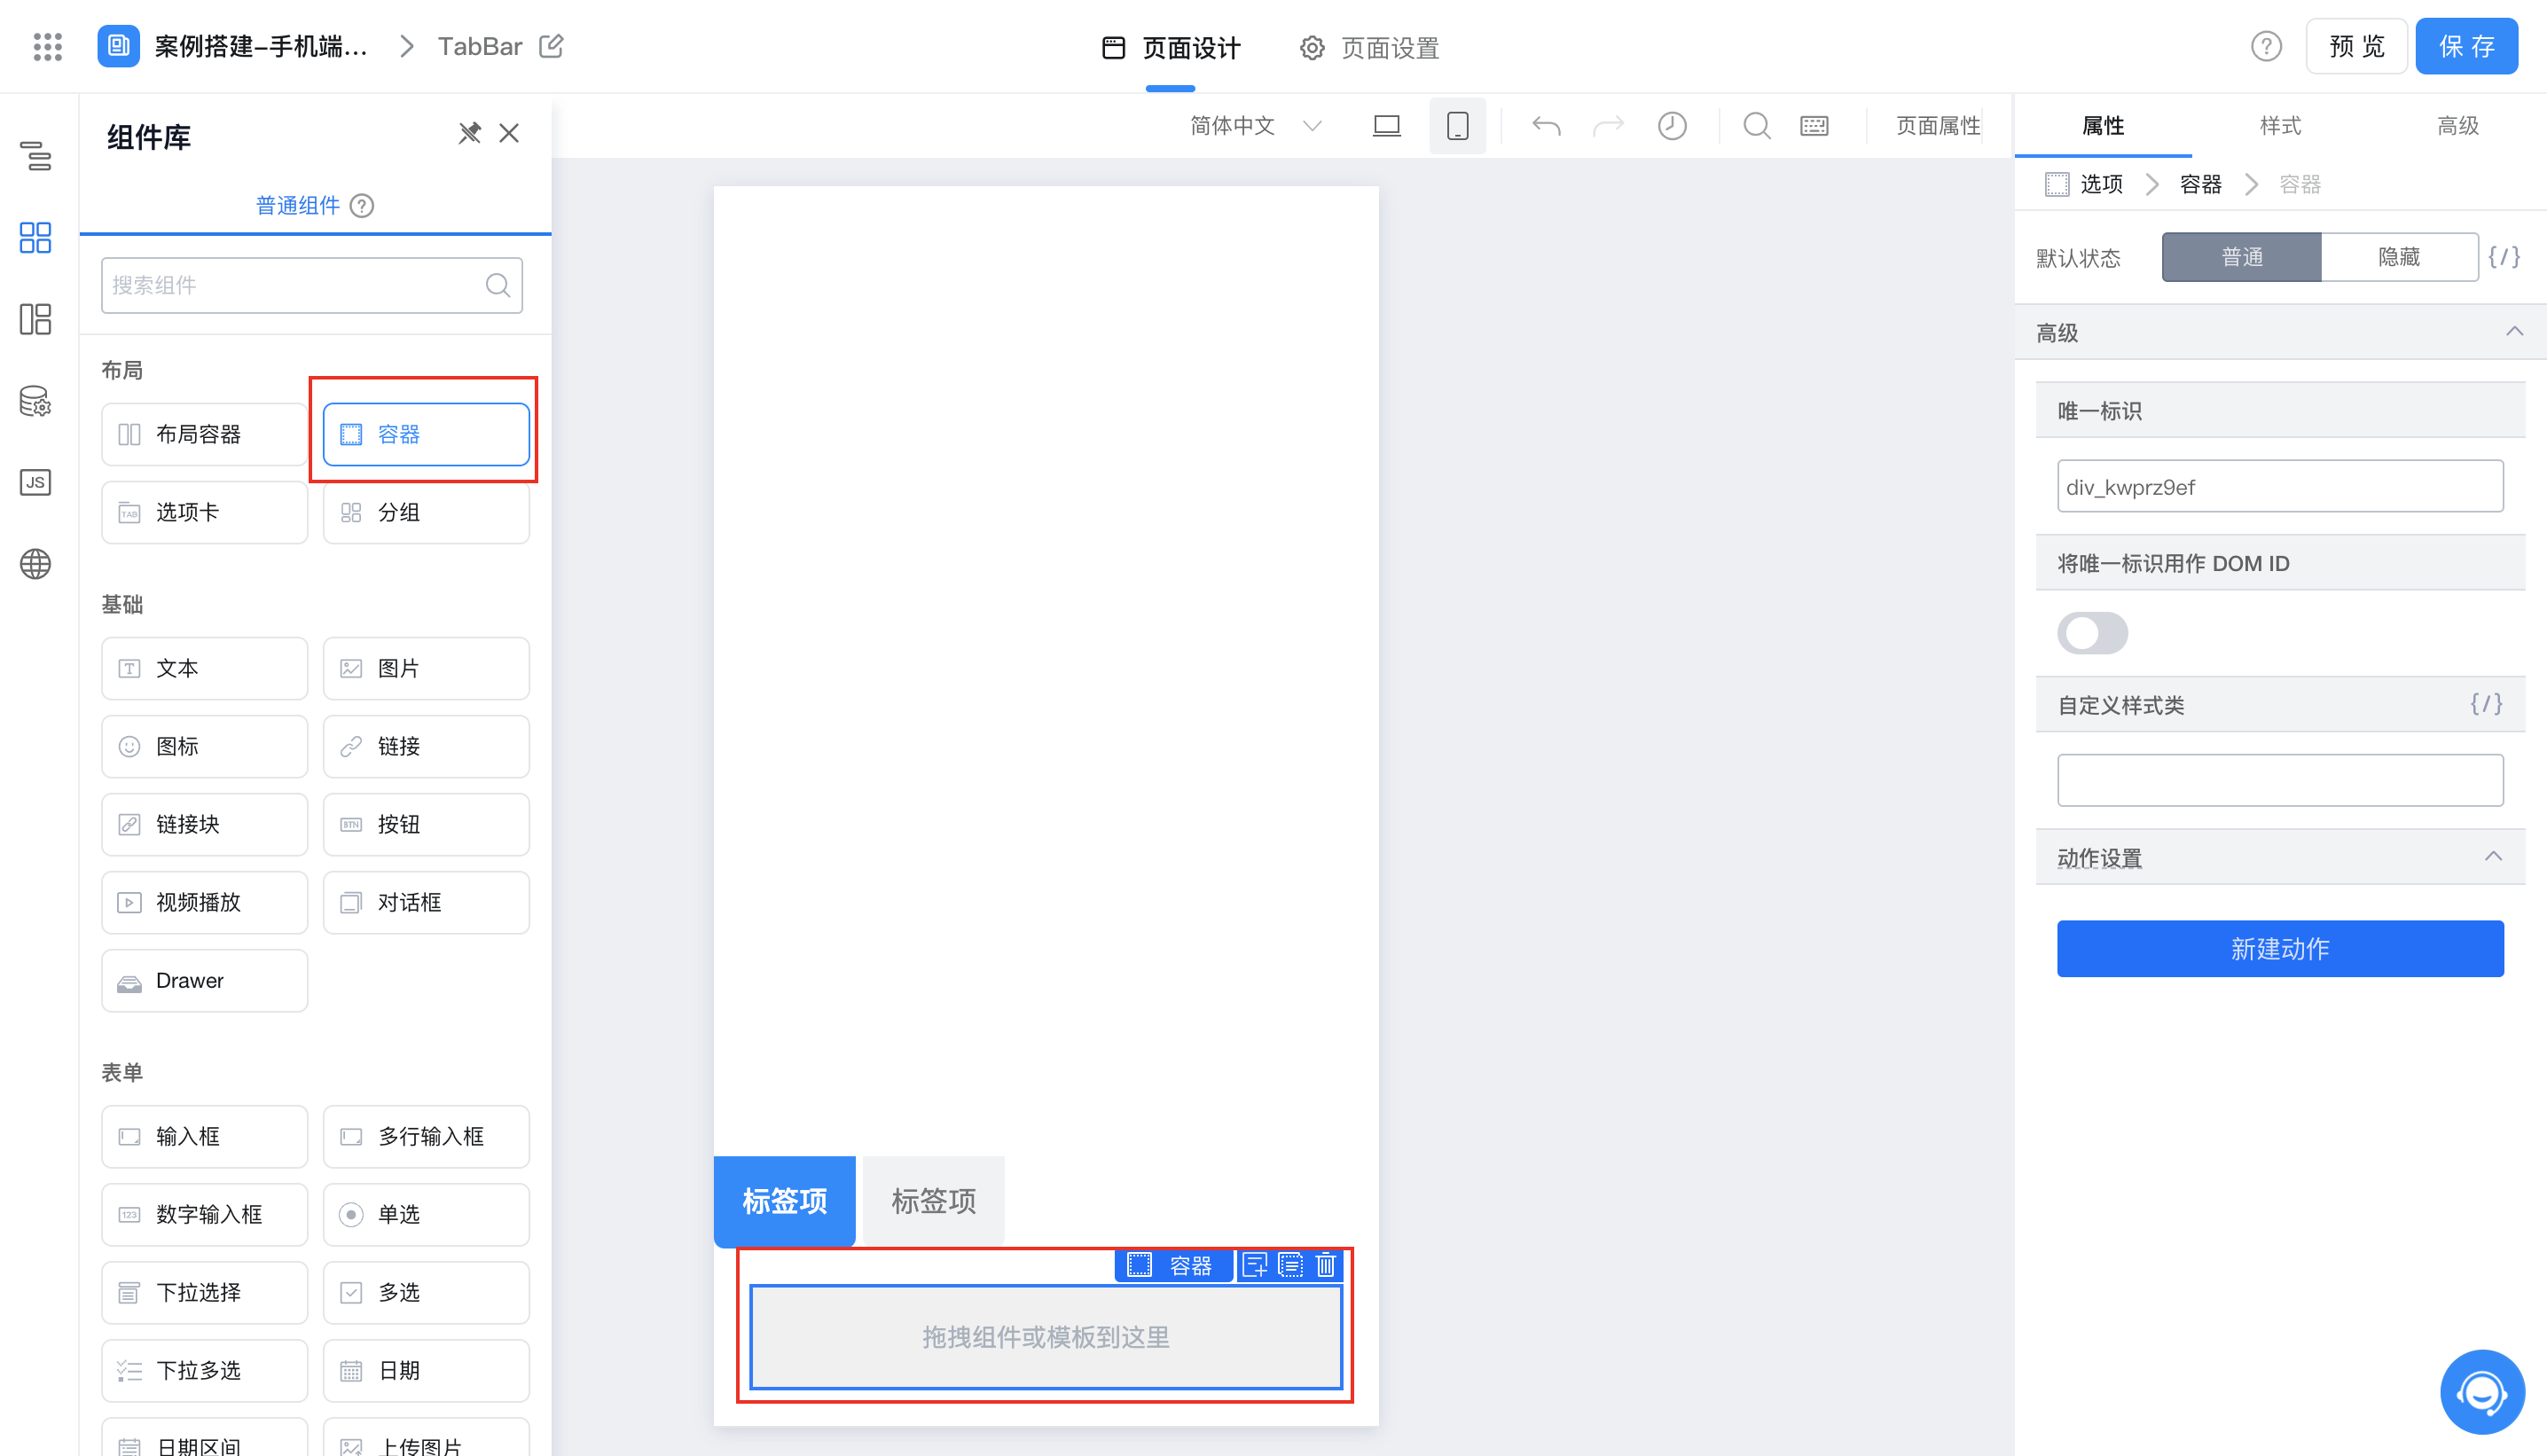
拖入容器
选中「容器」组件,在「样式」的「源码编辑」中添加如下代码
width: 90vw;
height: 88vh;
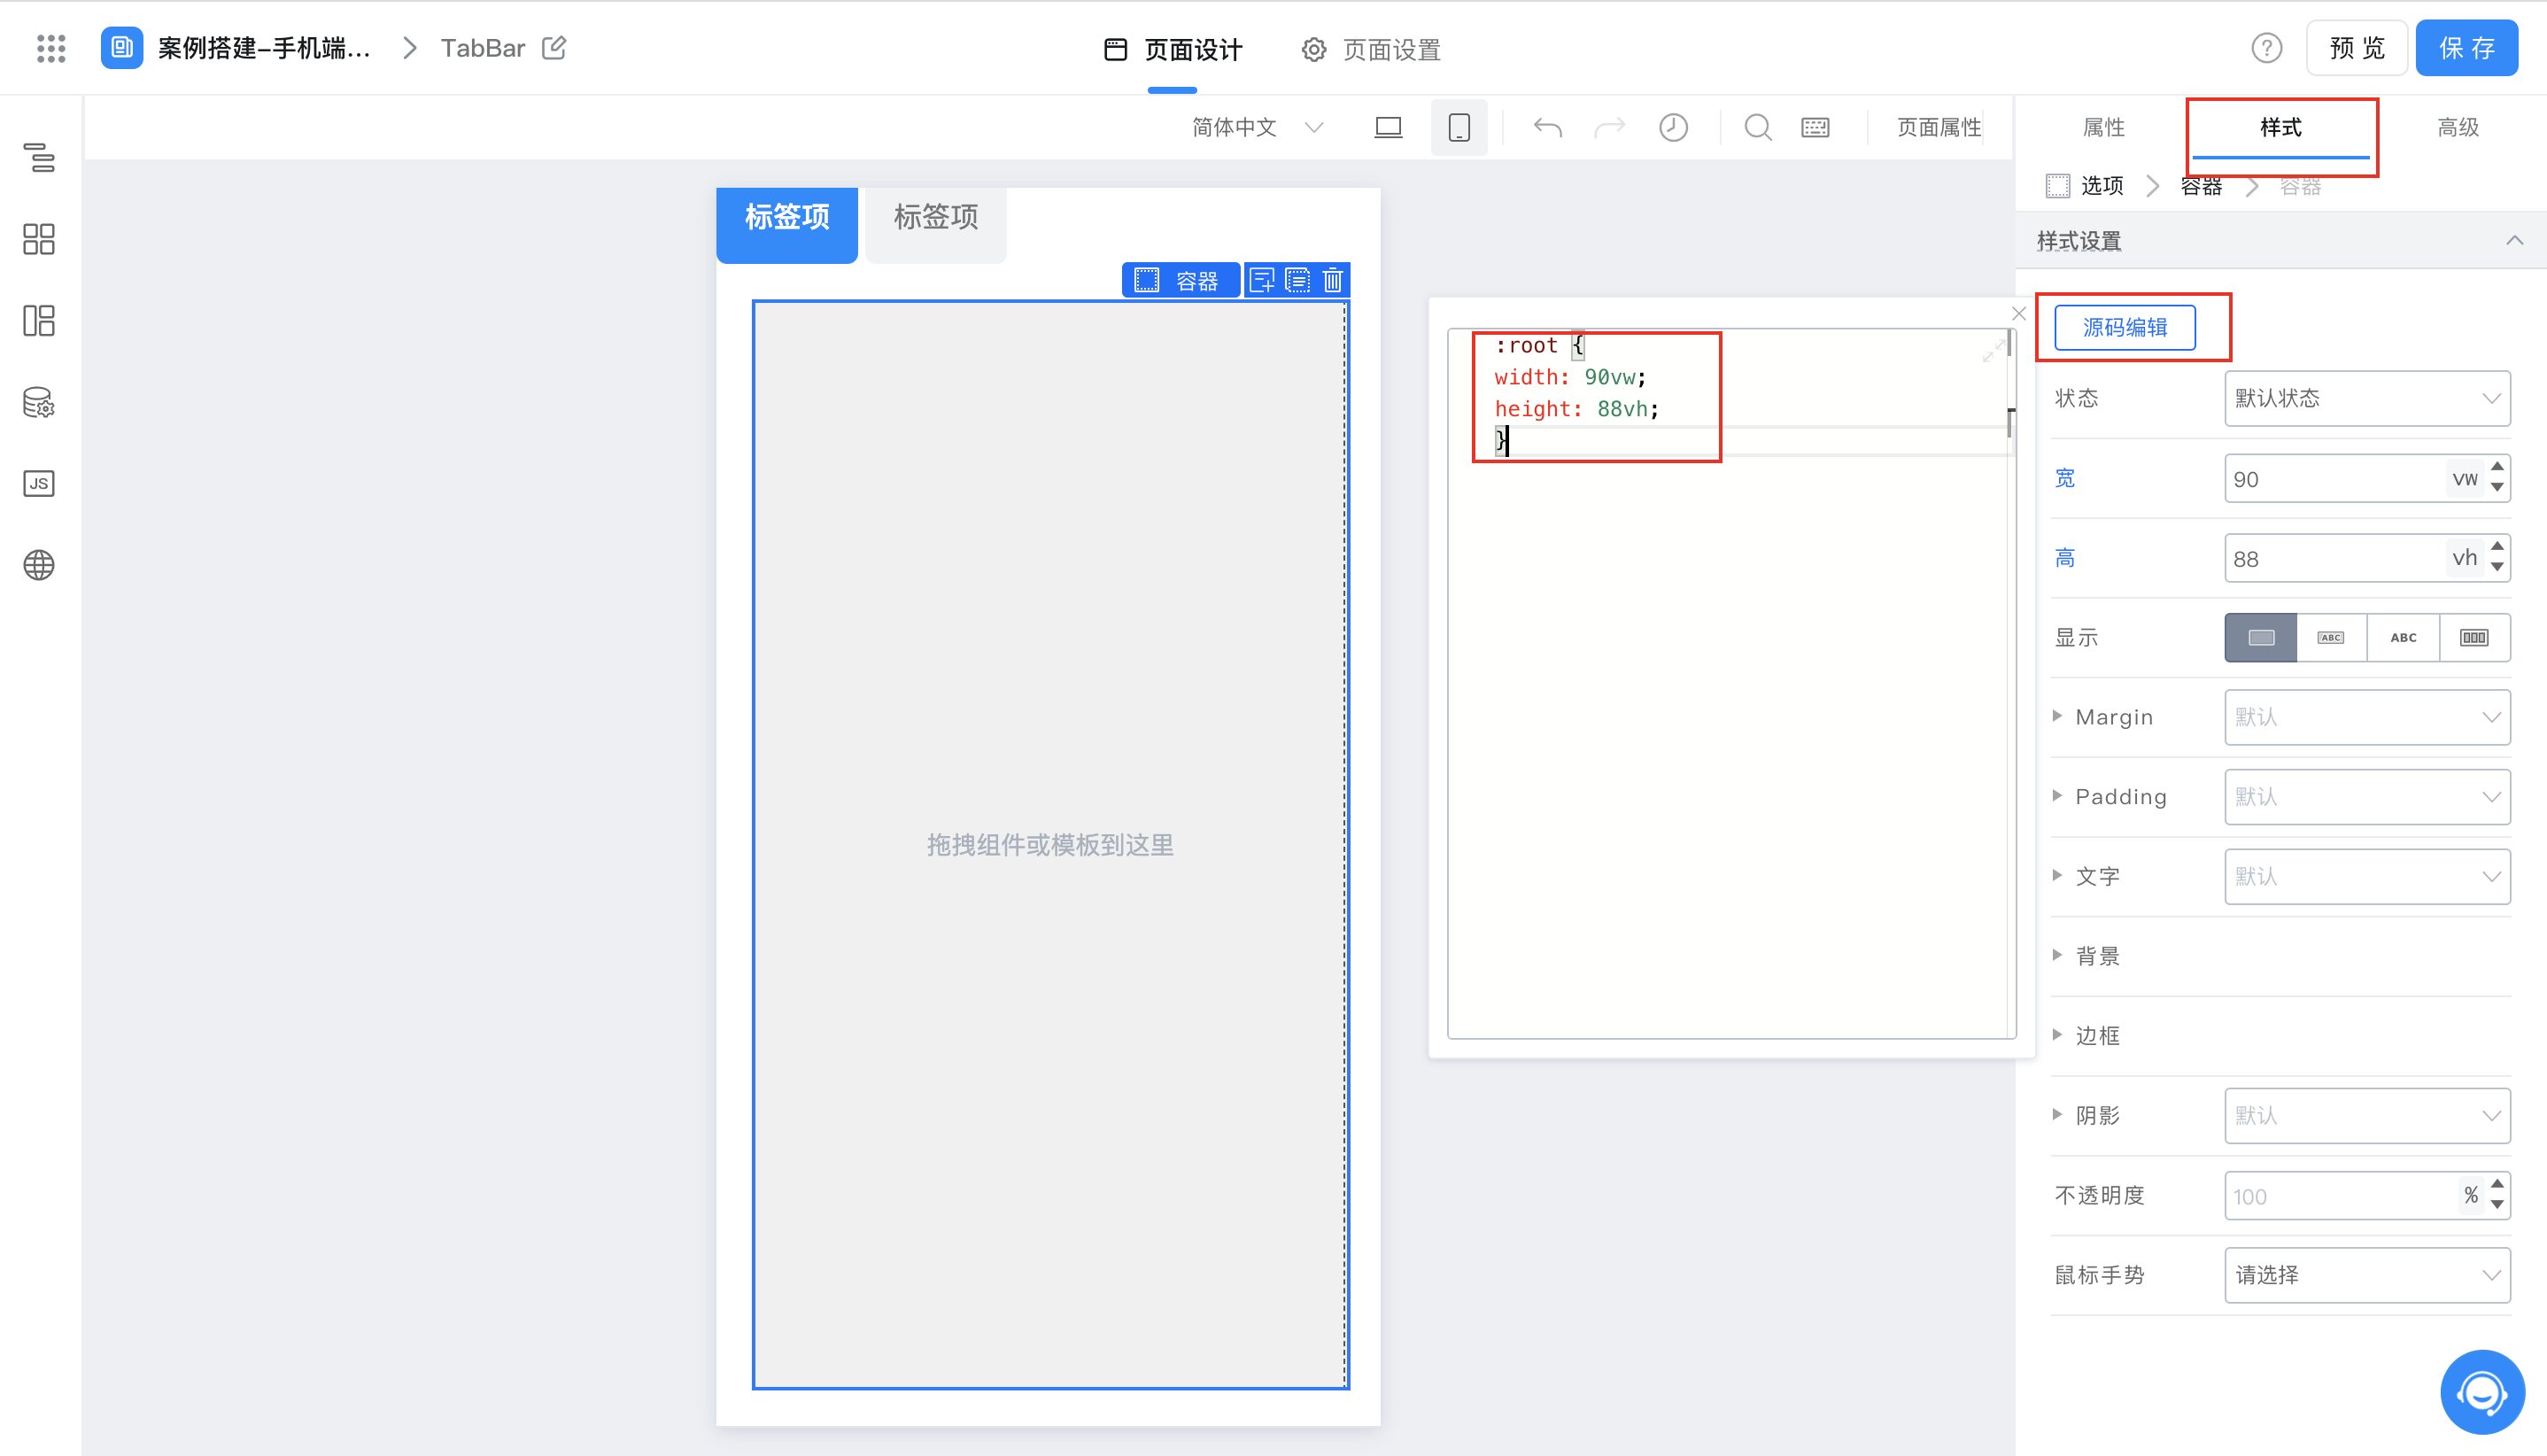
设置宽高
此步骤只对选中的标签项内部添加容器组件,如有多个标签项,需要重复该步骤。
2.5 配置选项卡以及容器内组件
「选项卡」名称以及个数可如下图进行配置
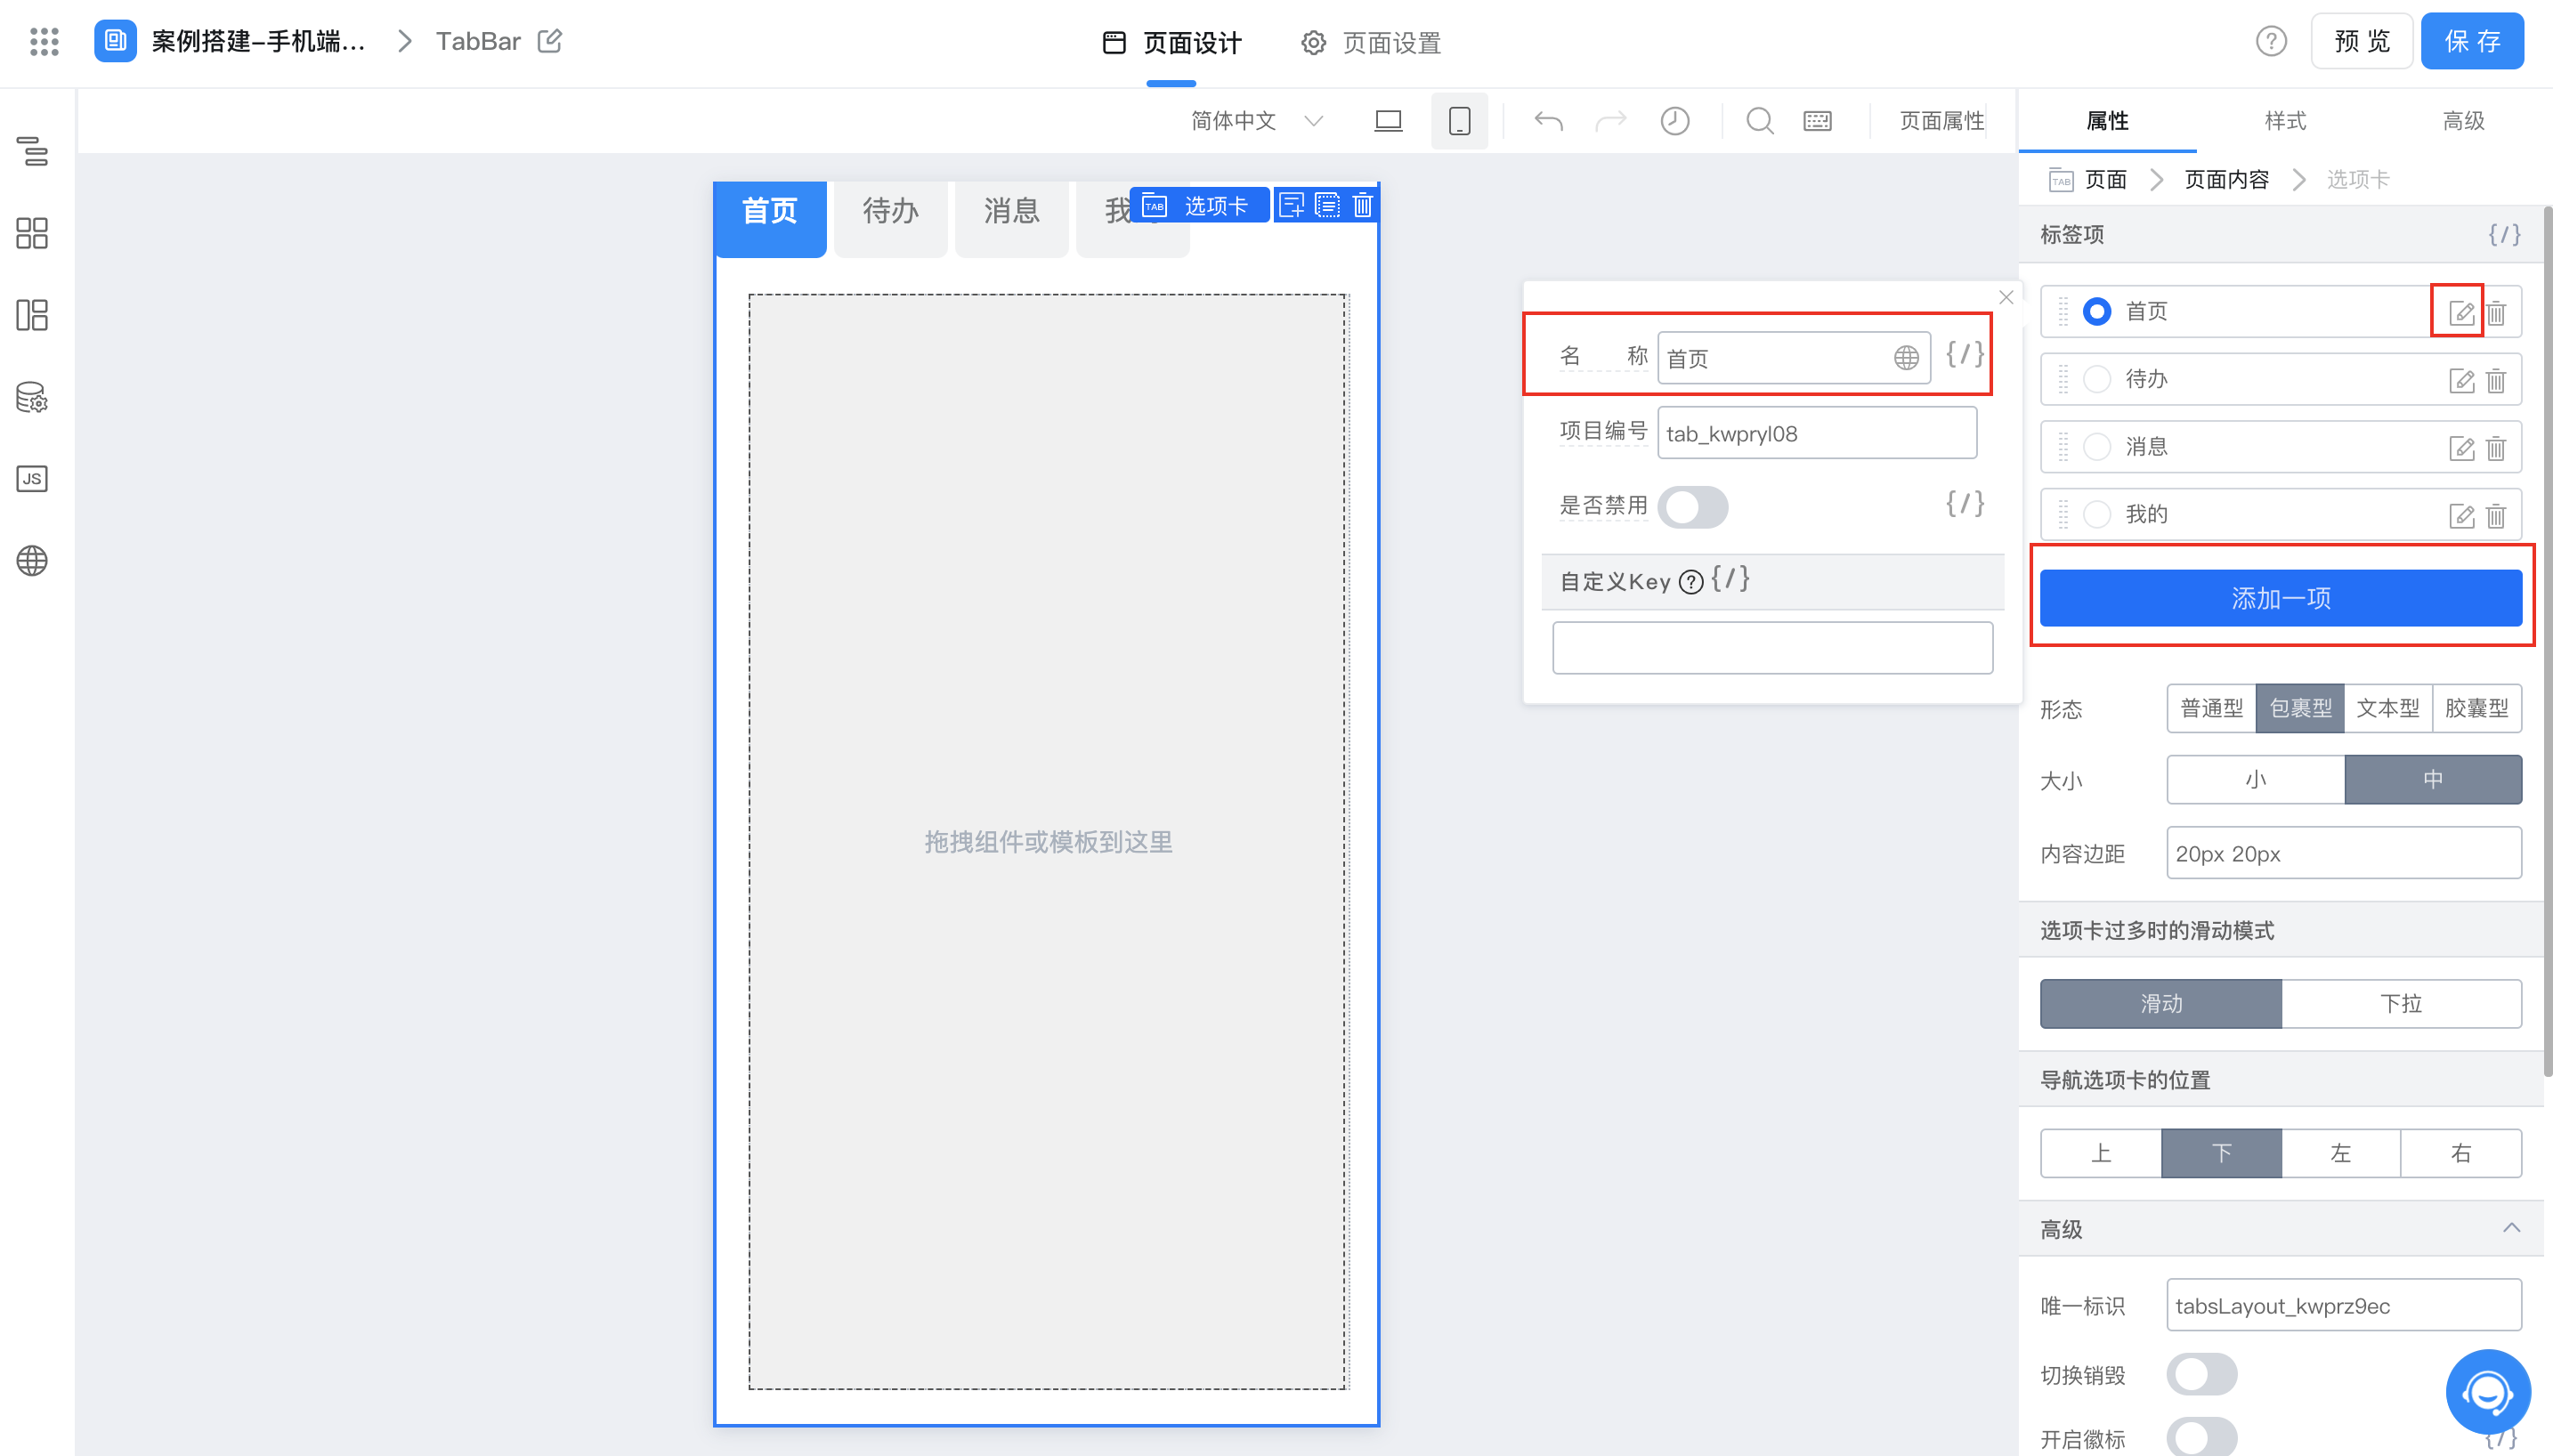
编辑选项卡
可将需要的组件自定义放入「容器」中进行展示
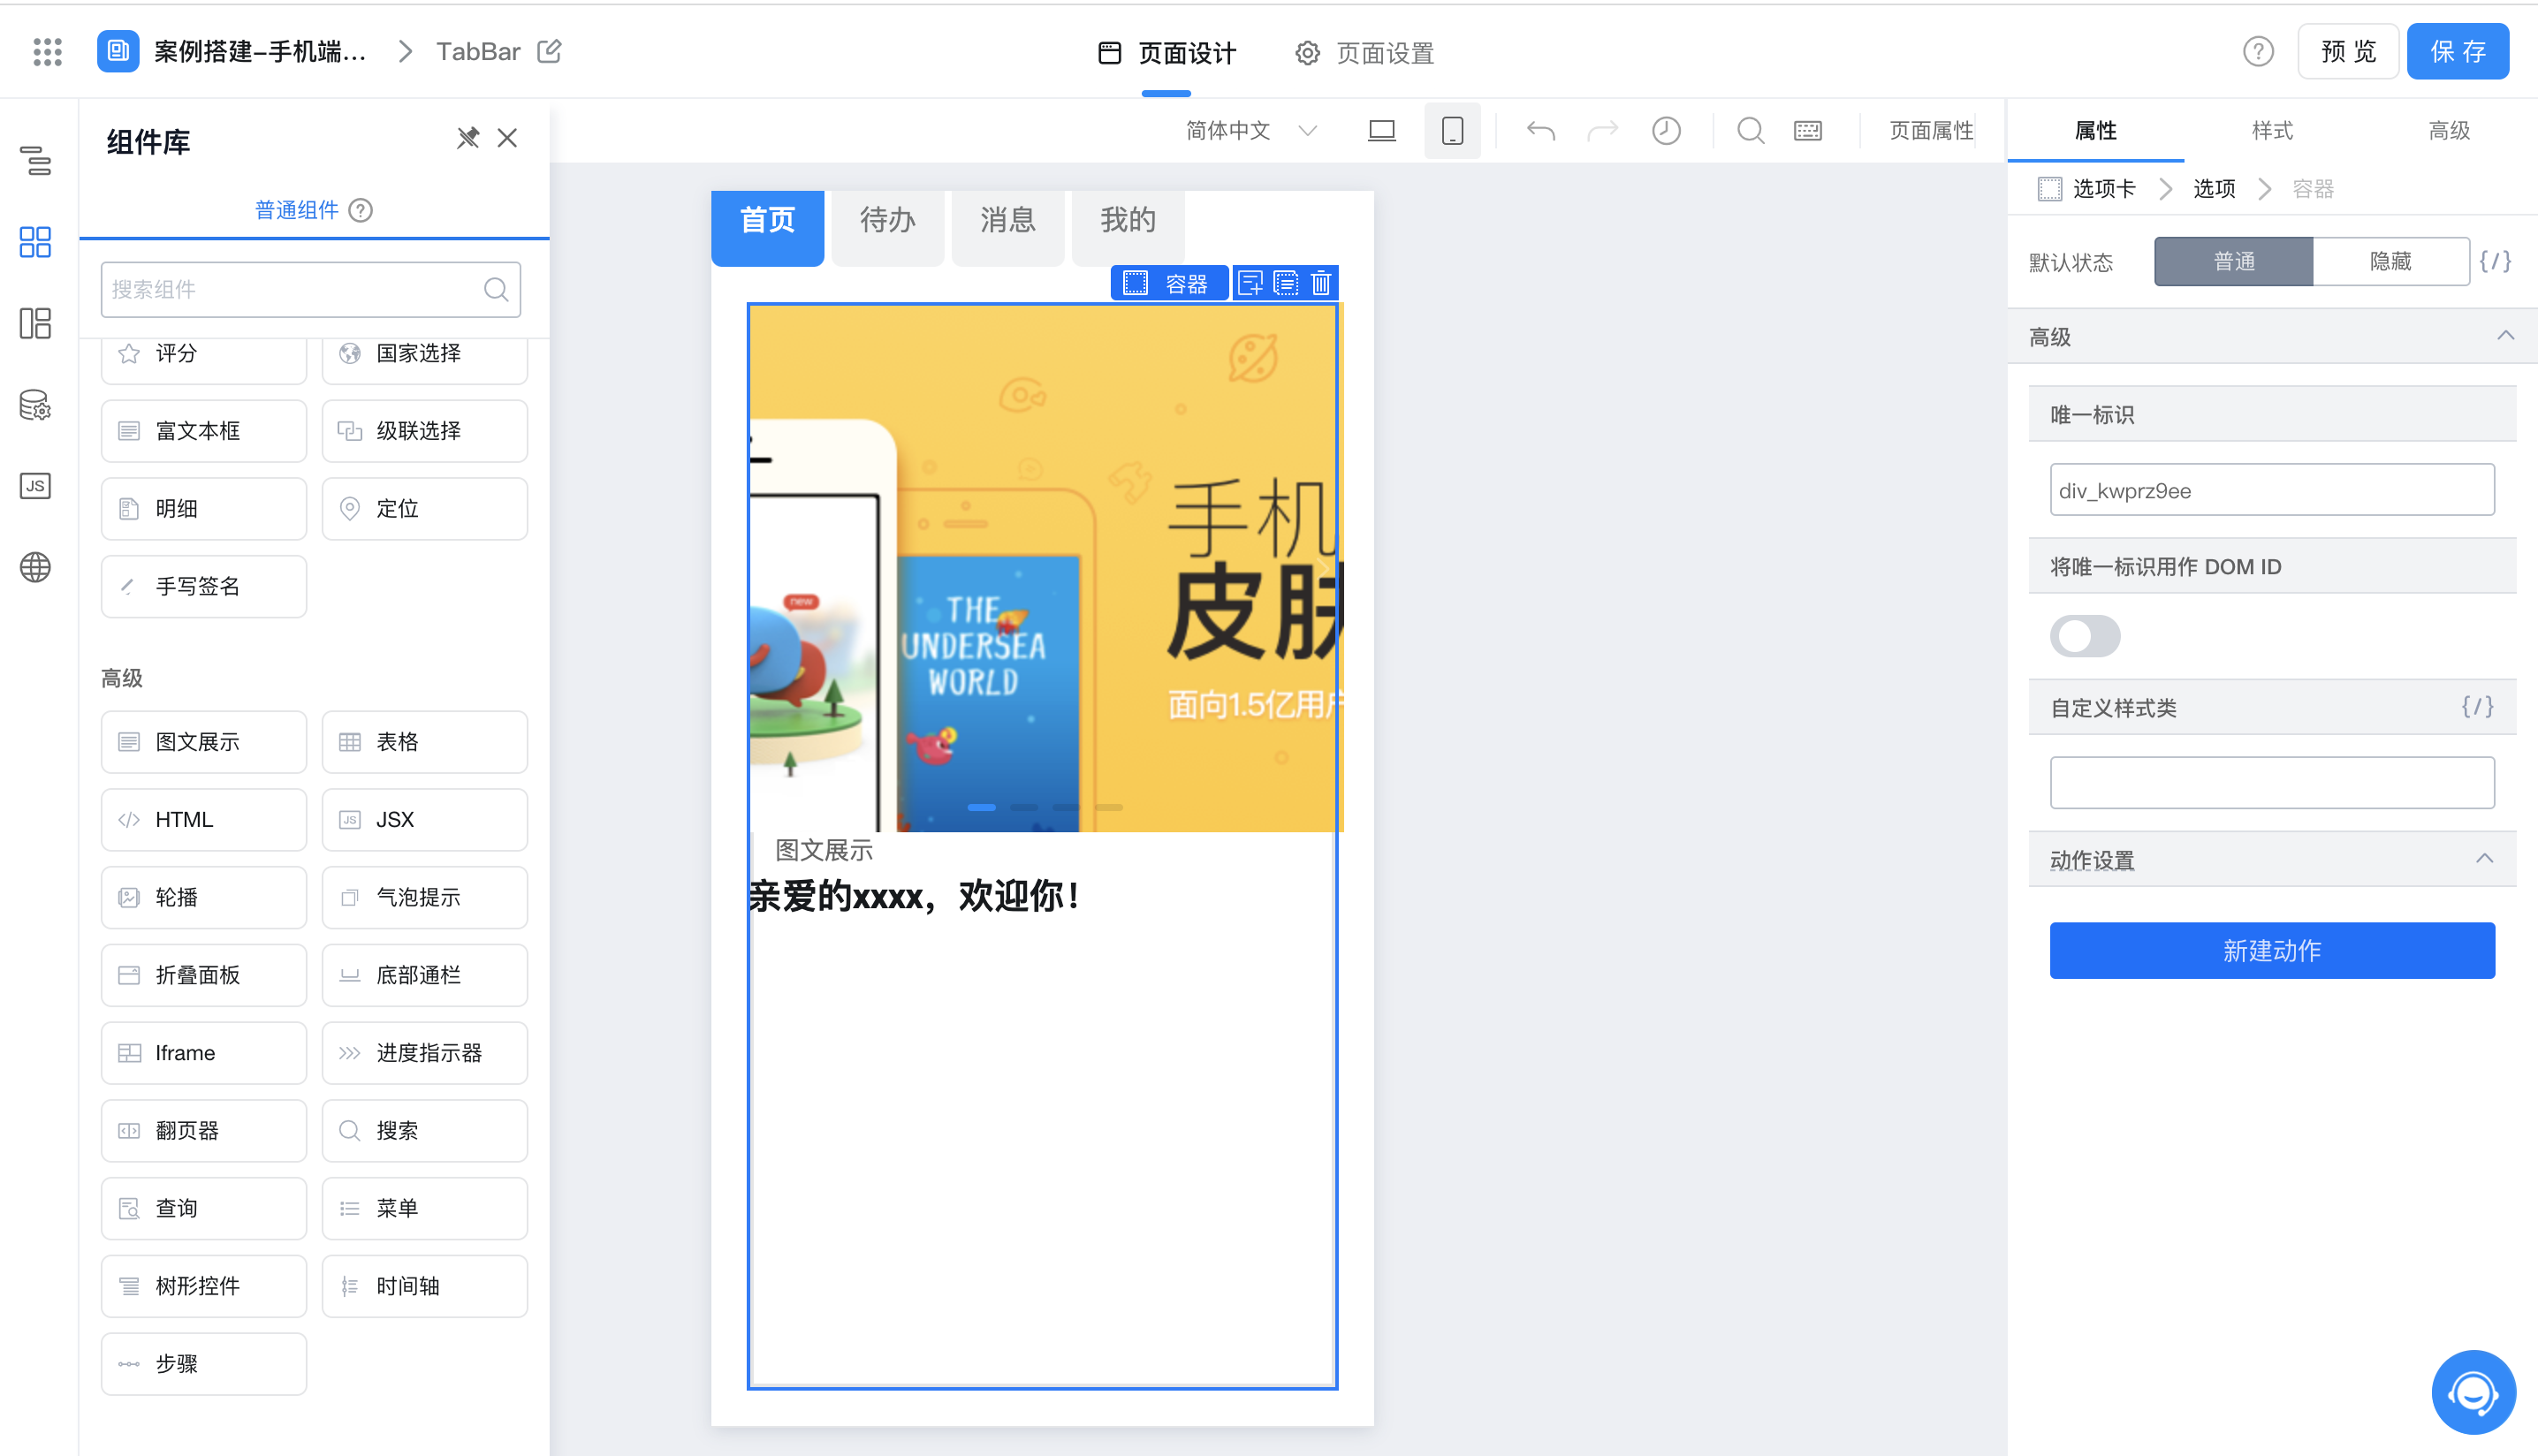
编辑容器组件
3. 效果展示
此处为语雀视频卡片,点击链接查看:Record_2021-12-03-14-55-50_6483dd1576f1330fe7c408604fe48ee1.mp4
4. 在线试玩
https://www.aliwork.com/bench/coe?tplUuid=TPL_DCCZHVKSZD567BFPDPZQ
此文档对您是否有帮助?