FaaS connector-add form instances in batches
Note: We do not recommend that you use this OpenAPI directly in the front-end data source as an HTTP connector. For more information, see configure FaaS connectors in this case. Otherwise, systemToken parameters will be leaked, threatening the data security of the application.
1. Usage scenarios
The development language of this example is NodeJS
This example describes how to use the DingTalk open platform OpenAPI to add form instances in batches.
2. Implement functions
2.1. Apply for DingTalk open platform application credentials and interface permissions
If you have applied, you can ignore this step.
 宜搭自定义连接器鉴权凭证申请及接口权限申请 | 钉钉宜搭·帮助中心
2.2. Create and configure FaaS connectors
The interface used in this example is:
Note:
- If you select not to execute validation rules, associated business rules, and third-party service callbacks (noExecuteExpression:true), then the number of form instances that can be created in batches at a time is 500.
- If you select execute validation rules, associated business rules, and third-party service callbacks (noExecuteExpression:false)
- If you select synchronization (asynchronousExecution:false), 50 entries are allowed at a time.
- If asynchronous (asynchronousExecution:true), 200 entries are allowed at a time.
2.2.1. Create FaaS connector
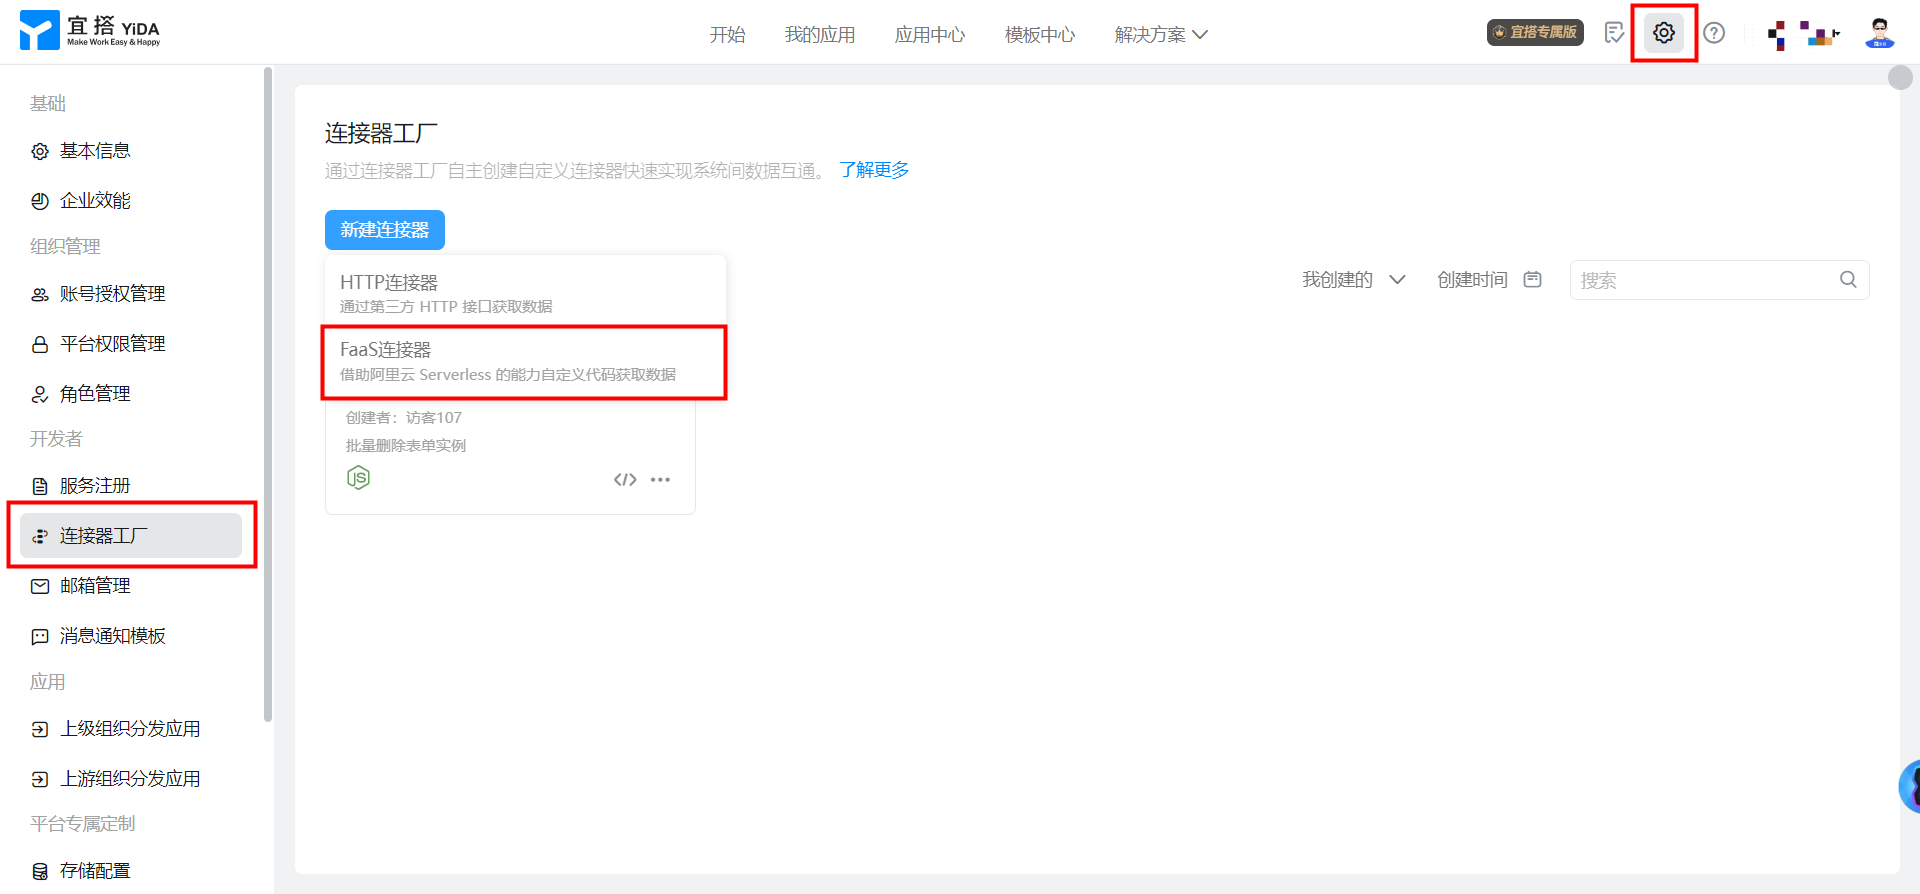
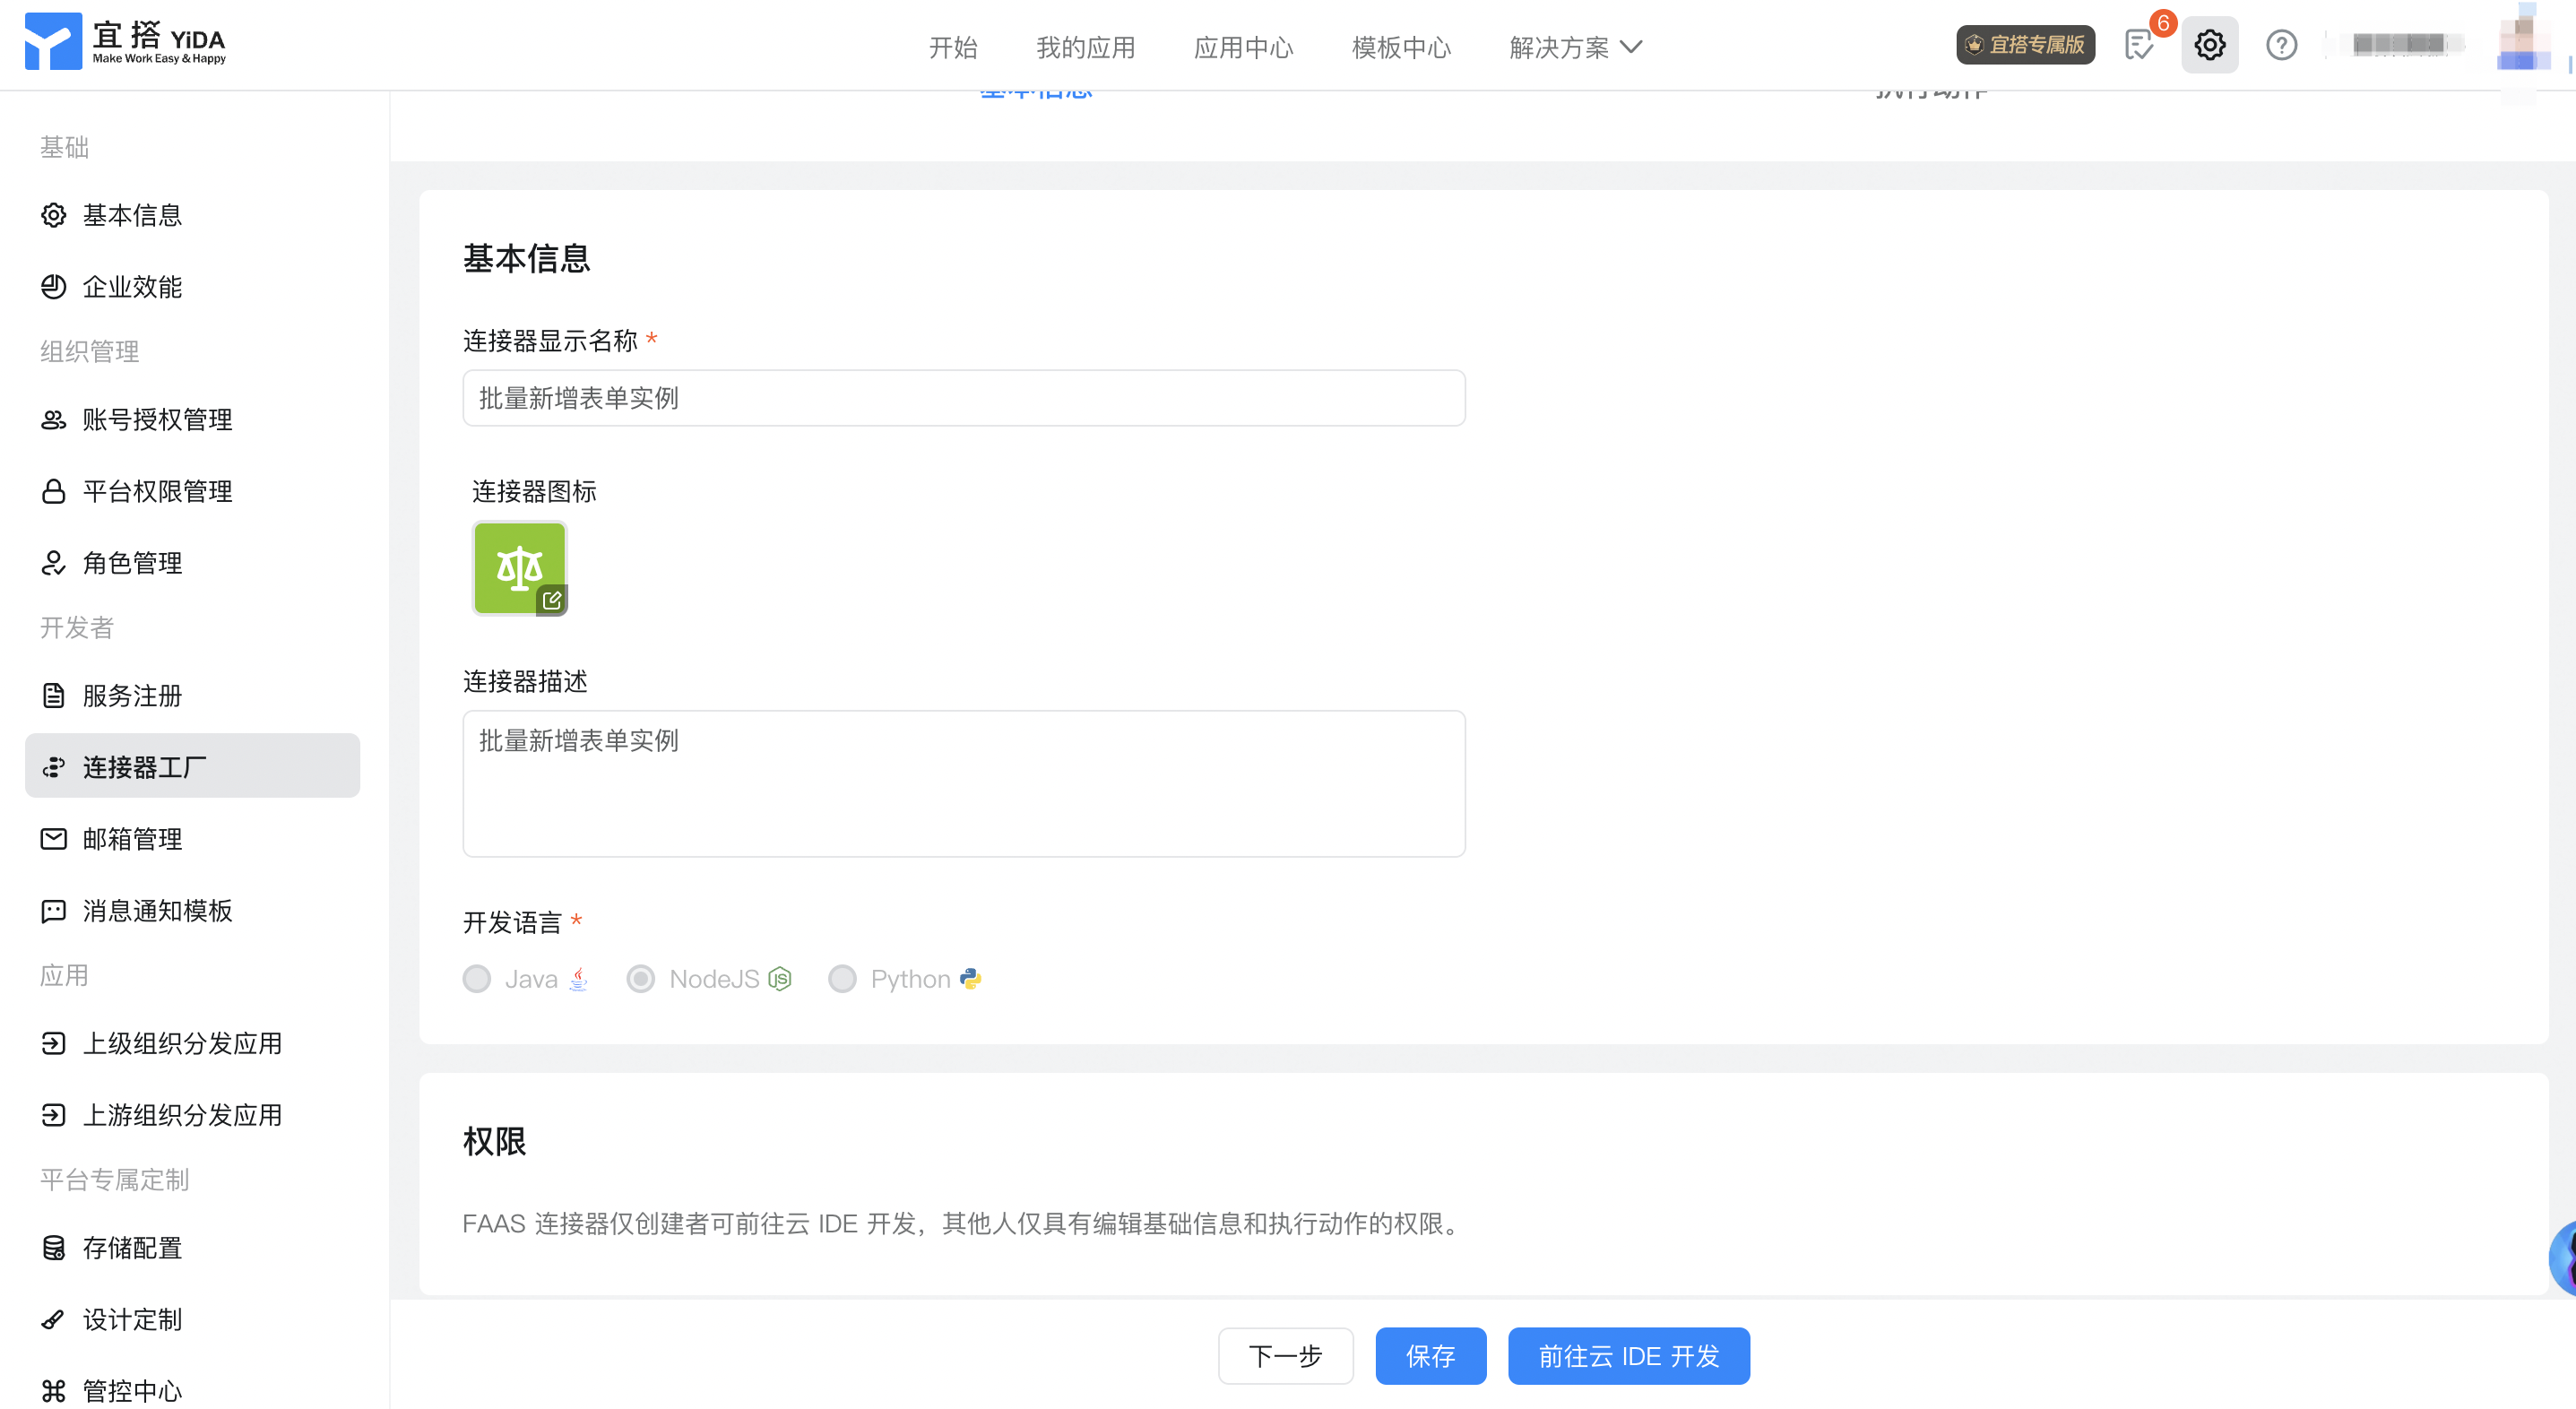
2.2.2. Configure connector basic information and development language
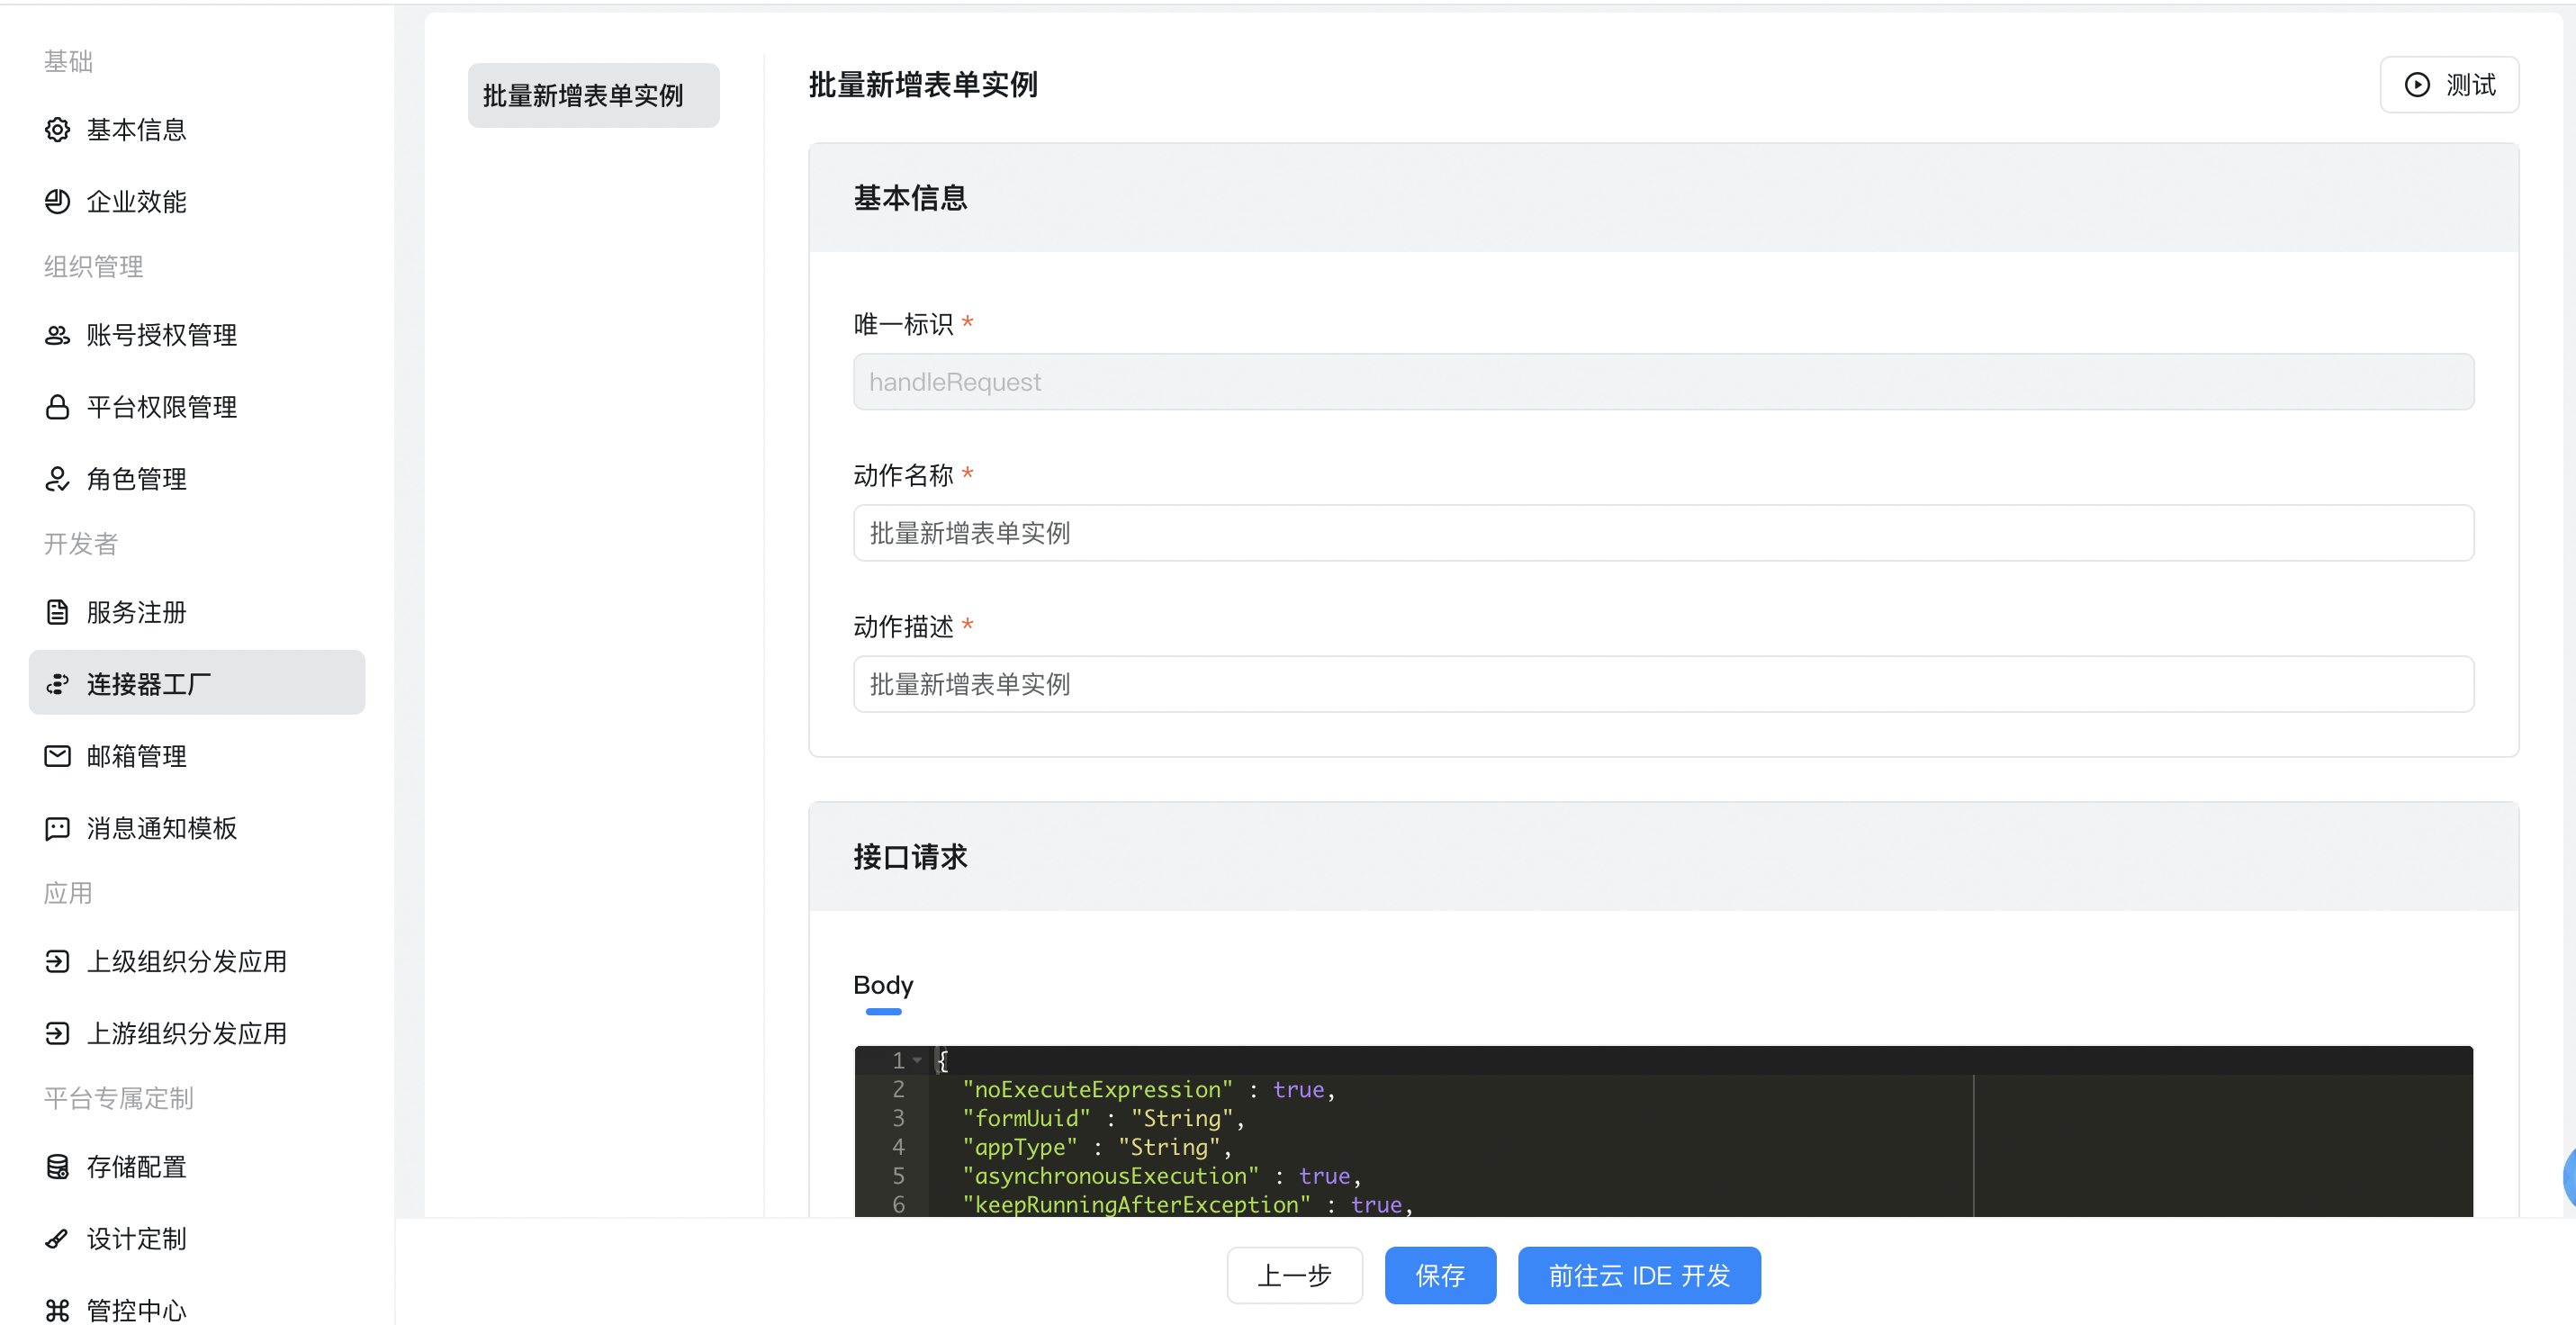
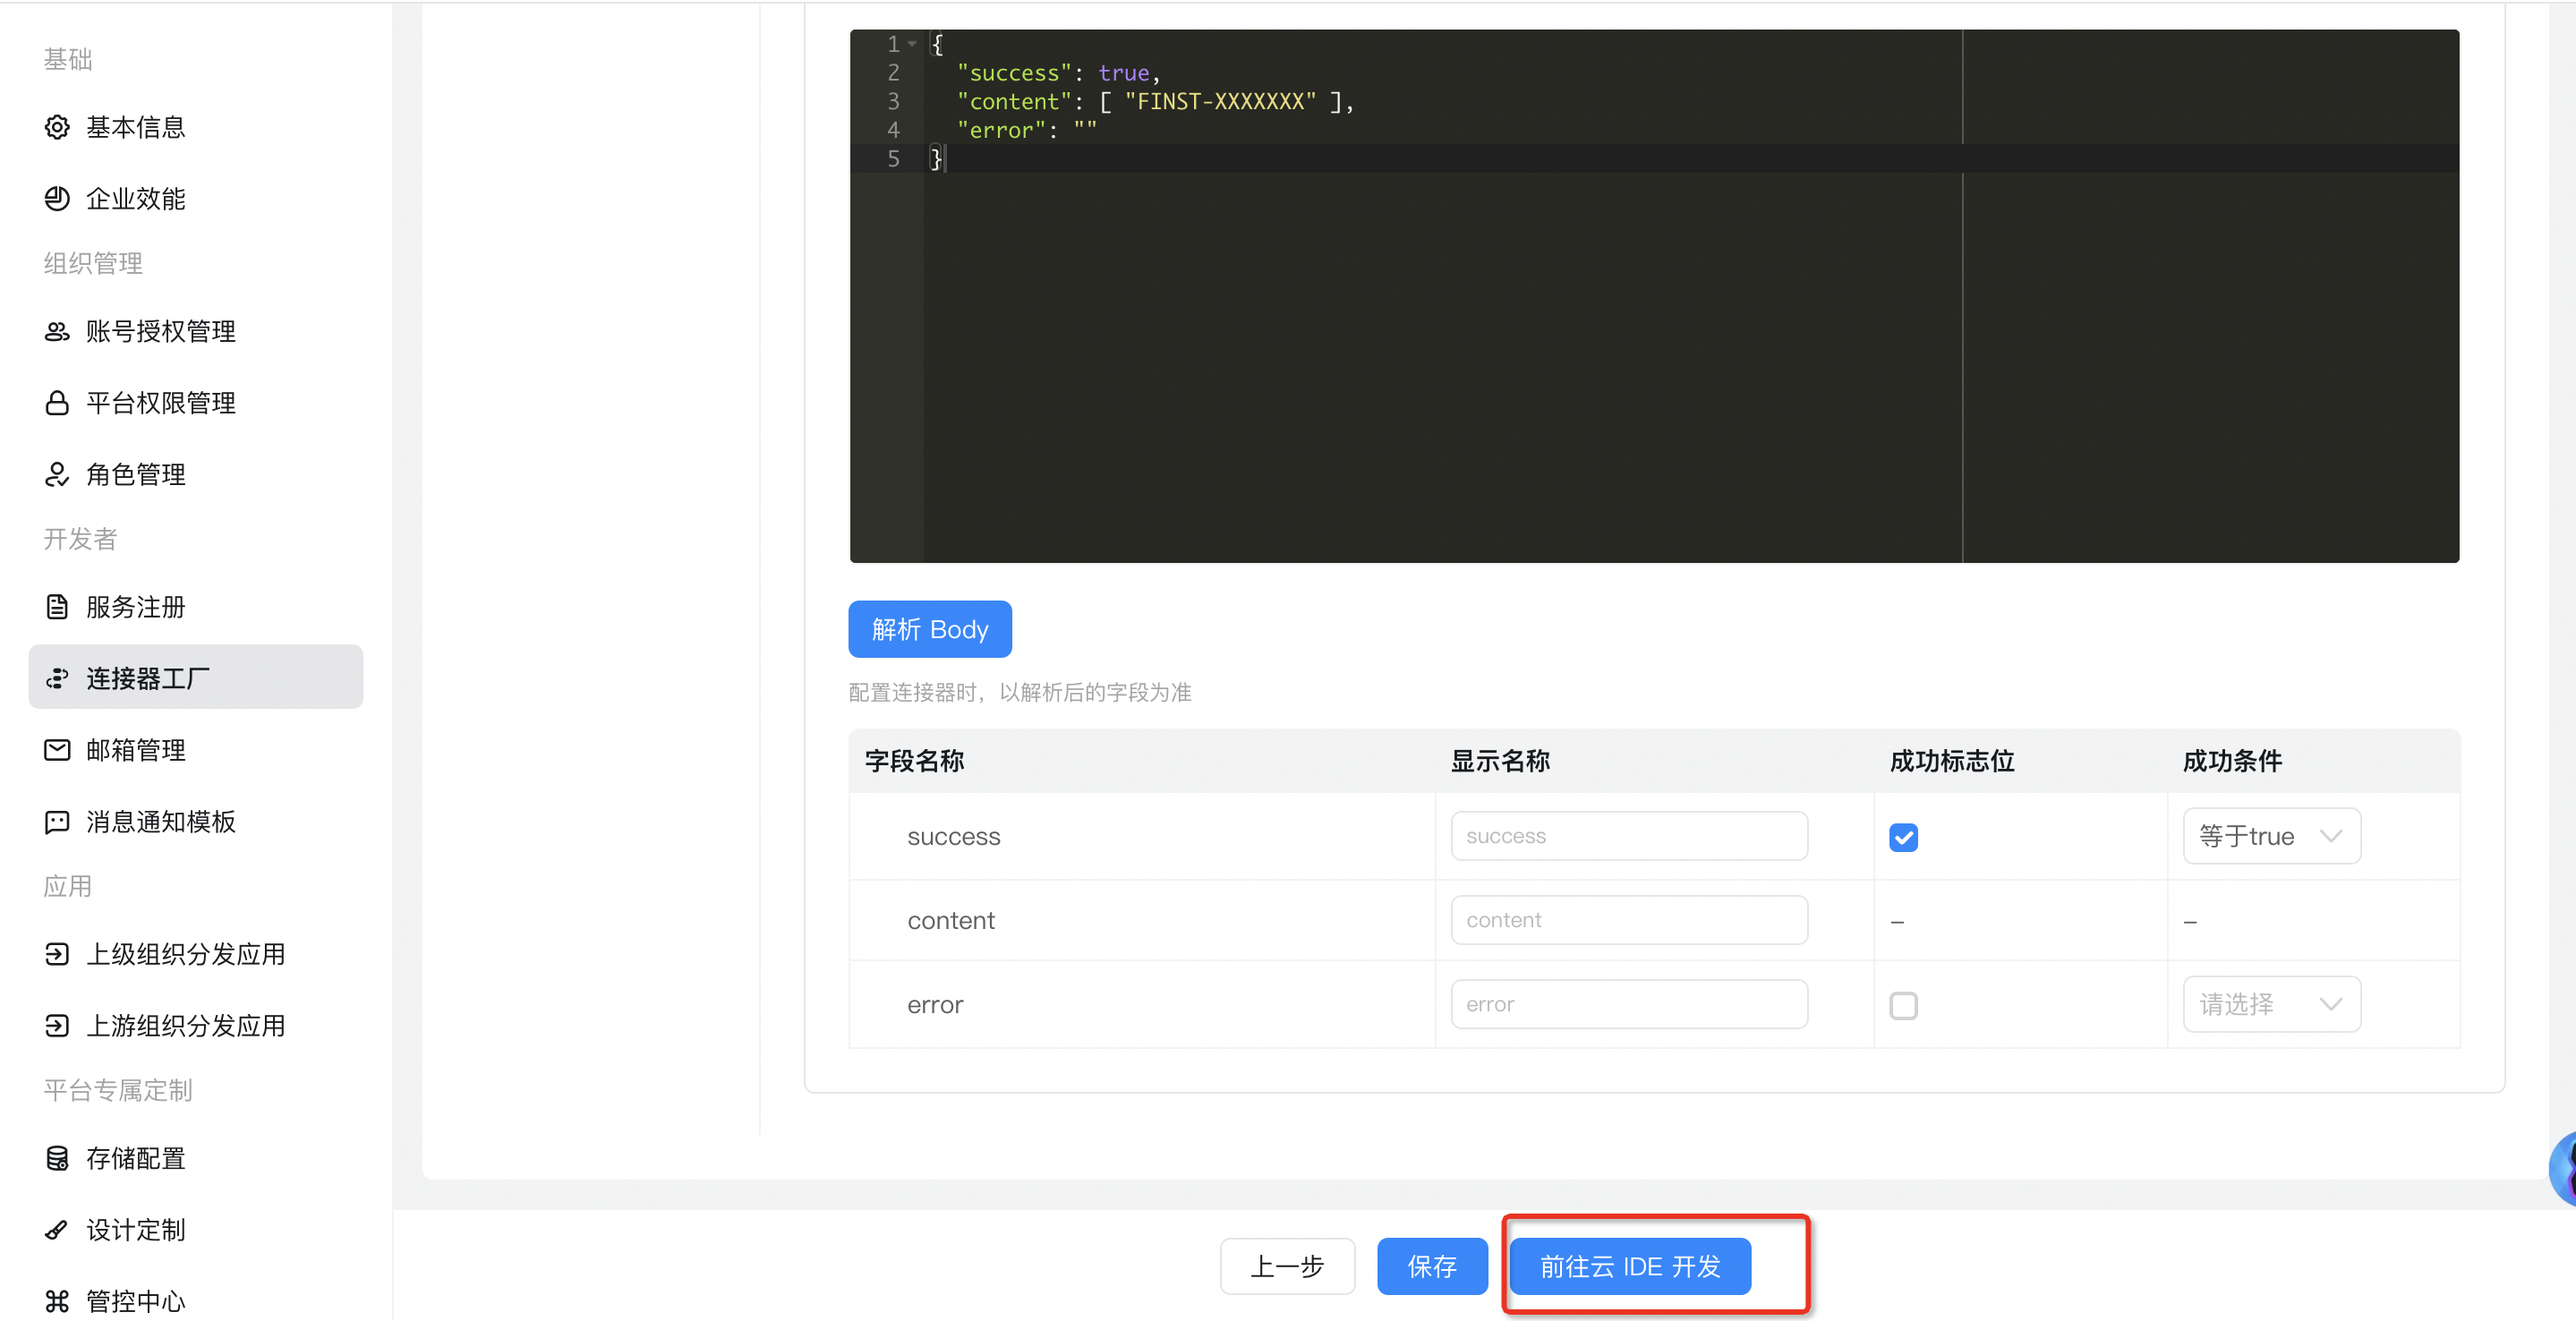
2.2.3. Configure connector execution actions
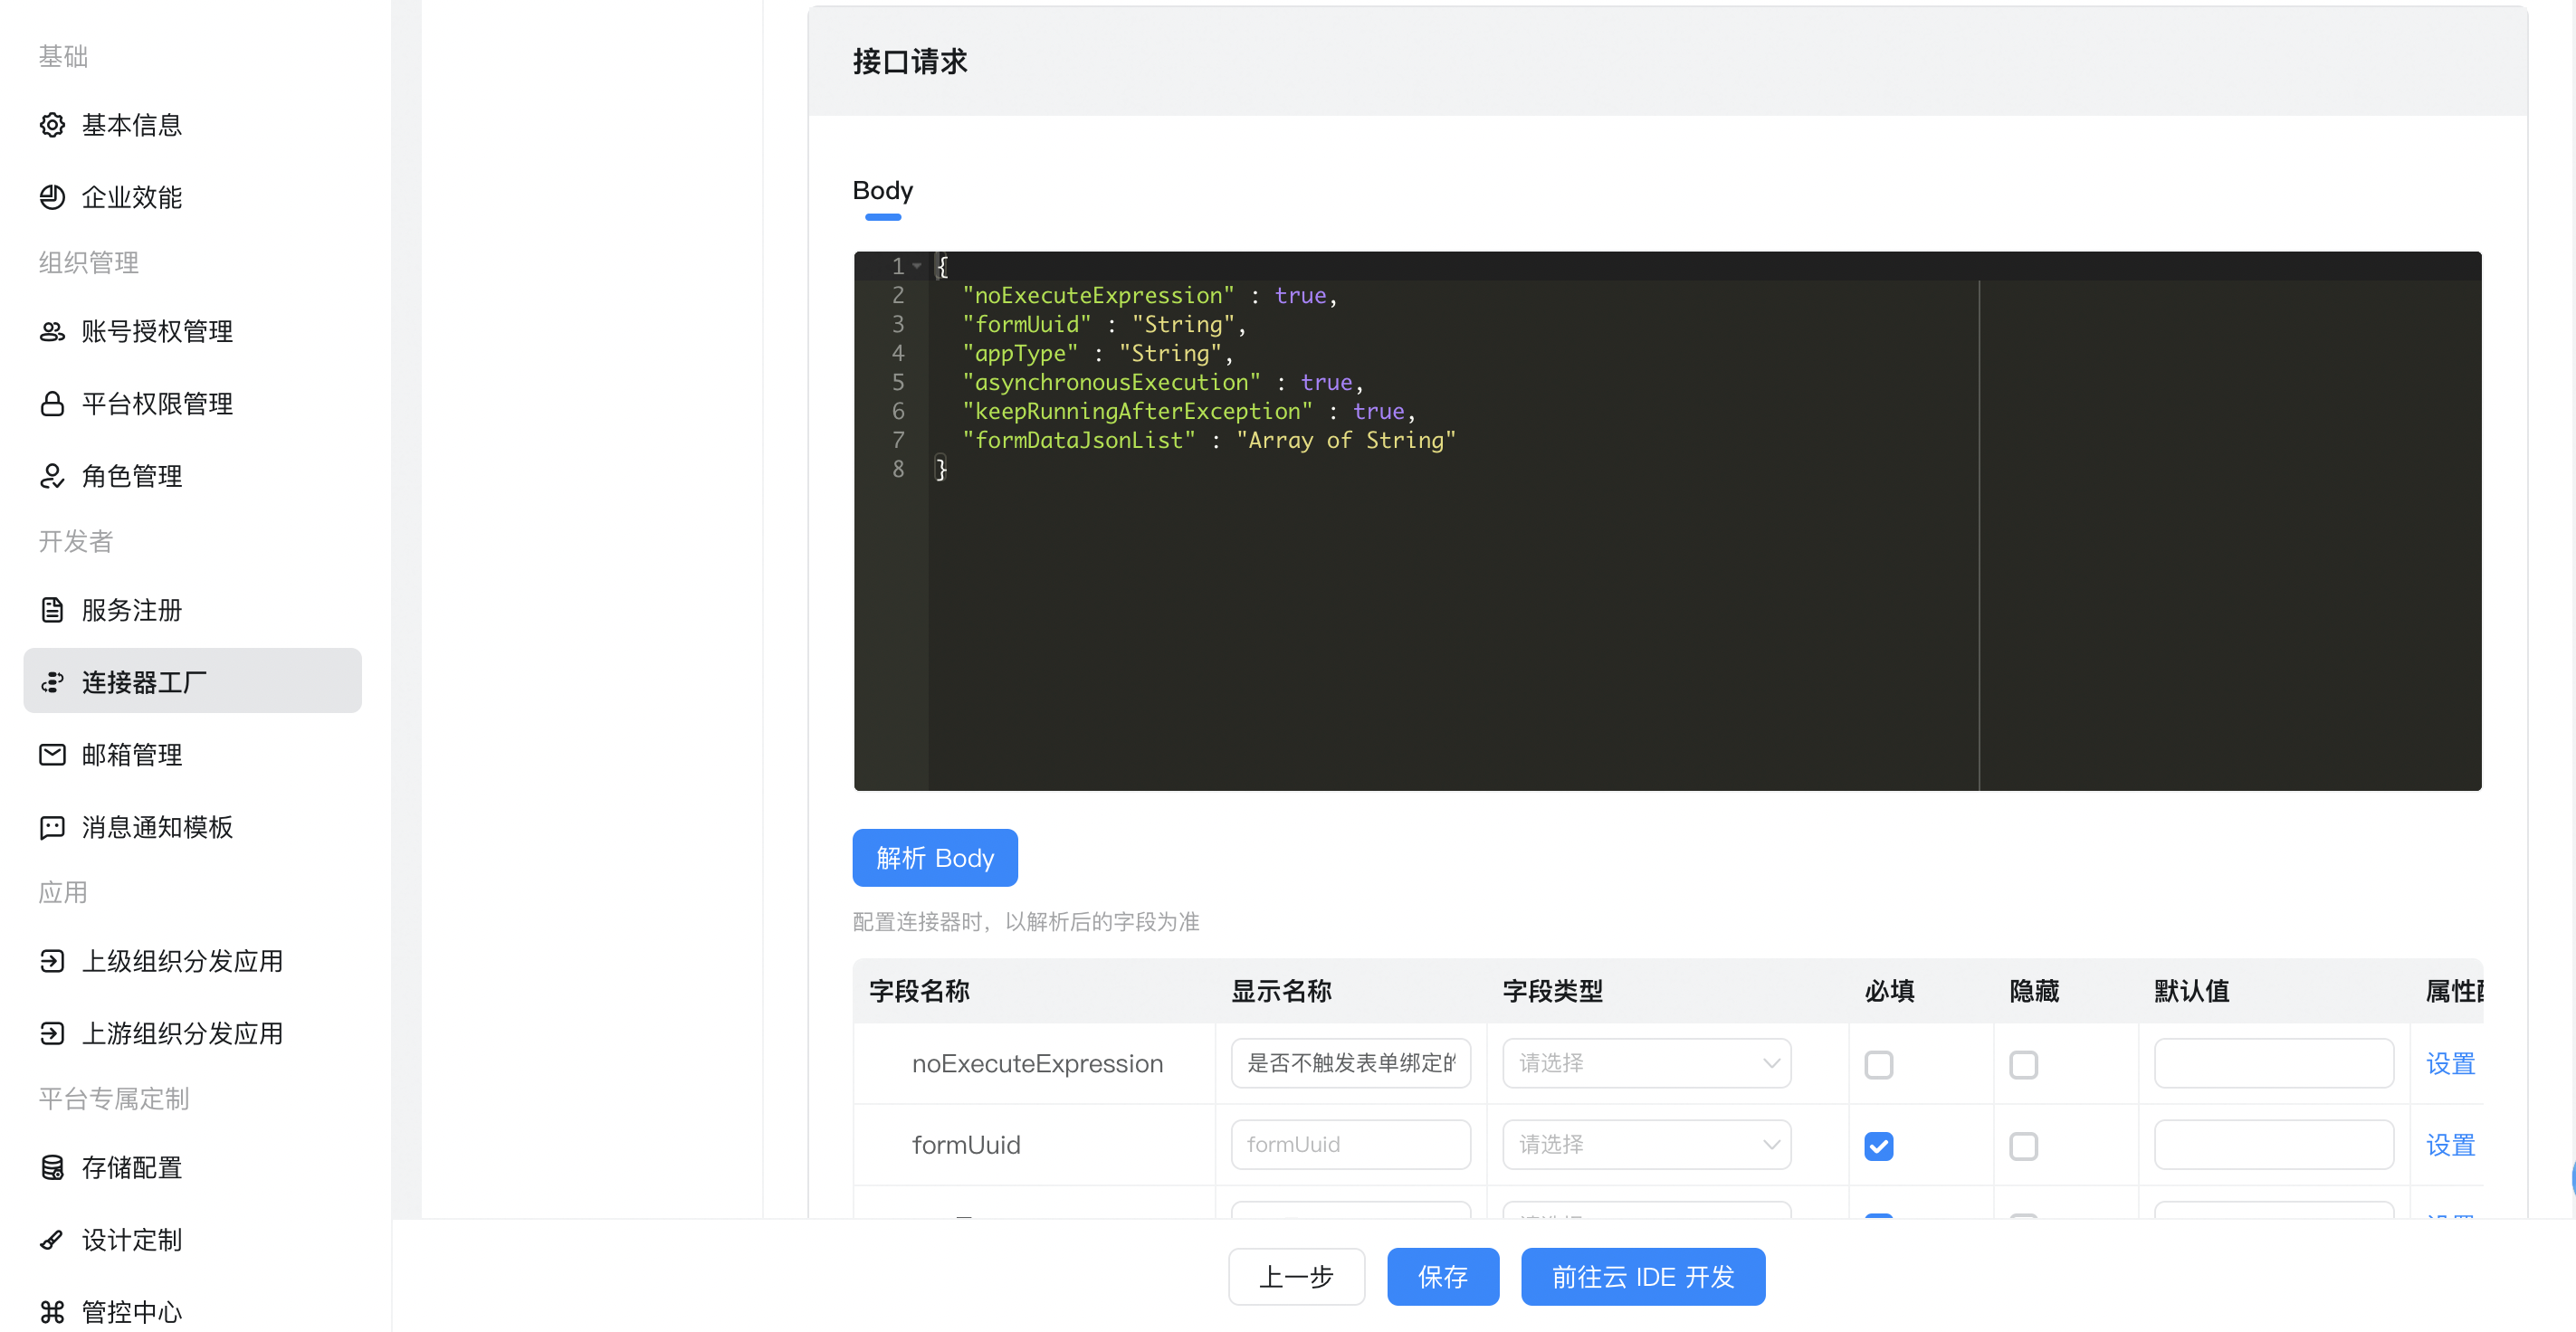
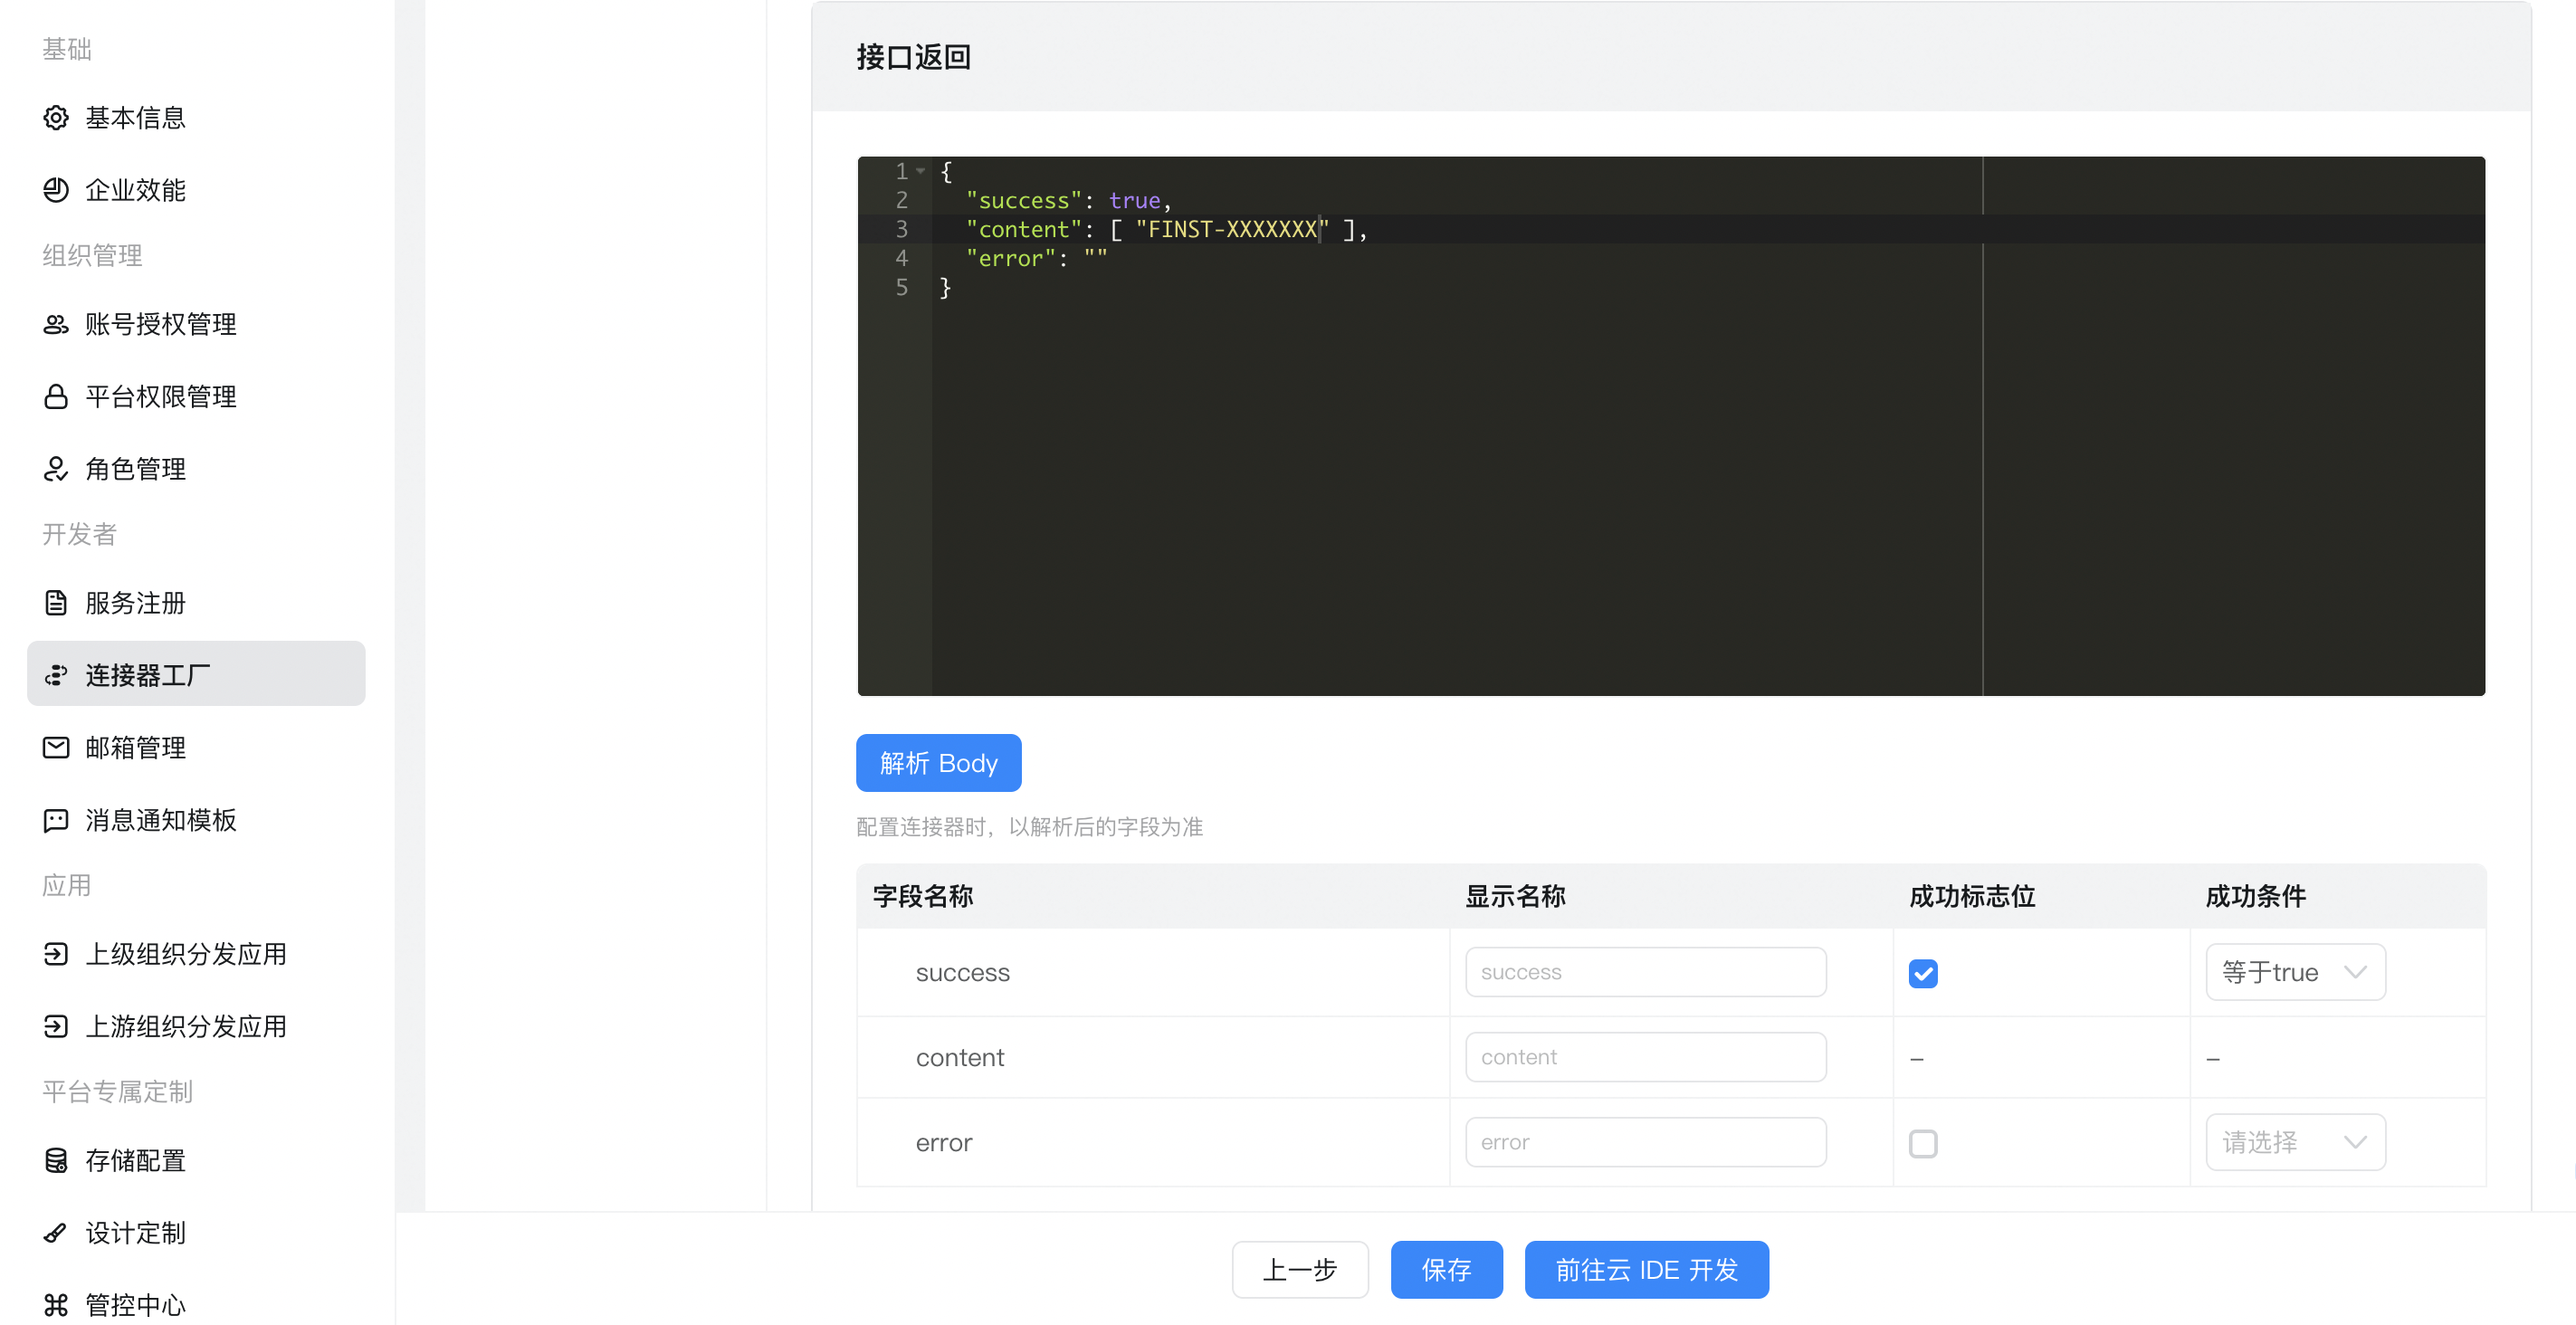
Note that the Body is parsed and the success flag bit is configured.
{
  "noExecuteExpression" : true,
  "formUuid" : "String",
  "appType" : "String",
  "asynchronousExecution" : true,
  "keepRunningAfterException" : true,
  "formDataJsonList" : "Array of String"
}
{
  "success": true,
  "content": [ "FINST-XXXXXXX" ],
  "error": ""
}
2.3. Develop FaaS connectors
2.3.1. Go to Cloud IDE development anddingOpenApiUtil.jsAdd code to the file
You need to save it after adding it.
Windows:Ctrl + S Mac:Command + S
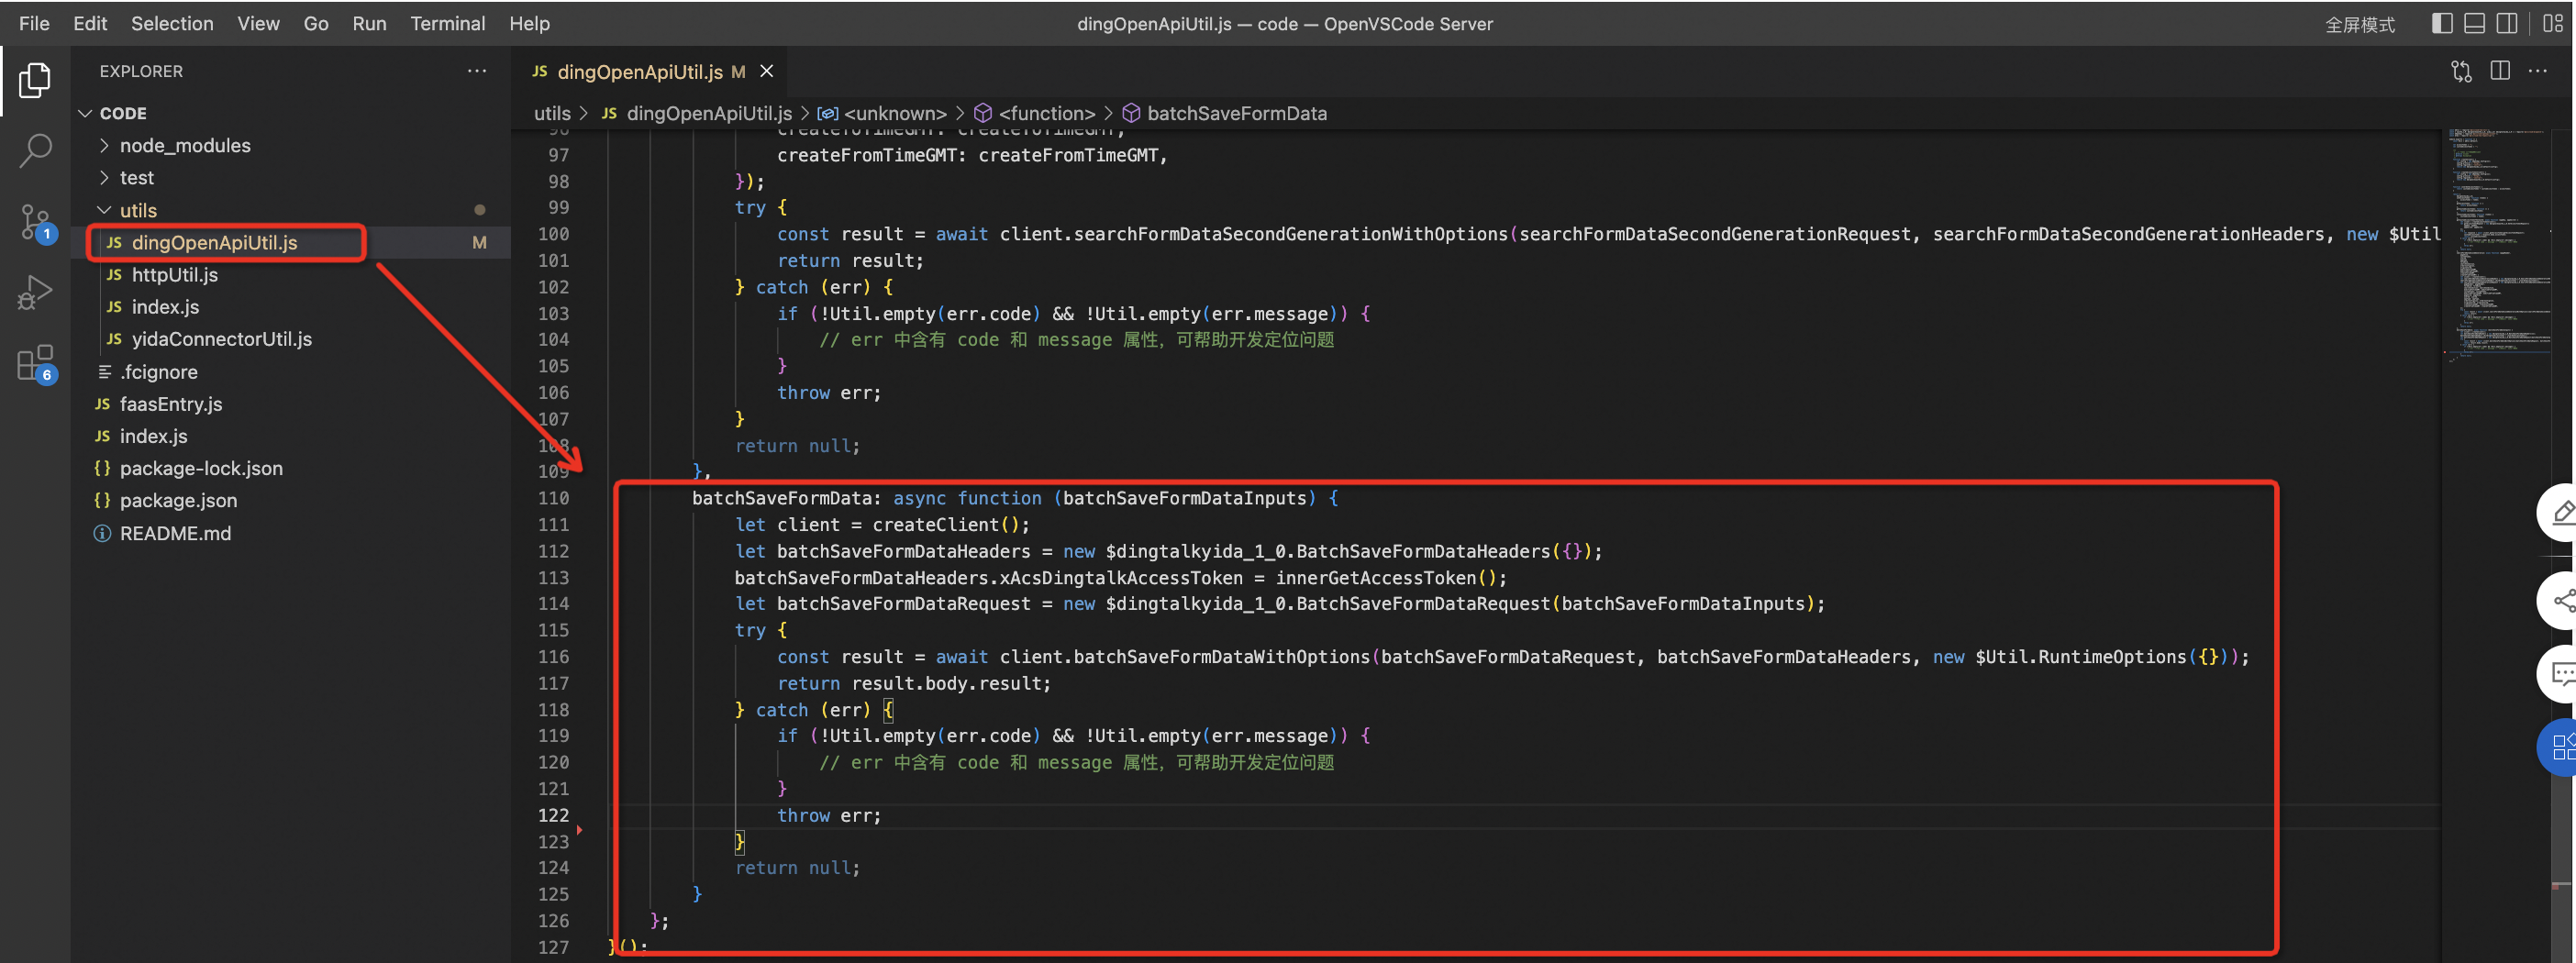
Copy the following code to replace the batchSaveFormData marked in the preceding figure 」.
batchSaveFormData: async function (batchSaveFormDataInputs) {
  let client = createClient();
  let batchSaveFormDataHeaders = new $dingtalkyida_1_0.BatchSaveFormDataHeaders({});
  batchSaveFormDataHeaders.xAcsDingtalkAccessToken = innerGetAccessToken();
  let batchSaveFormDataRequest = new $dingtalkyida_1_0.BatchSaveFormDataRequest(batchSaveFormDataInputs);
  try {
    const result = await client.batchSaveFormDataWithOptions(batchSaveFormDataRequest, batchSaveFormDataHeaders, new $Util.RuntimeOptions({}));
    return result.body.result;
  } catch (err) {
    if (!Util.empty(err.code) && !Util.empty(err.message)) {
      // err 中含有 code 和 message 属性,可帮助开发定位问题
    }
    throw err;
  }
  return null;
}
2.3.2. Replace the code in the faasEntry.js file completely.
Modify the fixed parameters according to the actual situation.
The application credentials applied for with appKey and appSecret as 2.1.
systemToken can be found directly in YIDA application settings-deployment O & M.
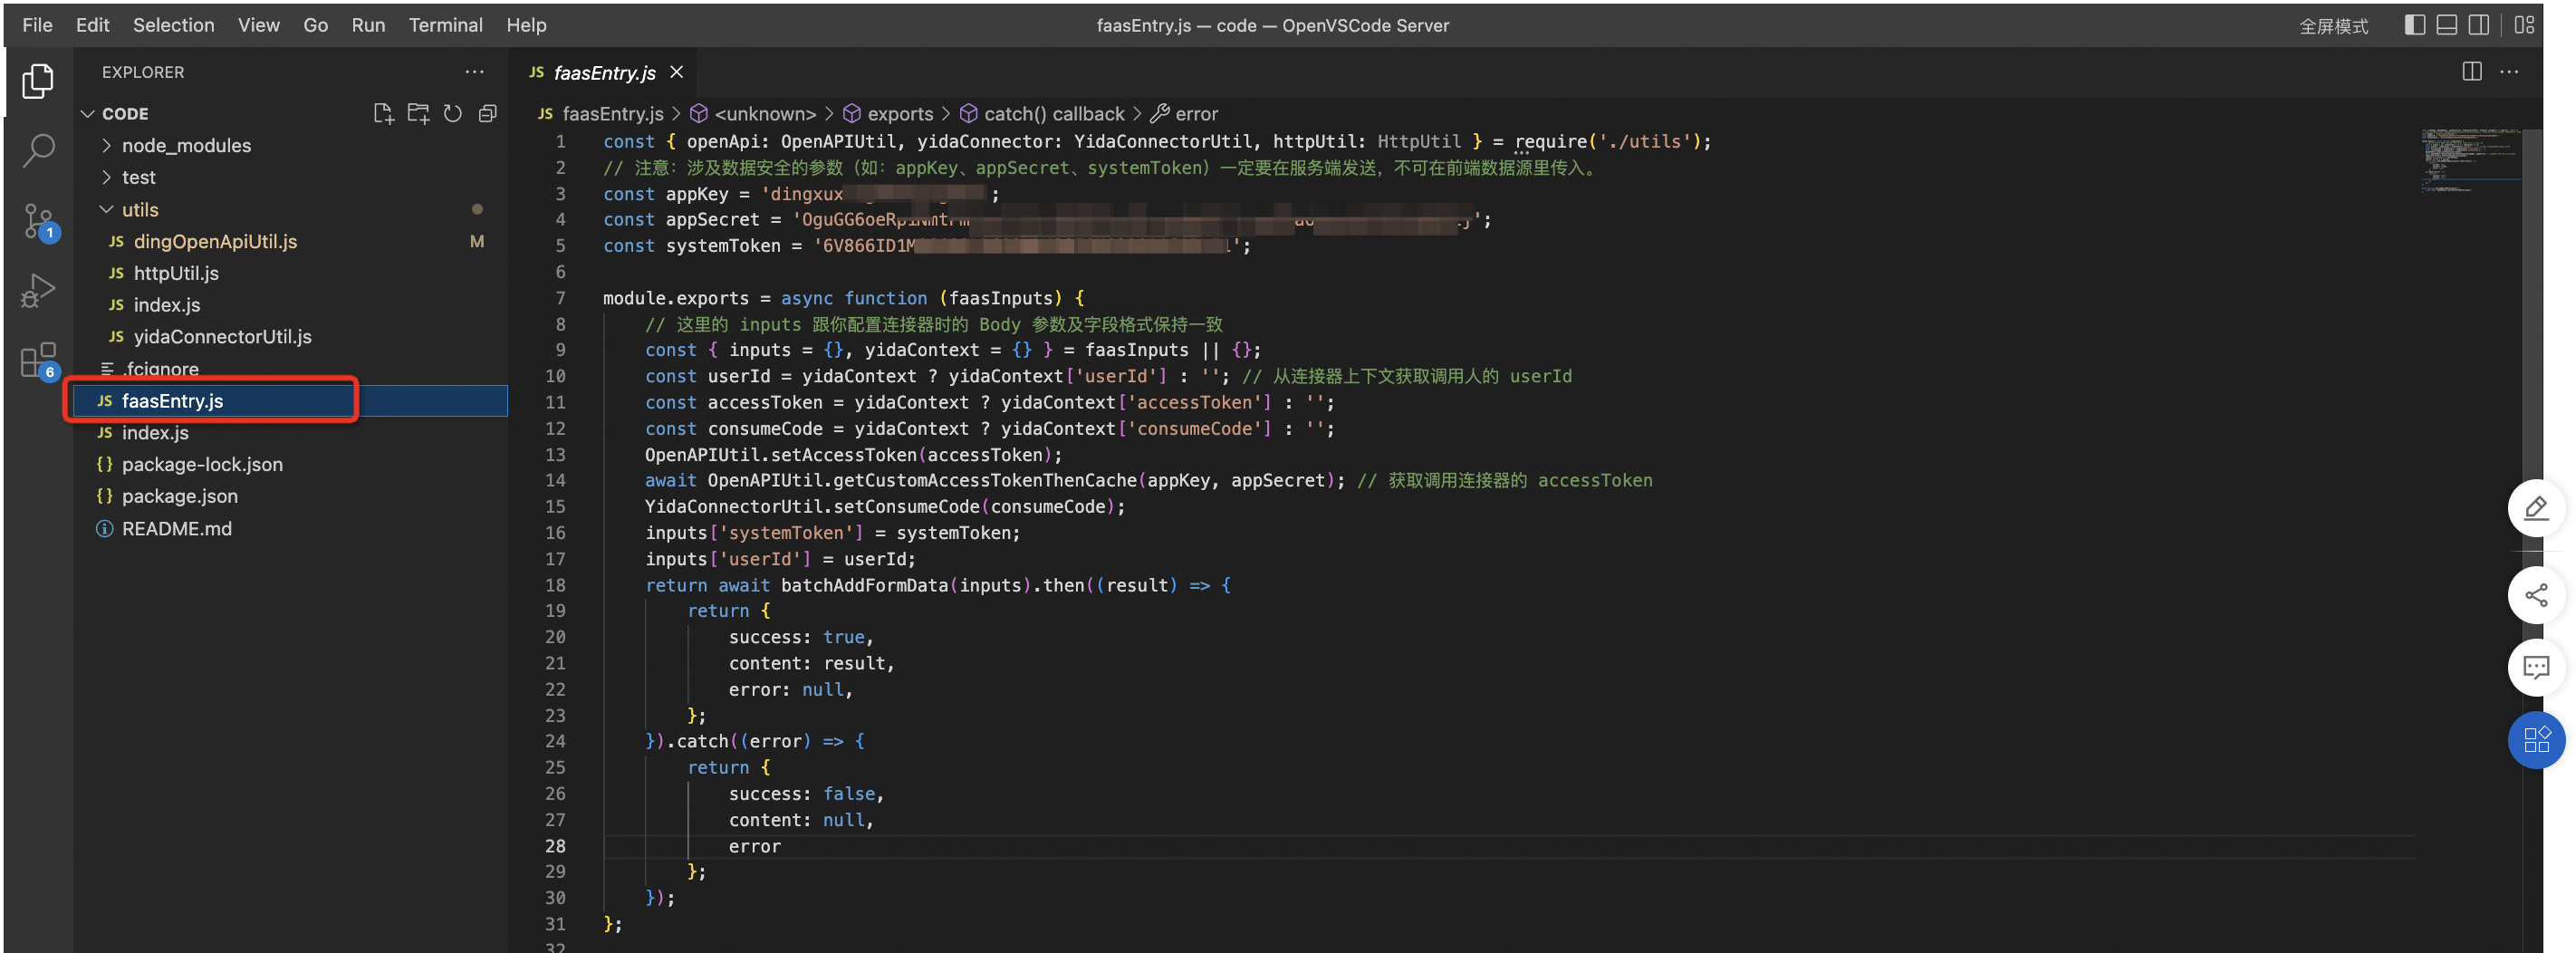
const { openApi: OpenAPIUtil, yidaConnector: YidaConnectorUtil, httpUtil: HttpUtil } = require('./utils');
// 注意:涉及数据安全的参数(如:appKey、appSecret、systemToken)一定要在服务端发送,不可在前端数据源里传入。
const appKey = 'XXXXXXXXXXXXXXXXXXXXXX';
const appSecret = 'XXXXXXXXXXXXXXXXXXXXXXXXX';
const systemToken = 'XXXXXXXXXXXXXXXXXXXXXXXXXXXXXXX';

module.exports = async function (faasInputs) {
    // 这里的 inputs 跟你配置连接器时的 Body 参数及字段格式保持一致
    const { inputs = {}, yidaContext = {} } = faasInputs || {};
    const userId = yidaContext ? yidaContext['userId'] : ''; // 从连接器上下文获取调用人的 userId
    const accessToken = yidaContext ? yidaContext['accessToken'] : '';
    const consumeCode = yidaContext ? yidaContext['consumeCode'] : '';
    OpenAPIUtil.setAccessToken(accessToken);
    await OpenAPIUtil.getCustomAccessTokenThenCache(appKey, appSecret); // 获取调用连接器的 accessToken
    YidaConnectorUtil.setConsumeCode(consumeCode);
    inputs['systemToken'] = systemToken;
    inputs['userId'] = userId;
    return await batchSaveFormData(inputs).then((result) => {
        return {
            success: true,
            content: result,
            error: null,
        };
    }).catch((error) => {
        return {
            success: false,
            content: null,
            error,
        };
    });
};

async function batchSaveFormData(inputs) {
    return await OpenAPIUtil.batchSaveFormData(inputs);
}
2.4. Deploy FaaS connector
Save the added code.
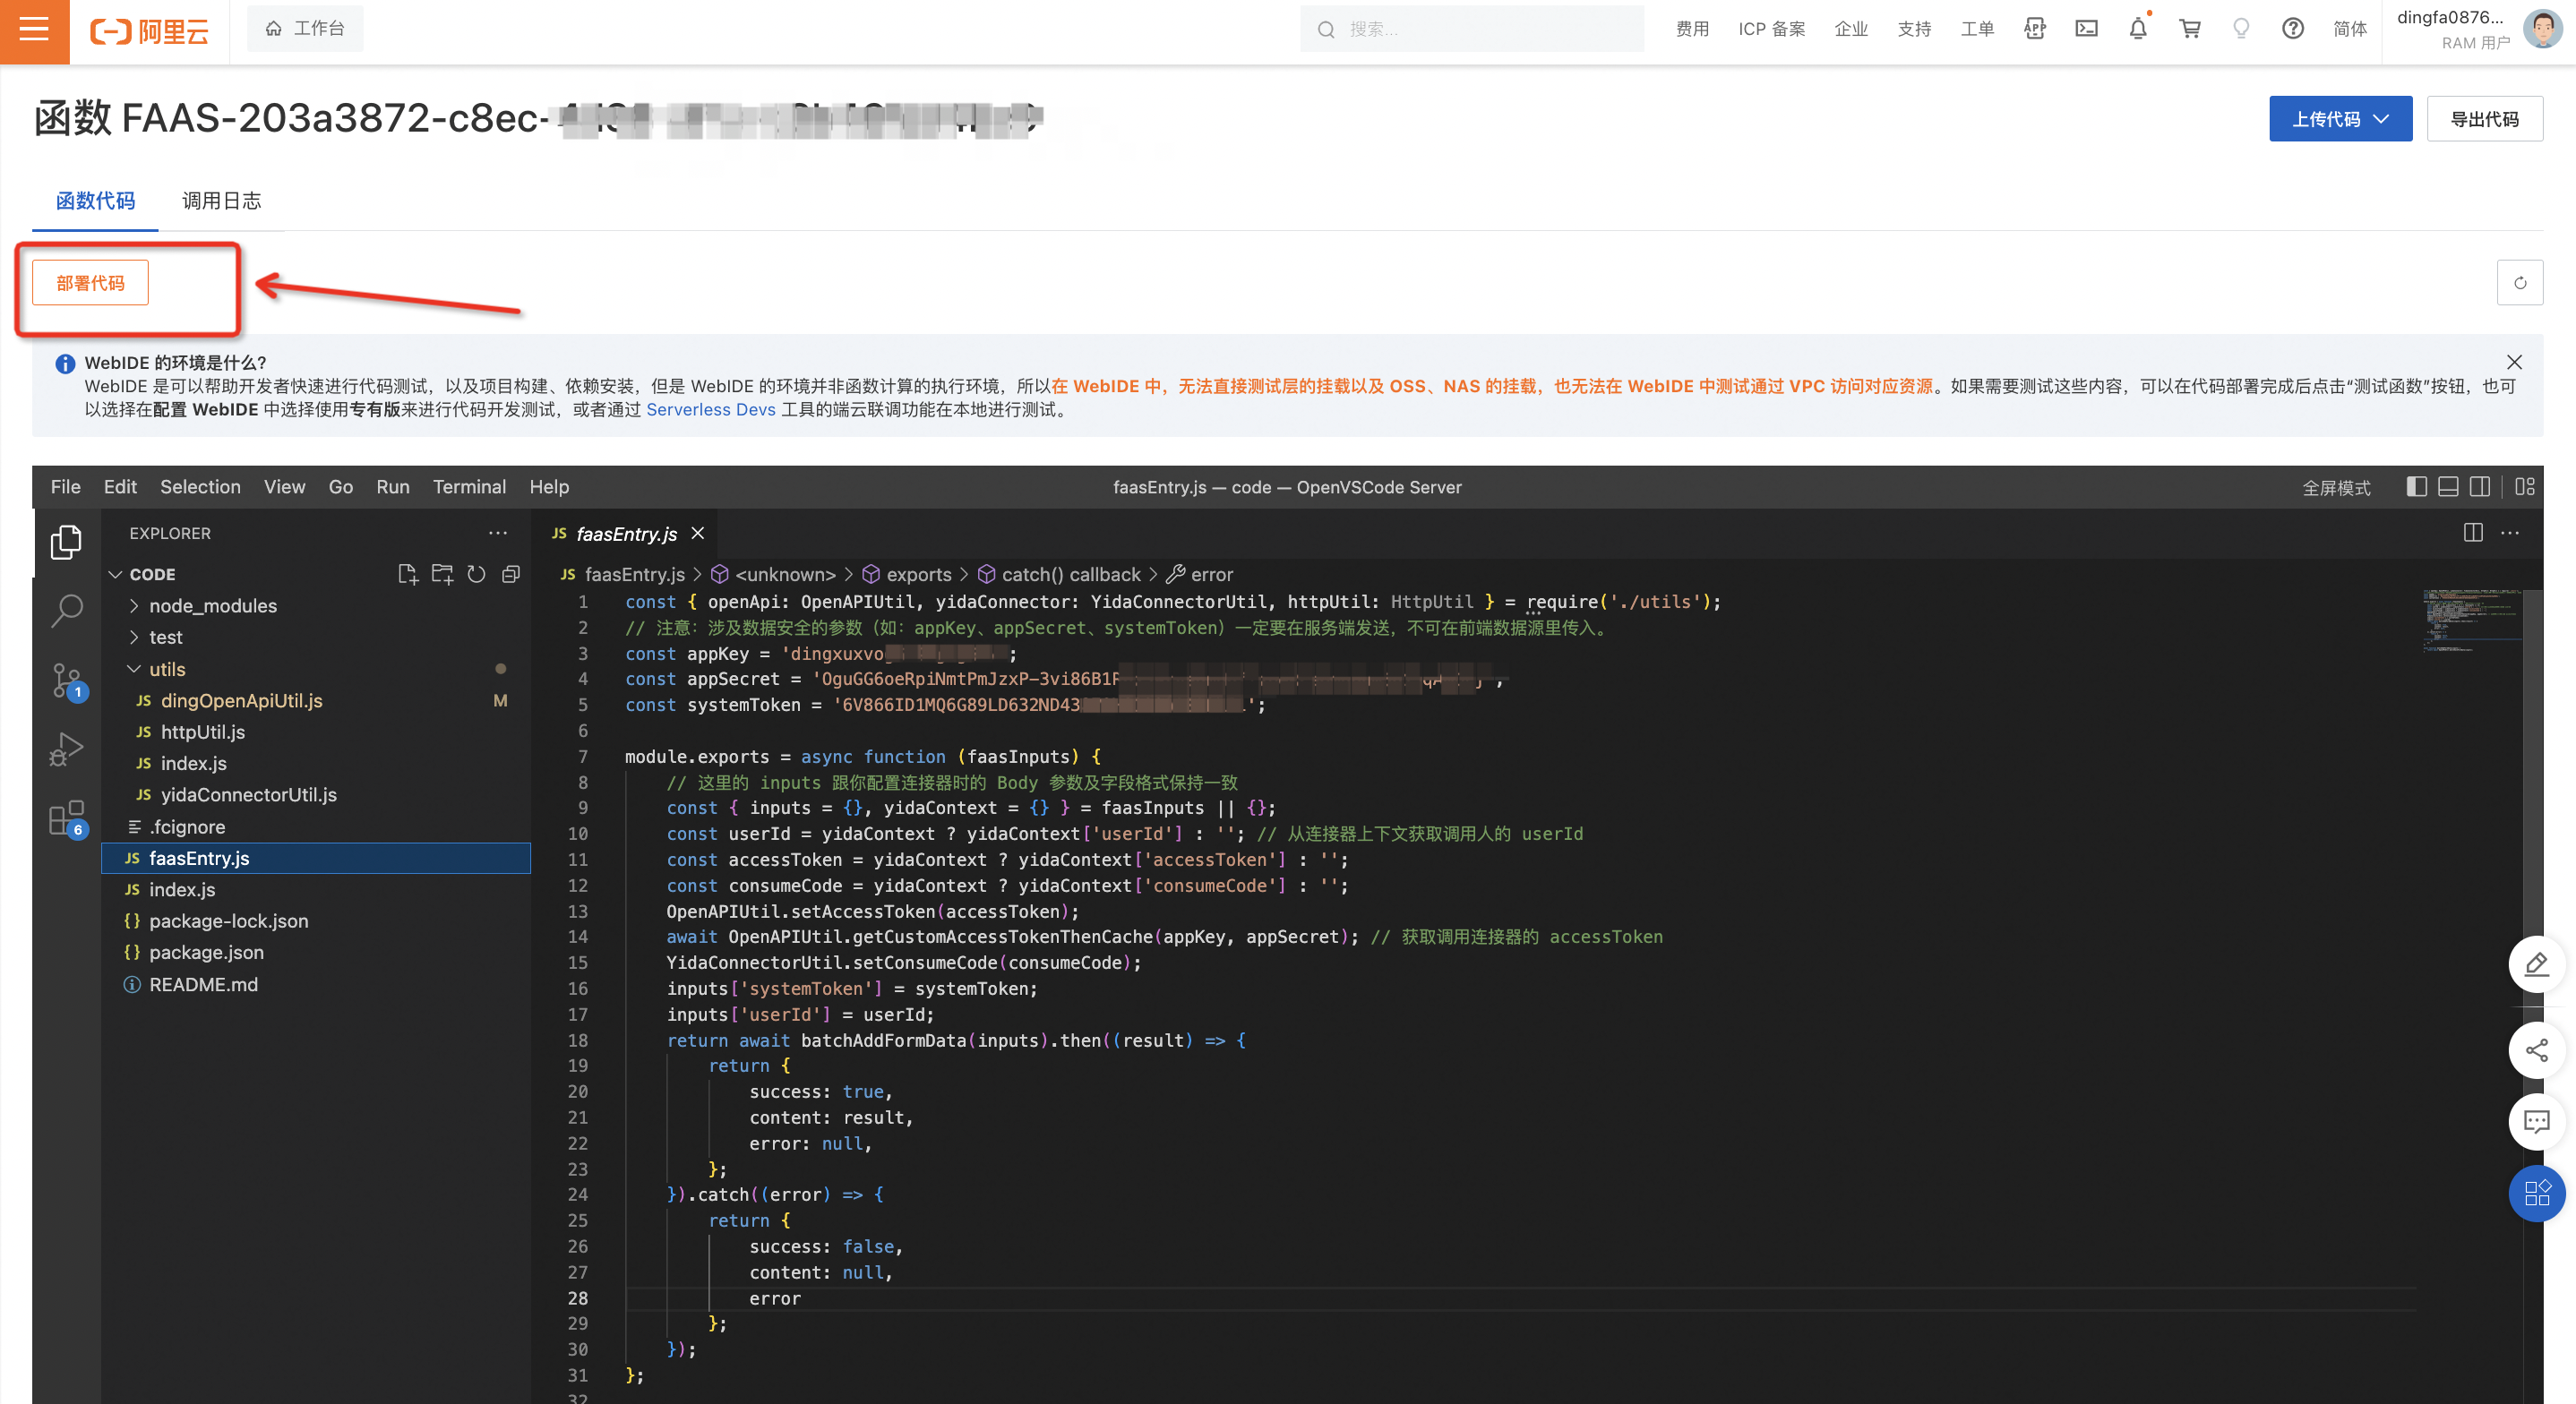
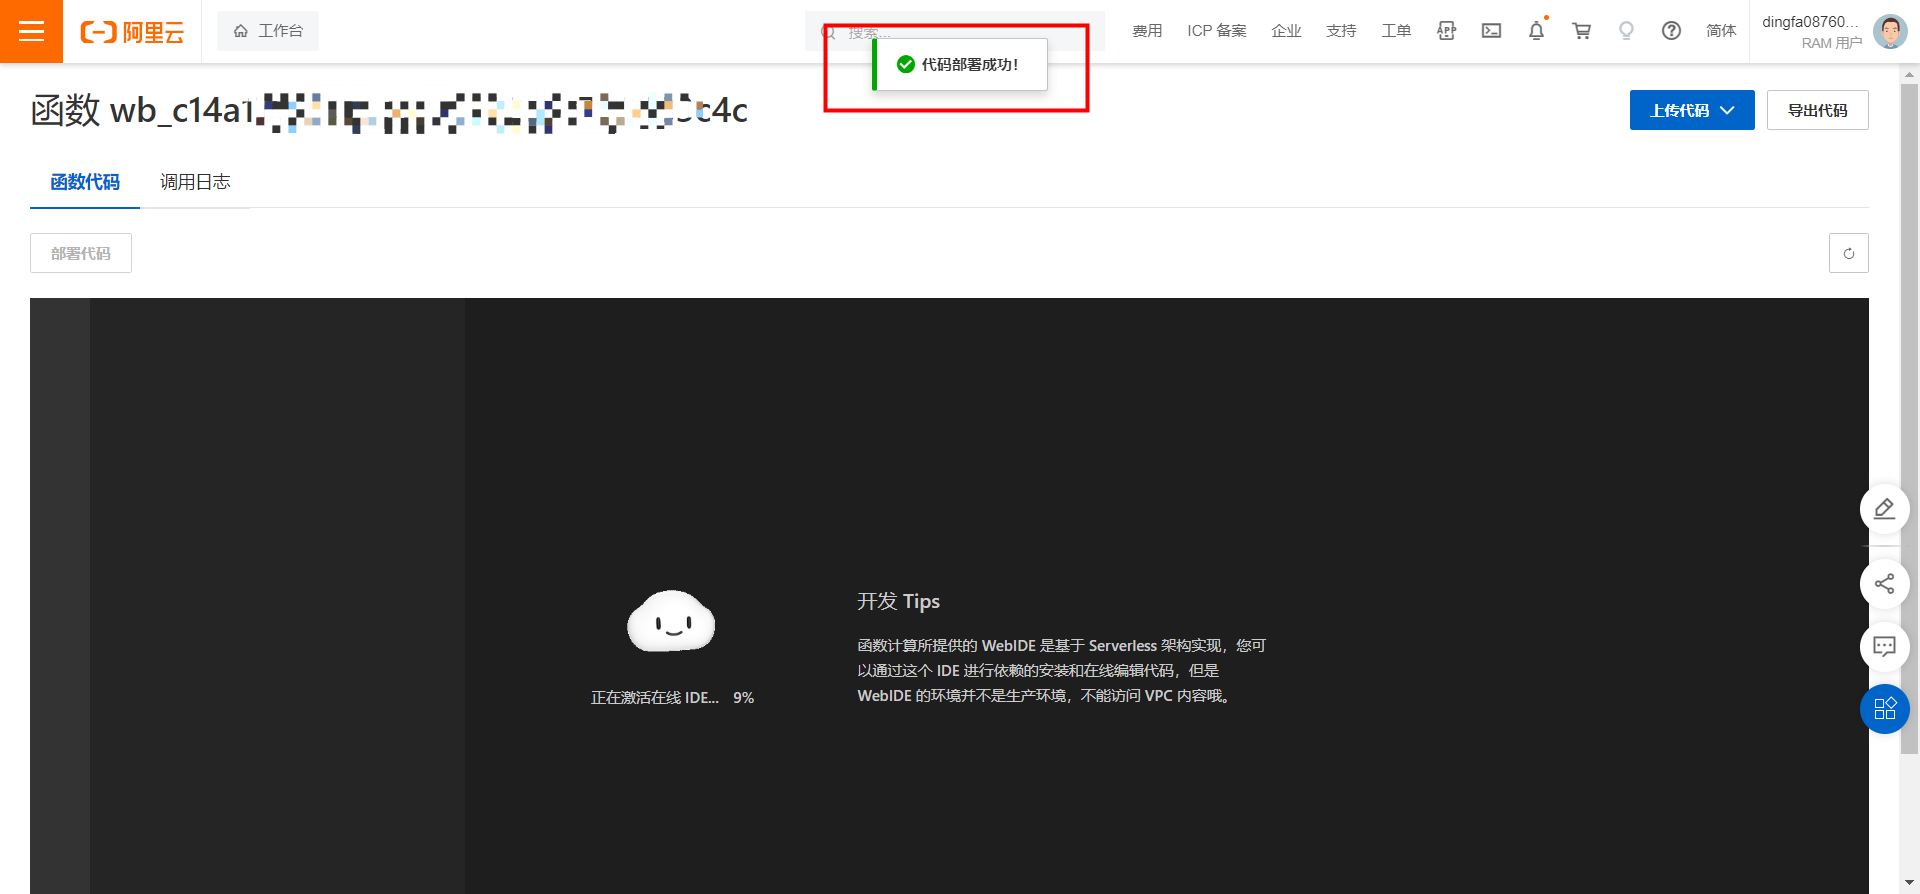
When the code is successfully deployed, the FaaS Connector Cloud IDE development is completed.
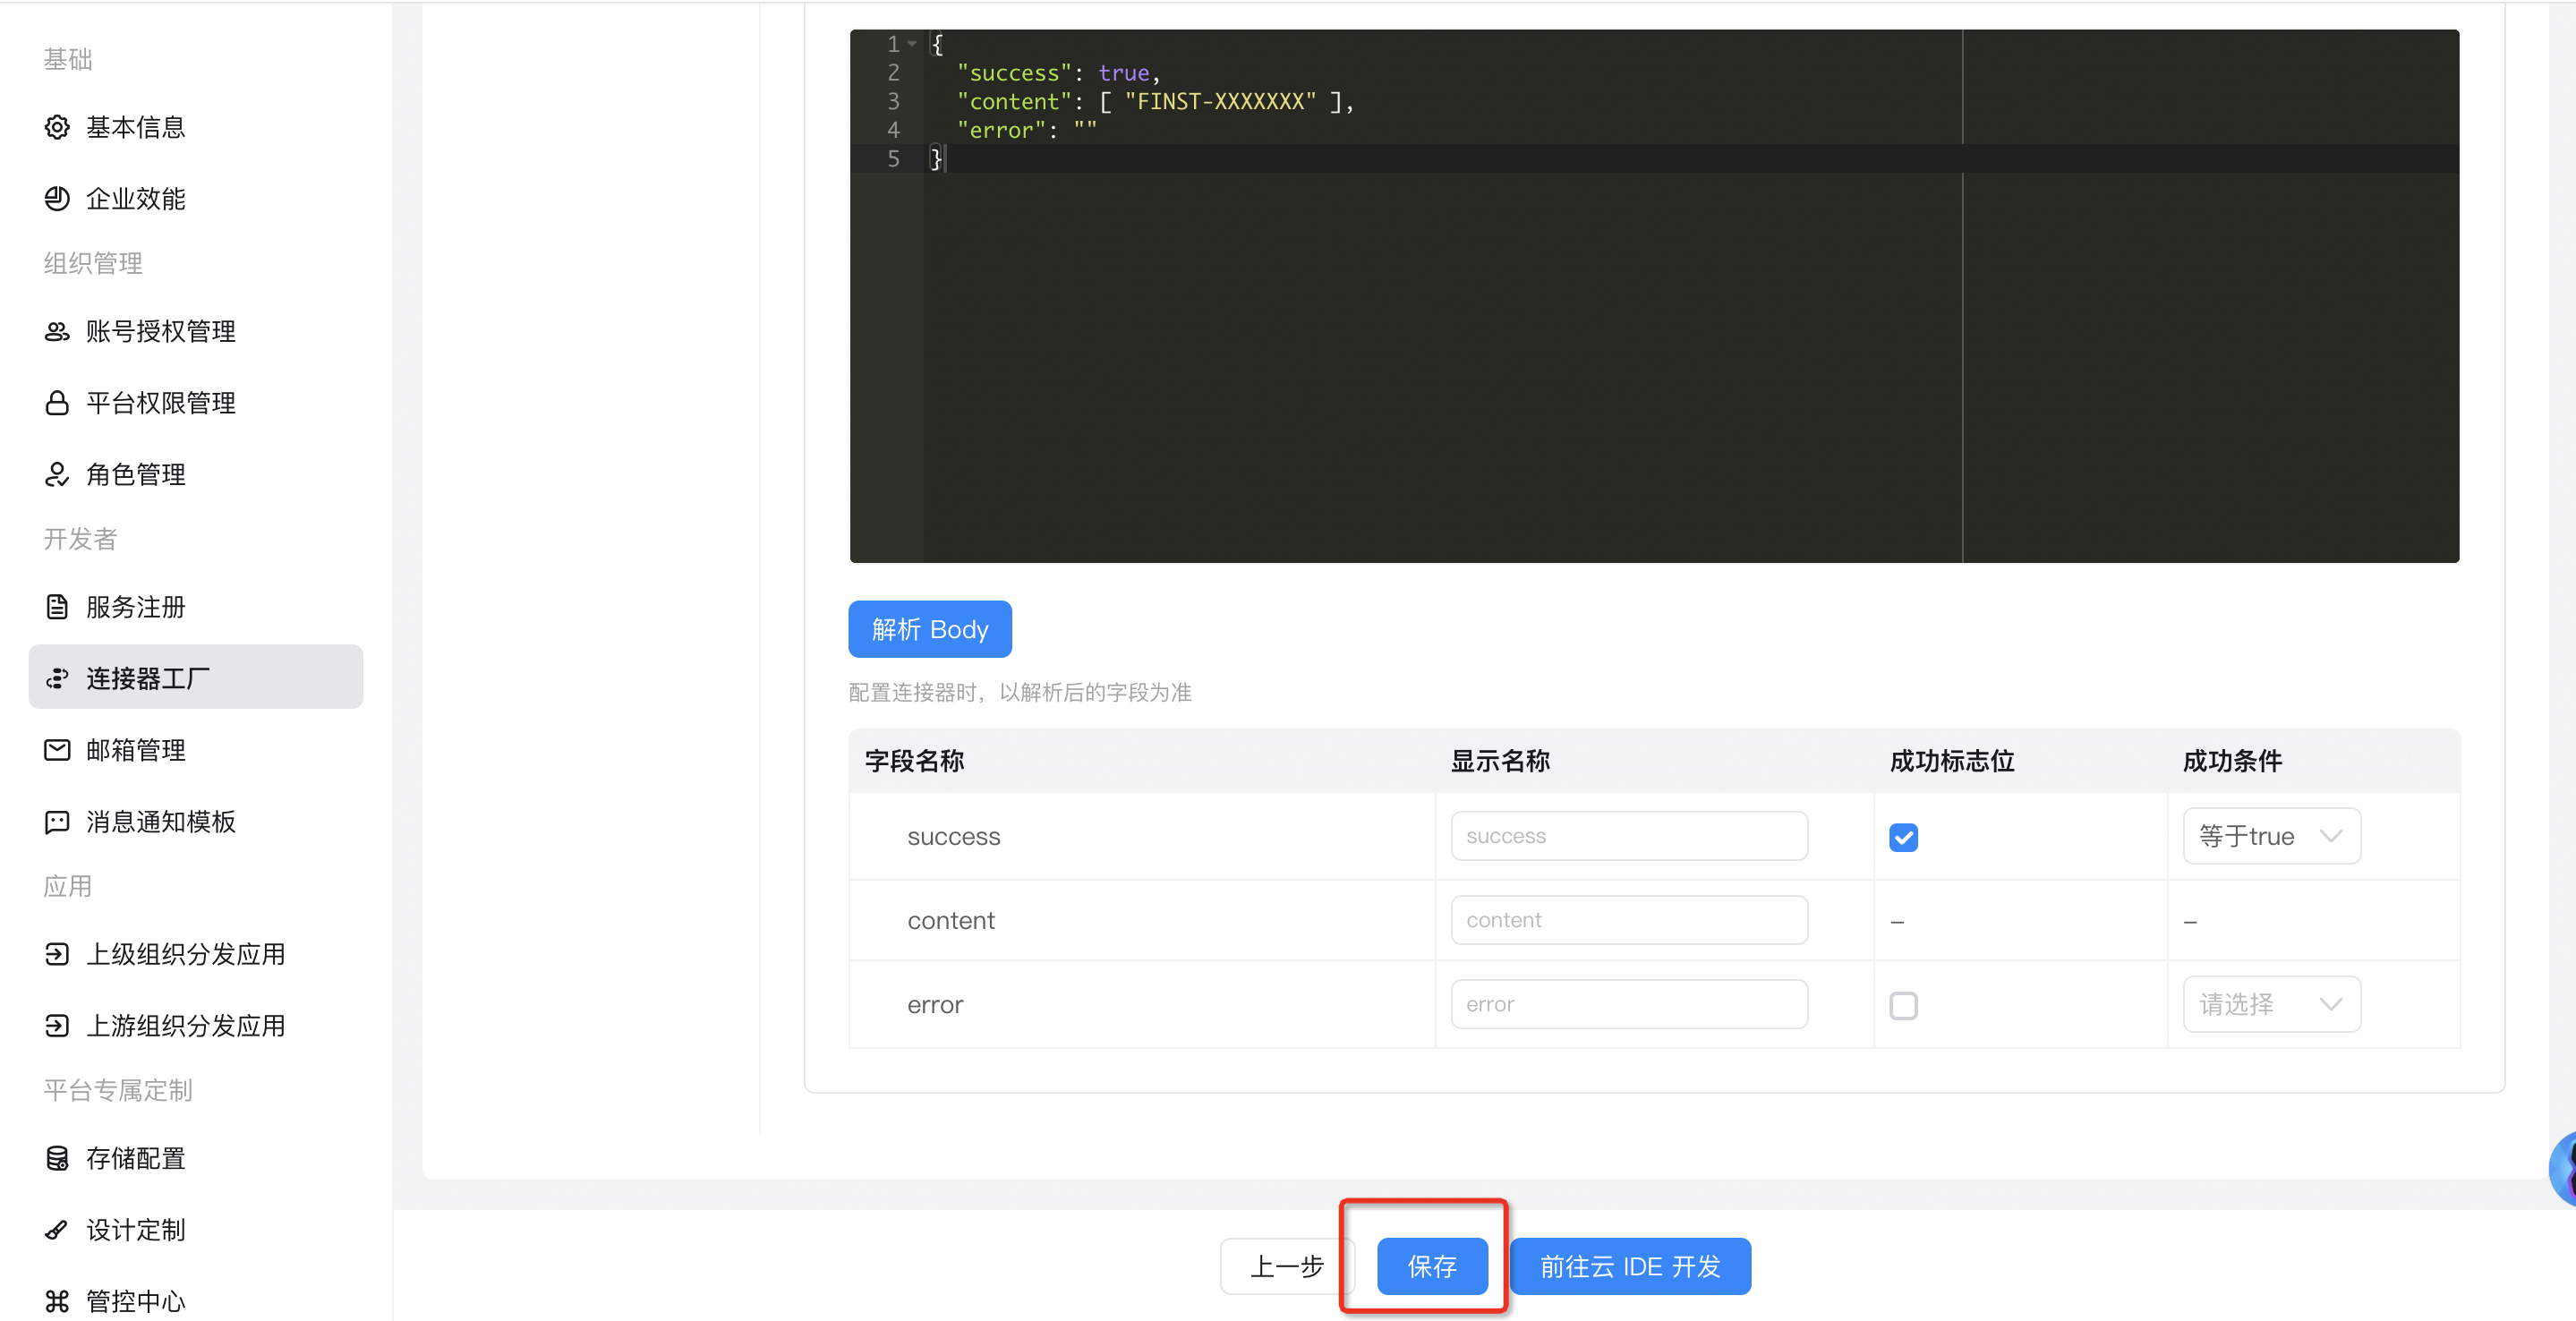
2.5. Return to the connector configuration and click save
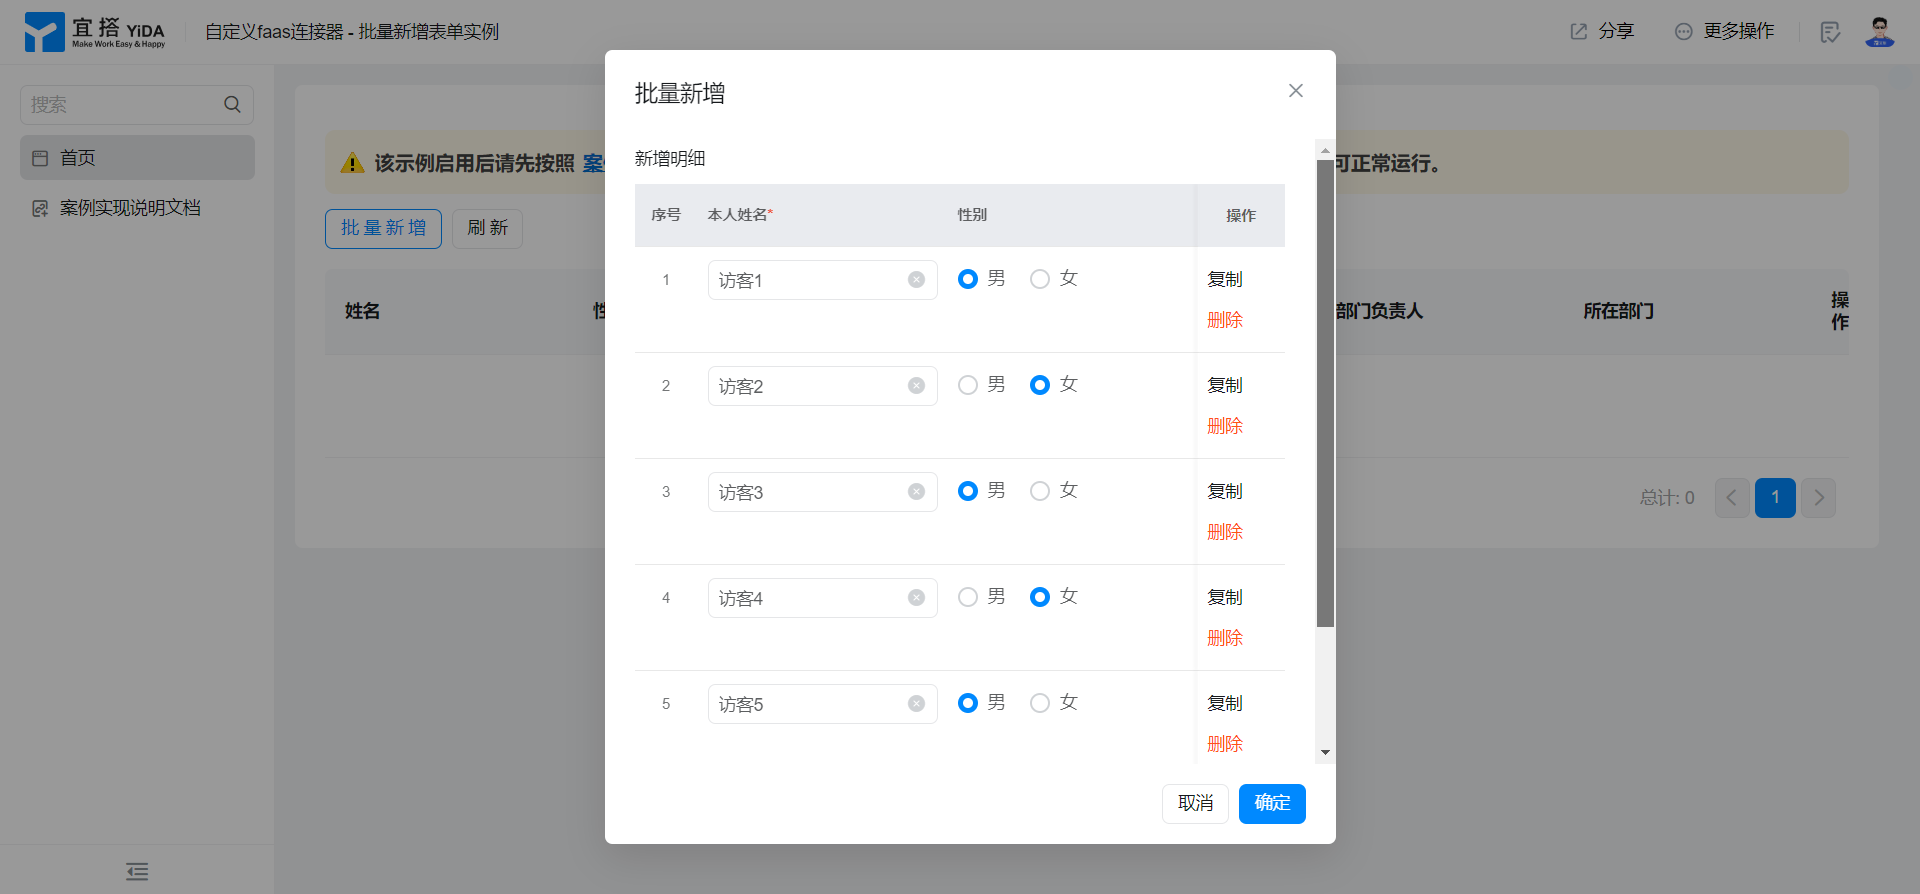
2.6. On the YIDA page, configure data sources and use data sources
2.6.1. Obtain data and display it in a table
For more information, see the following example. This example is an upgrade to the new data feature in the following example.
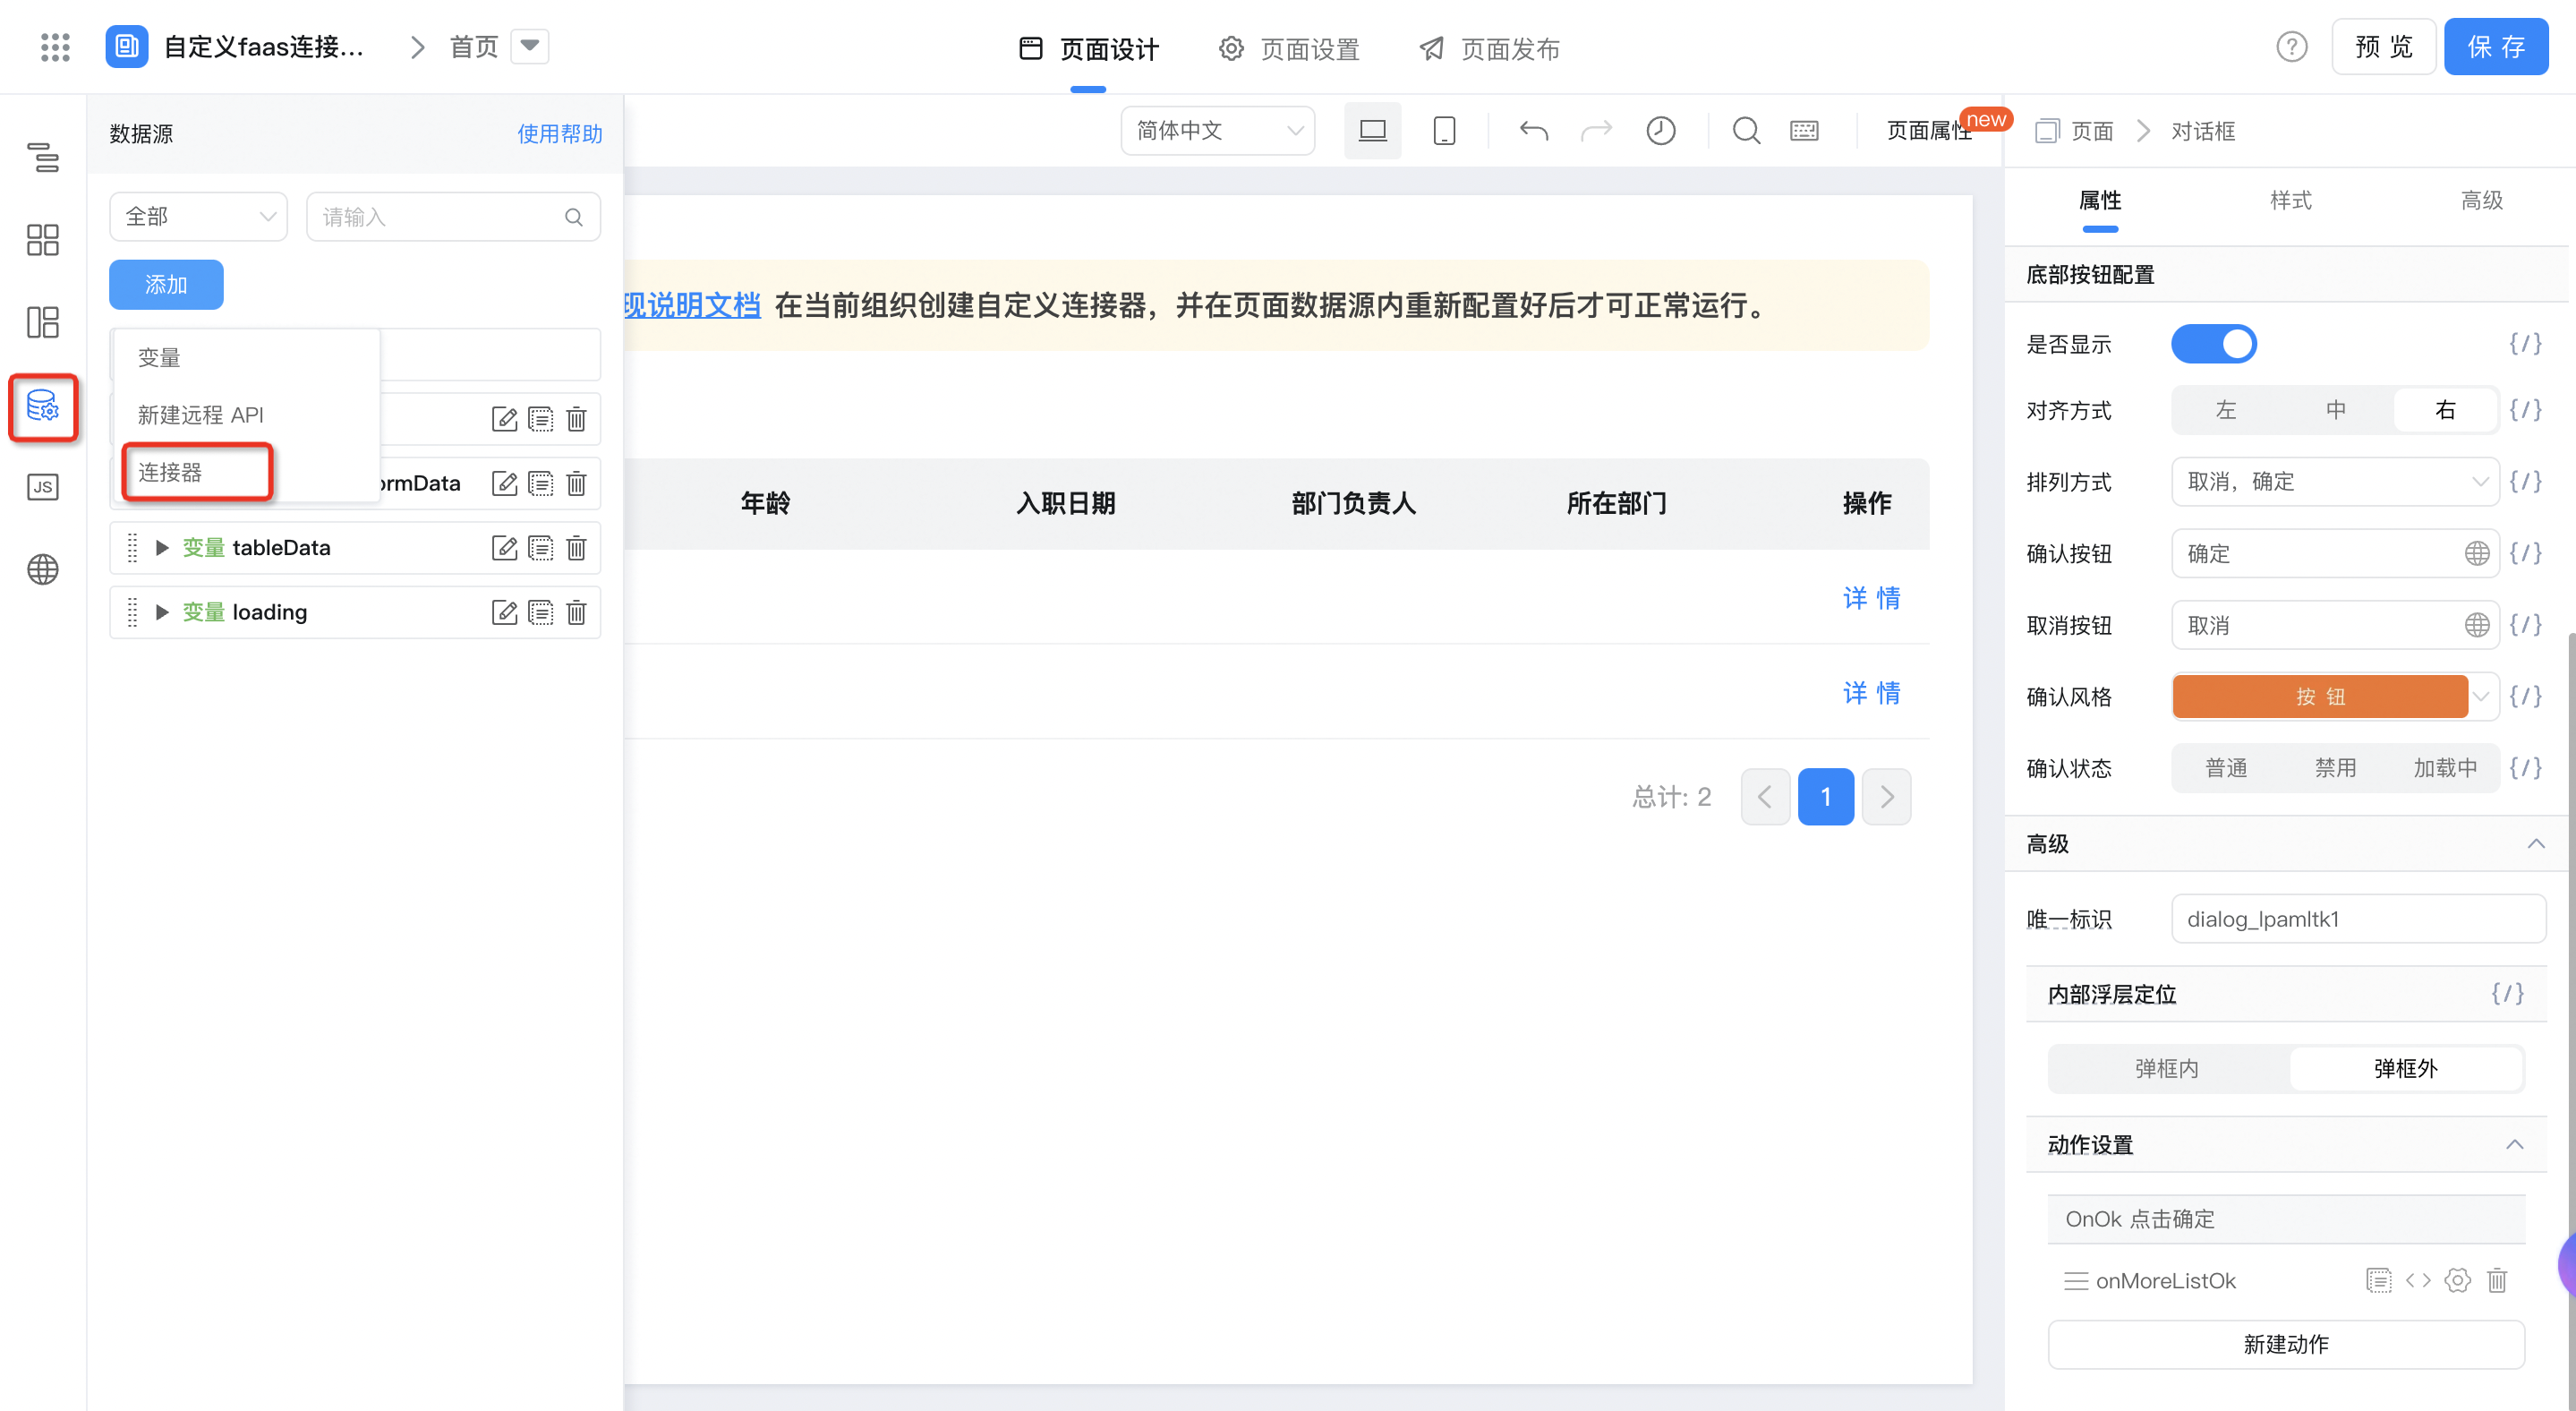
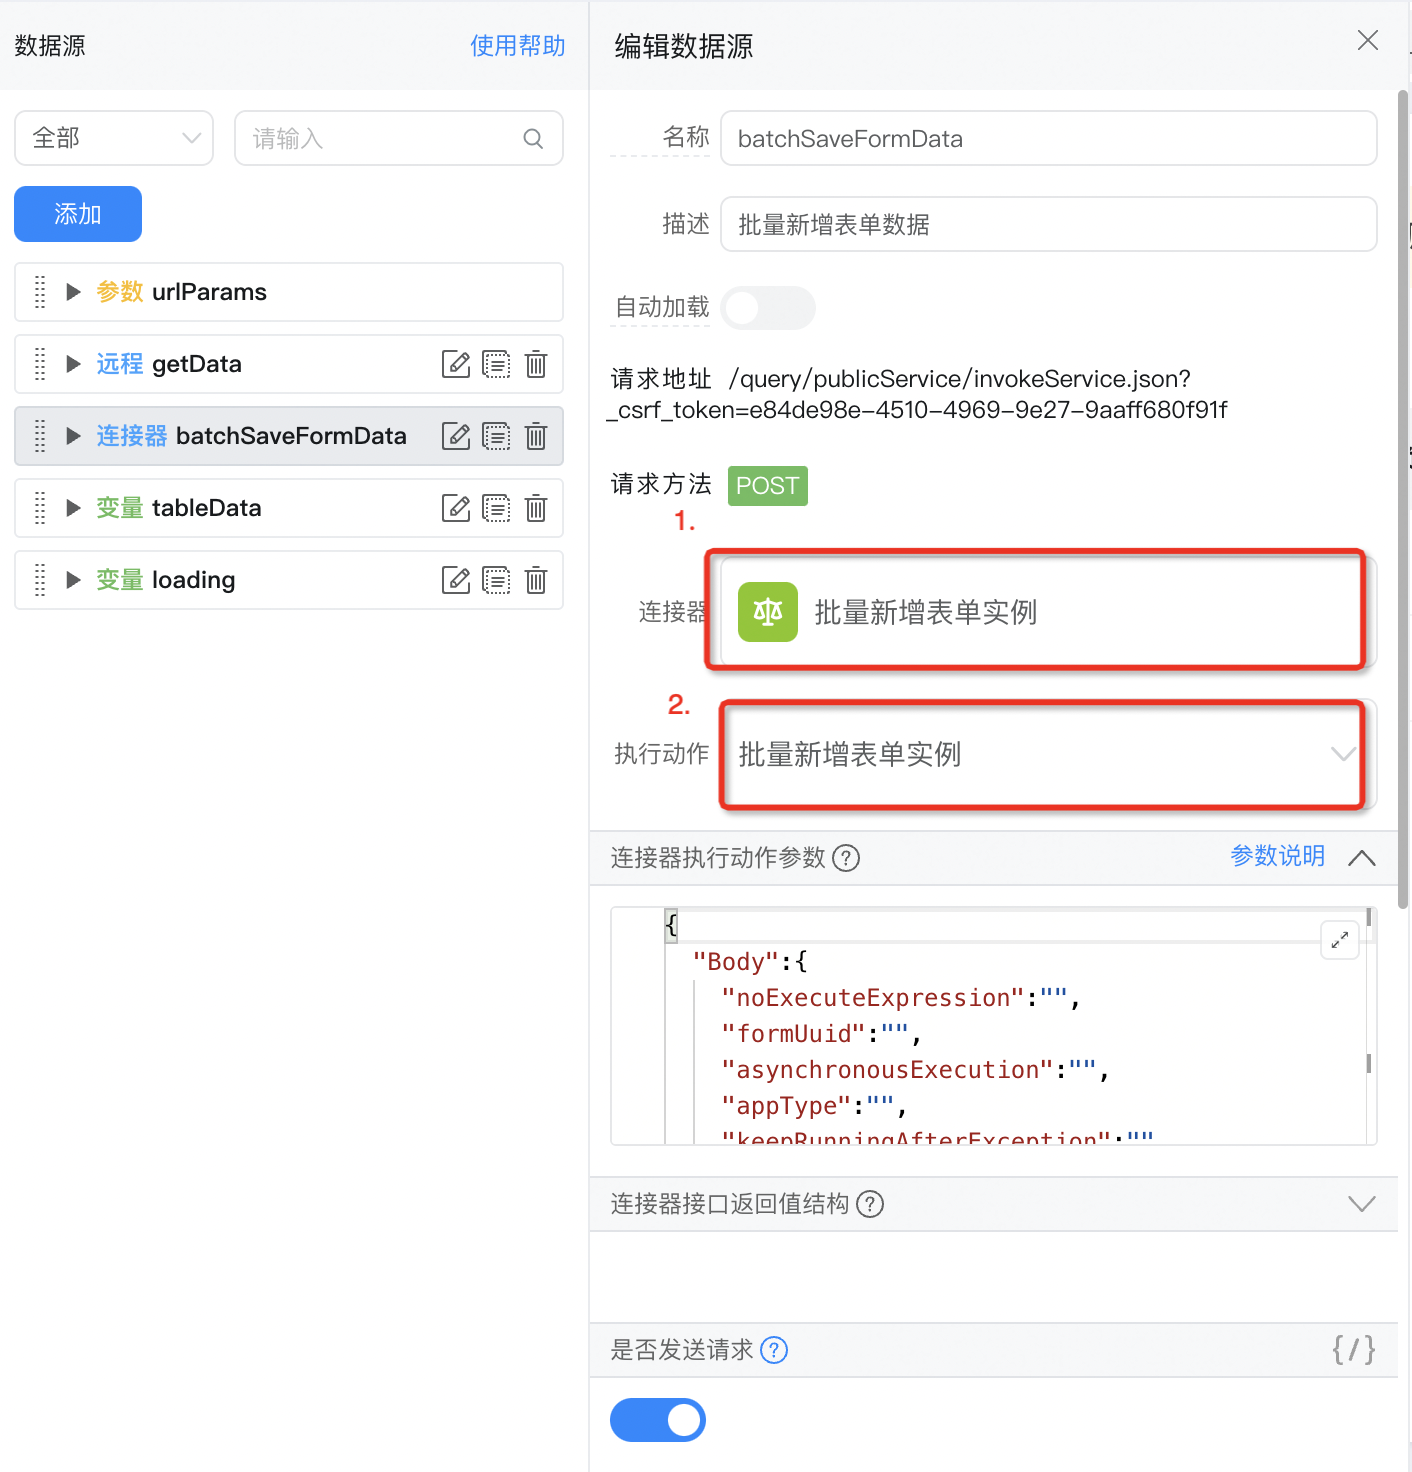
2.6.2. Select the connector you just created in the data source
2.6.3. The frontend directly calls the data source.
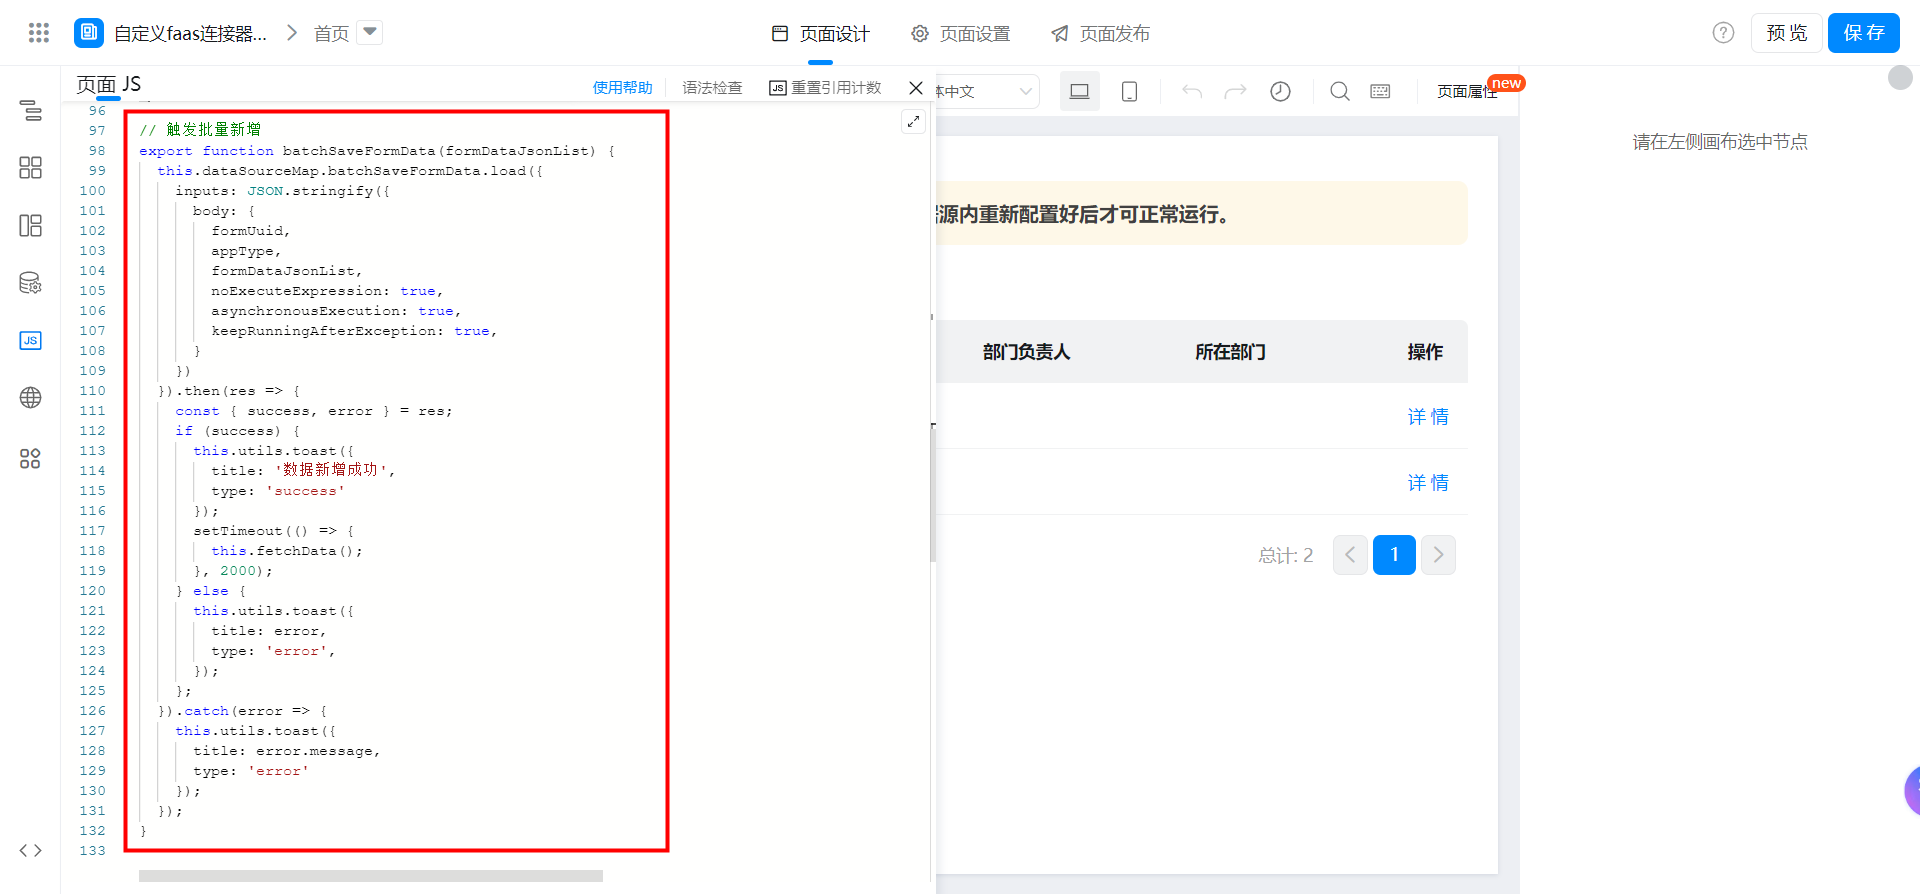
// 触发批量新增
export function batchSaveFormData(formDataJsonList) {
  this.dataSourceMap.batchSaveFormData.load({
    inputs: JSON.stringify({
      body: {
        formUuid,
        appType,
        formDataJsonList,
        noExecuteExpression: true,
        asynchronousExecution: true,
        keepRunningAfterException: true,
      }
    })
  }).then(res => {
    const { success, error } = res;
    if (success) {
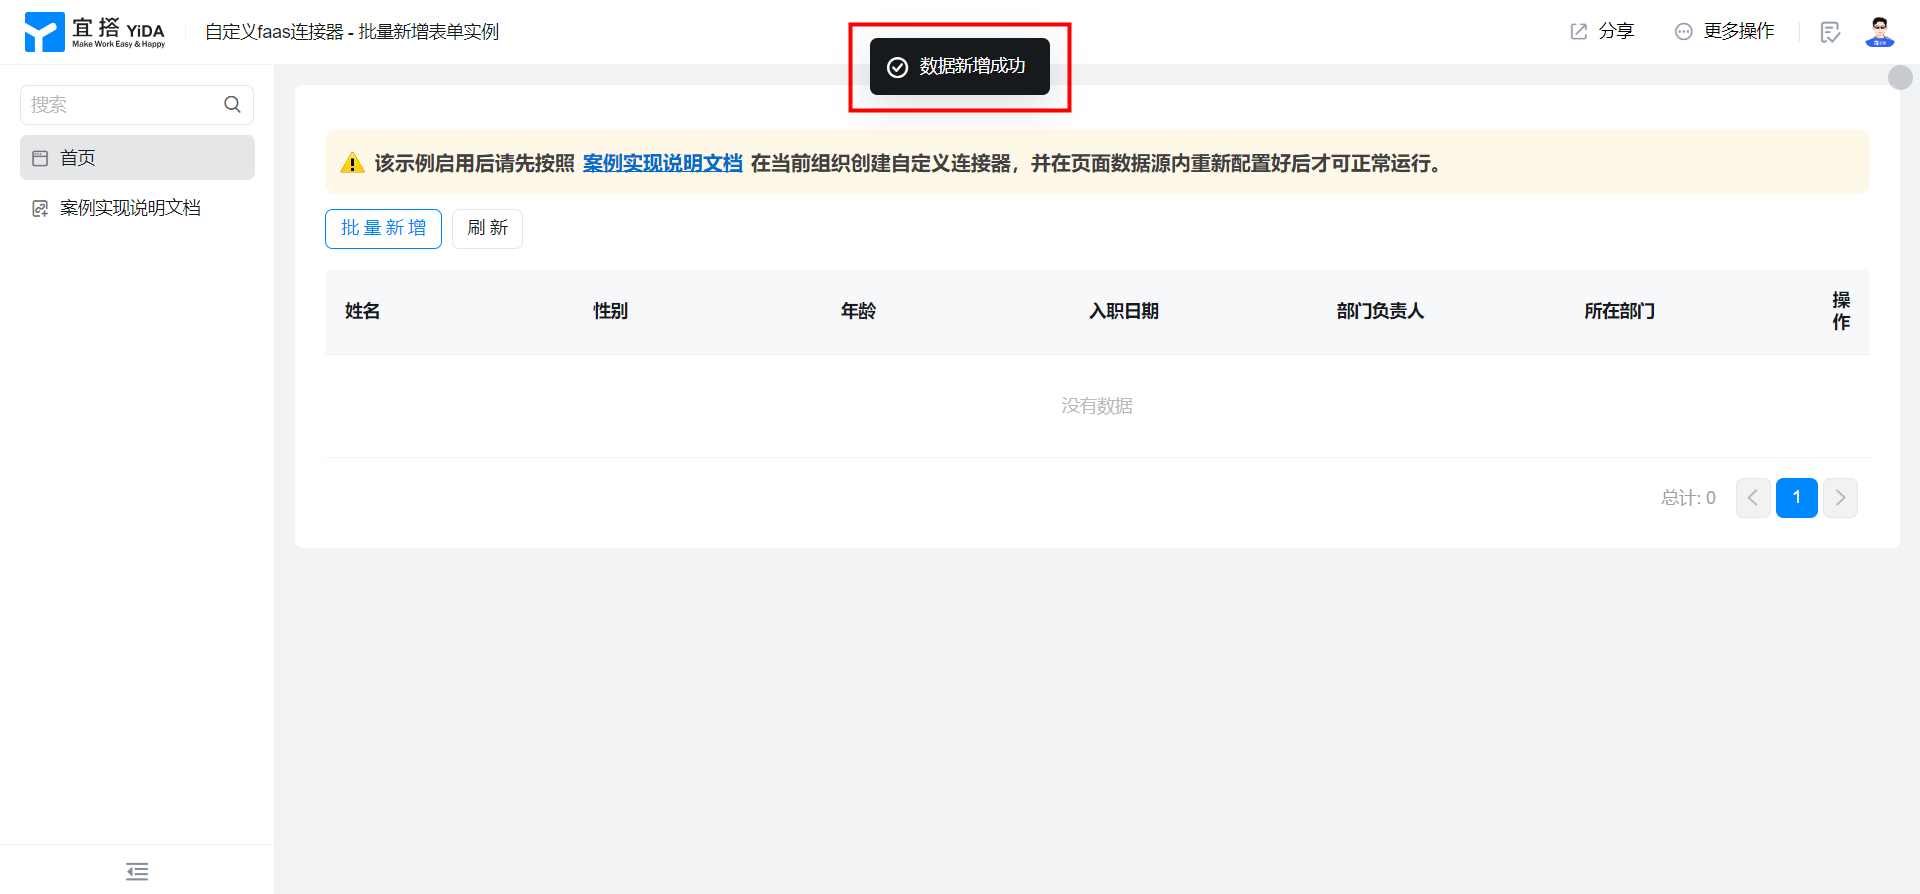
      this.utils.toast({
        title: '数据新增成功',
        type: 'success'
      });
      setTimeout(() => {
        this.fetchData();
      }, 2000);
    } else {
      this.utils.toast({
        title: error,
        type: 'error',
      });
    };
  }).catch(error => {
    this.utils.toast({
      title: error.message,
      type: 'error'
    });
  });
}
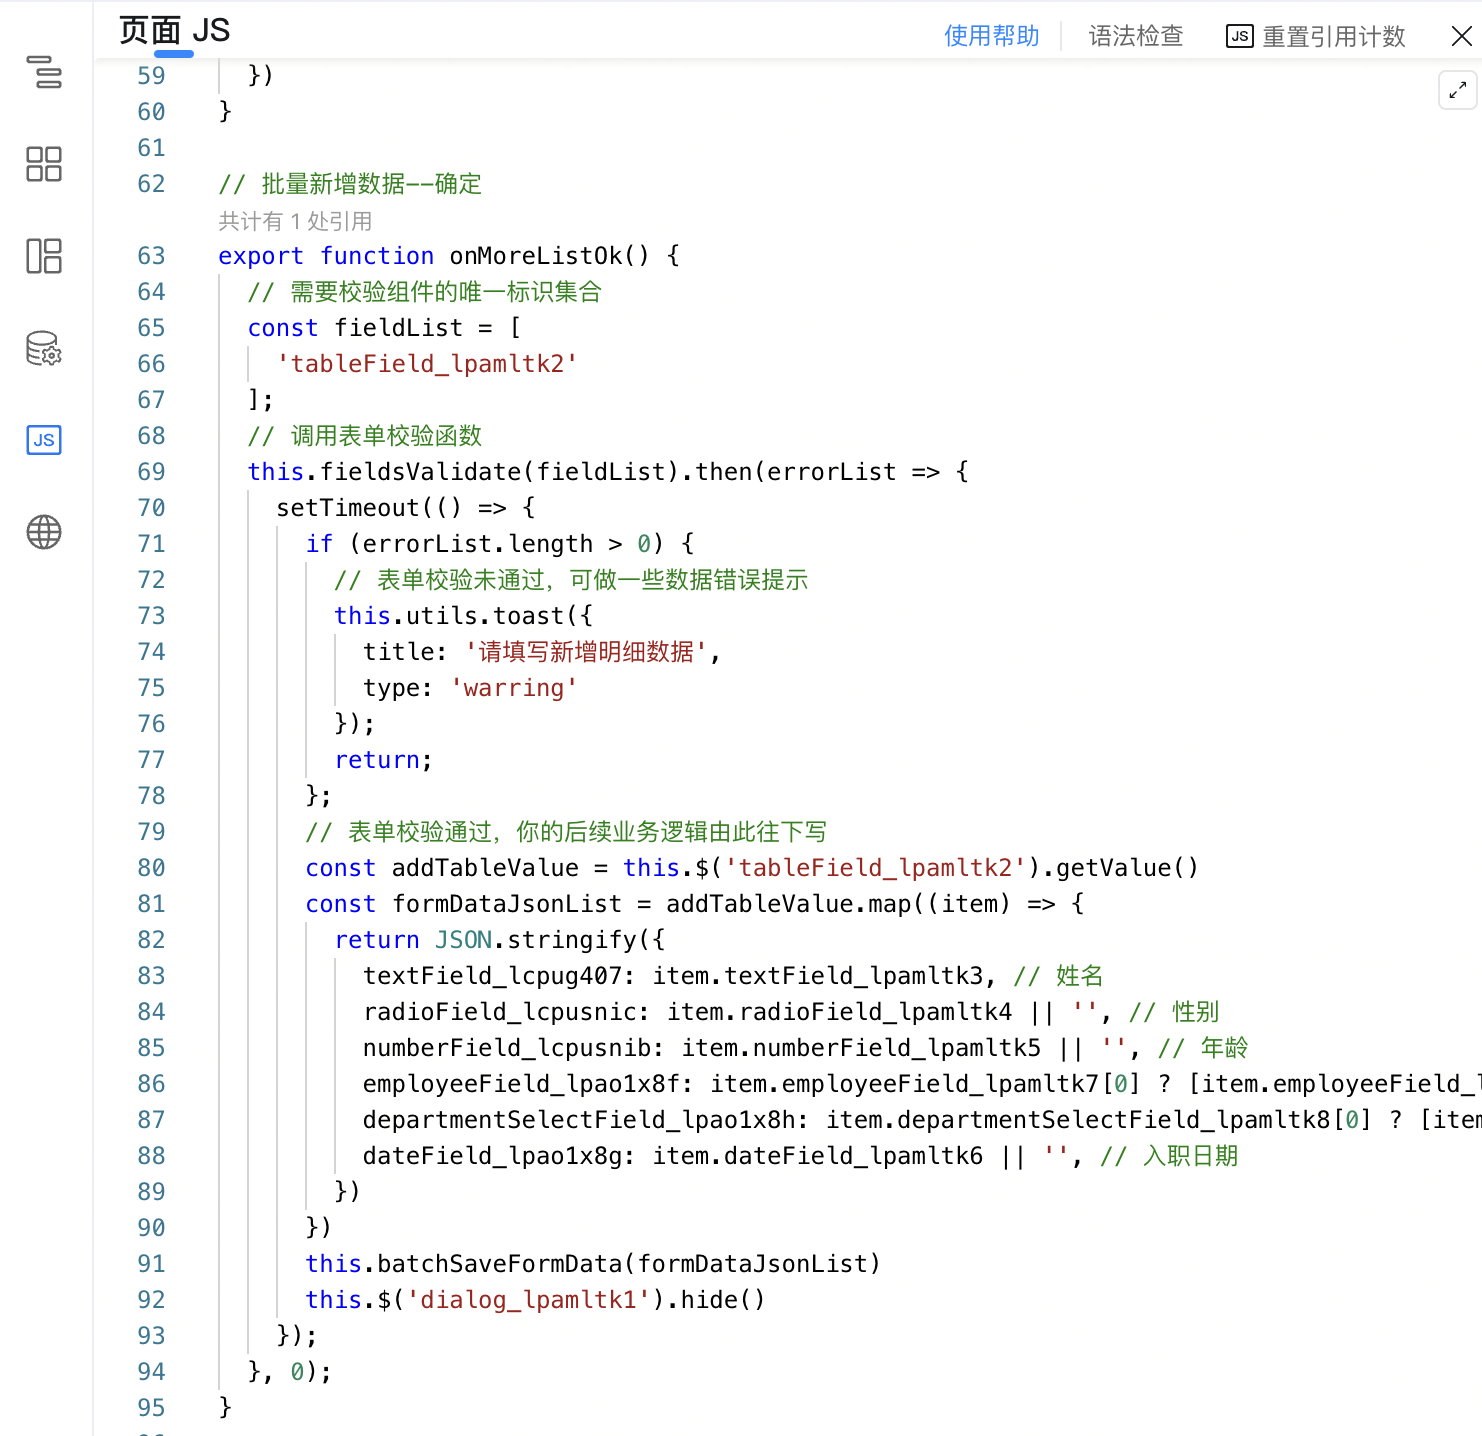
// 批量新增数据--确定
export function onMoreListOk() {
  // 需要校验组件的唯一标识集合
  const fieldList = [
    'tableField_lpamltk2'
  ];
  // 调用表单校验函数
  this.fieldsValidate(fieldList).then(errorList => {
    setTimeout(() => {
      if (errorList.length > 0) {
        // 表单校验未通过,可做一些数据错误提示
        this.utils.toast({
          title: '请填写新增明细数据',
          type: 'warring'
        });
        return;
      };
      // 表单校验通过,你的后续业务逻辑由此往下写
      const addTableValue = this.$('tableField_lpamltk2').getValue()
      const formDataJsonList = addTableValue.map((item) => {
        return JSON.stringify({
          textField_lcpug407: item.textField_lpamltk3, // 姓名
          radioField_lcpusnic: item.radioField_lpamltk4 || '', // 性别
          numberField_lcpusnib: item.numberField_lpamltk5 || '', // 年龄
          employeeField_lpao1x8f: this.formatEmployeeFieldValue(item.employeeField_lpamltk7), // 负责人
          departmentSelectField_lpao1x8h: item.departmentSelectField_lpamltk8[0] ? [item.departmentSelectField_lpamltk8[0].value] : [], // 所在部门
          dateField_lpao1x8g: item.dateField_lpamltk6 || '', // 入职日期
        })
      })
      this.batchSaveFormData(formDataJsonList)
      this.$('dialog_lpamltk1').hide()
    });
  }, 0);
}
// fieldList:Array,需要校验组件的唯一标识集合
export async function fieldsValidate(fieldList = []) {
  const result = [];
  for (let i = 0; i < fieldList.length; i++) {
    await this.$(fieldList[i]).validate((errors, values) => {
      if (!errors) { return };
      result.push({
        fieldId: fieldList[i], // 组件标识
        errors: this.utils.isMobile() ? errors.errors[fieldList[i]].errors : errors[fieldList[i]].errors // 校验错误信息
      });
    });
  };
  return result;
}
// 获取成员字段的 value --用于处理成员组件格式不一致
export function formatEmployeeFieldValue(userData) {
  if (Array.isArray(userData)) {
    return userData.length ? userData.map((item) => { return item.value; }) : '';
  } else {
    return userData ? [userData.value] : '';
  }
}
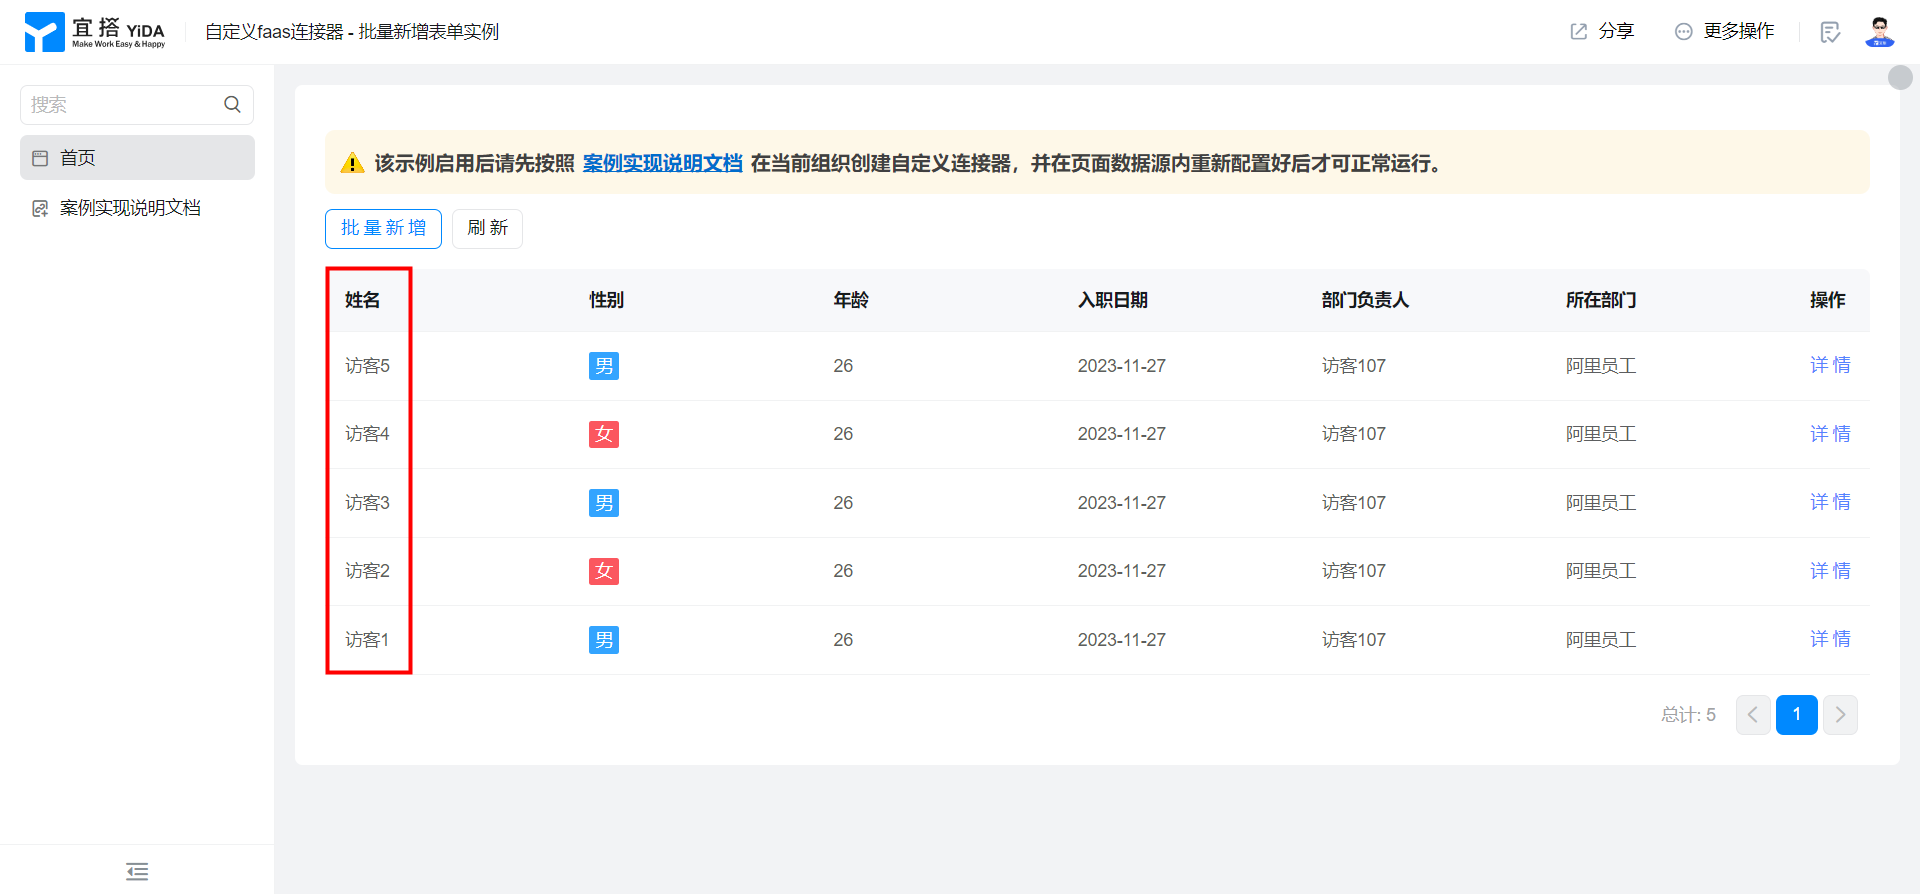
3. Effect
