Integration & Automation-AI intelligent translation
1. Usage scenarios
This example describes how to use integration automation and connector factory to input a piece of text in YIDA to obtain a translation in a specified language.China, Britain, Japan, and KoreaAnd other common language translation.
2. Implement functions
2.1. Used in integrated automation
2.1.1. Create a form
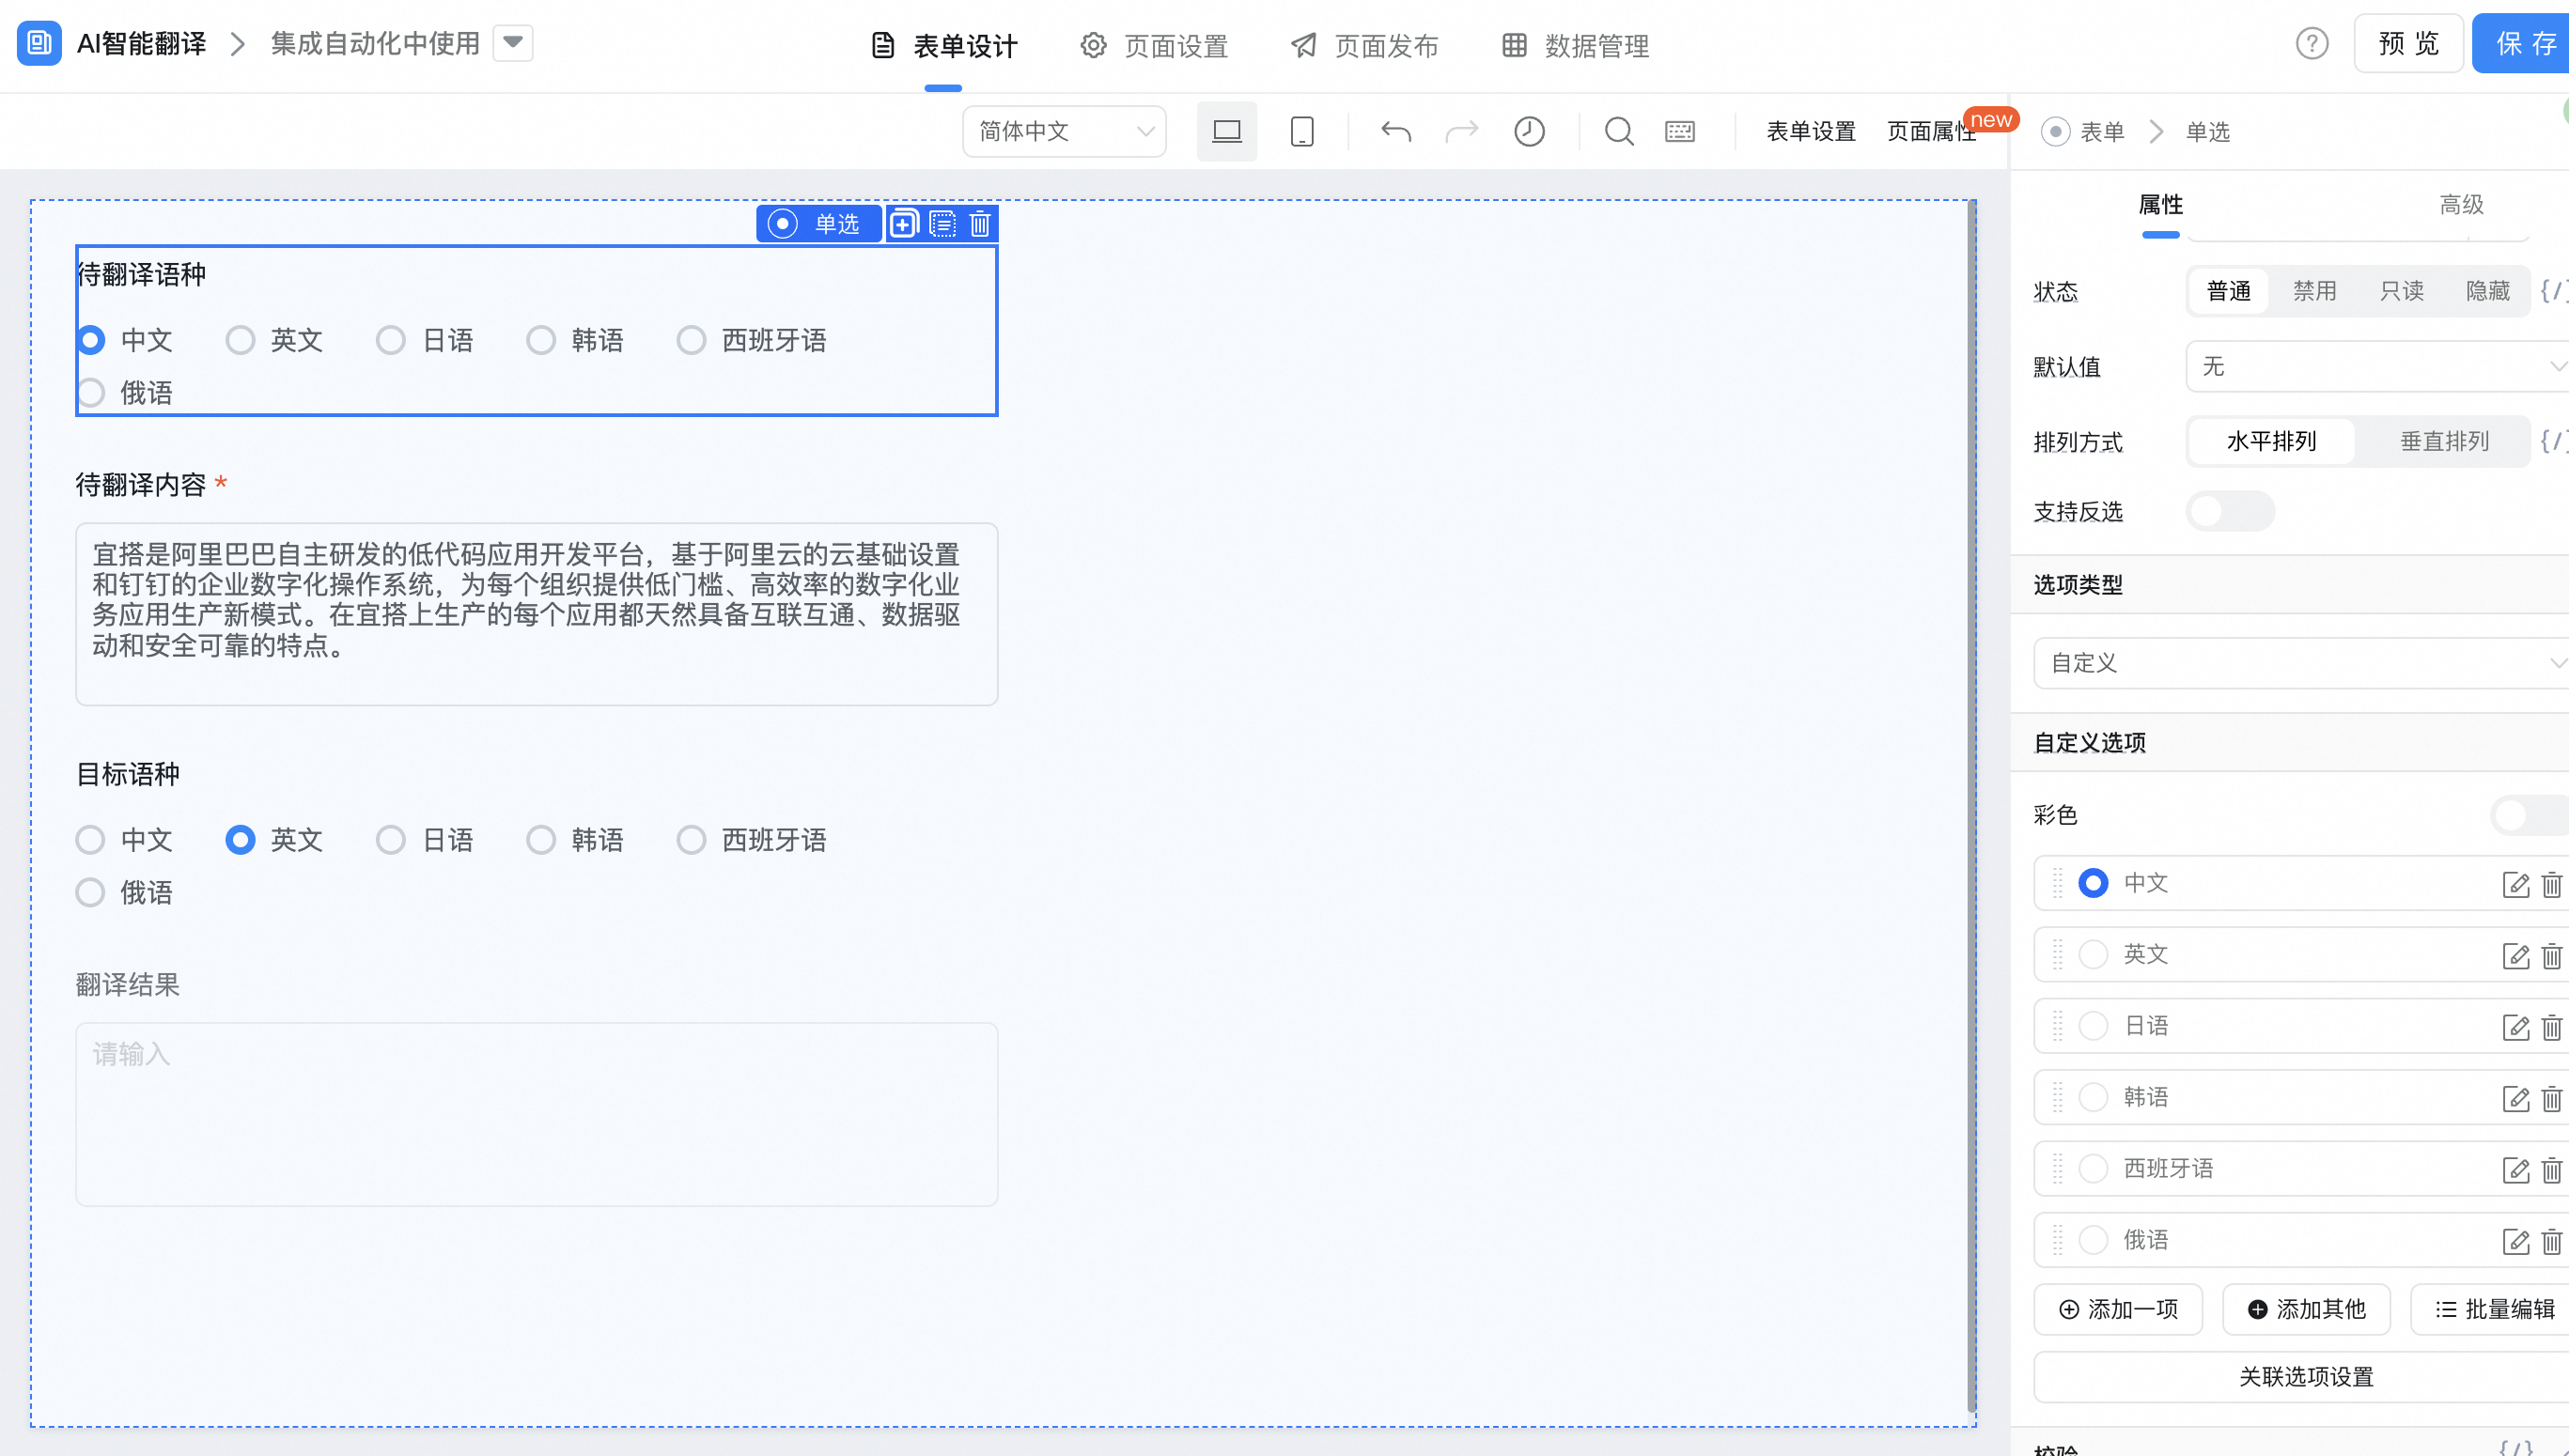
- Configure language items for languages to be translated and target languages respectively.
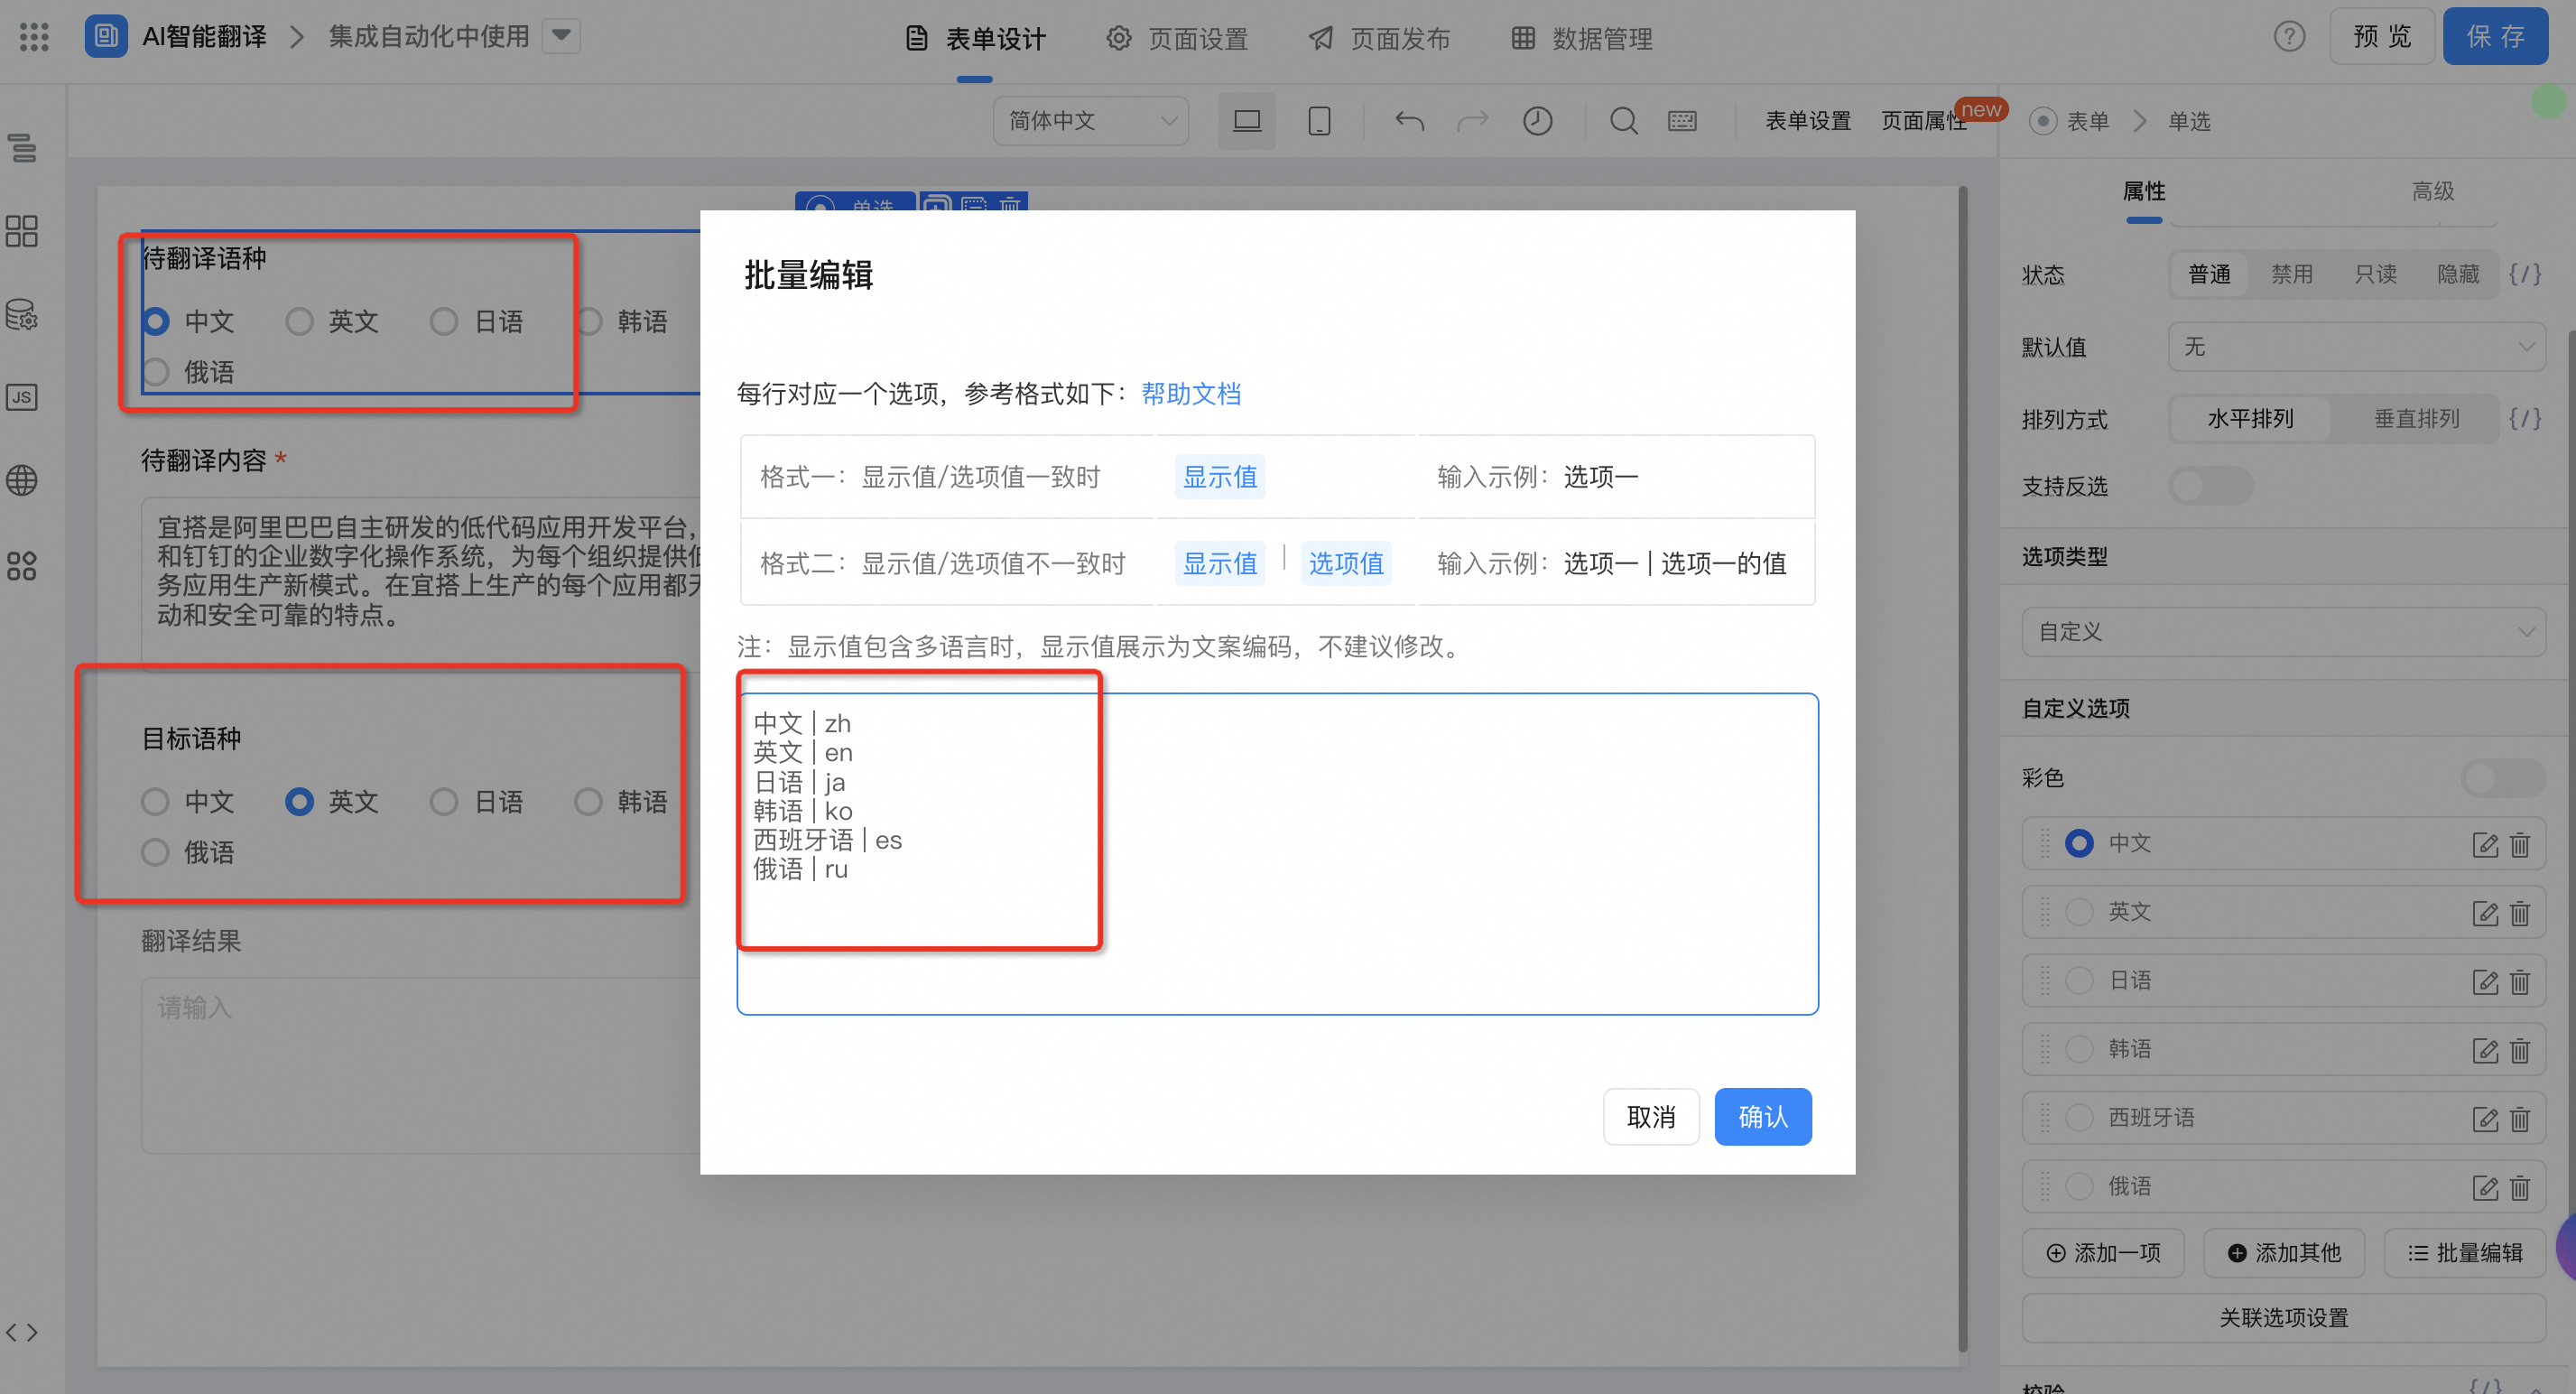
中文 | zh
英文 | en
日语 | ja
韩语 | ko
西班牙语 | es
俄语 | ru
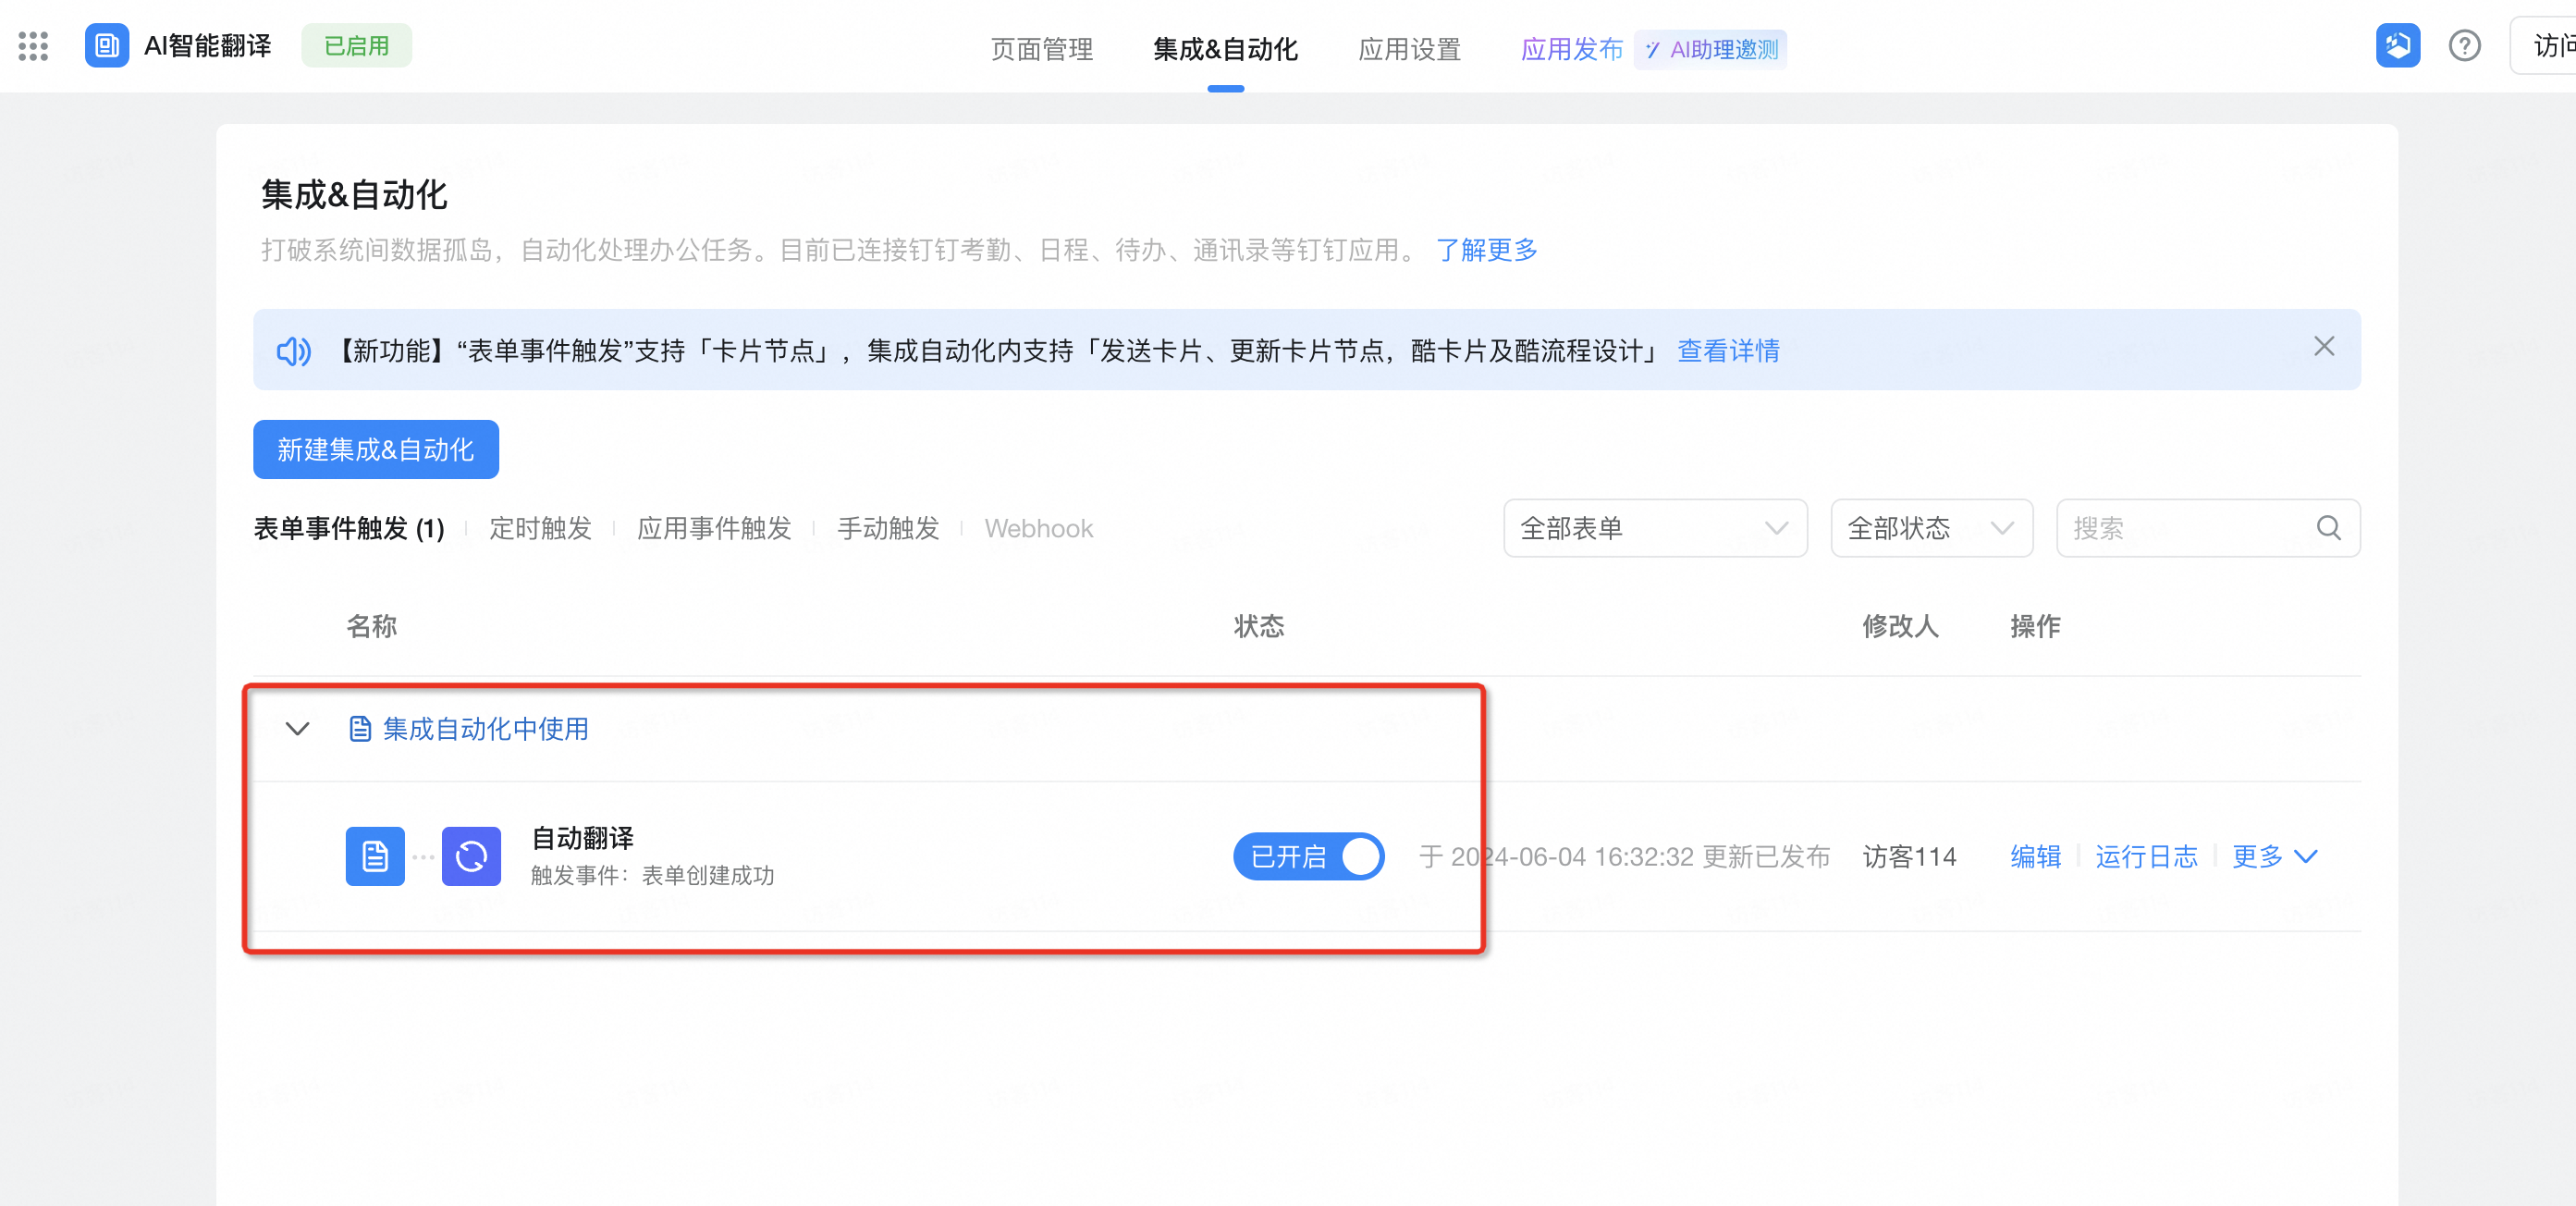
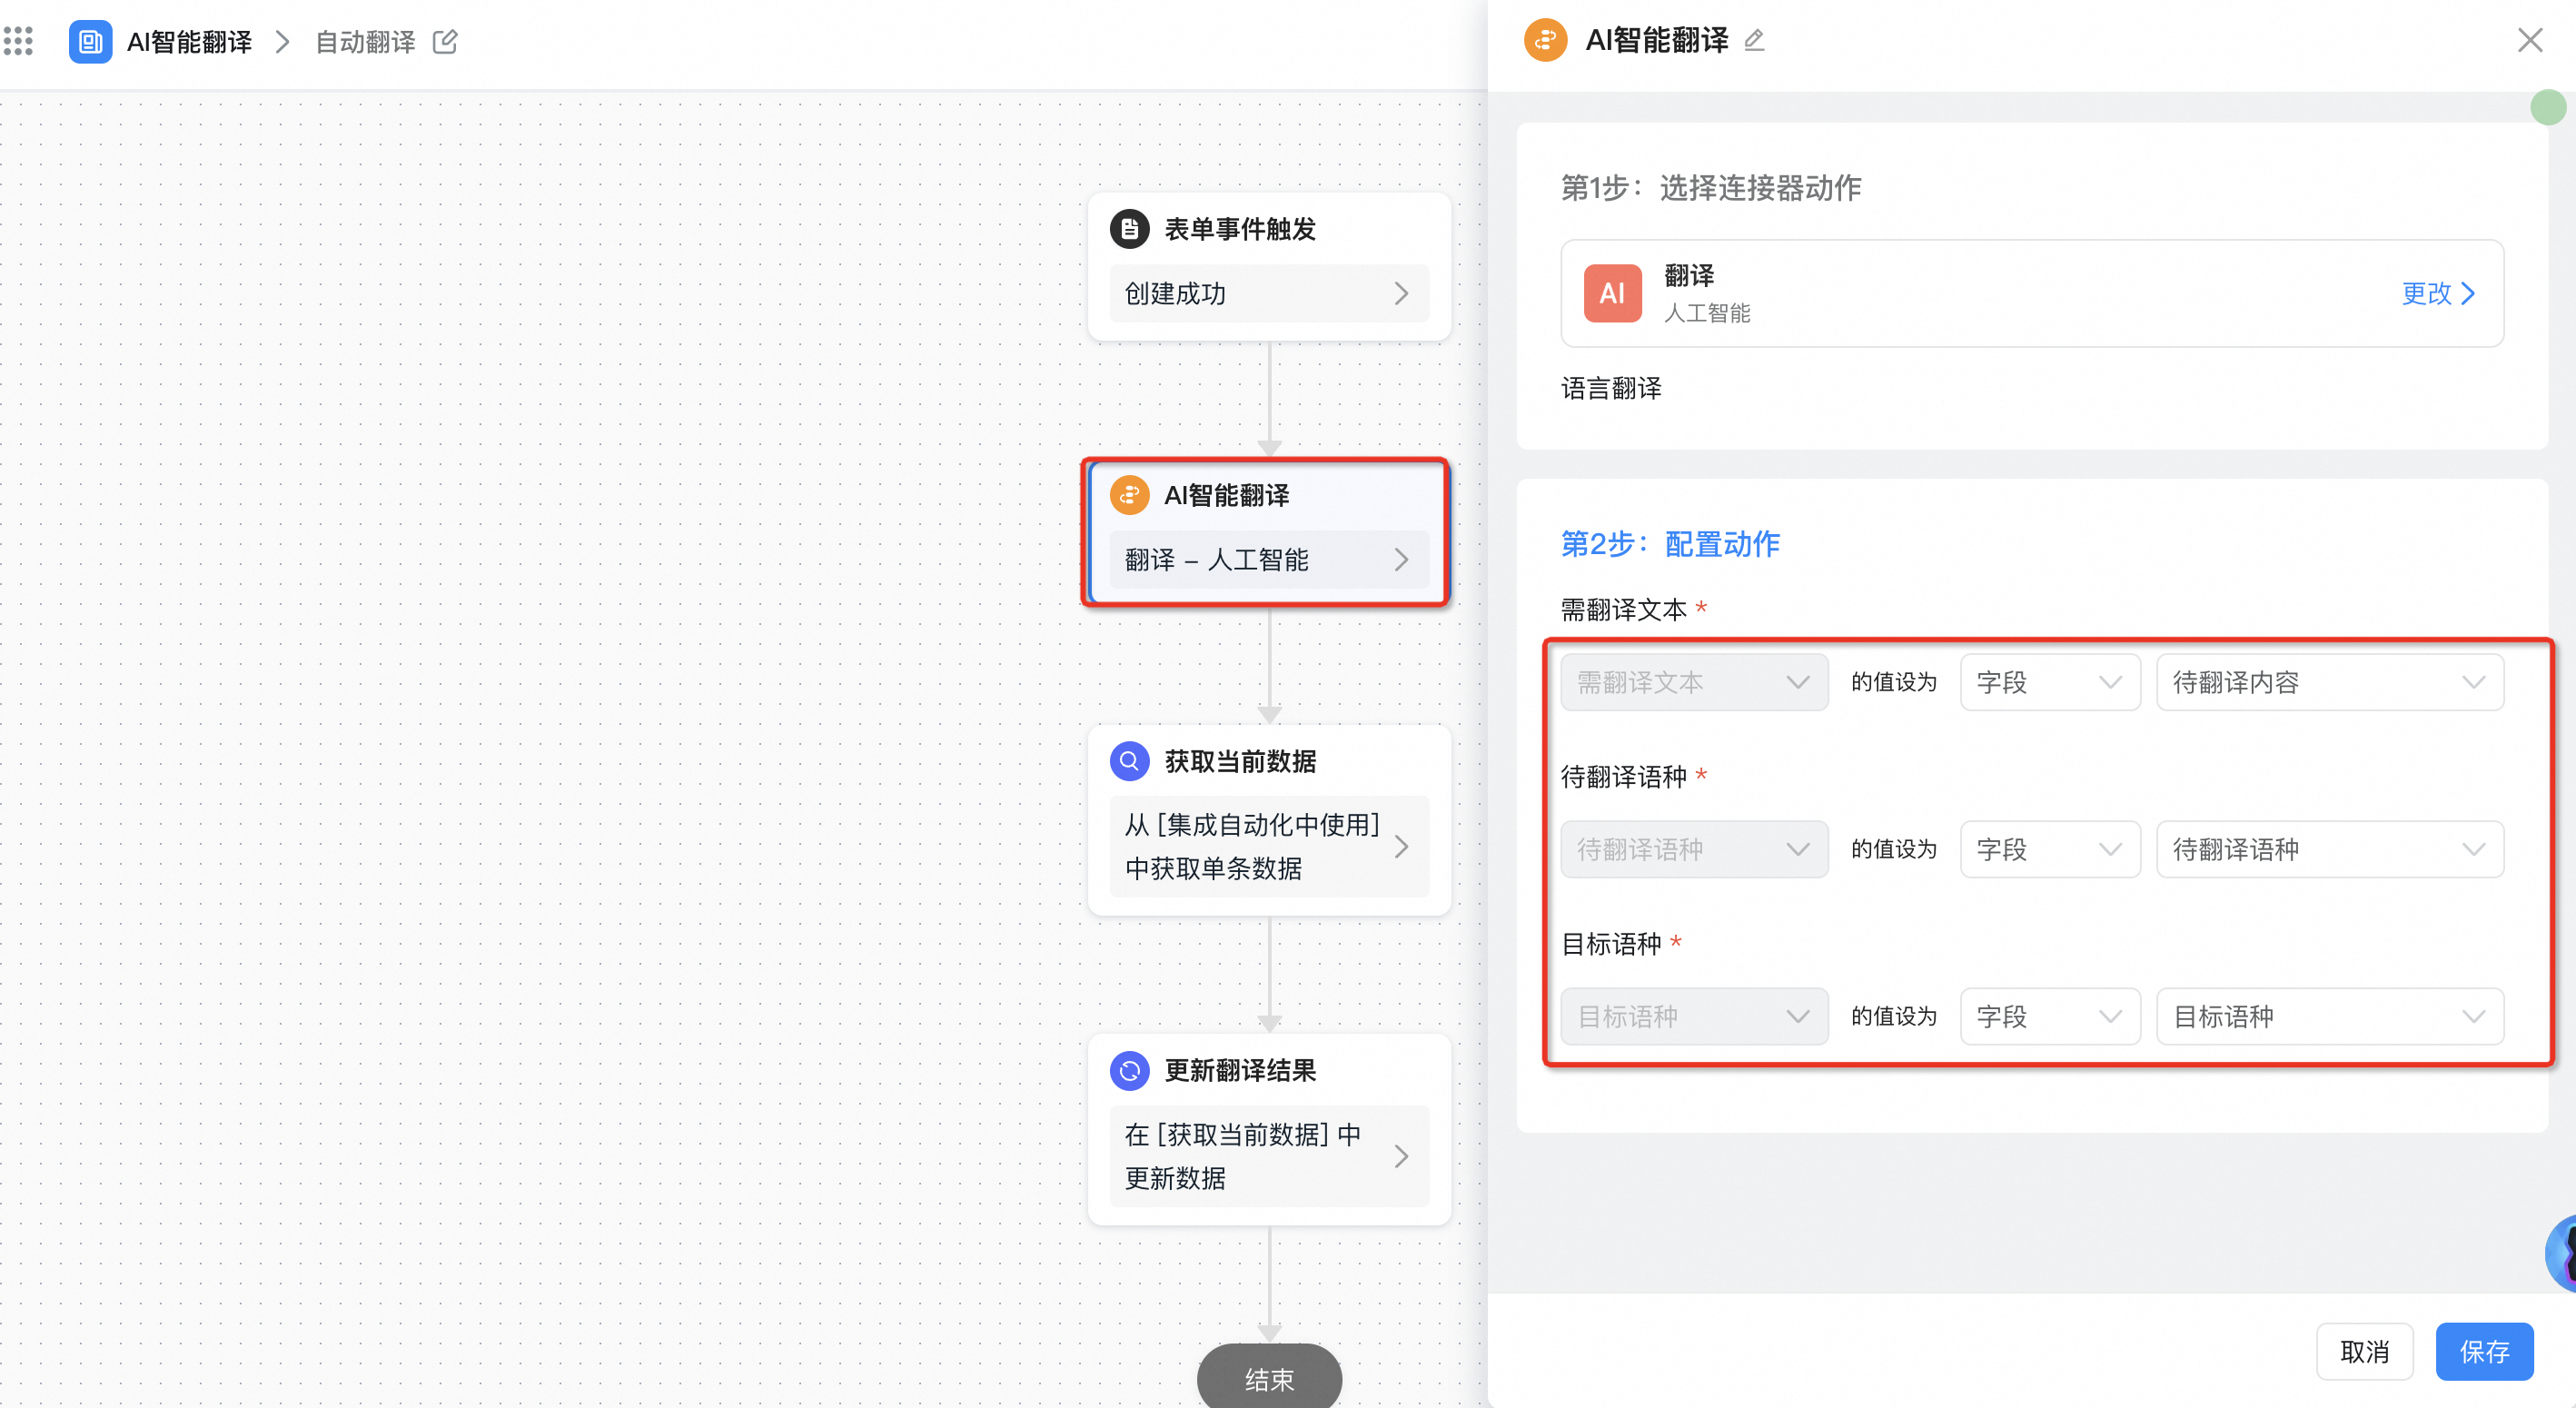
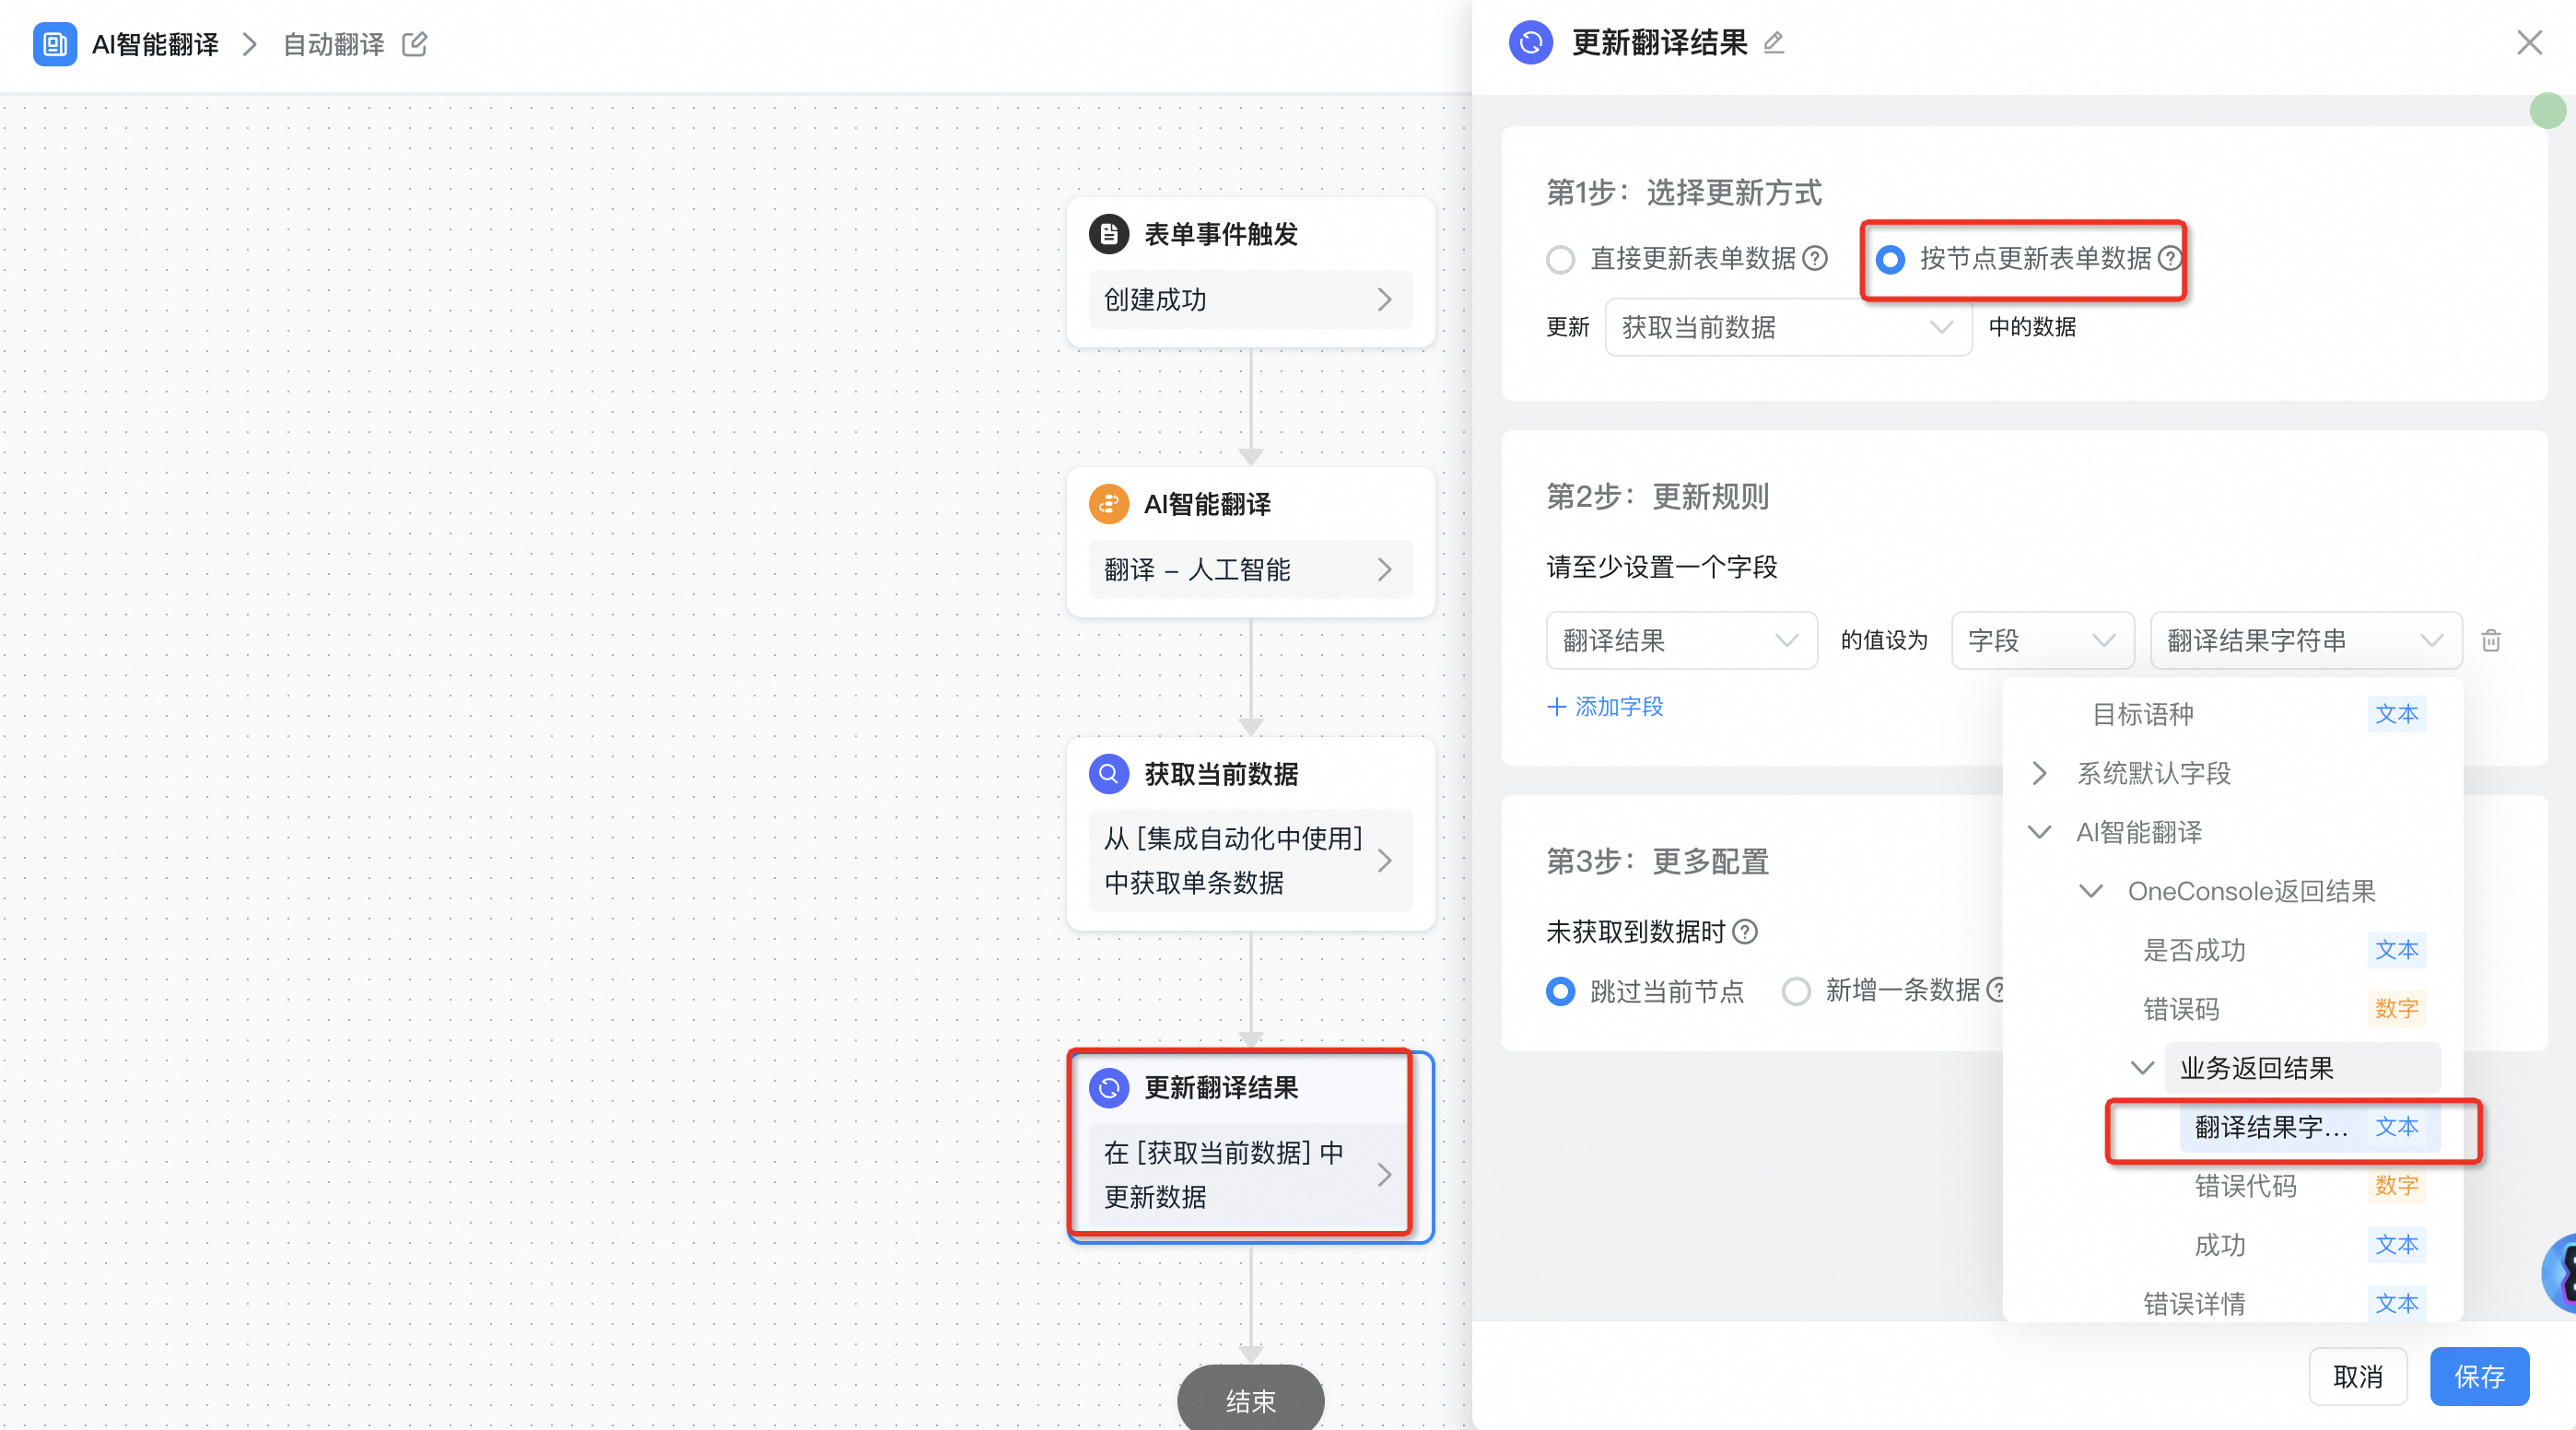
2.1.2 configuration Integration & Automation
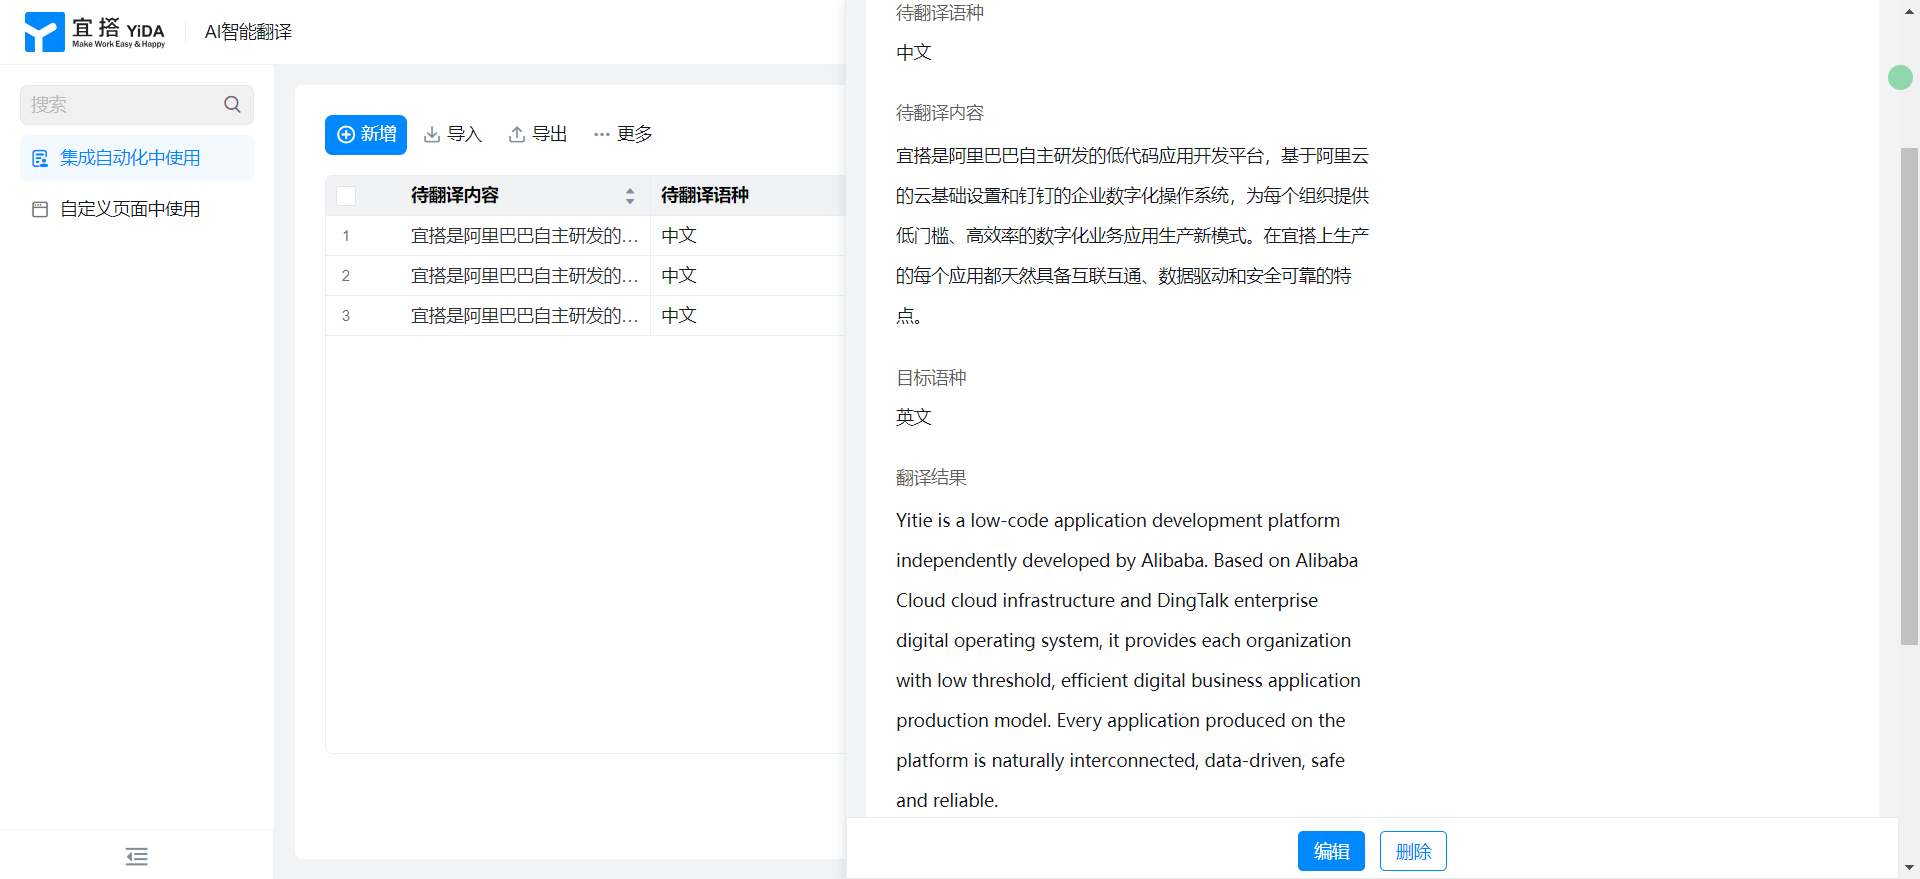
- Data created successfully-> the connector calls AI intelligent translation and stores the translation results.

2.2. Use in custom pages
2.2.1. Apply for DingTalk open platform application credentials and interface permissions
If you have applied, you can ignore this step.
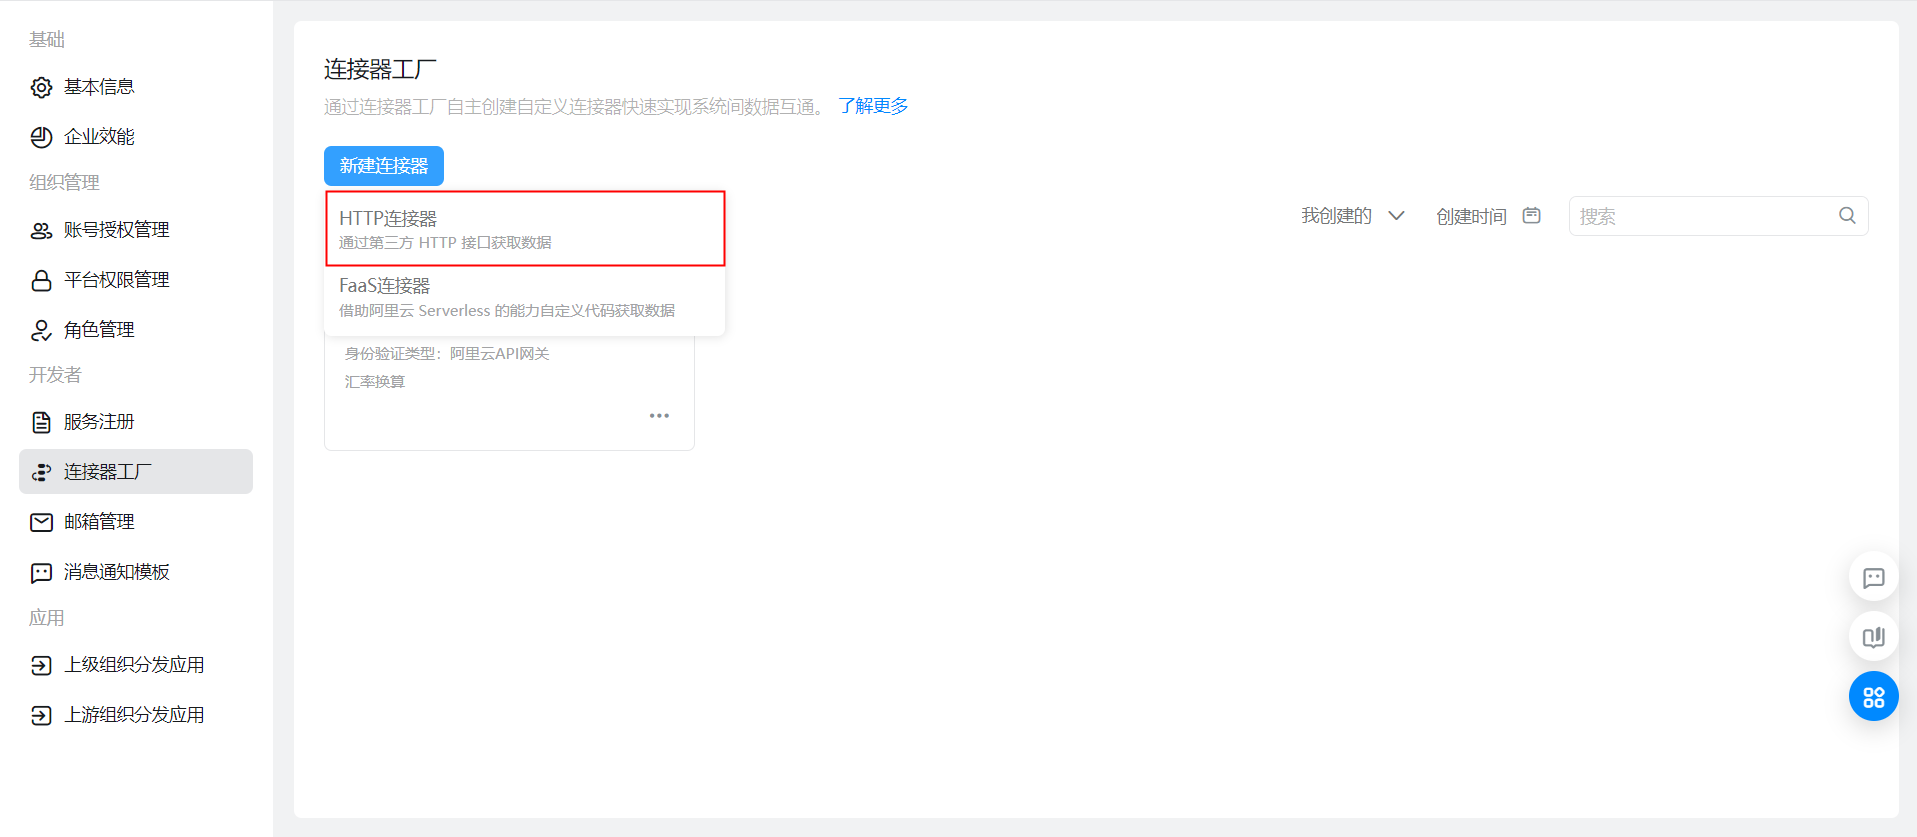
2.2.2. Create an HTTP connector
The connector used in this example:
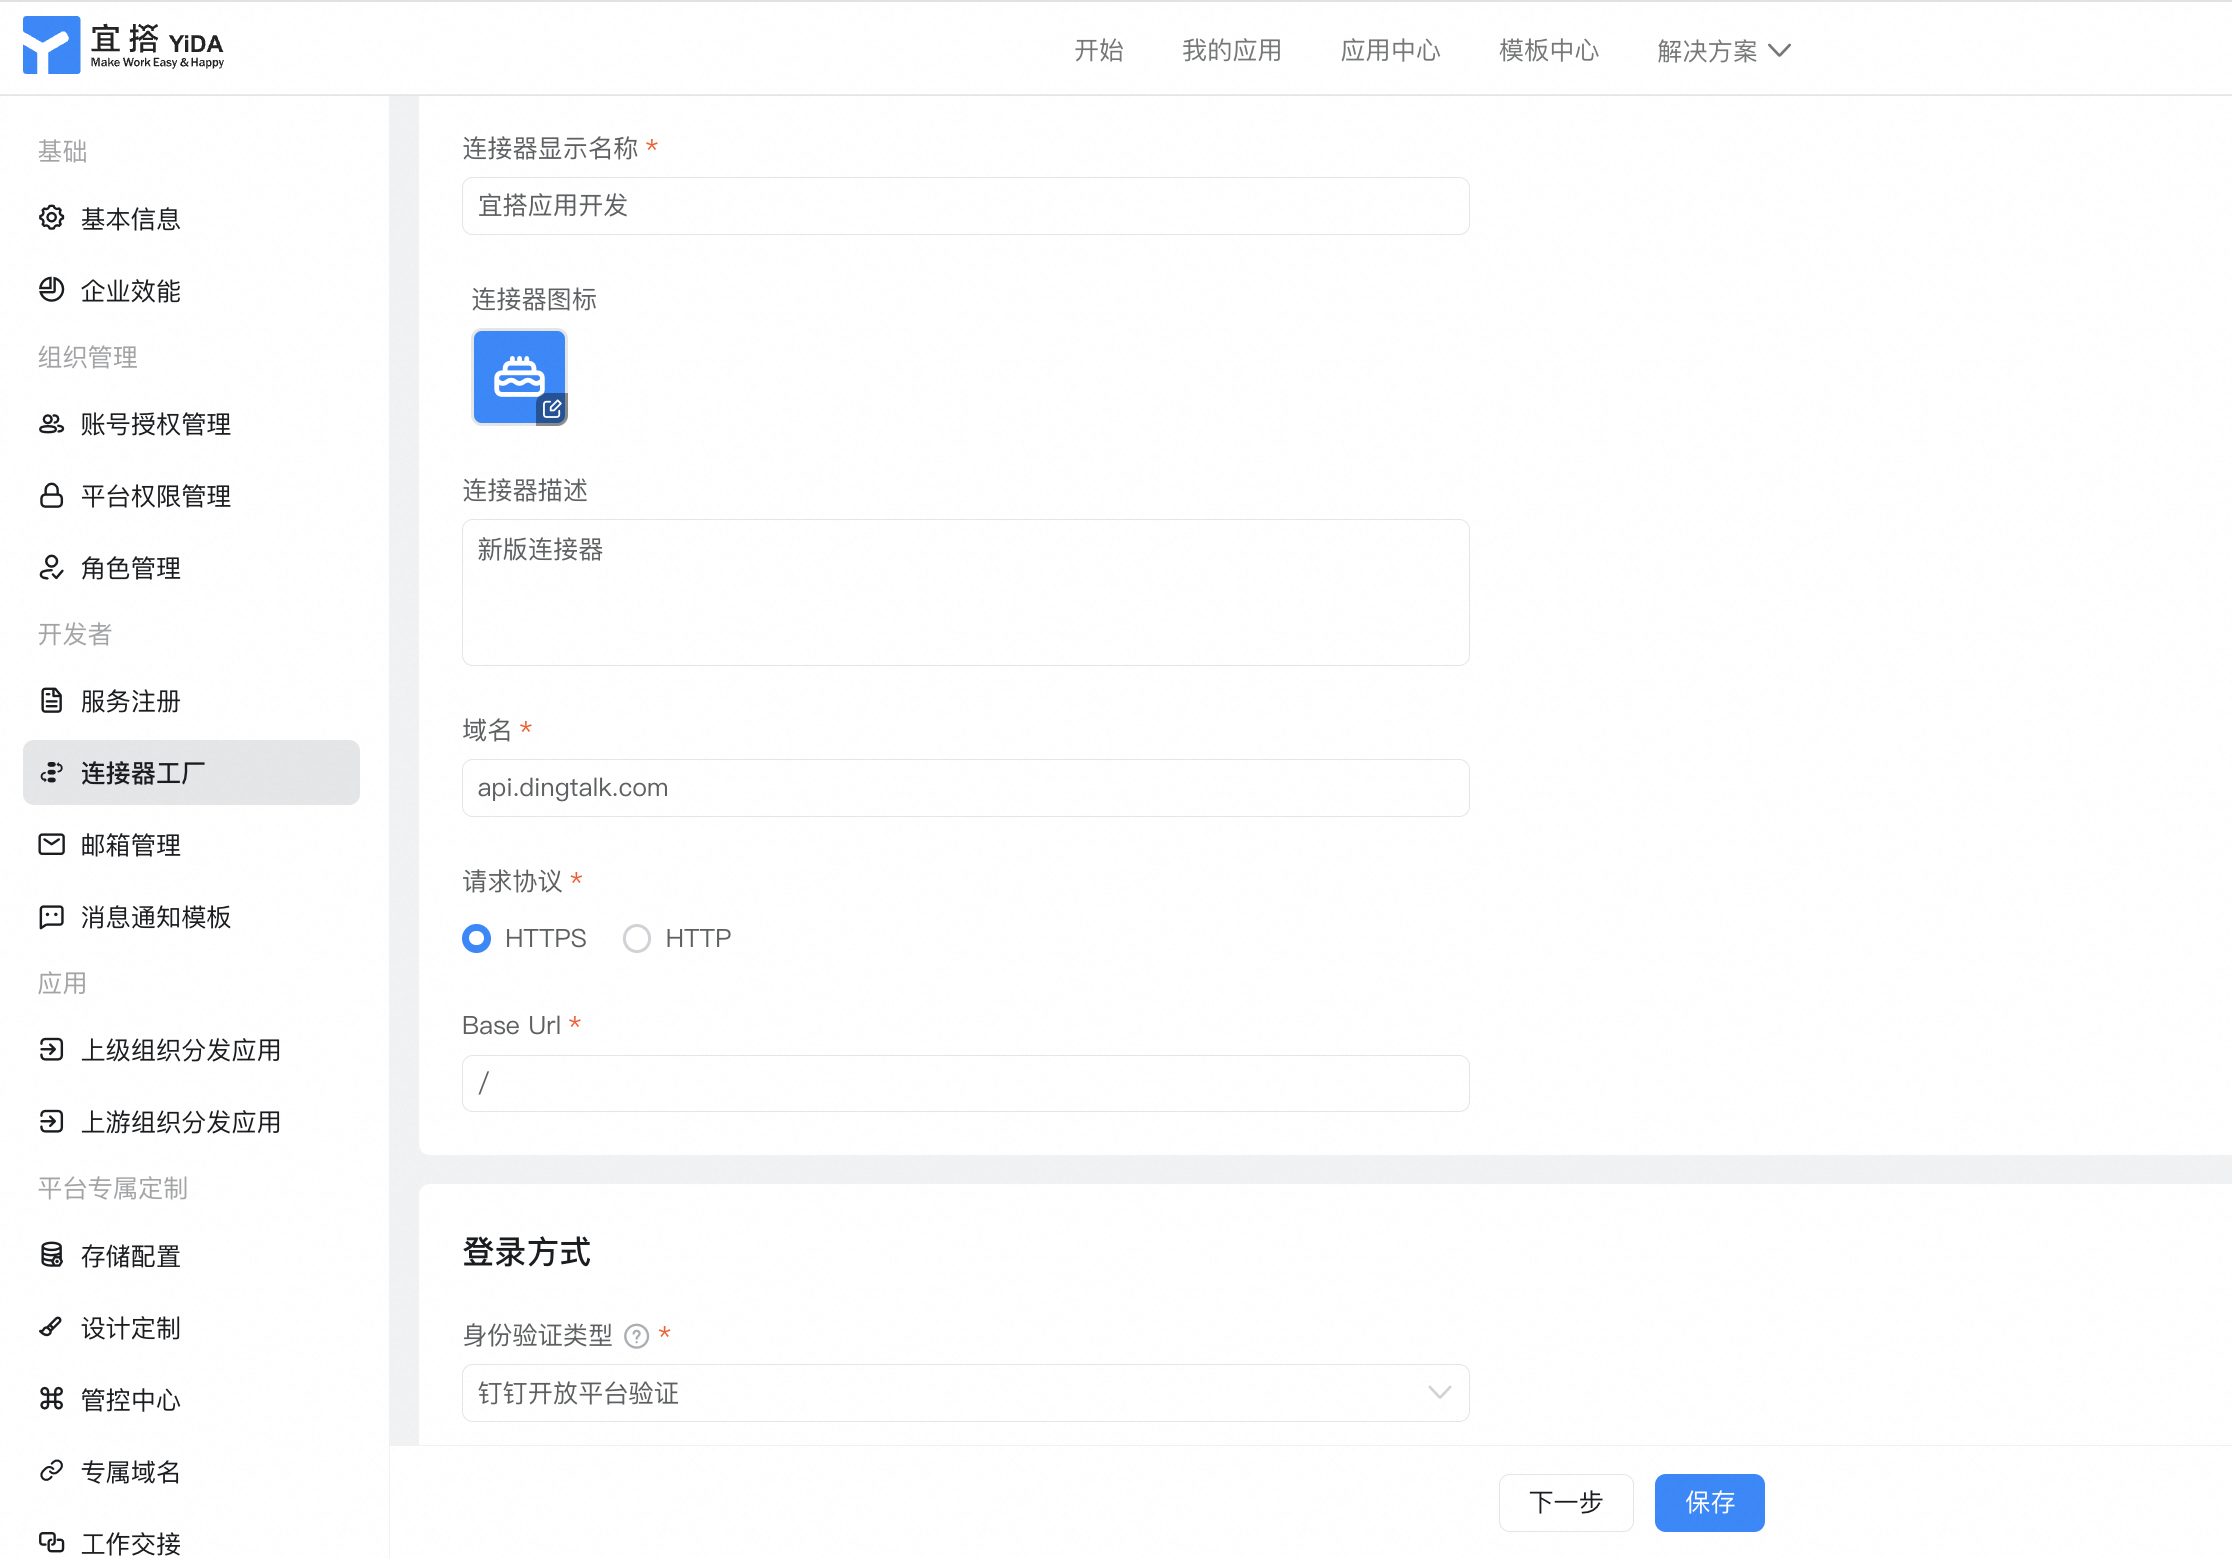
2.2.3. Configure basic connector information and logon methods
2.2.4. Configure connector execution actions
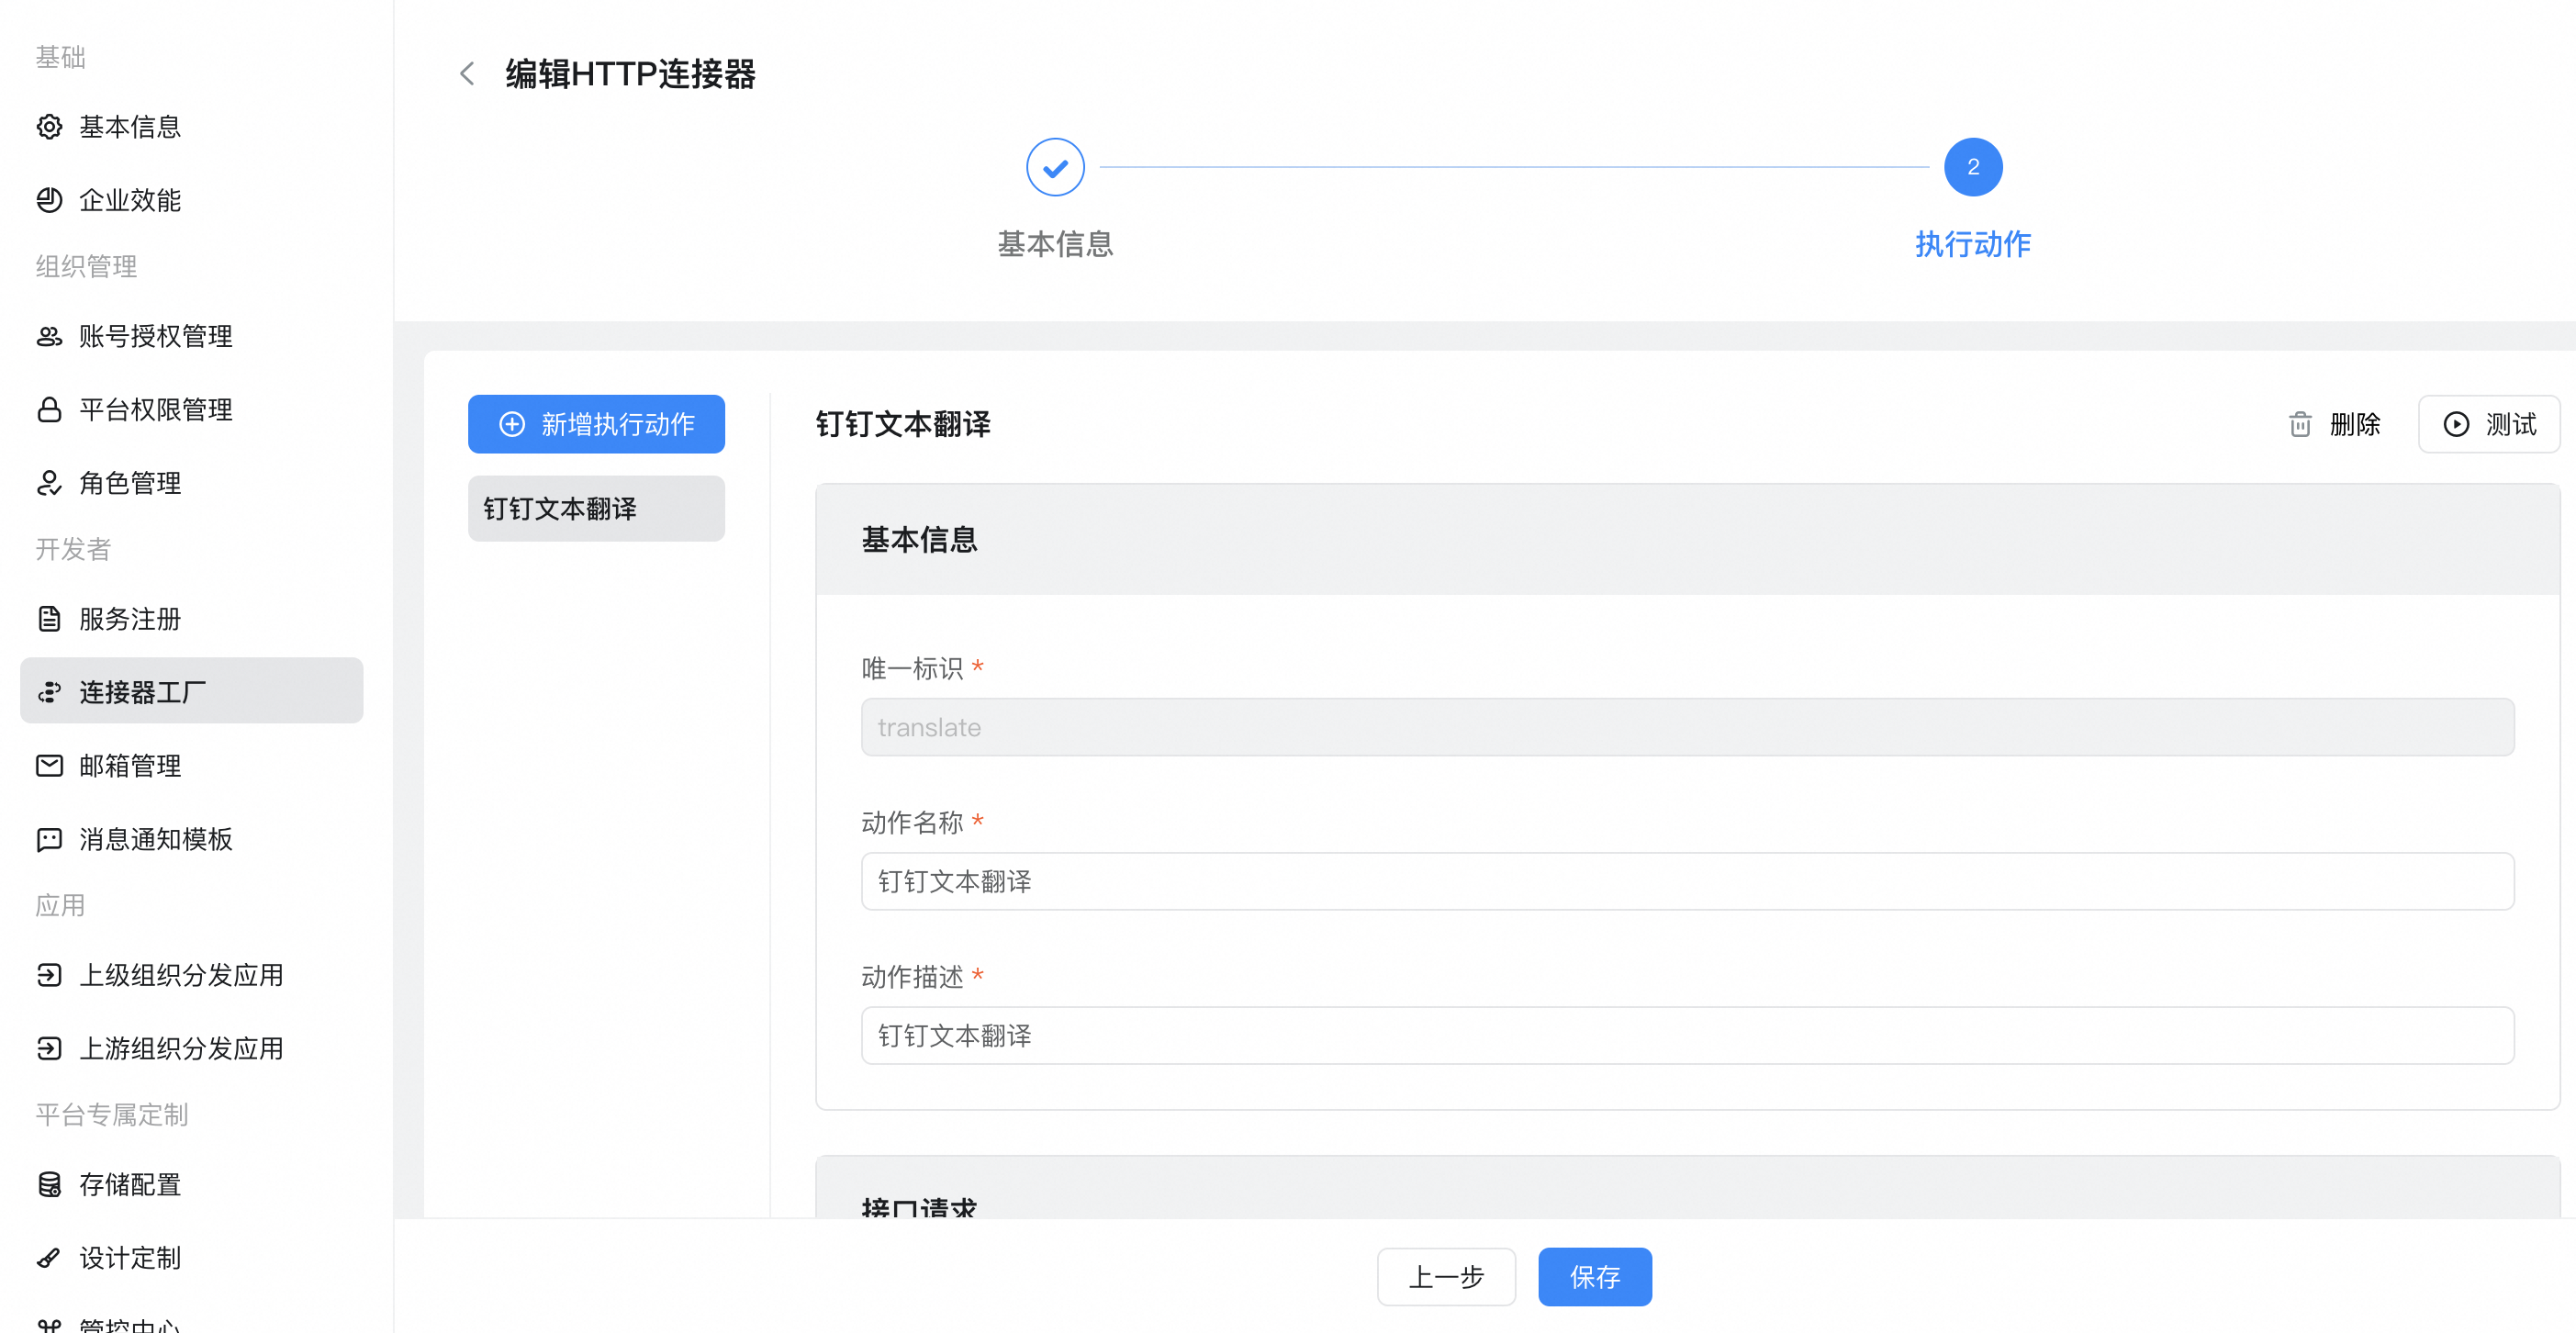
Interface request:
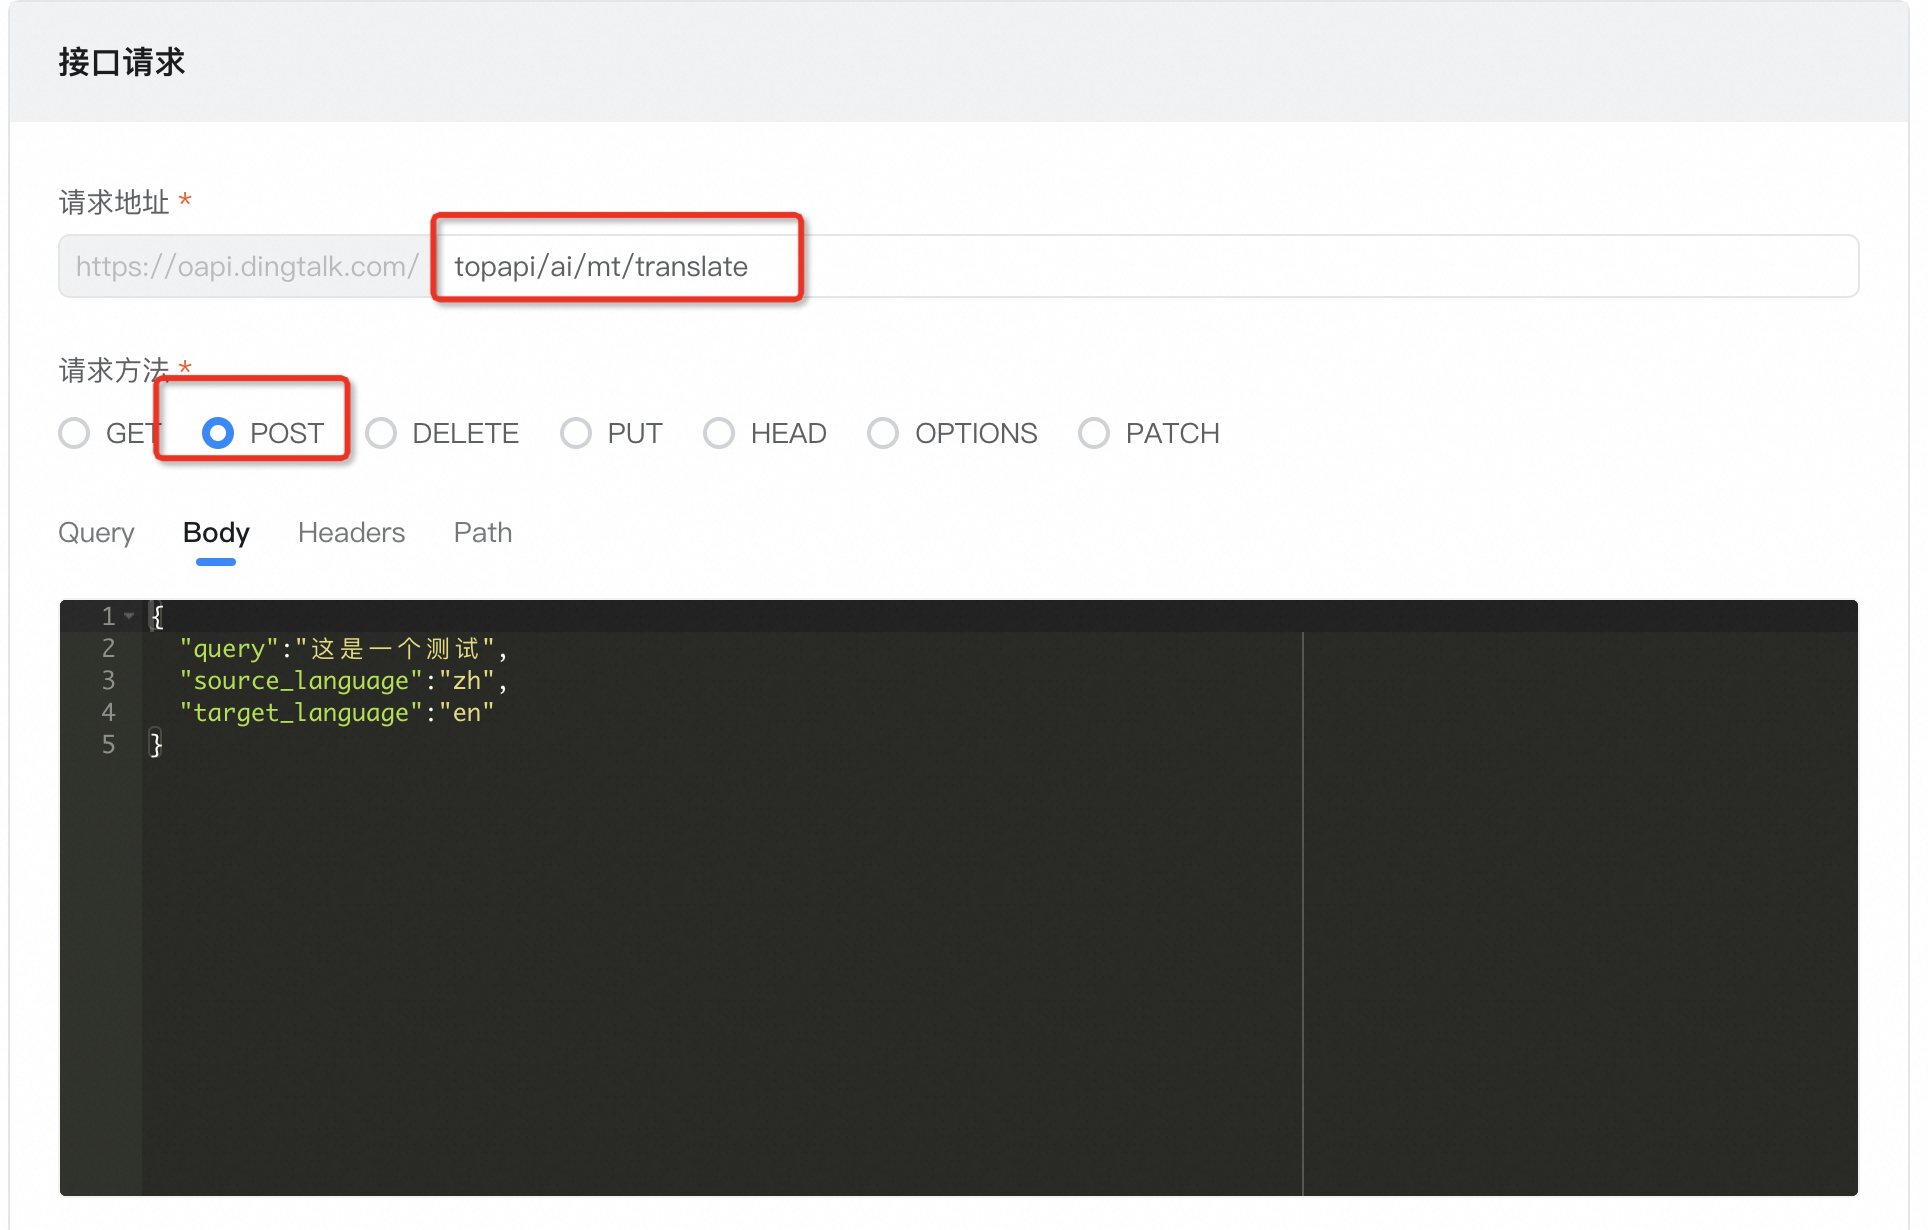
Body parameter:
{
  "query":"这是一个测试",
  "source_language":"zh",
  "target_language":"en"
}
The interface returns:
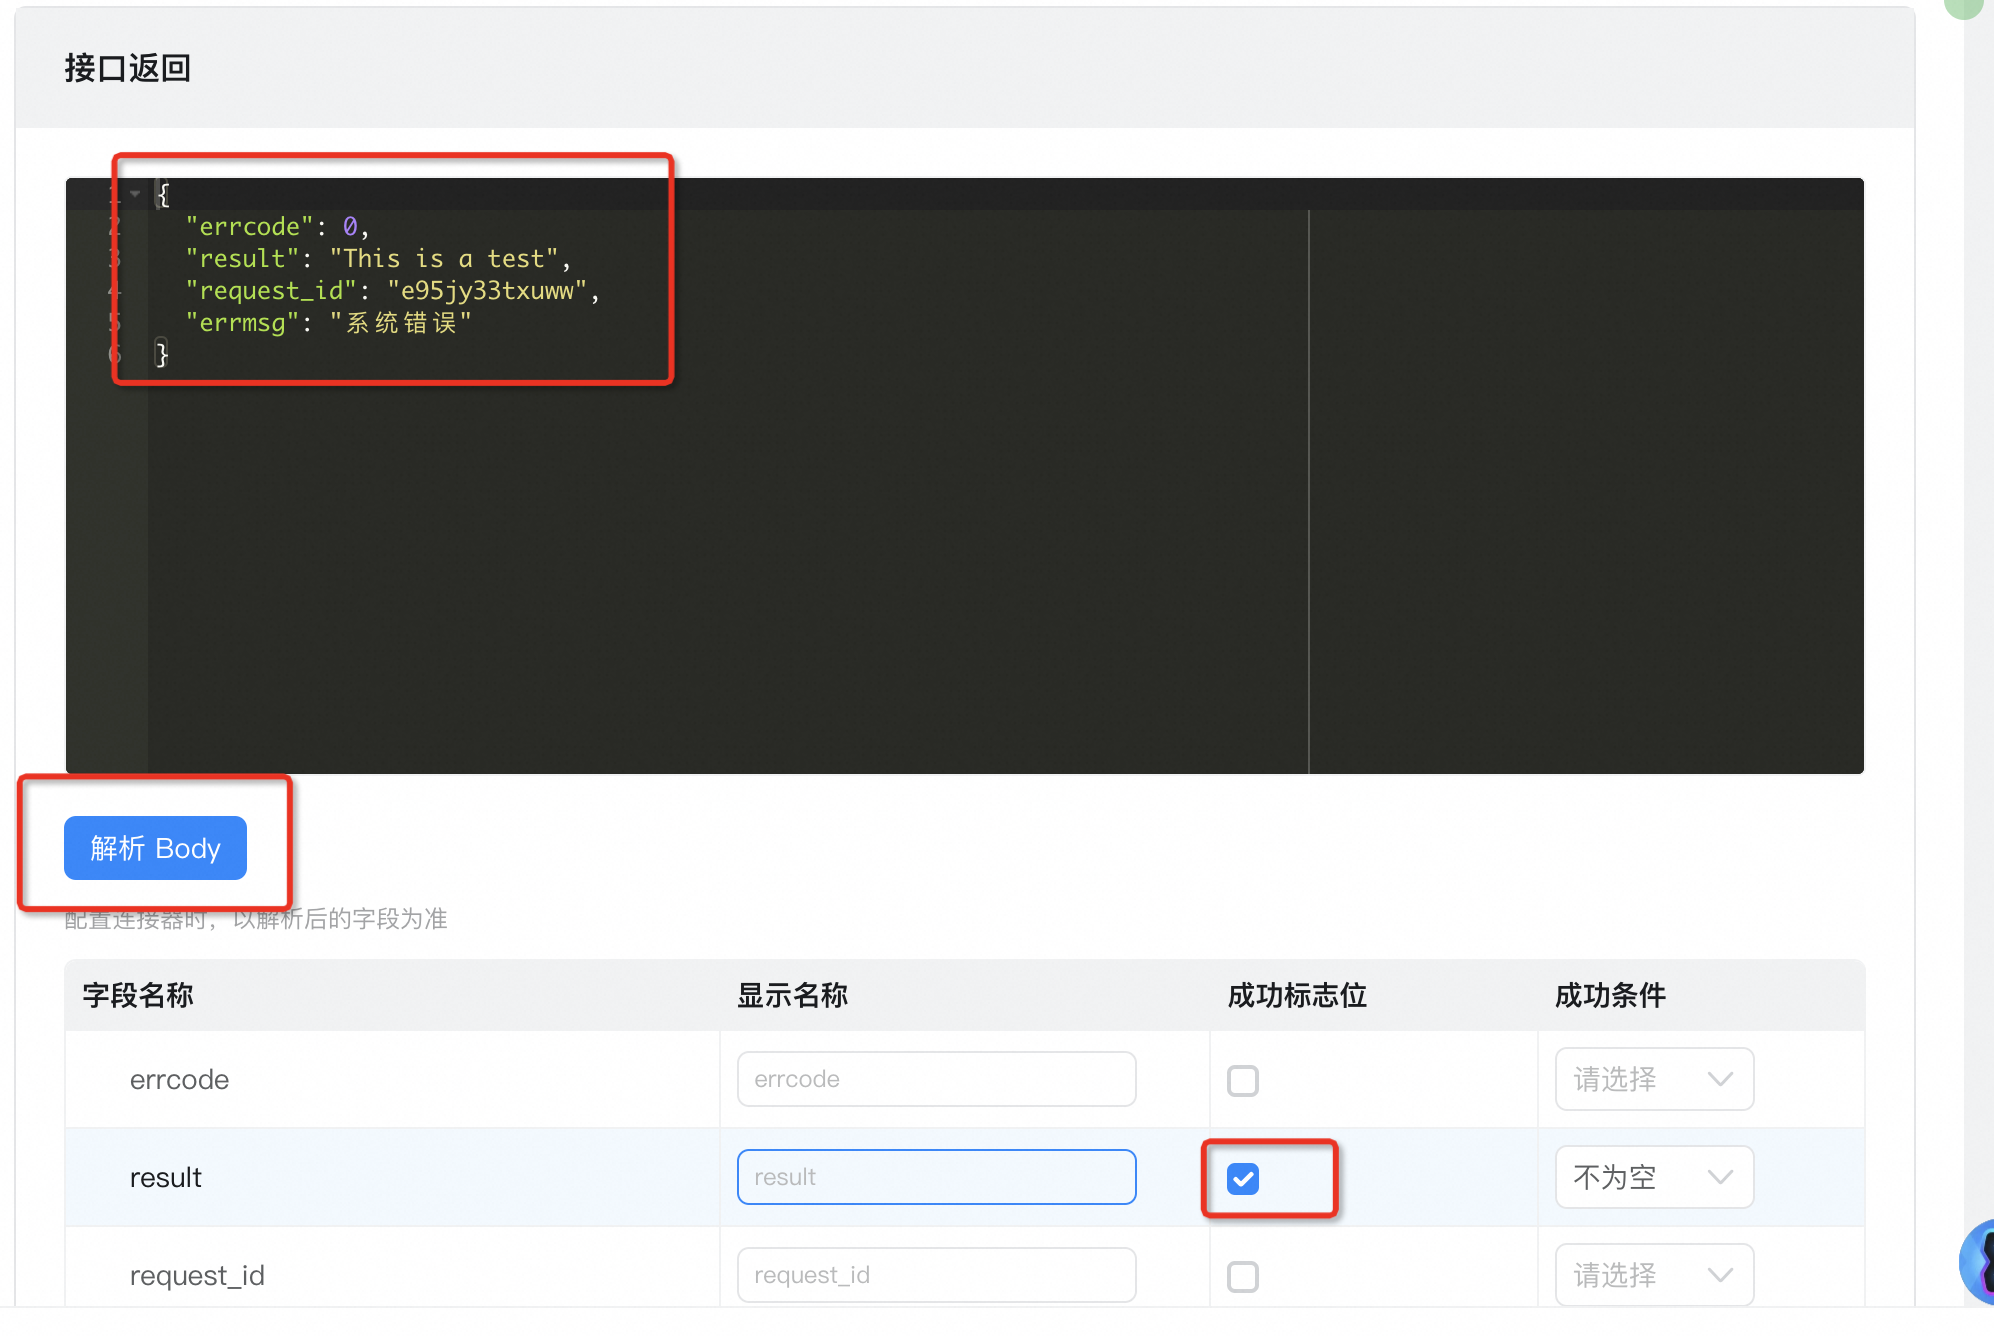
{
  "errcode": 0,
  "result": "This is a test",
  "request_id": "e95jy33txuww",
  "errmsg": "系统错误"
}
2.2.5. Configure authentication templates
If you do not have an account, you must add an account. For more information about the parameters required for the account, see 2.2.1:
For more information about the authentication template, see:
2.2.6. Create page & configure data source
2.2.6.1. Create Page
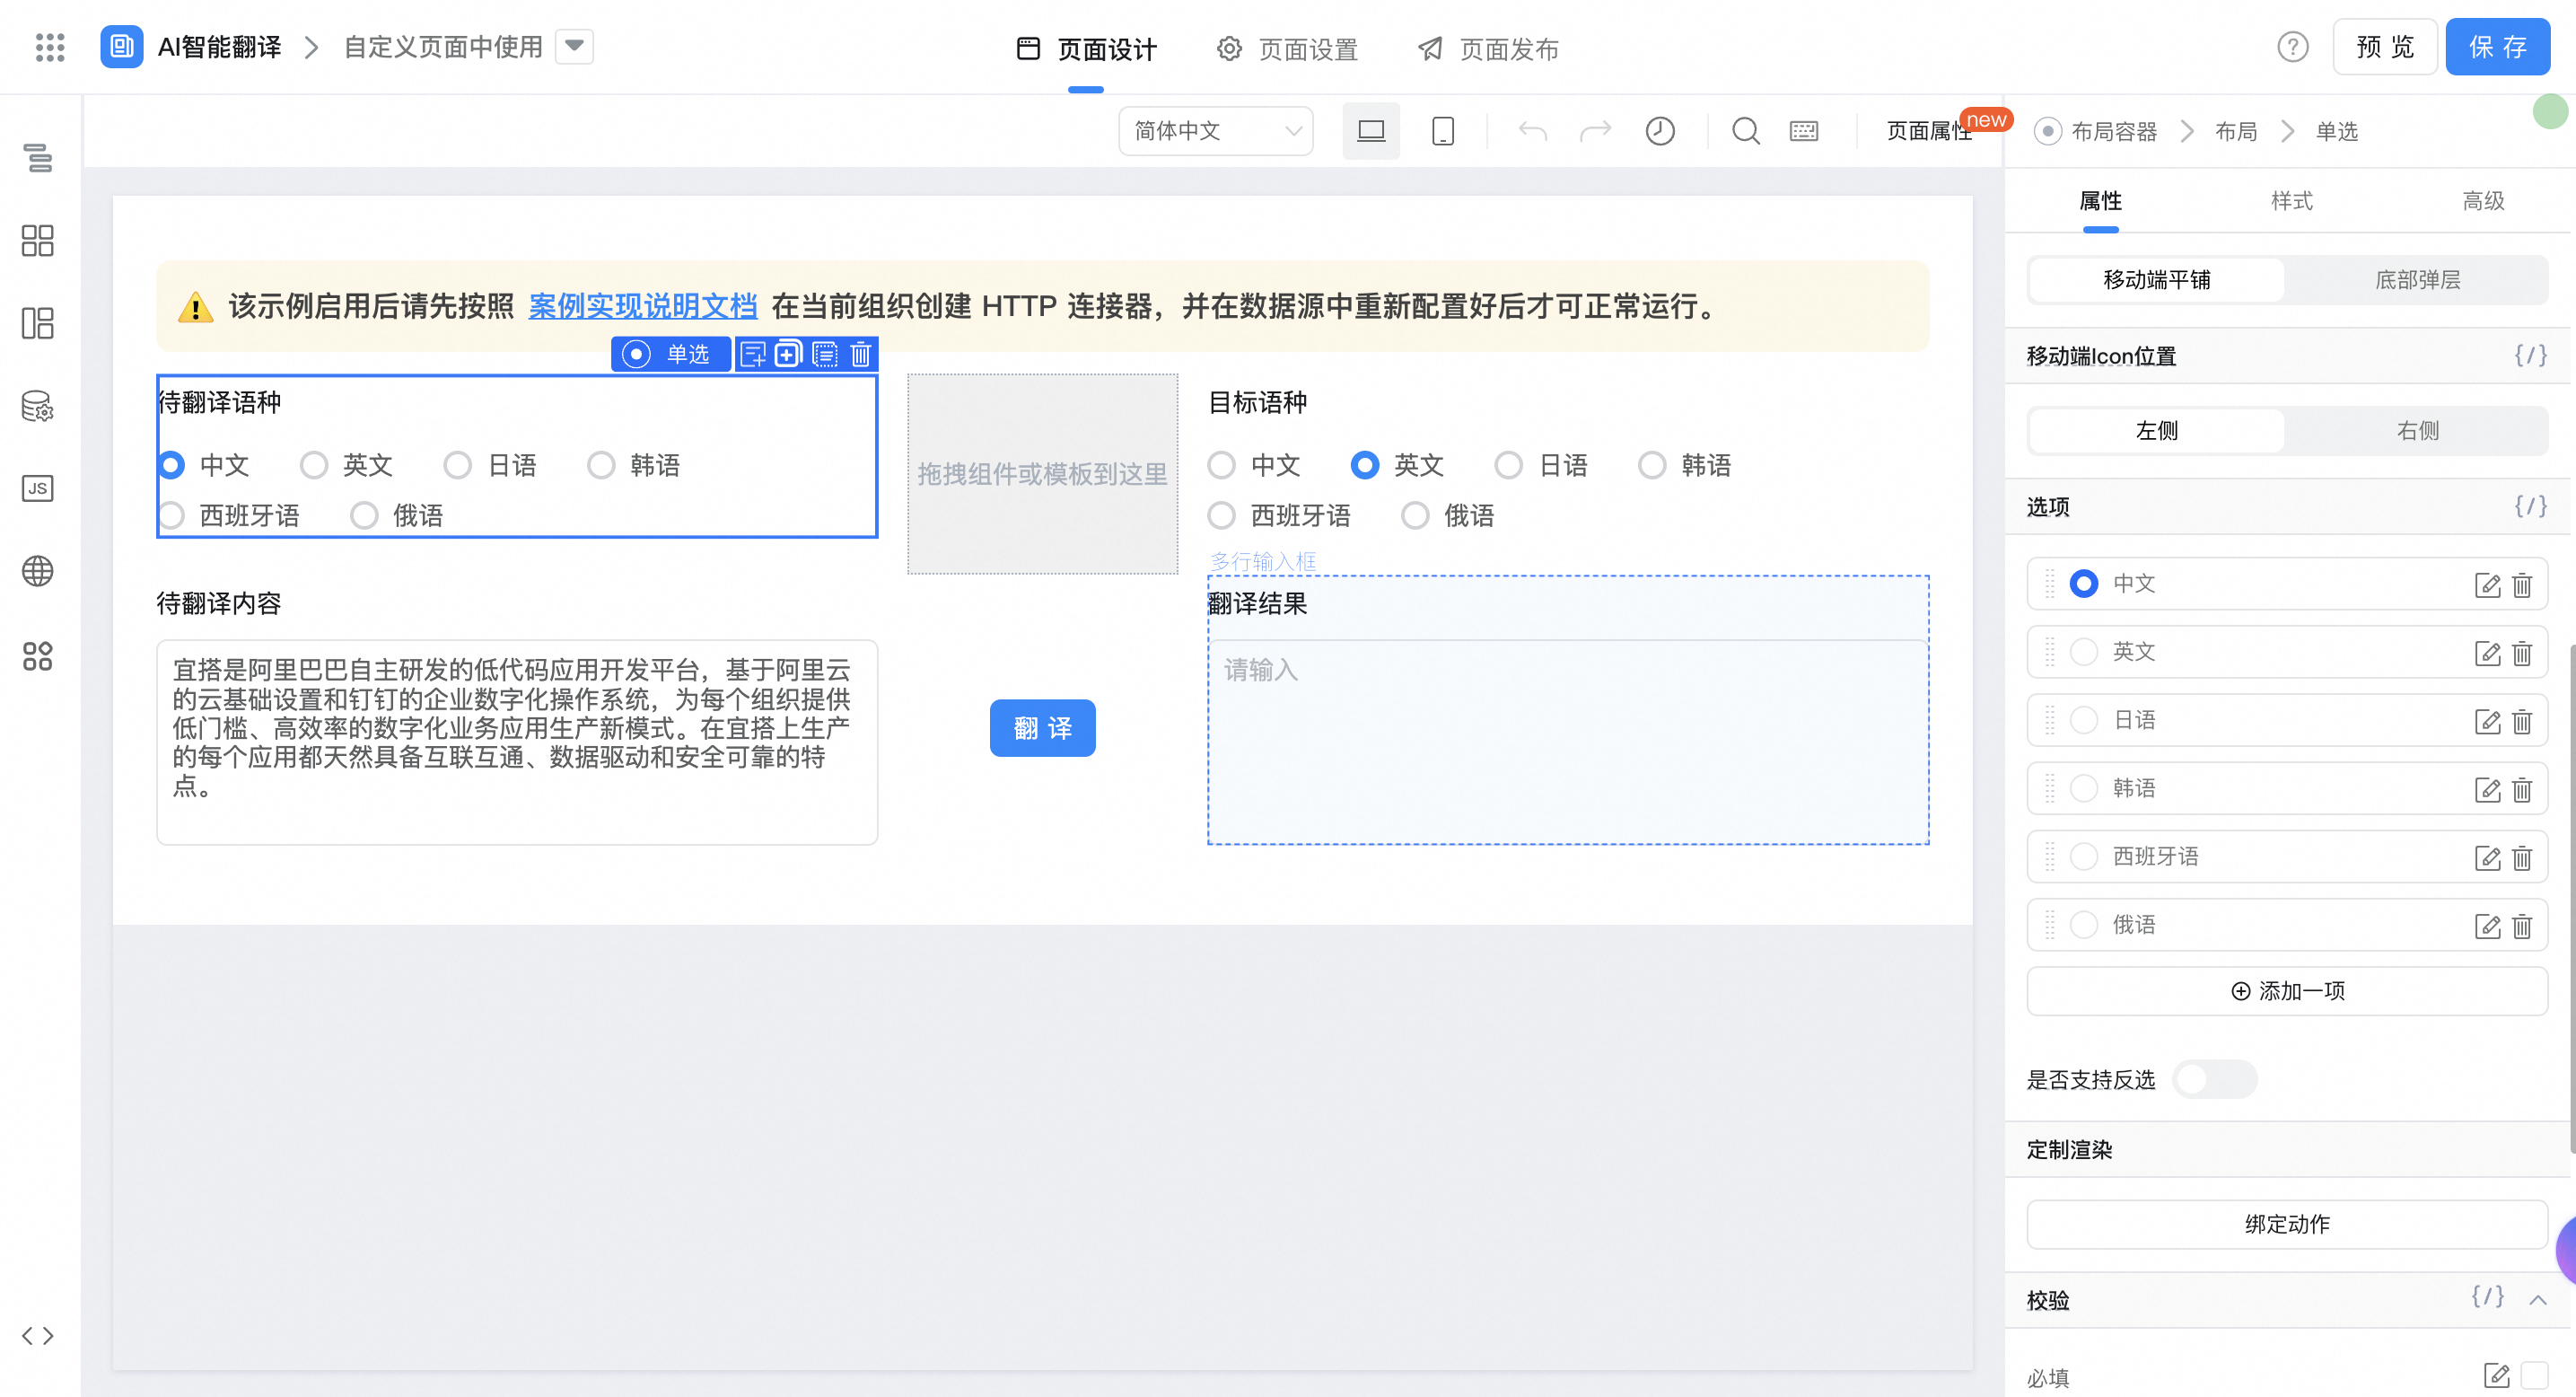
2.2.6.2. Add a connector to the data source
For more information, see:

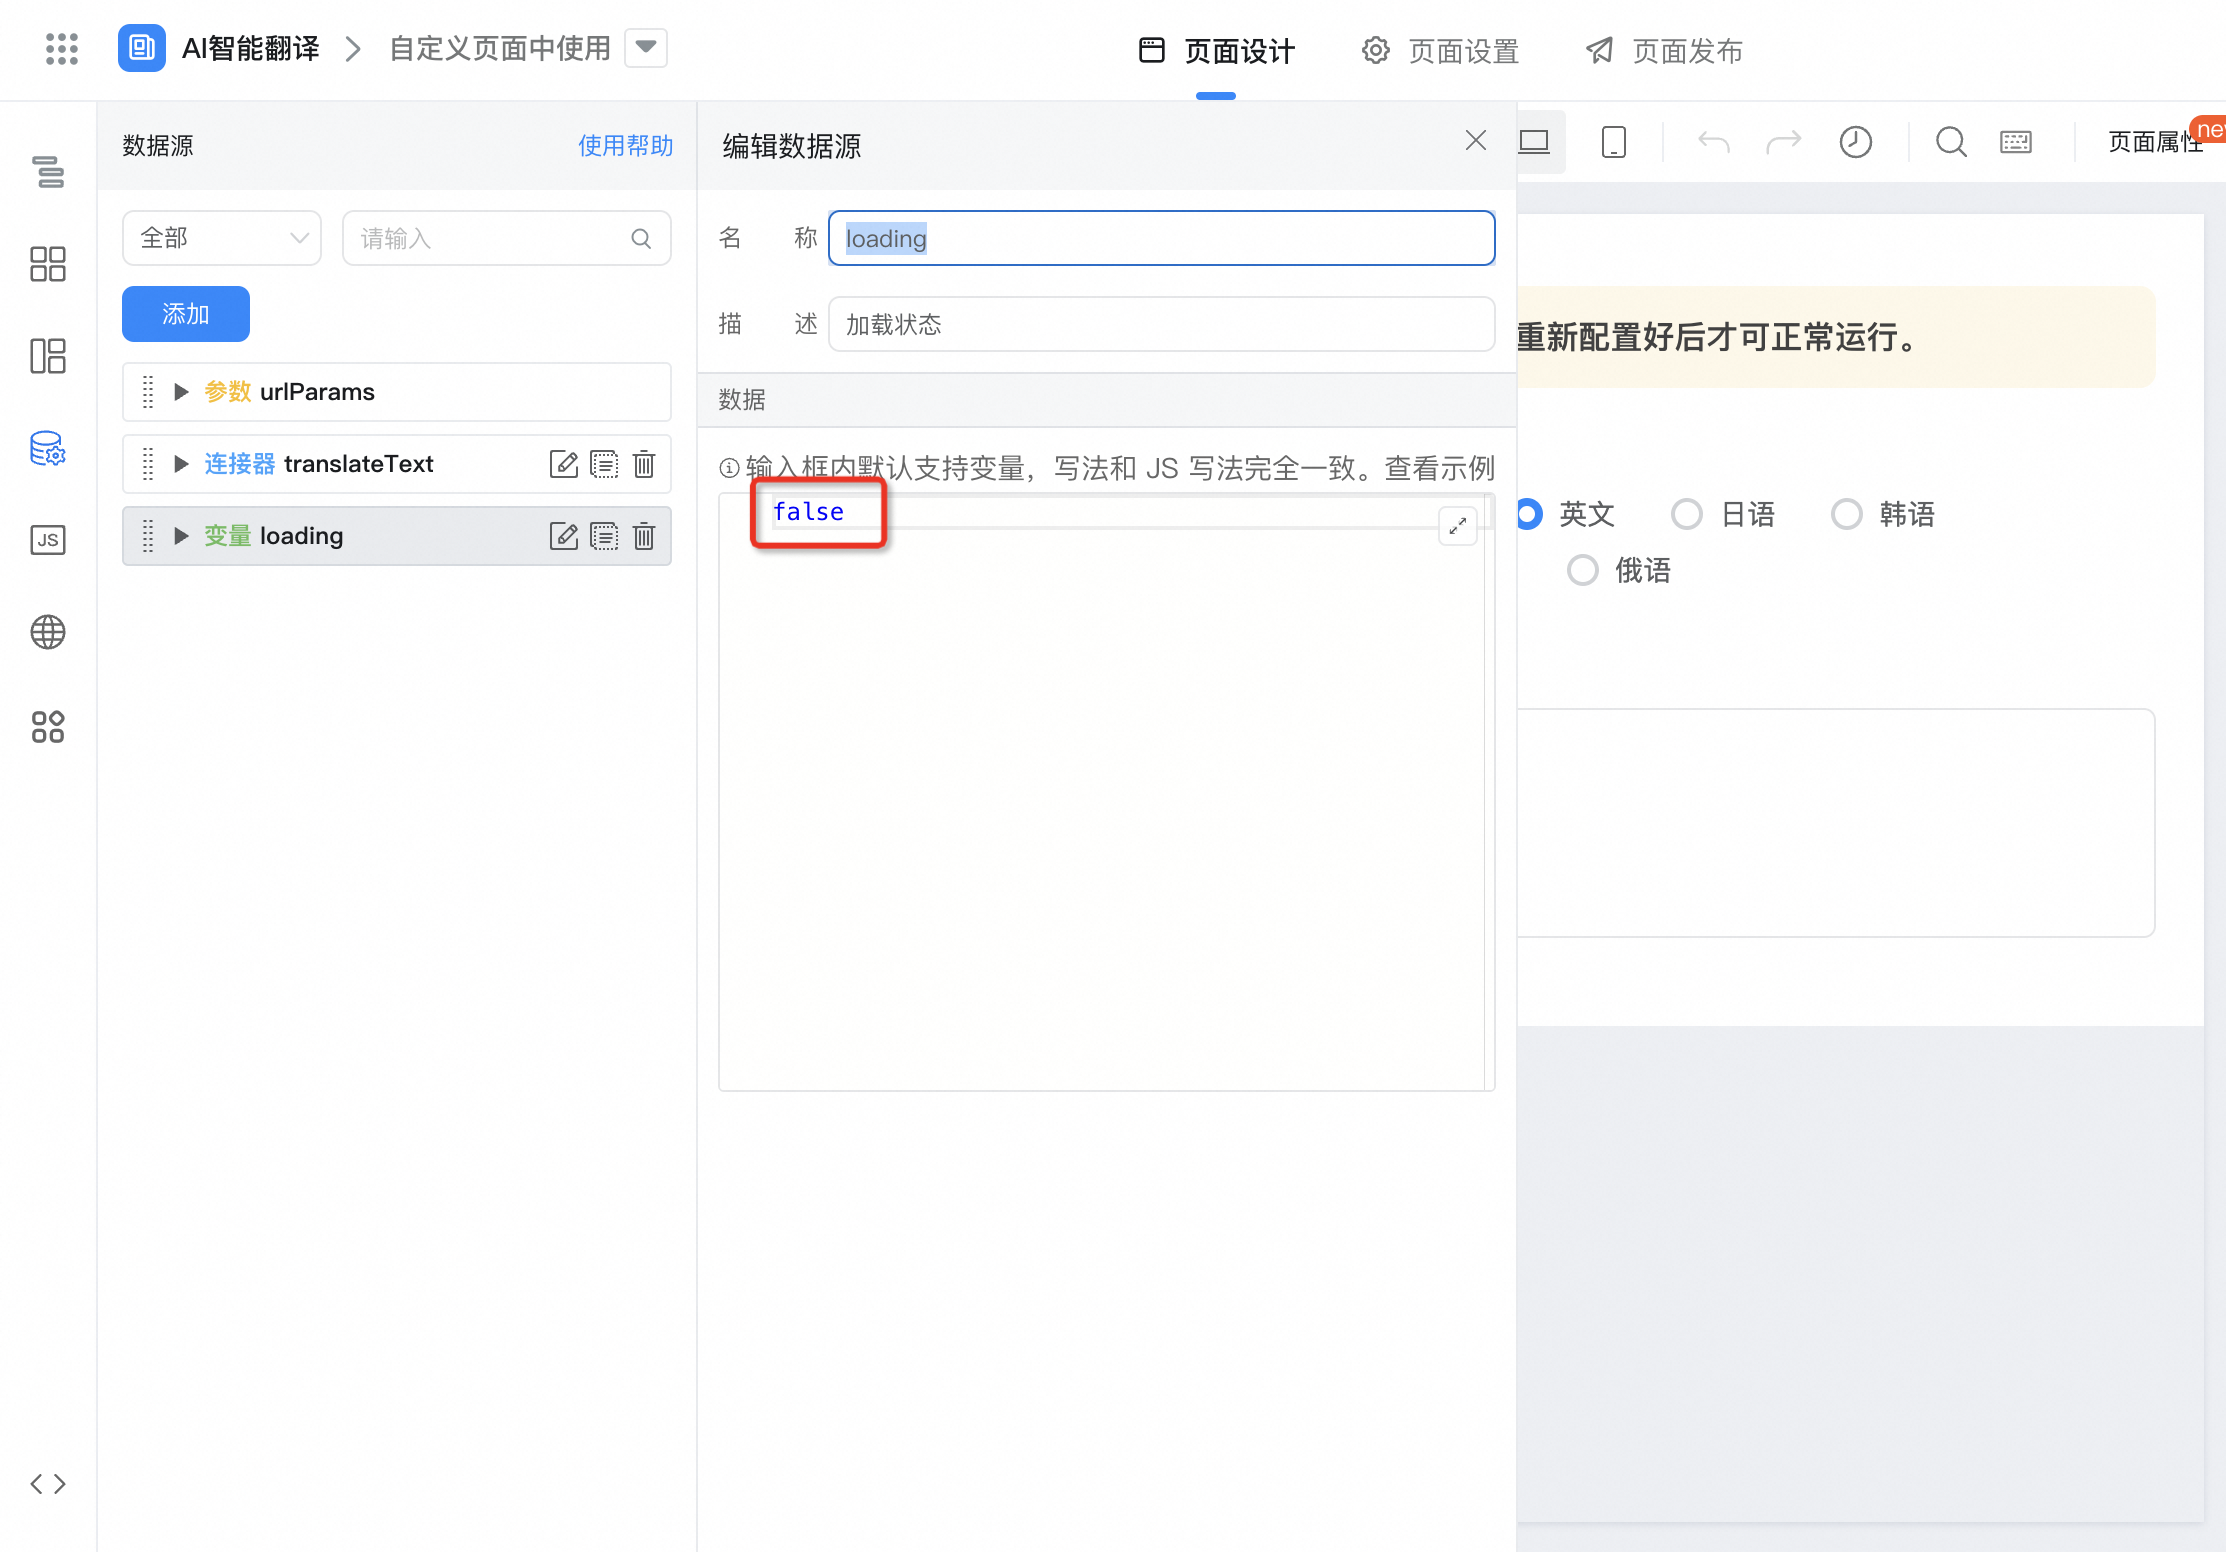
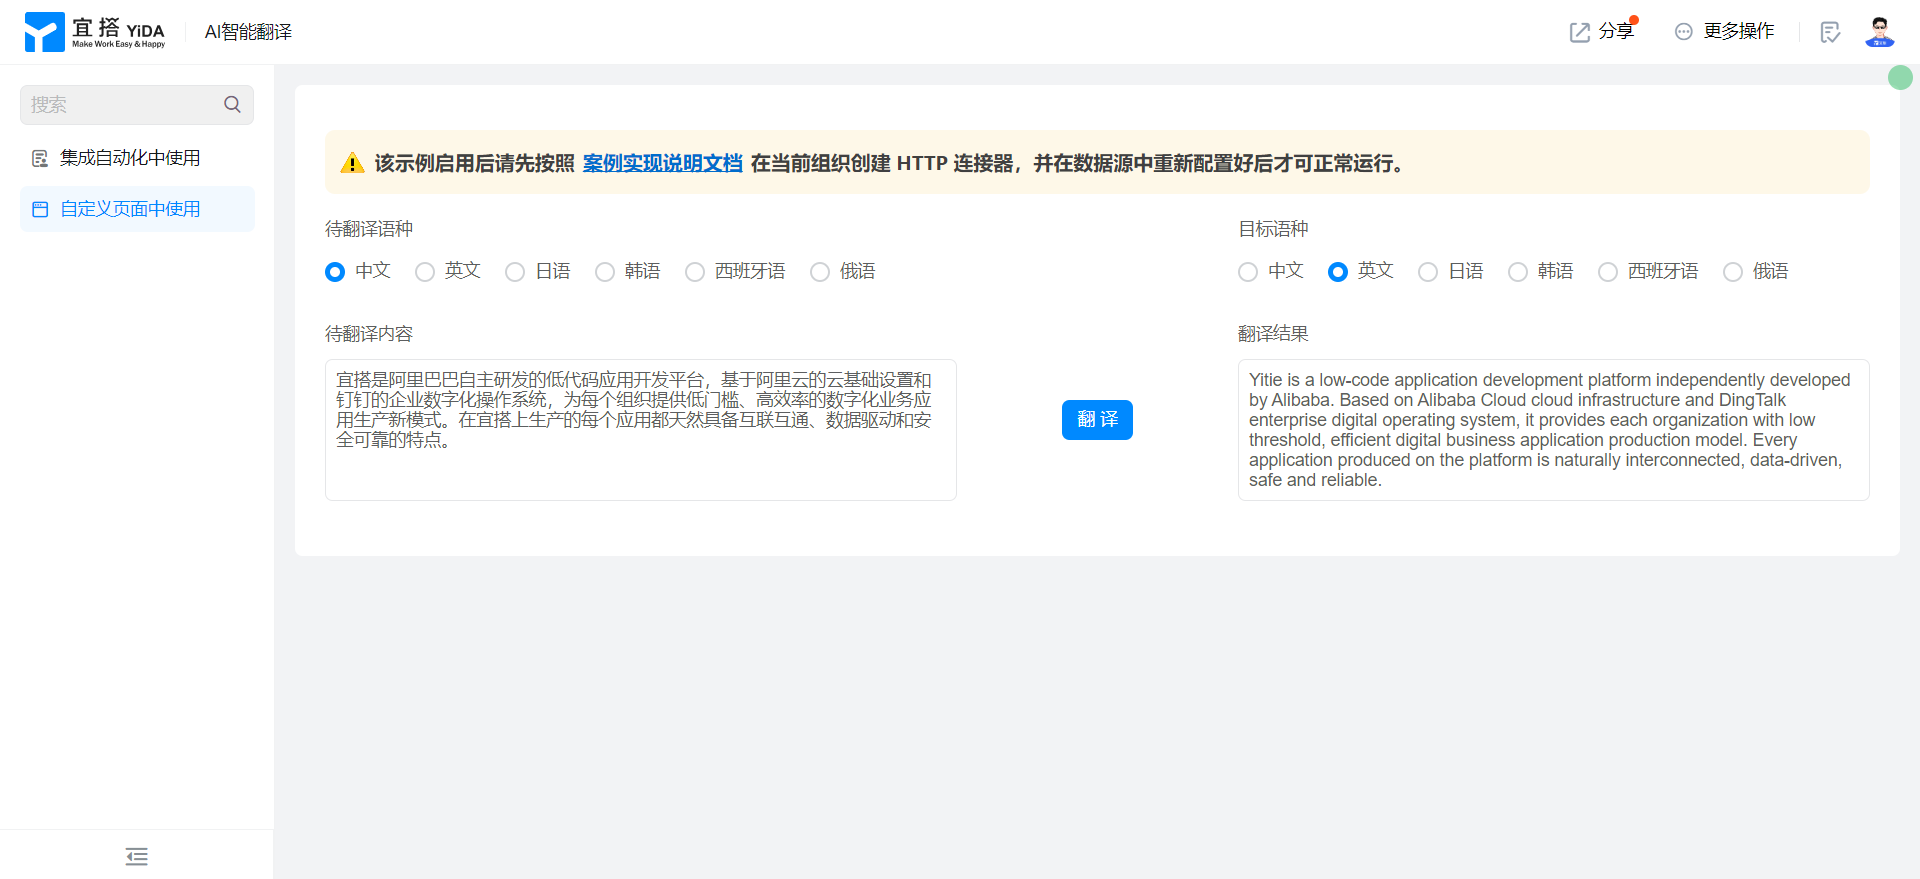
2.2.6.3. Configure translation button events
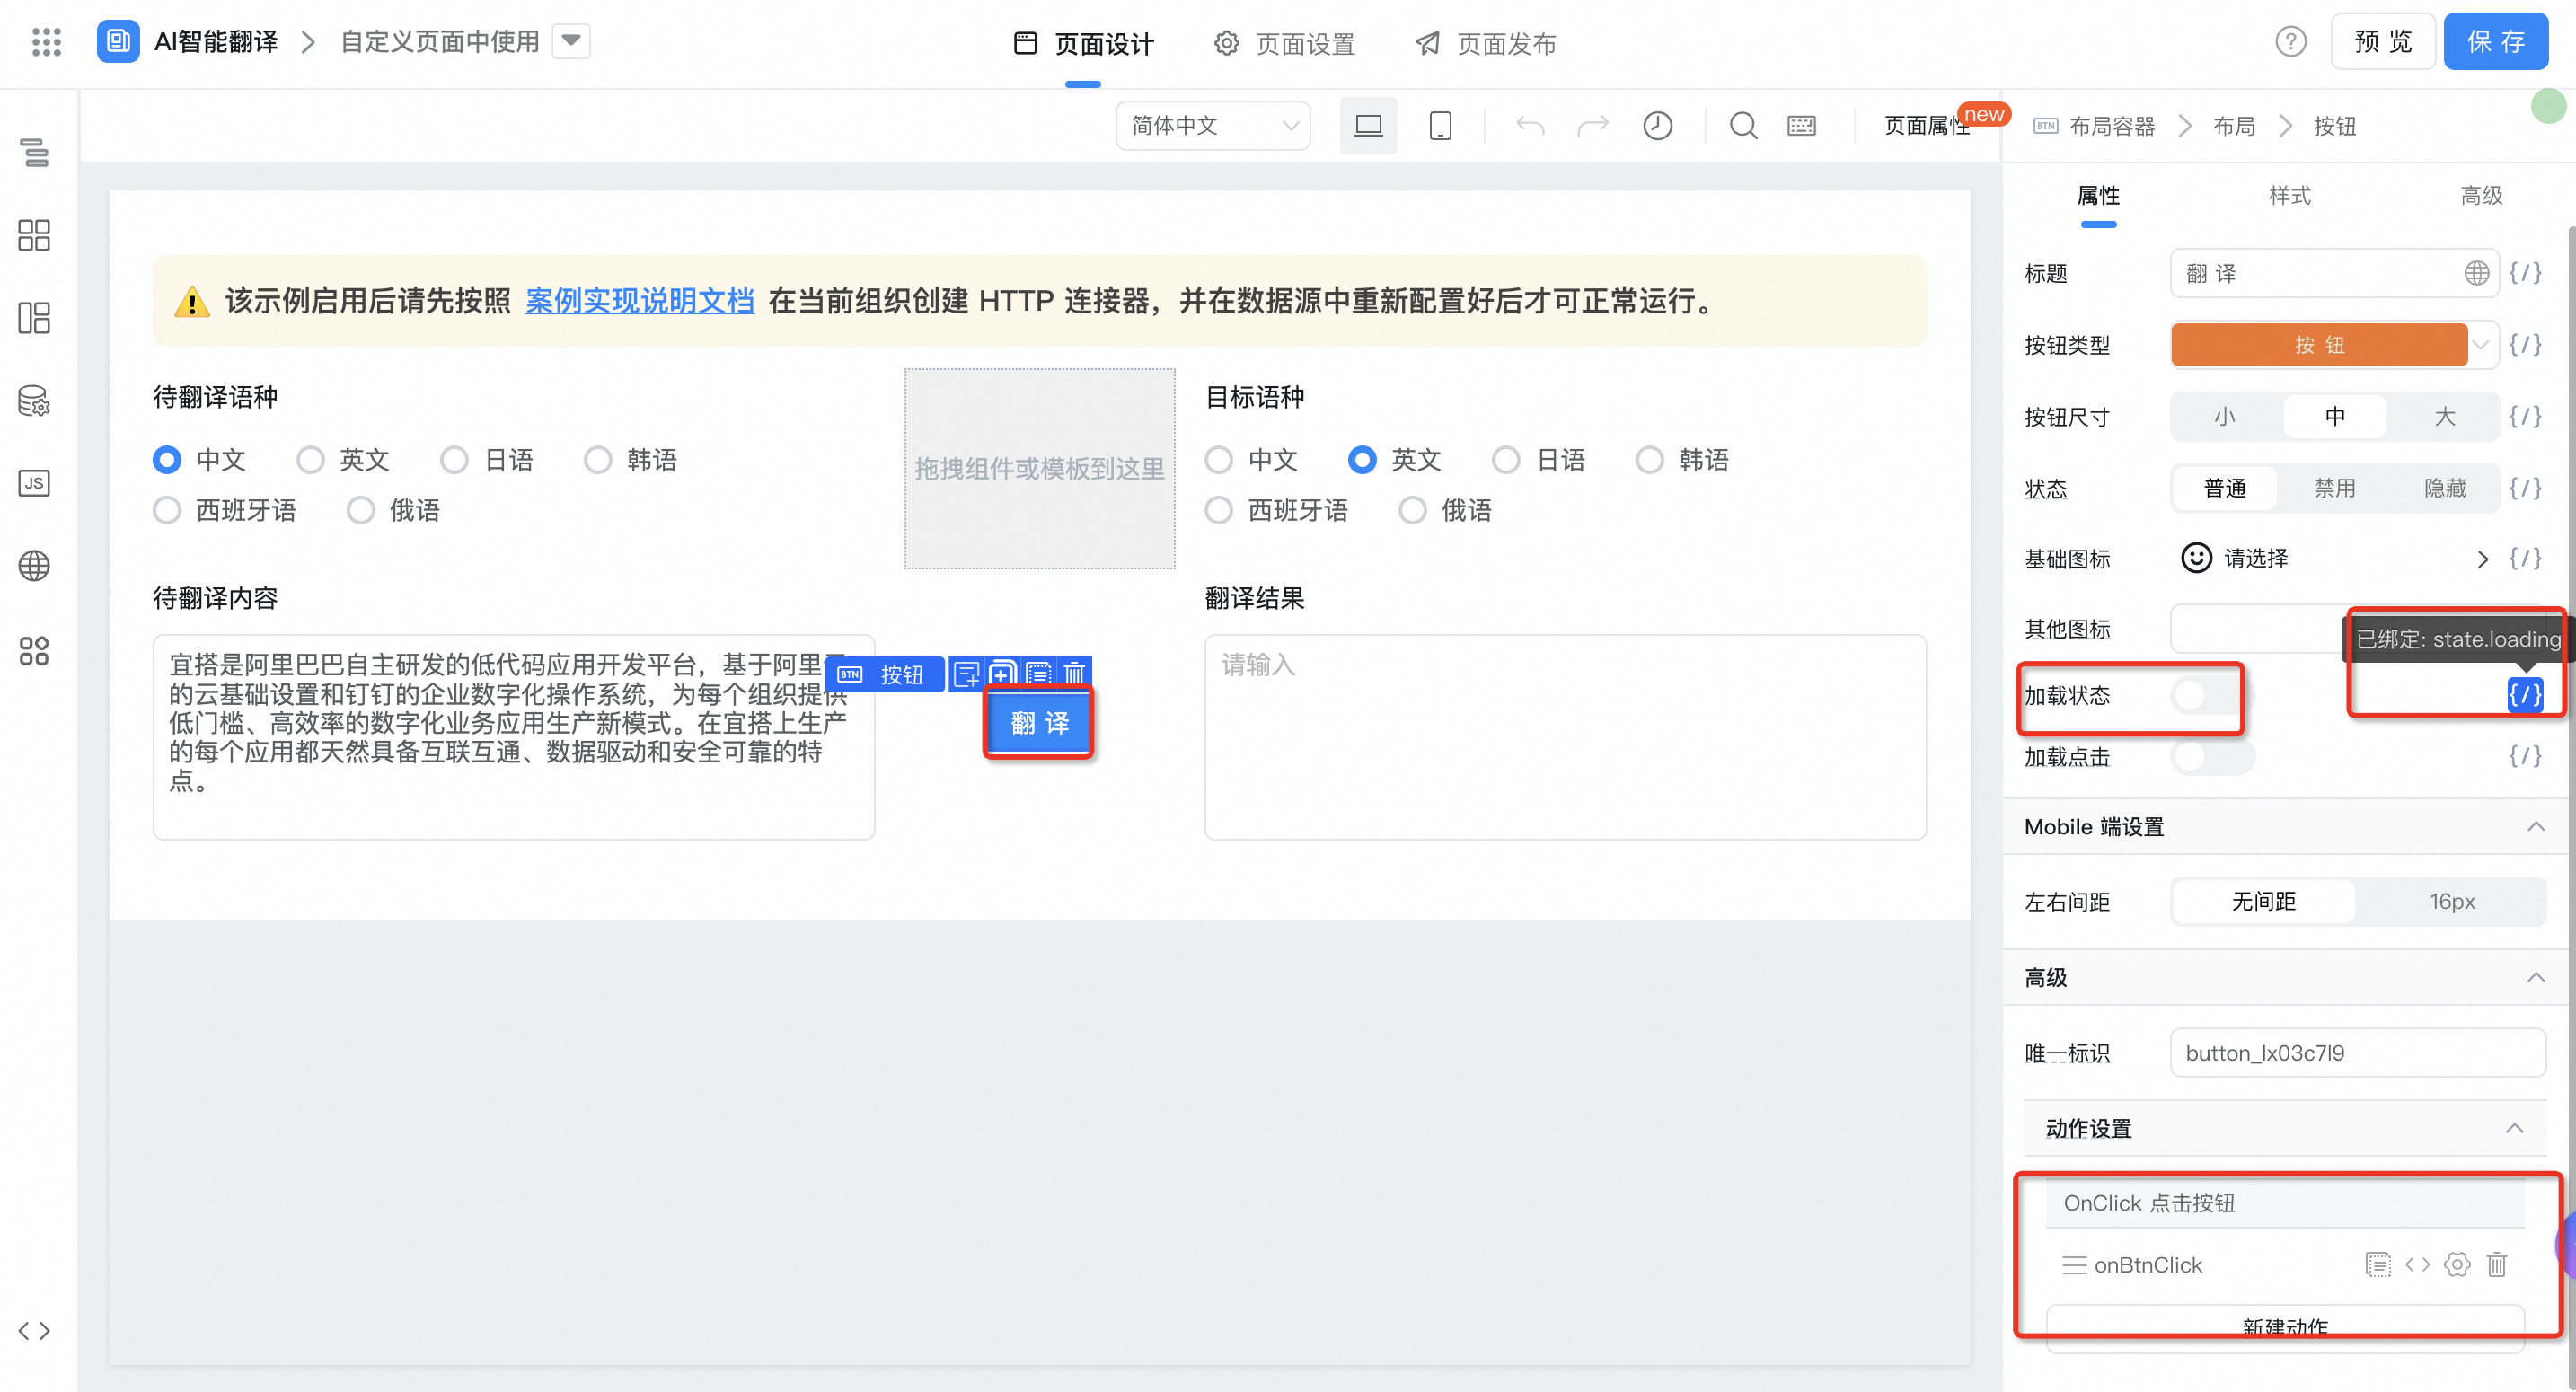
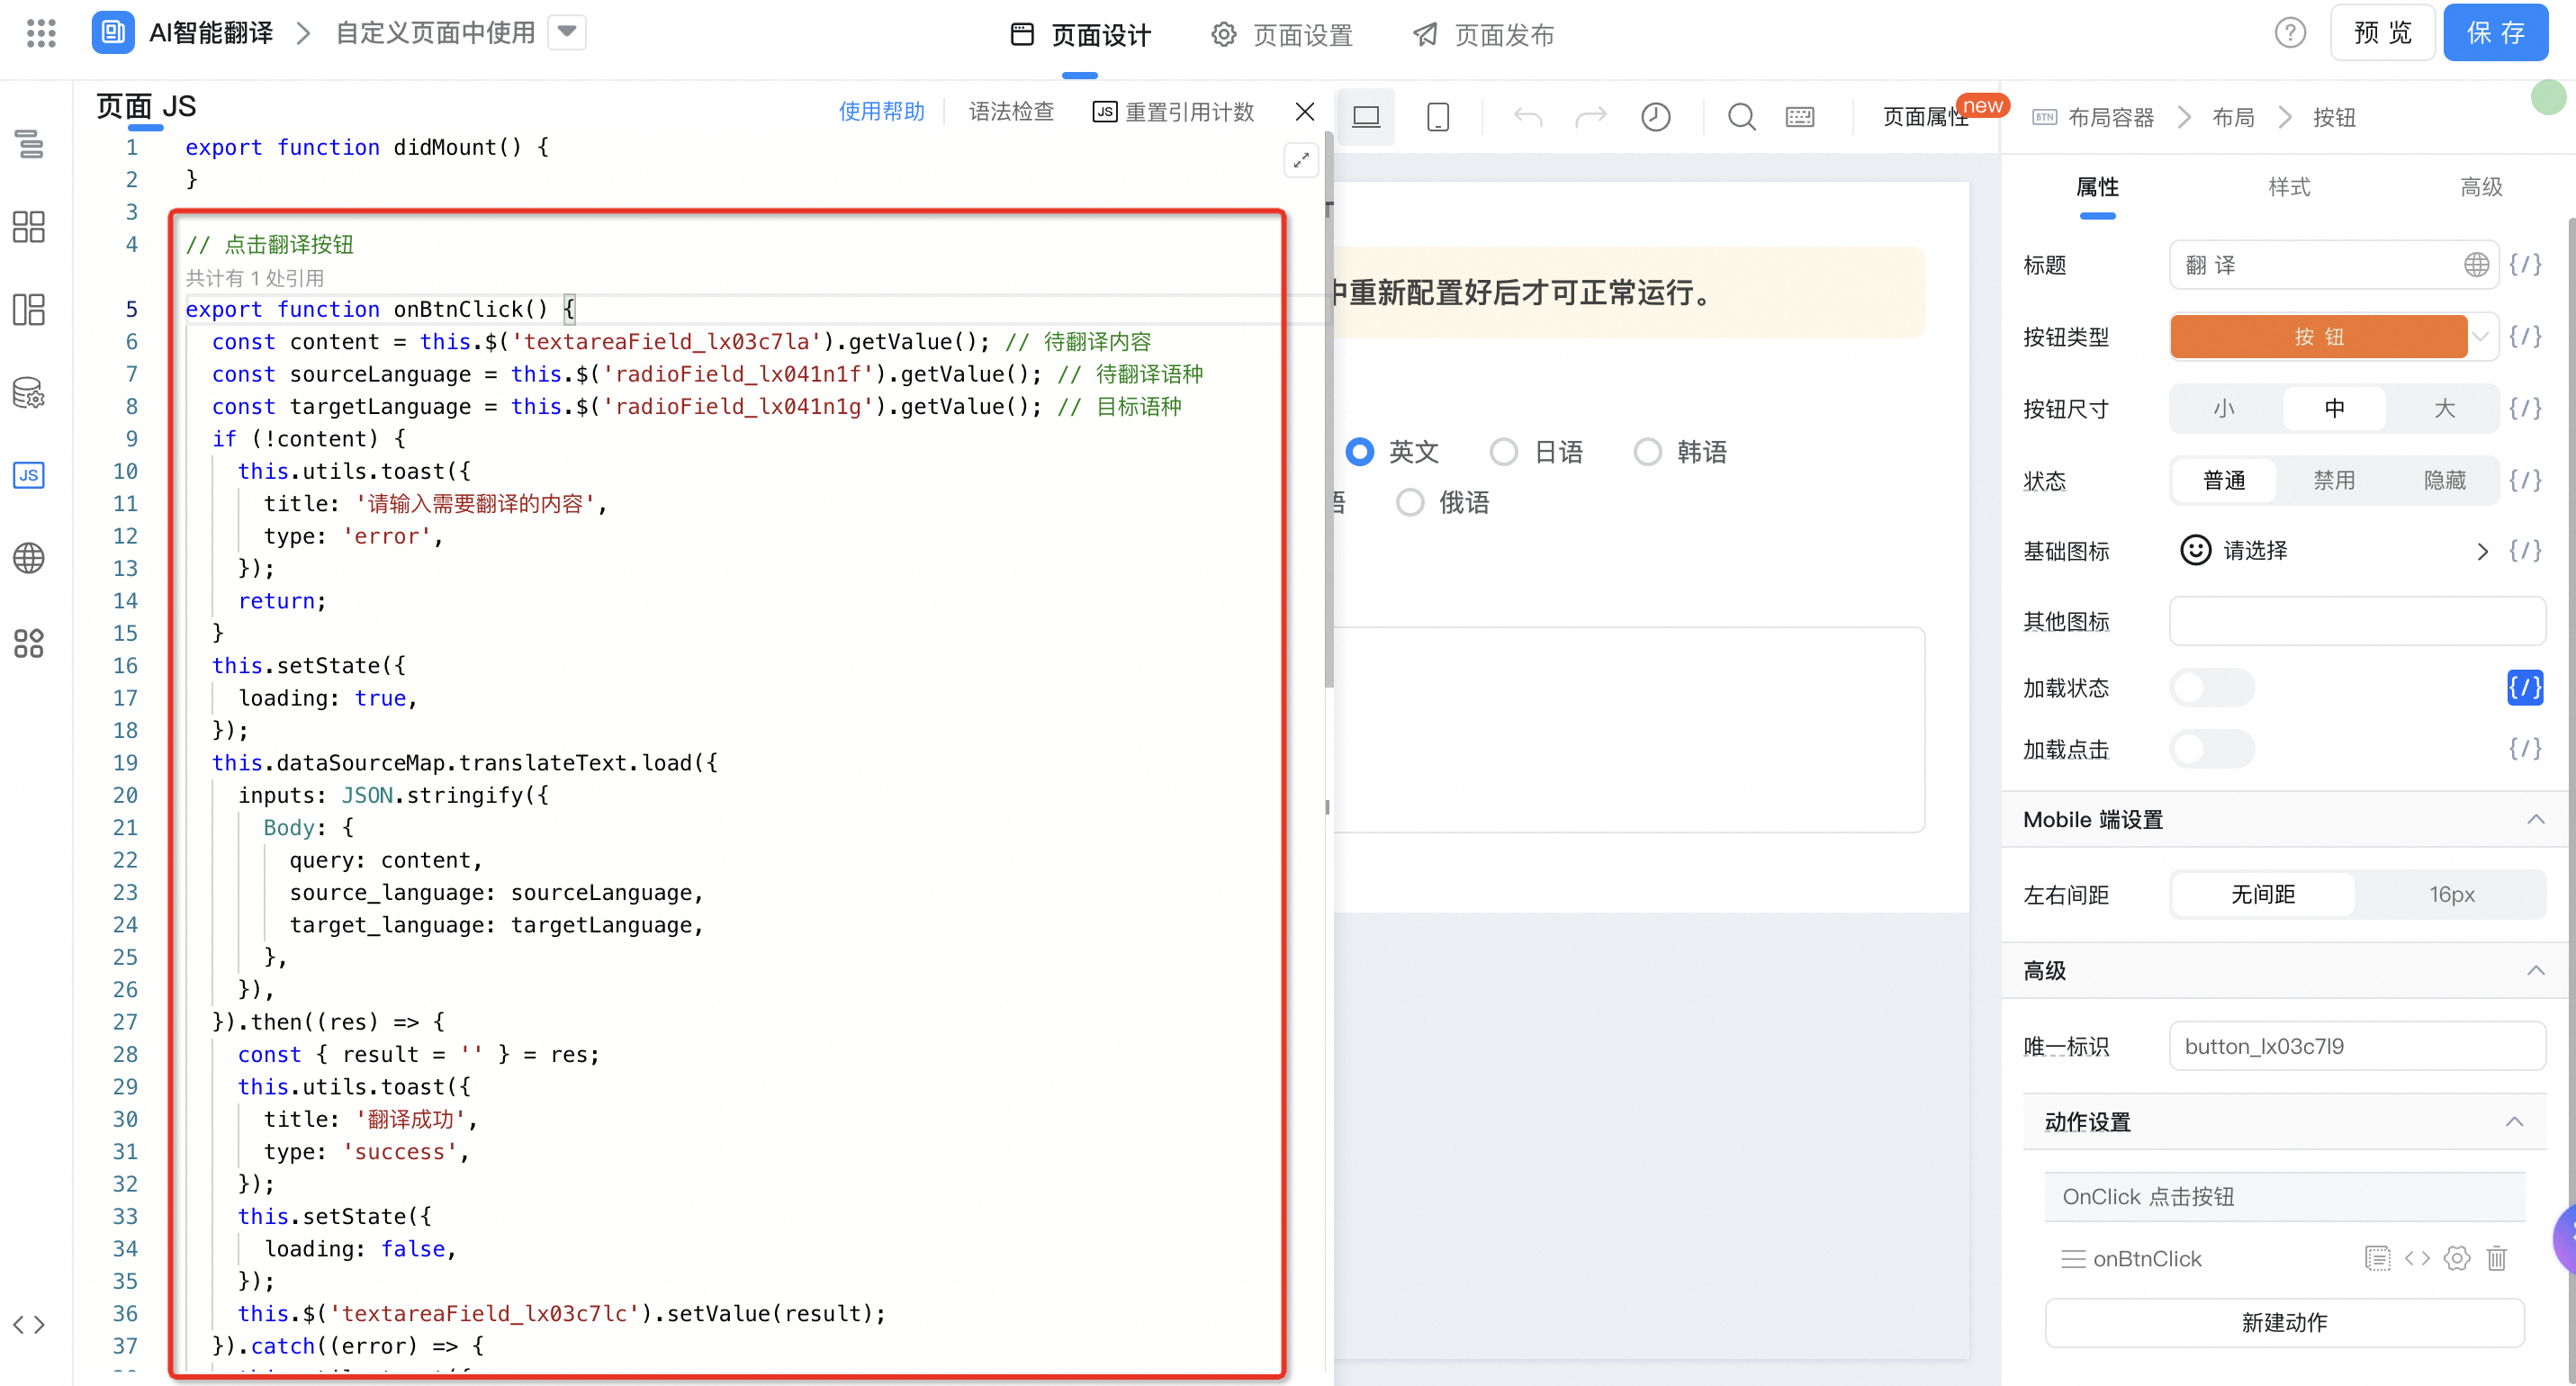
export function onBtnClick() {
  const content = this.$('textareaField_lx03c7la').getValue(); // 待翻译内容
  const sourceLanguage = this.$('radioField_lx041n1f').getValue(); // 待翻译语种
  const targetLanguage = this.$('radioField_lx041n1g').getValue(); // 目标语种
  if (!content) {
    this.utils.toast({
      title: '请输入需要翻译的内容',
      type: 'error',
    });
    return;
  }
  this.setState({
    loading: true,
  });
  this.dataSourceMap.translateText.load({
    inputs: JSON.stringify({
      Body: {
        query: content,
        source_language: sourceLanguage,
        target_language: targetLanguage,
      },
    }),
  }).then((res) => {
    const { result = '' } = res;
    this.utils.toast({
      title: '翻译成功',
      type: 'success',
    });
    this.setState({
      loading: false,
    });
    this.$('textareaField_lx03c7lc').setValue(result);
  }).catch((error) => {
    this.utils.toast({
      title: error.message,
      type: 'error',
    });
    this.setState({
      loading: false,
    });
  });
}
2.3. Chinese-English translation of official AI controls
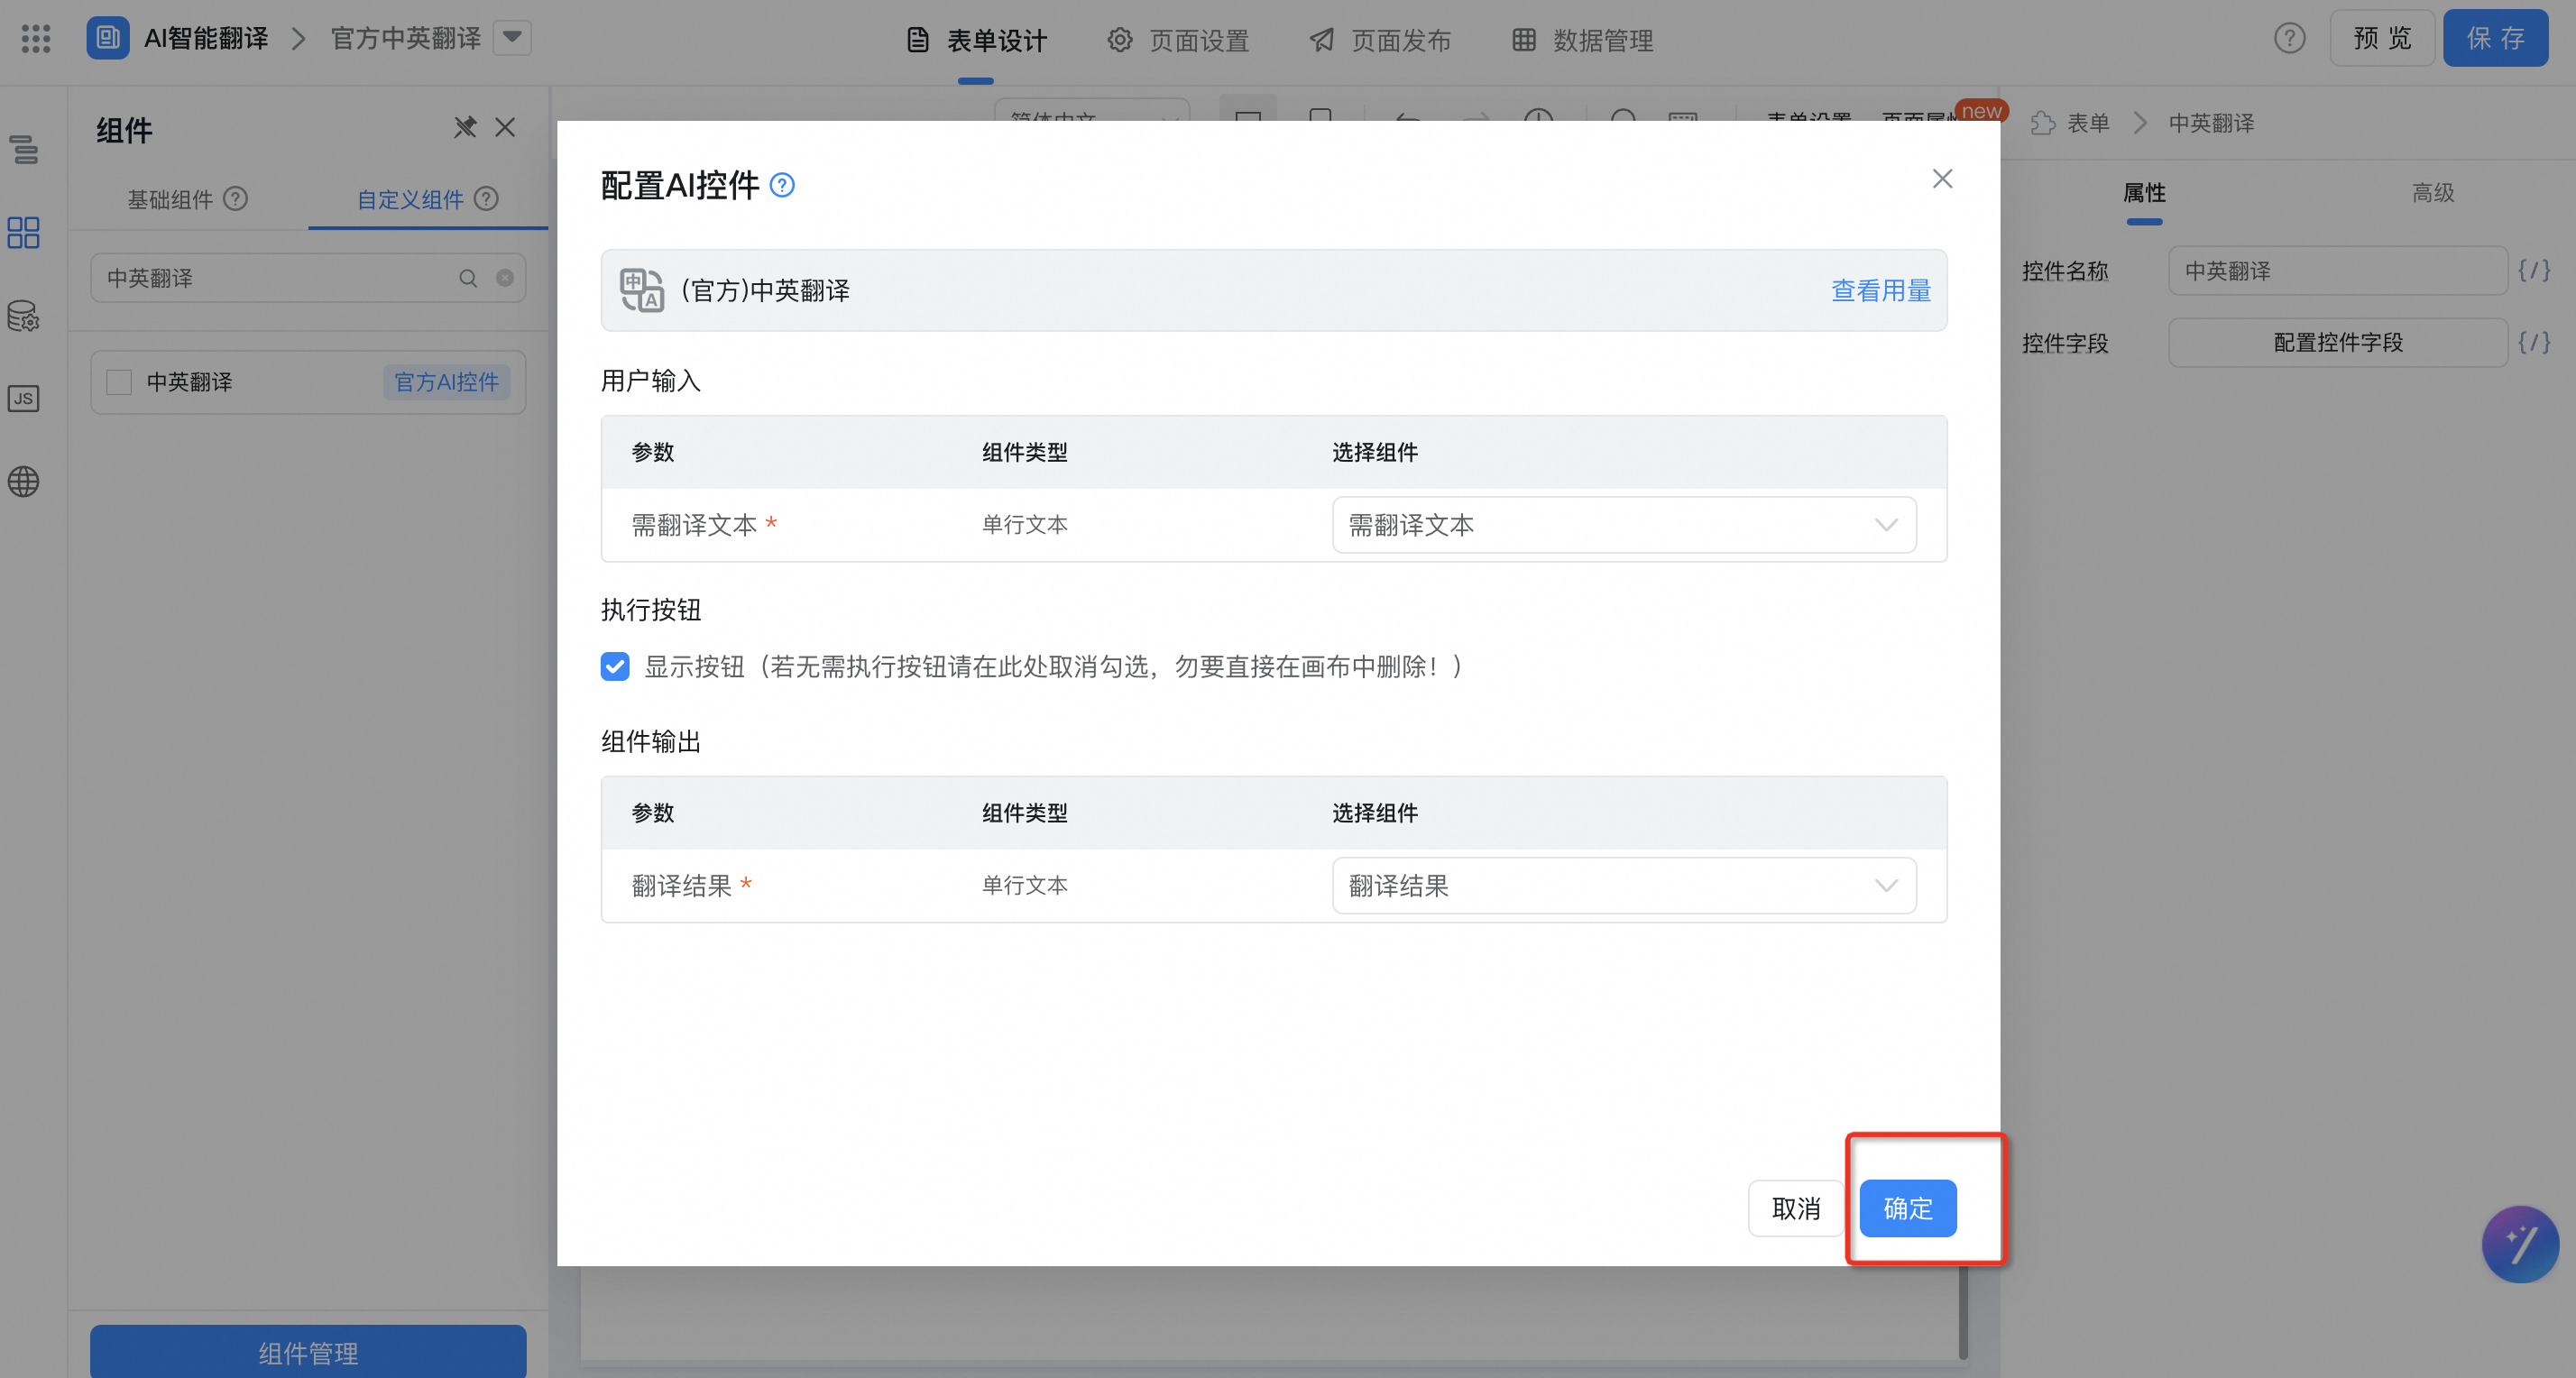
Currently, the custom components of Chinese-English translation are available. You can configure them as follows:
Go to the system background-page design-Component Library on the left-custom component-input content "Chinese-English translation"-select the control

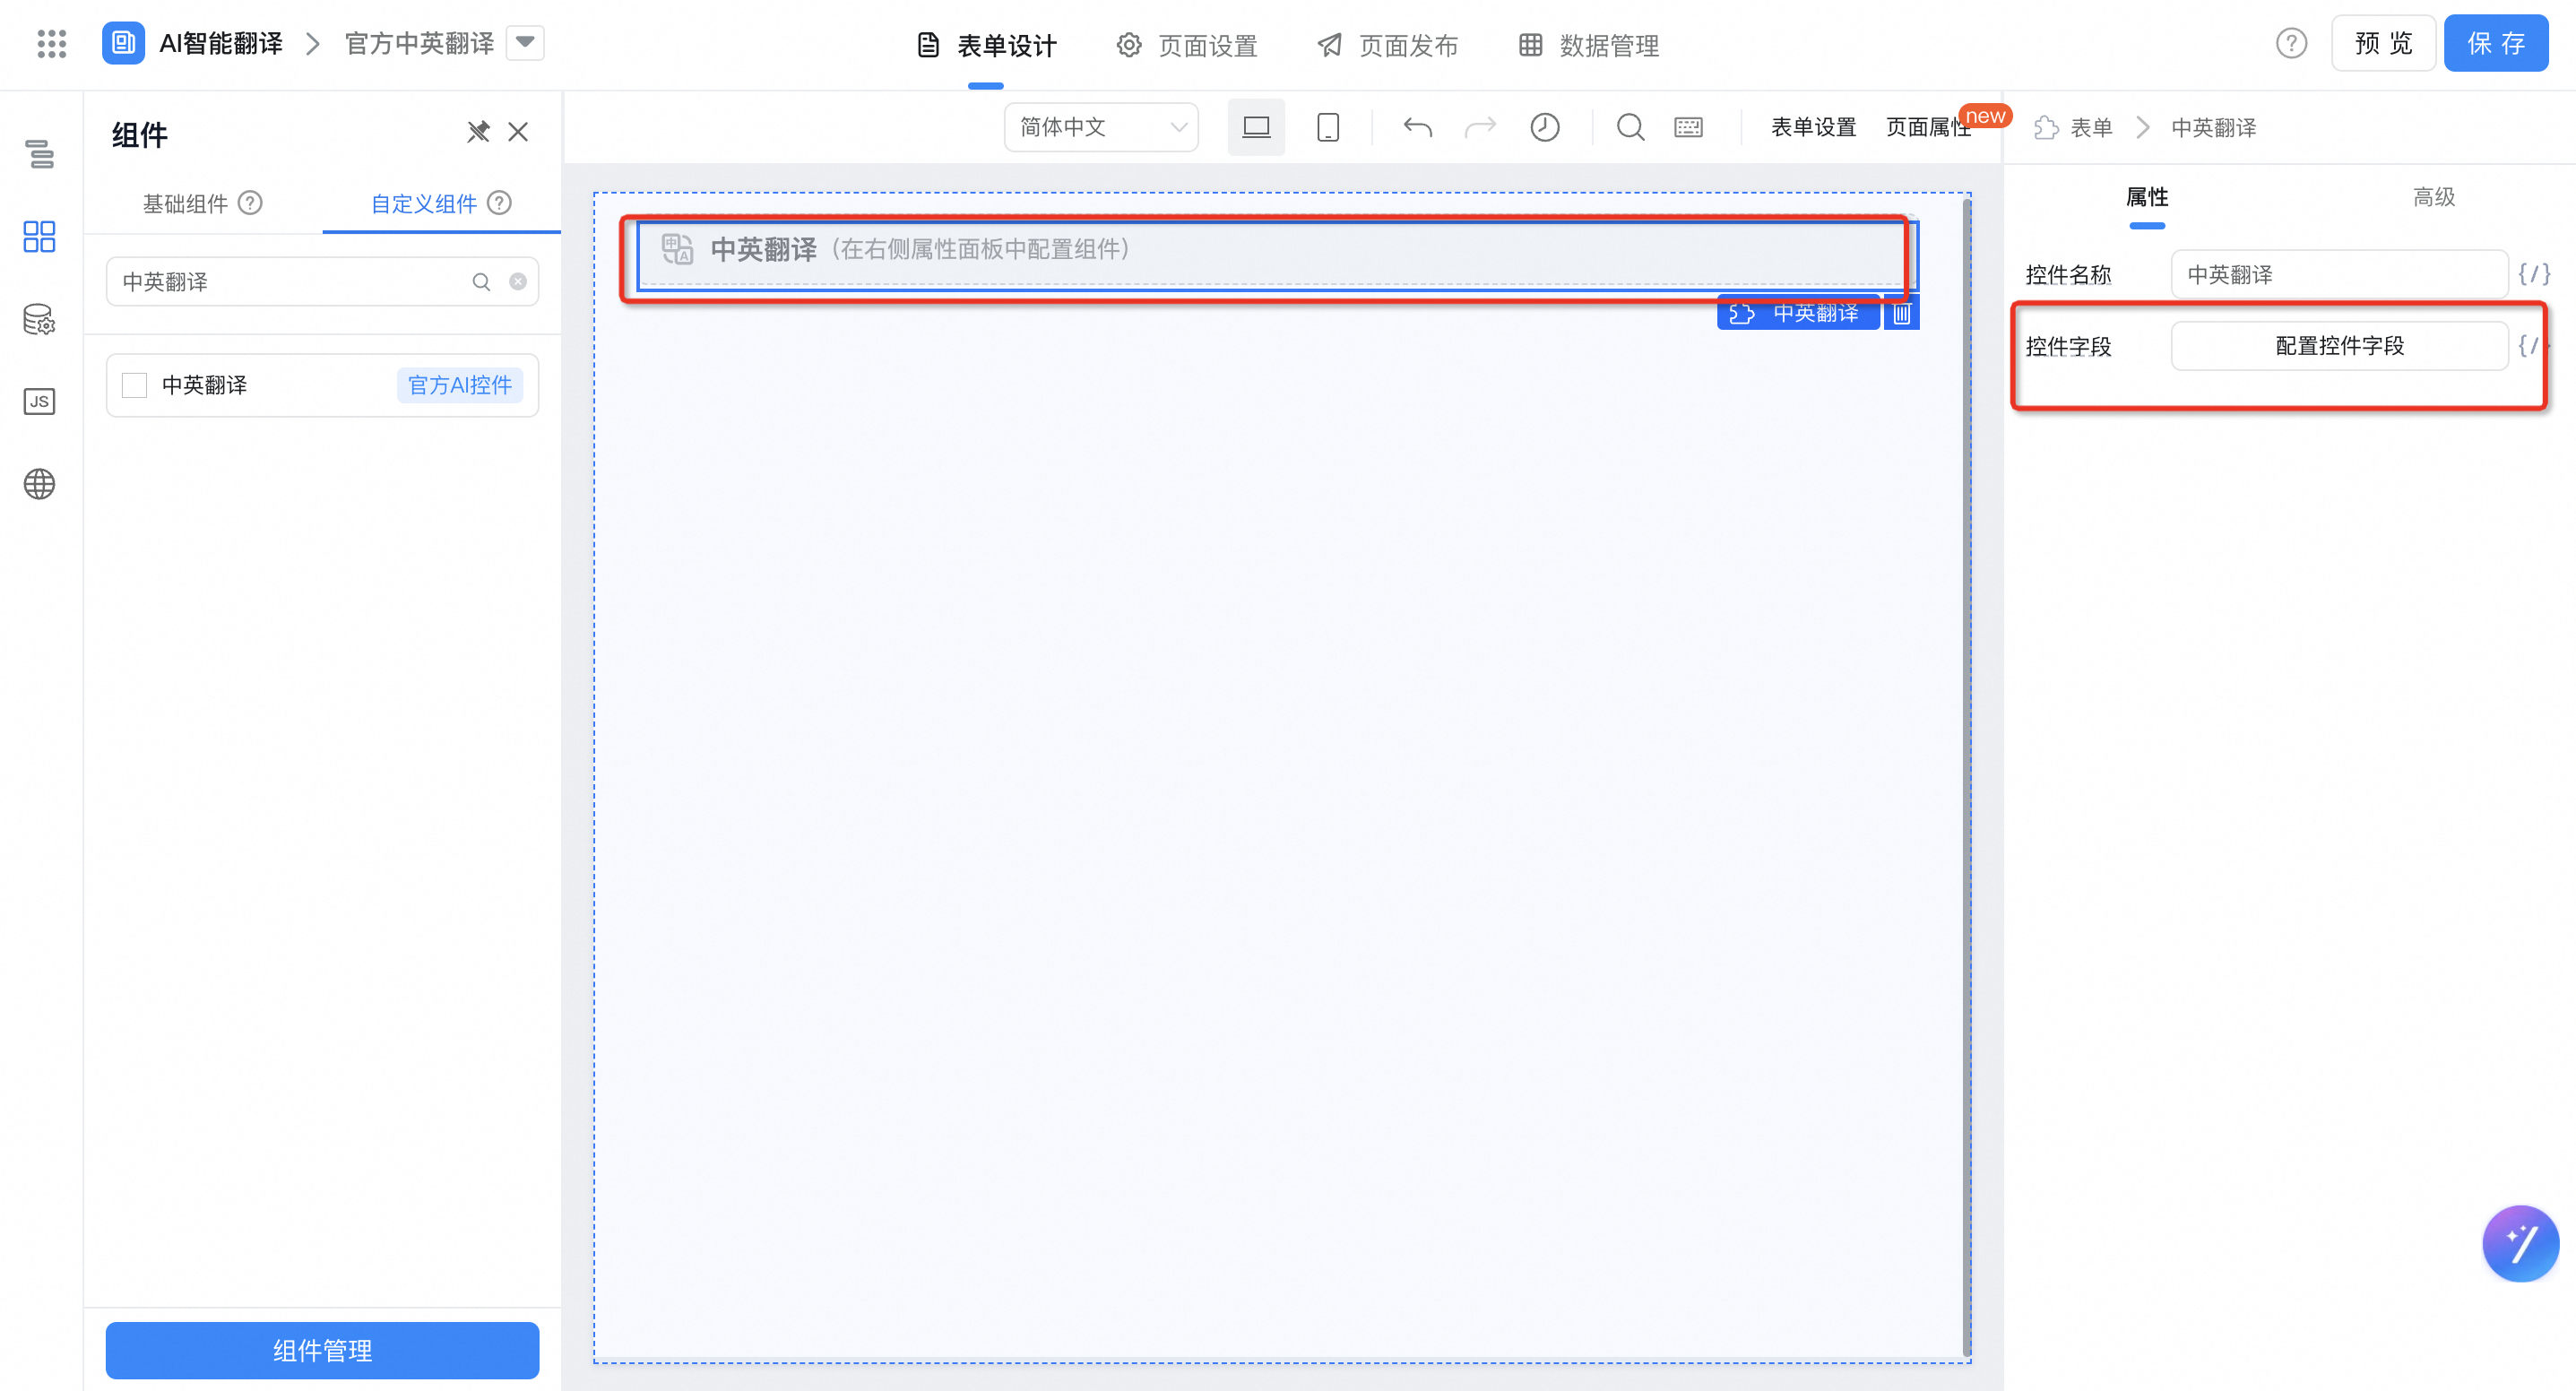
Select components-configure control fields in the actions bar on the right-click OK 」
3. Effect display
3.1. Used in integrated automation

3.2. Use in custom pages
3.3. Chinese-English translation of official AI controls
