Form Management
1. Introduction
1.1 function introduction
Forms are the basic tool for YIDA. Data collection depends on forms. Therefore, forms are also the source of data.
In YIDA, there are two form types:
Common form:You can collect all data in business progress, and the collected data can also be decentralized and coordinated to grant data permissions.PublishCollect external data to members who need to manage data or publish it to external members.
Flow chart:Data can be transferred from bottom to top and approved step by step. You can also assign permissions to further manage process data.
The biggest difference between normal forms and flow chart is that flow chart needs to be approved step by step and setProcess.
1.2 Application scenarios
- General form: Survey statistics, online registration, sales reporting, meeting appointment, purchase warehousing, order entry, QR code scanning, etc.
- Flow chart: reimbursement approval, work report, task dispatch, employee leave, item collection, maintenance application, feedback, etc.
1.3 conditions of use
The form is suitable for free. Users of all versions can use it free of charge.
For free users: there are 20000 Data bars and 20g attachment capacity submission limits. For more information, see:宜搭收费政策
2. Form Creation method
After creating a YIDA application, the form/flow chart is created as follows:
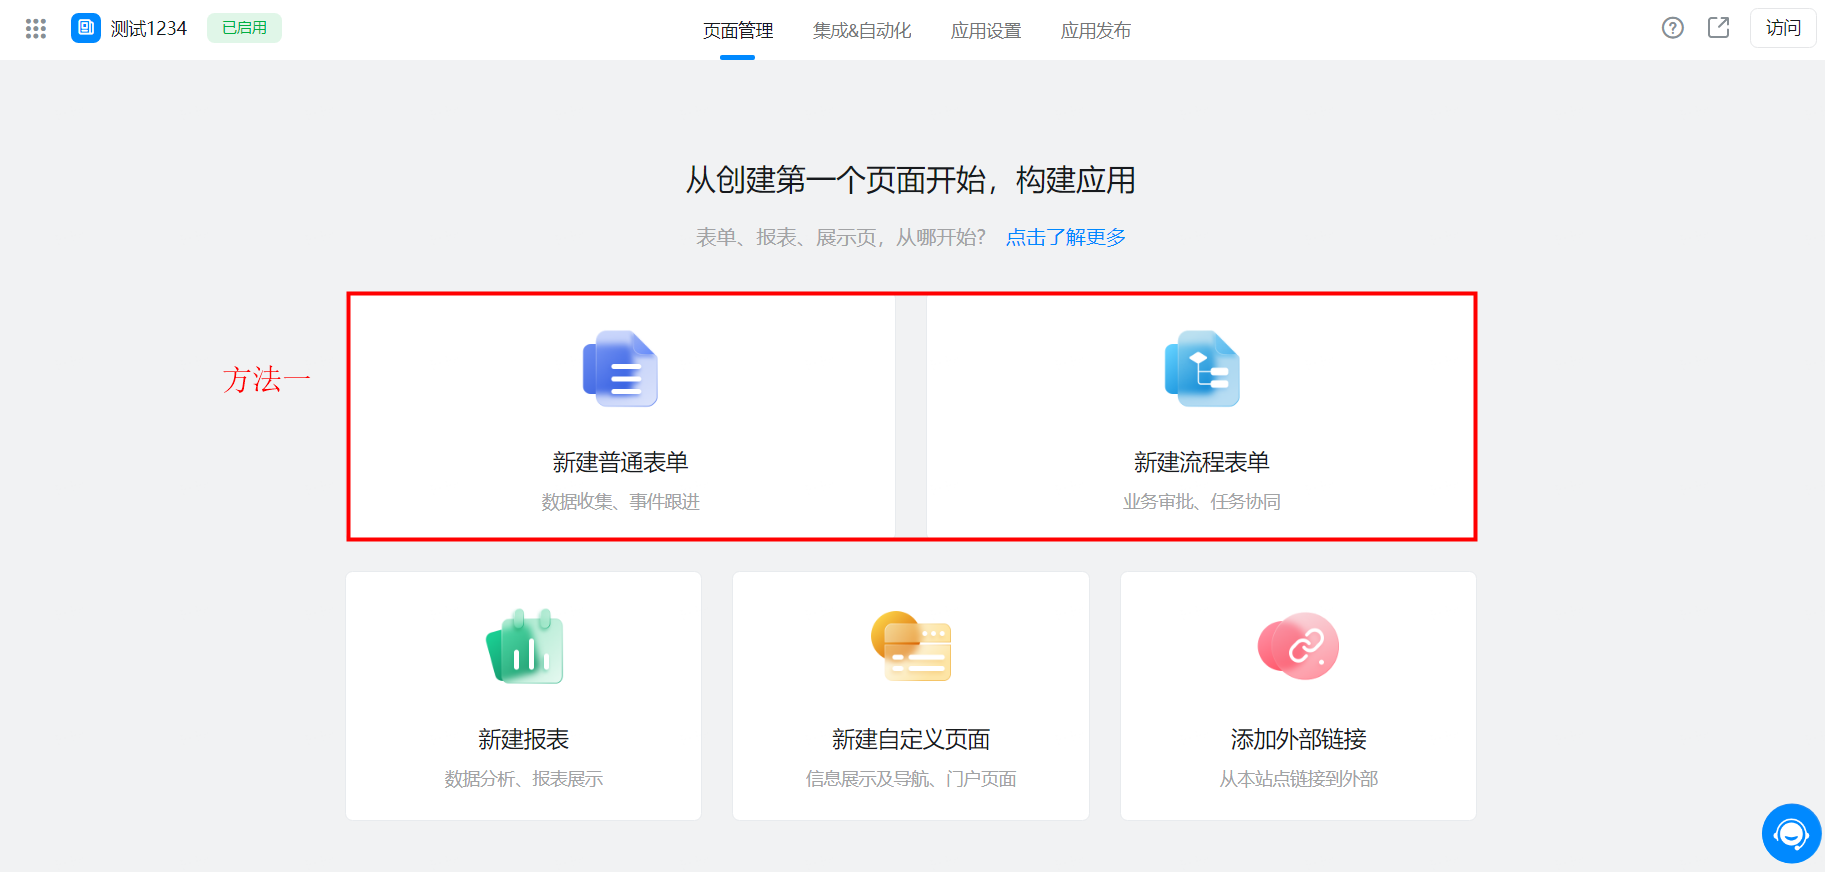
Method 1: go to the newly created application page management> select Create form/create flow chart
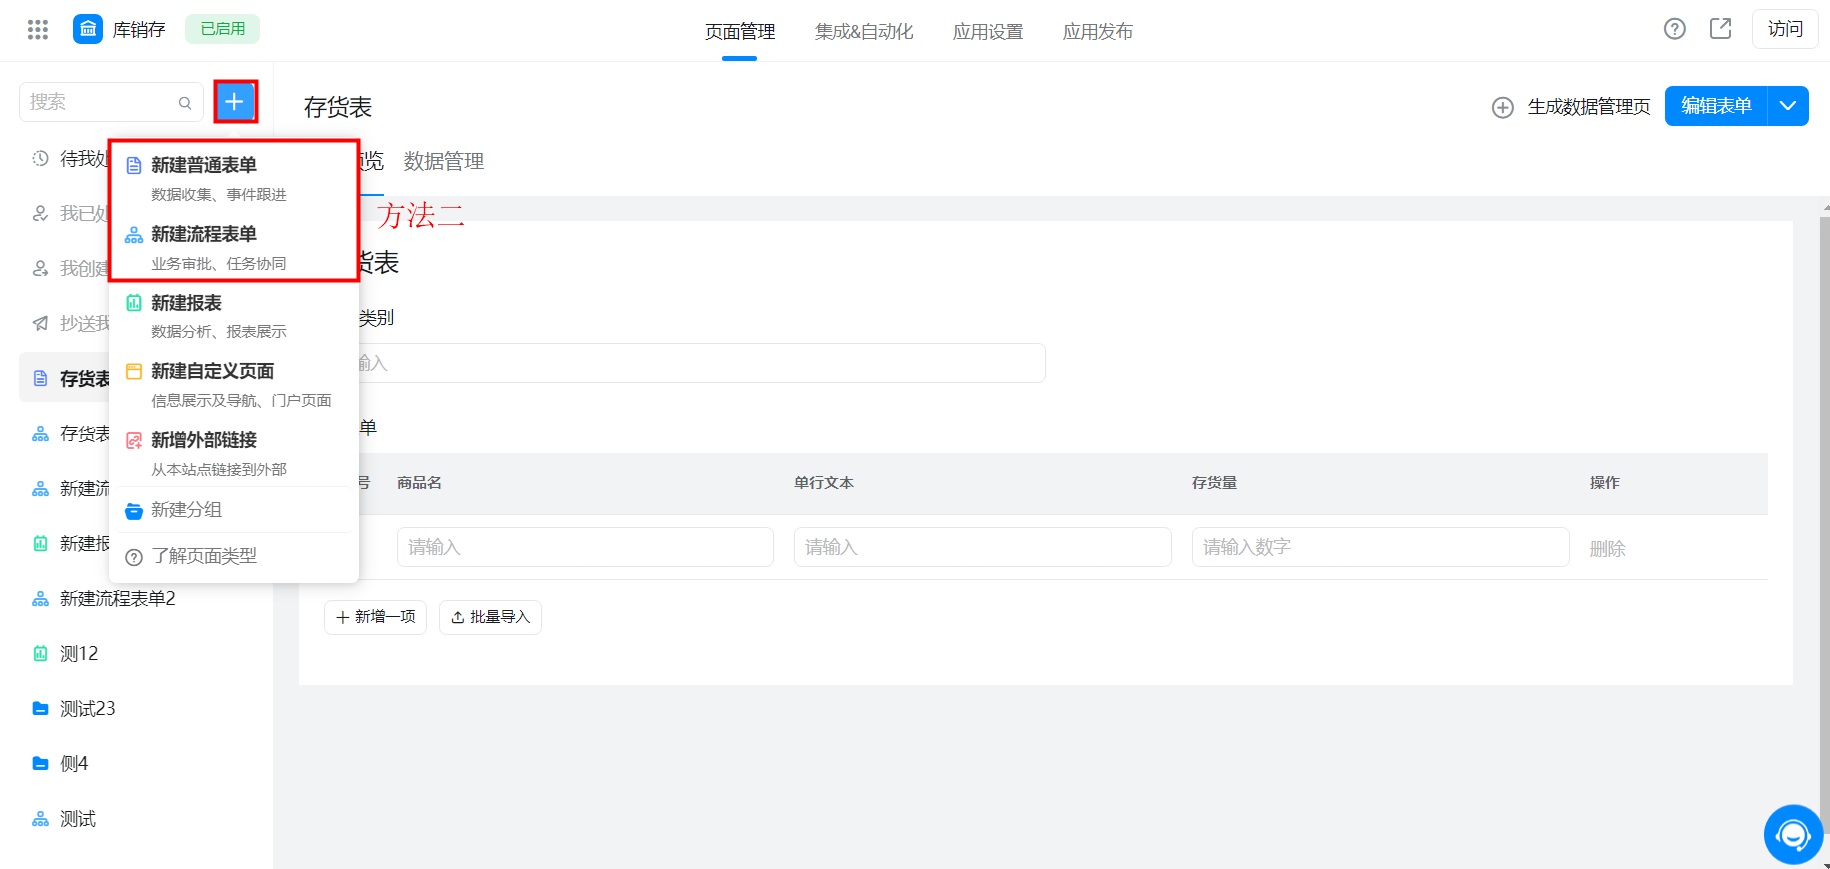
Method 2: after entering the application> Click Create form in the upper left corner of the application + sign/create flow chart
3. Form settings
After creating a form, you can start setting the form. Flow chart is slightly different from ordinary forms in form settings. Flow chart has more process settings than ordinary forms.
(1) Common form
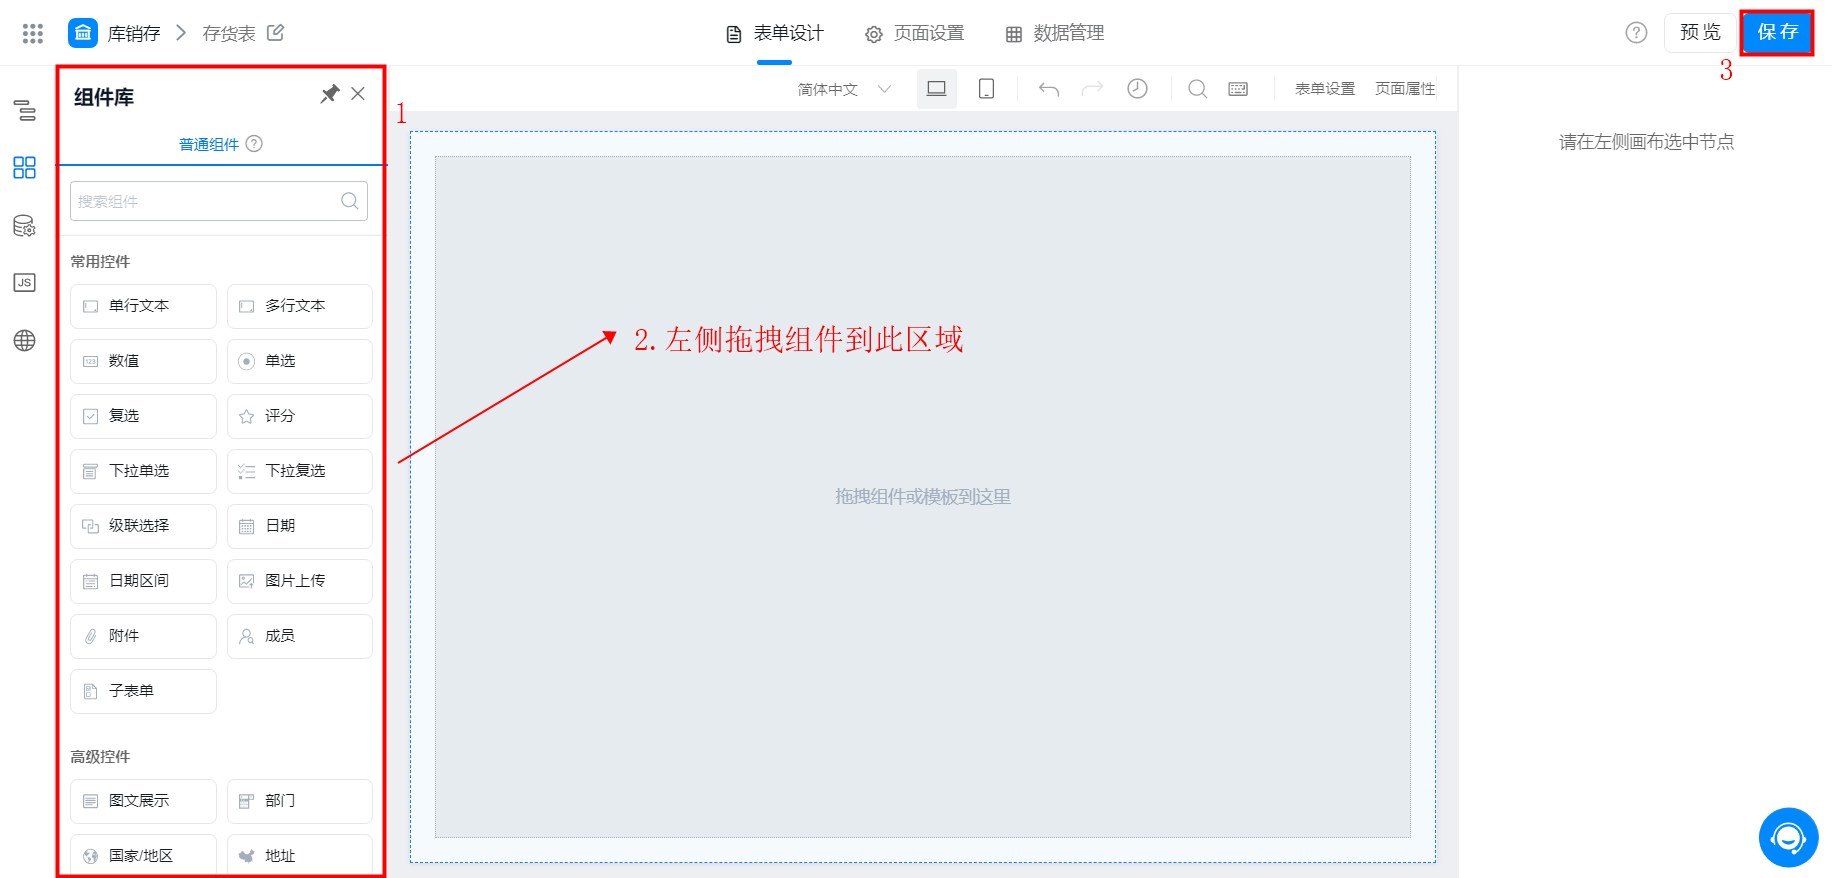
Setting steps: go to form design> select components to be used> Save
(2) flow chart
Procedure:Go to form Settings> select the components to be used> save> Process Design> set the approver/executor/CC node> save> publish process
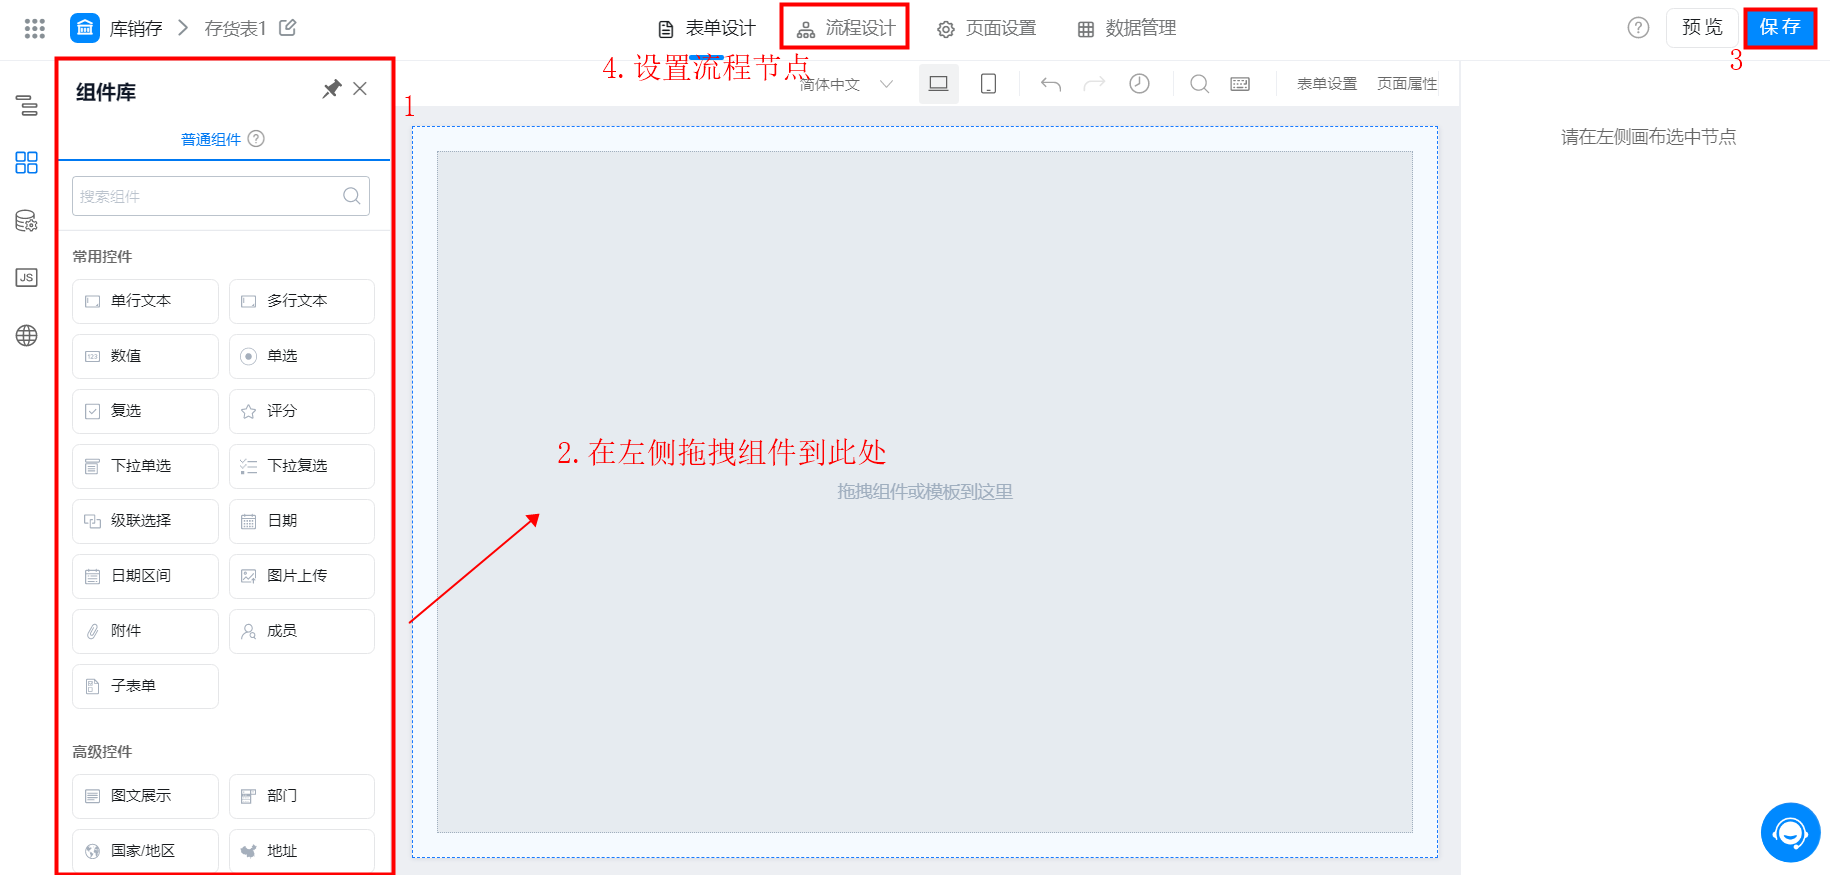
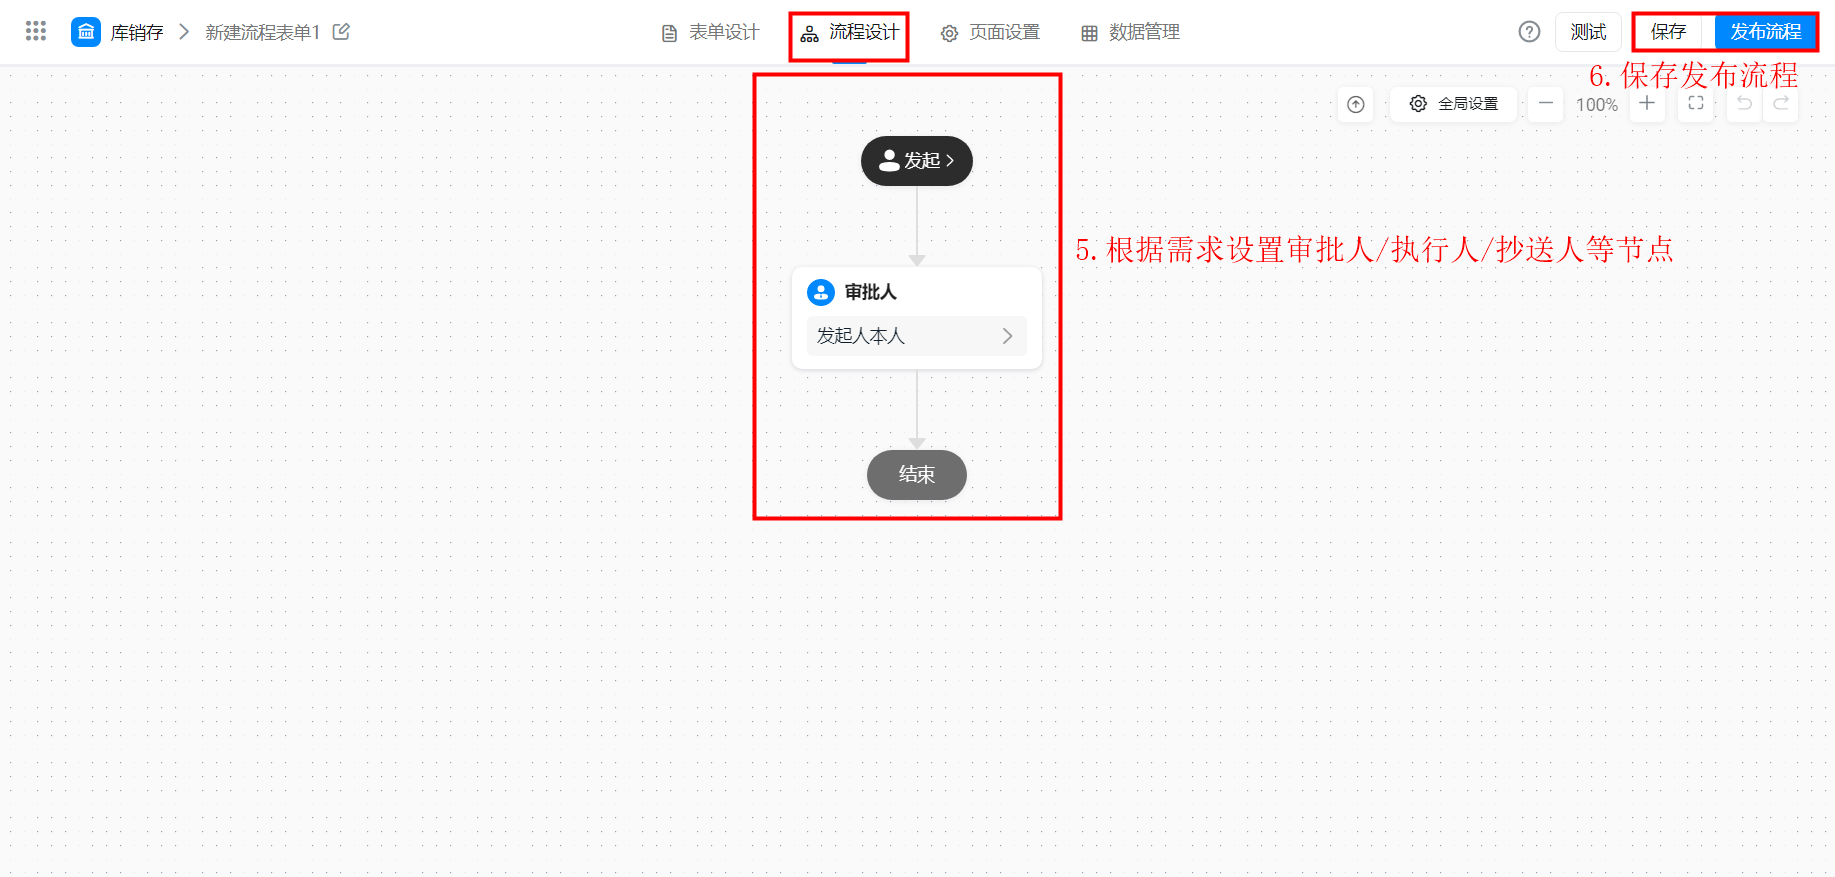
After you set up the application according to the preceding steps, you can click go online, and then members can access the form to fill in the data. For submitted data, the administrator can view it in data management.
3.1 form design
The form design is divided into three parts, as shown in the figure:
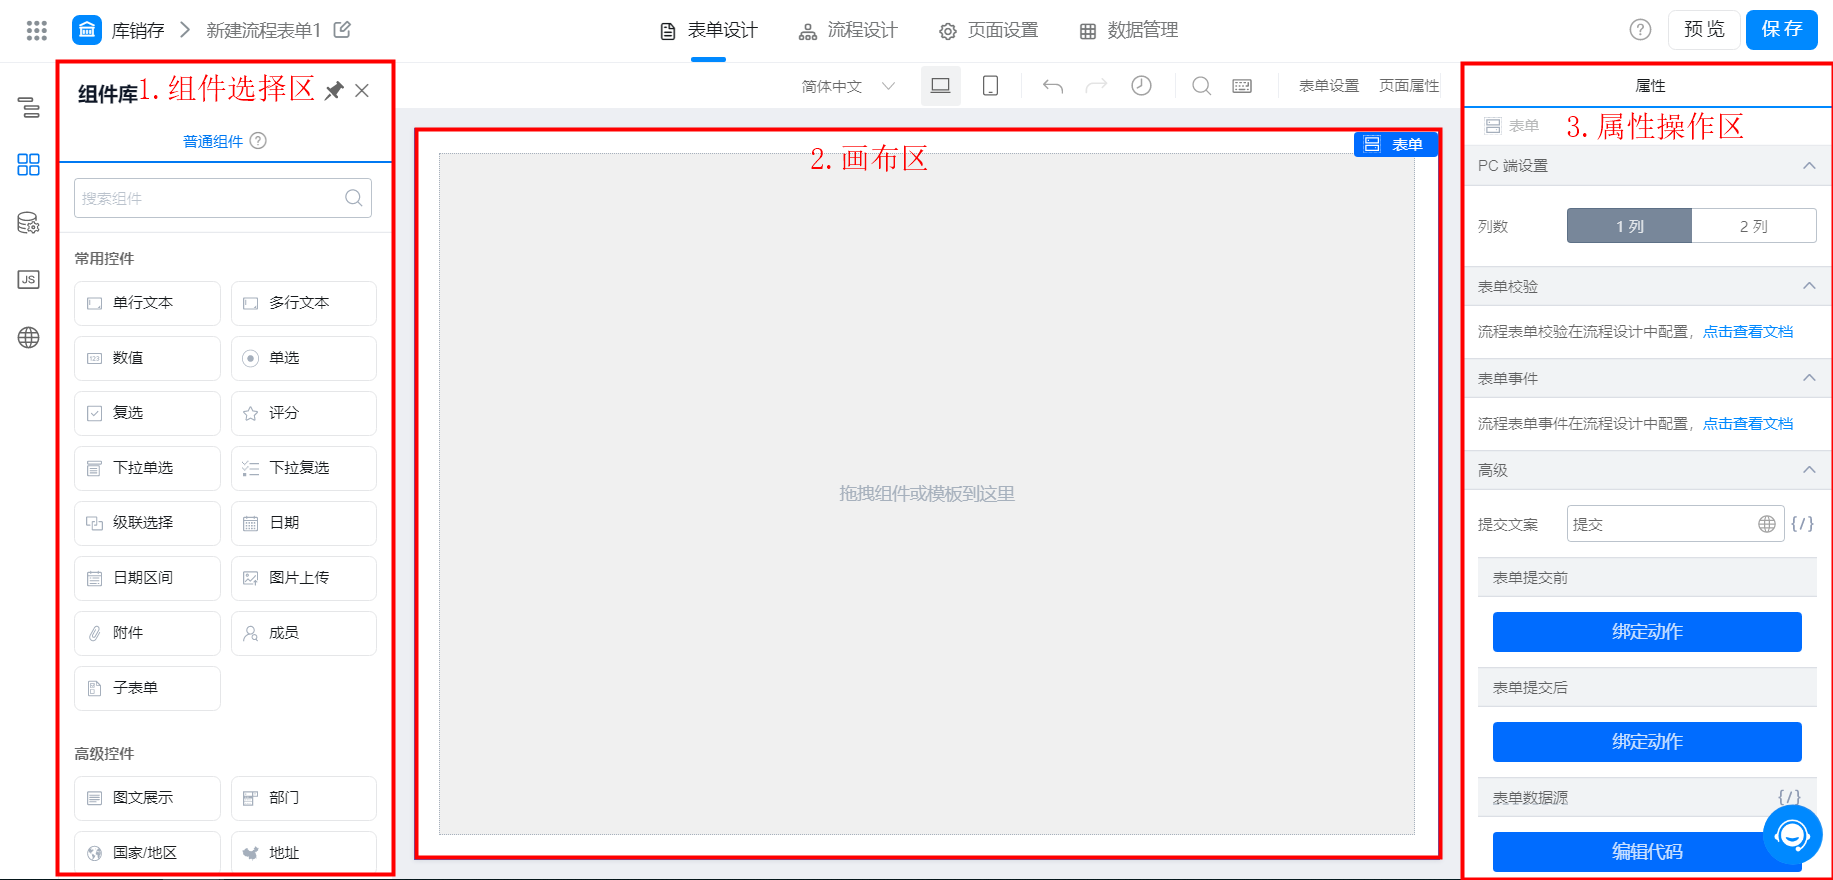
Component selection:Select a component. Different components can store different types of data.
Canvas area:You can arrange components in order, etc.
Component properties:Including the property settings of a single component segment and the property settings of the entire form
3.2 Process Design
Only flow chart involves setting process design, and common forms do not need to be set.
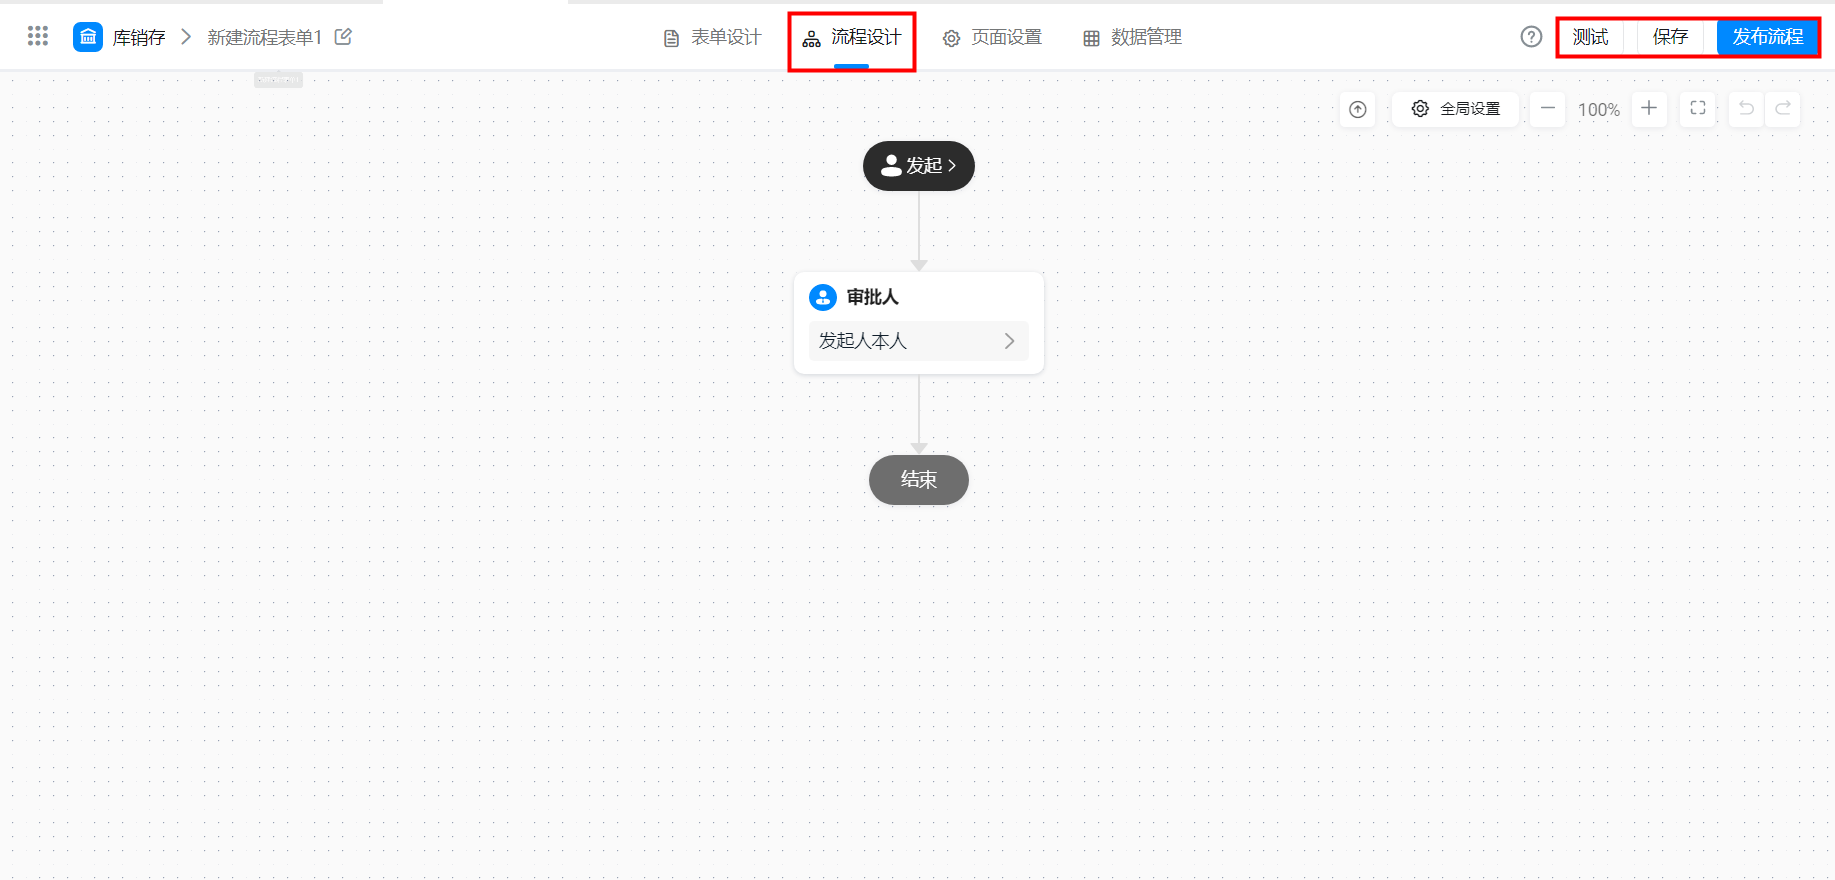
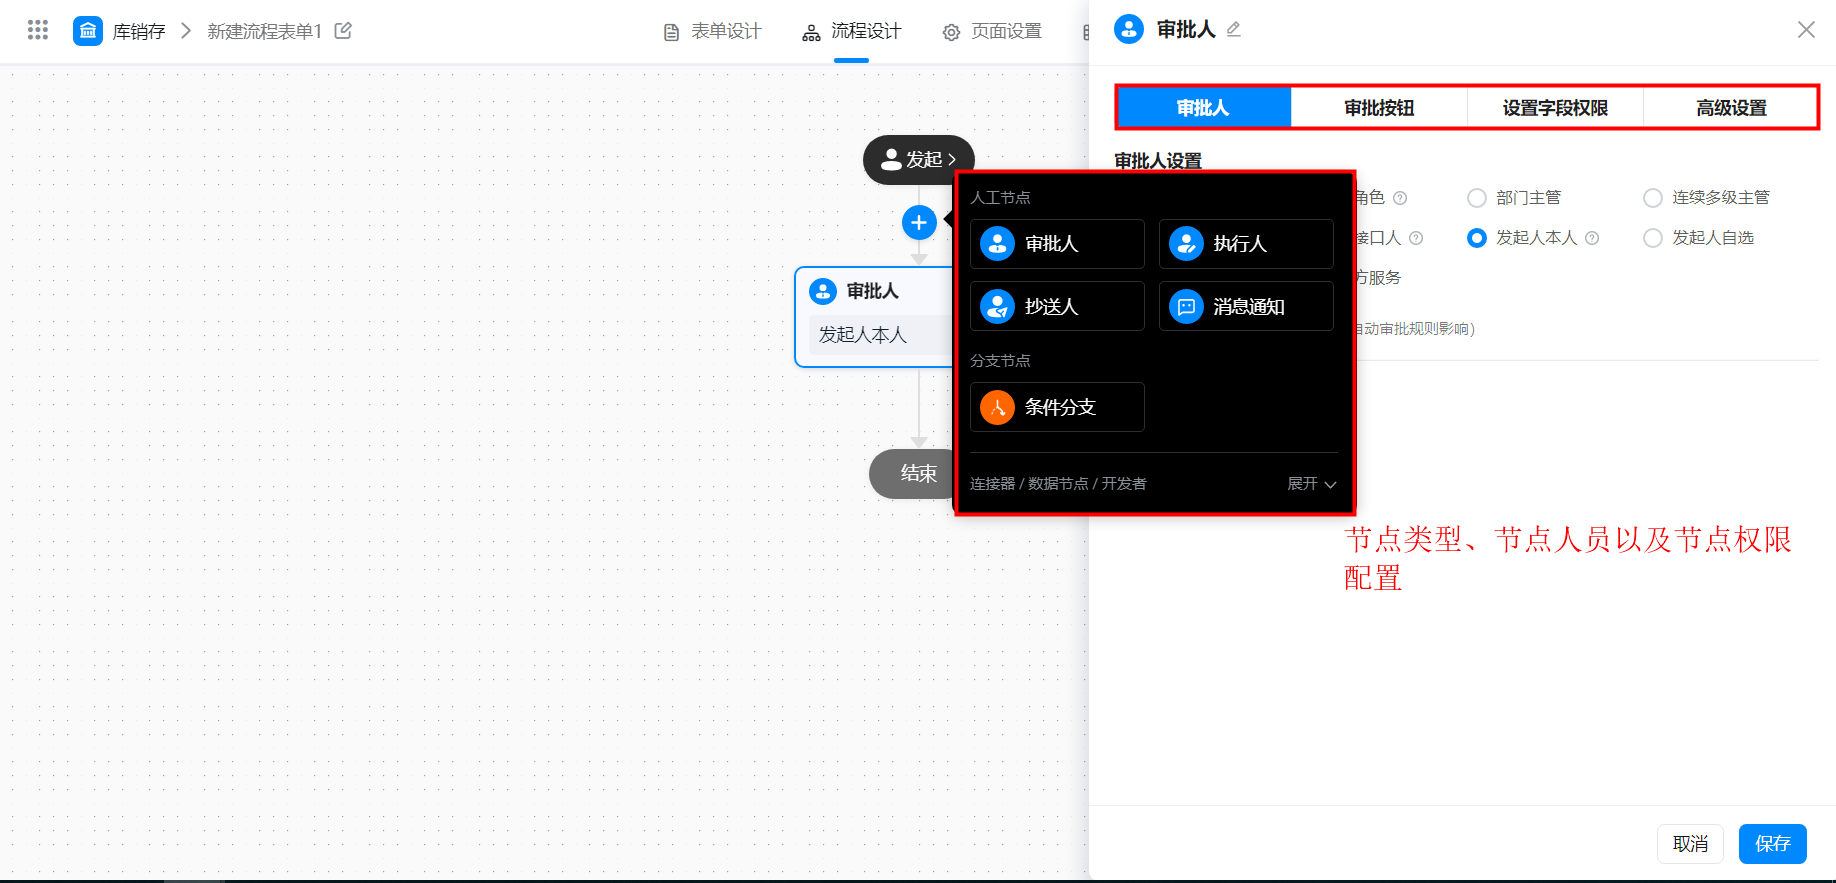
Node type selection: Select approver, executor, or CC based on scenario requirements.
Node personnel and permission configuration: you can approve the specific personnel rules, field permissions, and approval permissions of approver/executor/CC.
3.3 save form
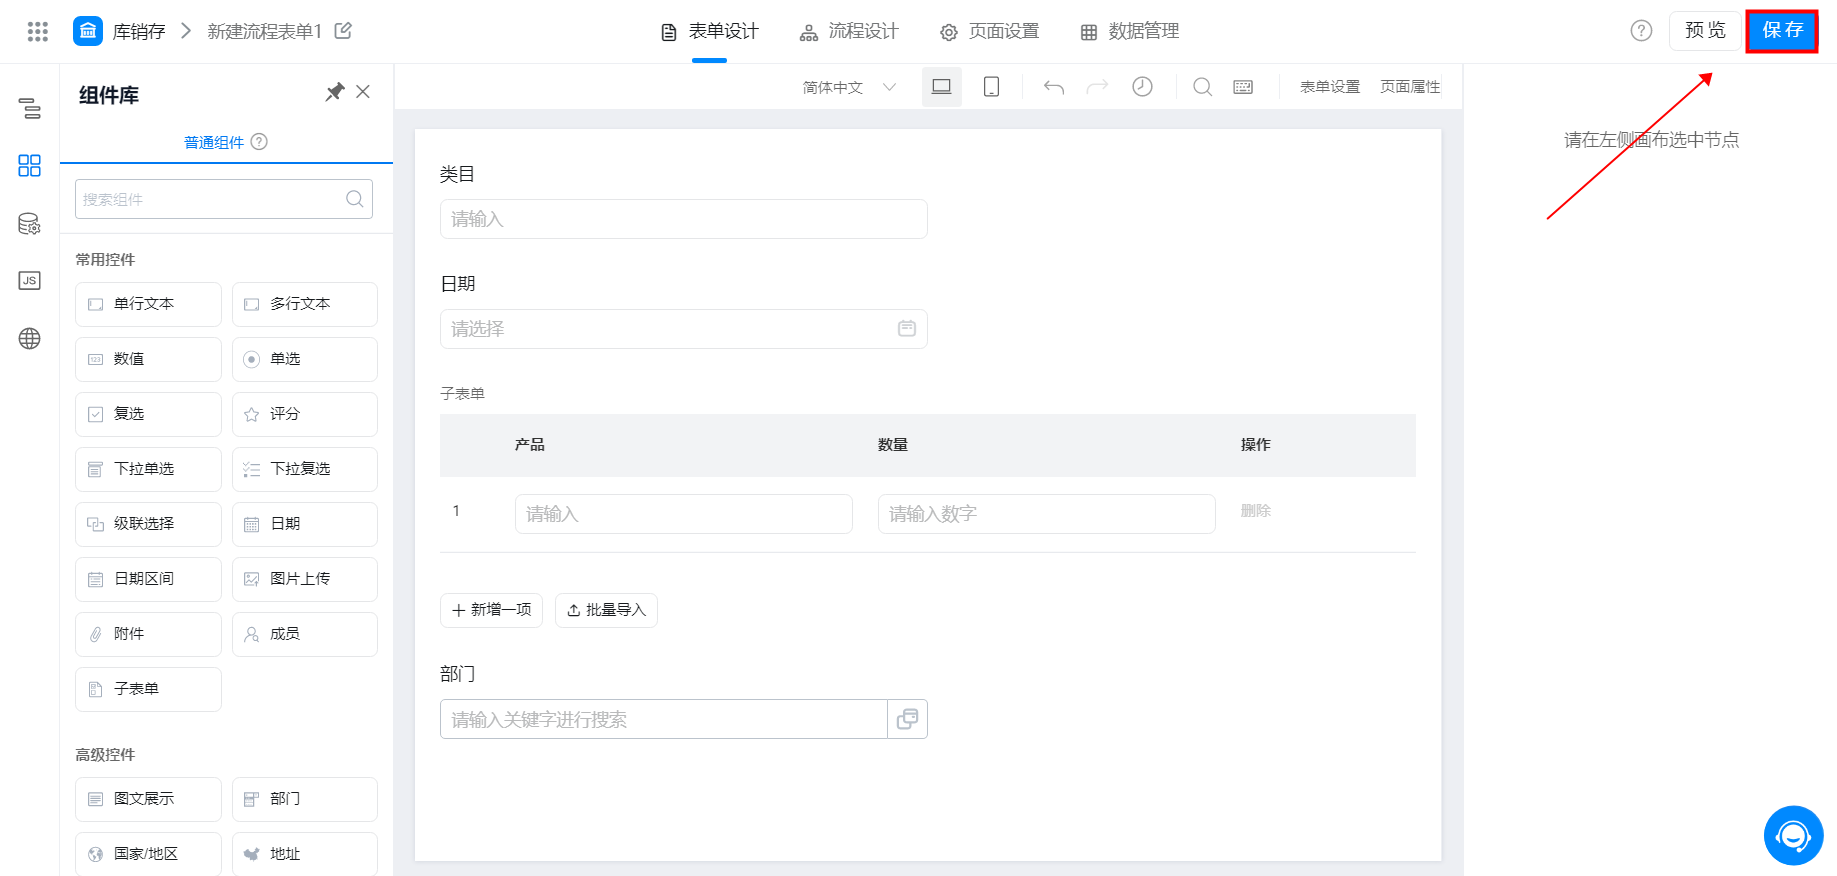
Whether it is a normal form or flow chart, after configuring the components in the form design, click save in the upper-right corner to create a form normally.
3.4 Process release
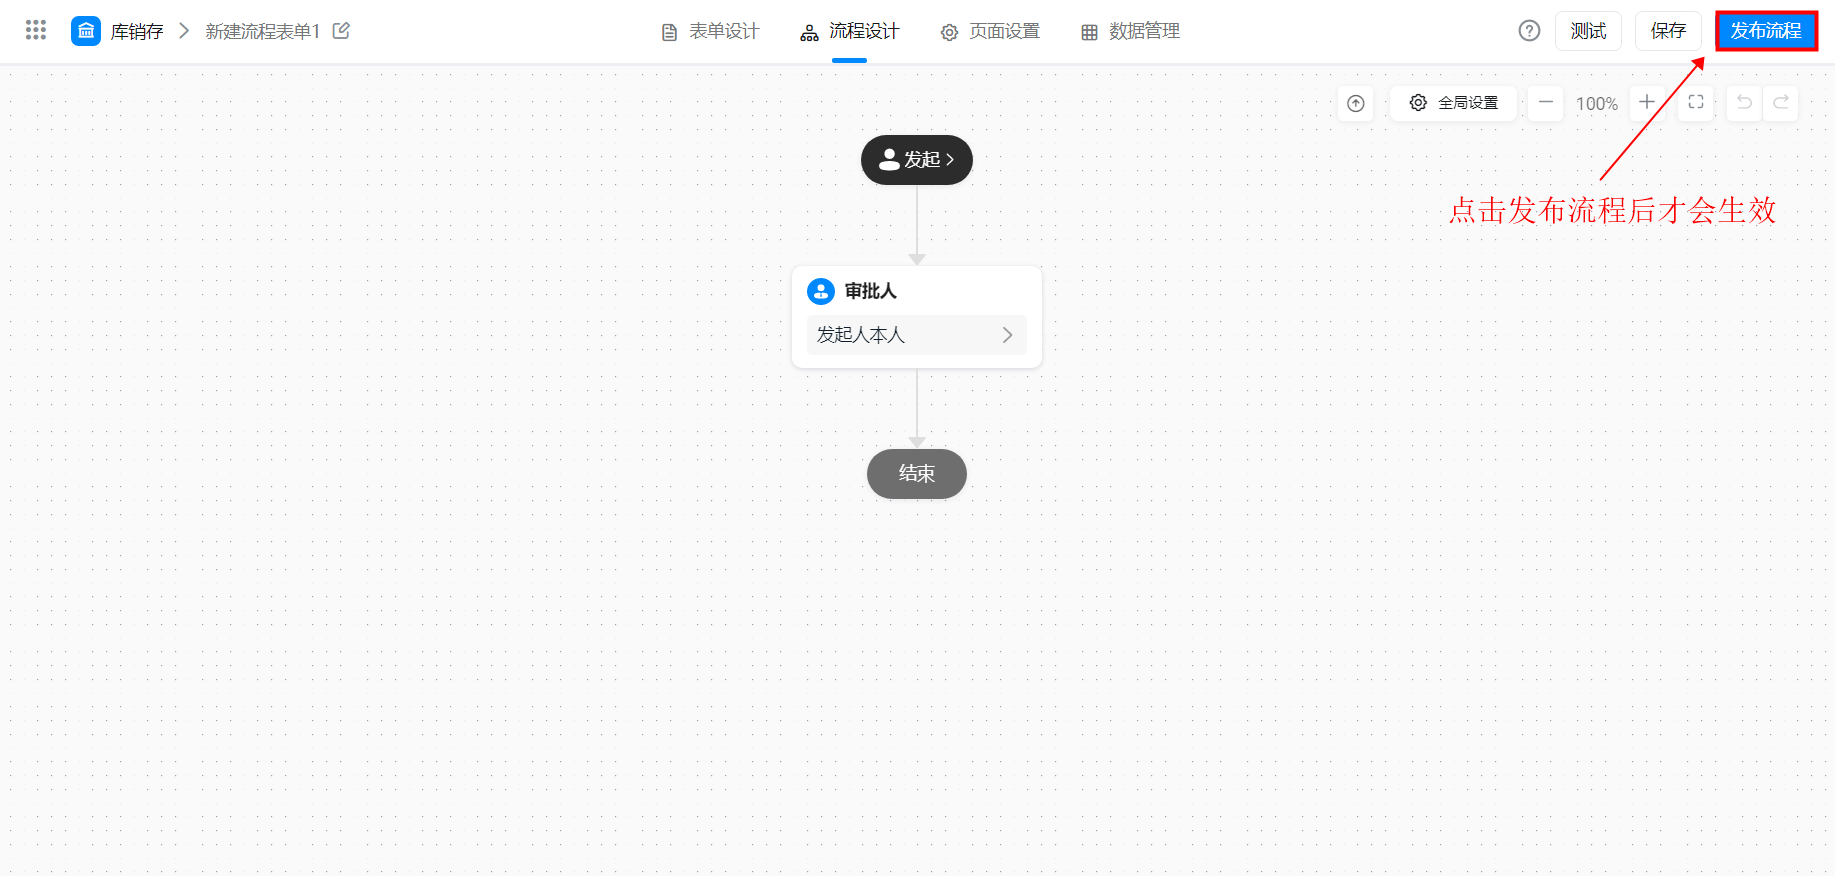
Flow chart by default, the system has its own process node, and the approver is the initiator himself. To prevent the administrator from forgetting to set the process node and causing the process node to fail to operate normally, you can customize and modify the process node. If you customize and modify the process node, click publish on the process page to take effect
Note: after the newly configured process node is published, it only takes effect for newly submitted data. The submitted historical data is still executed according to the previous process rules.
4. Data Management
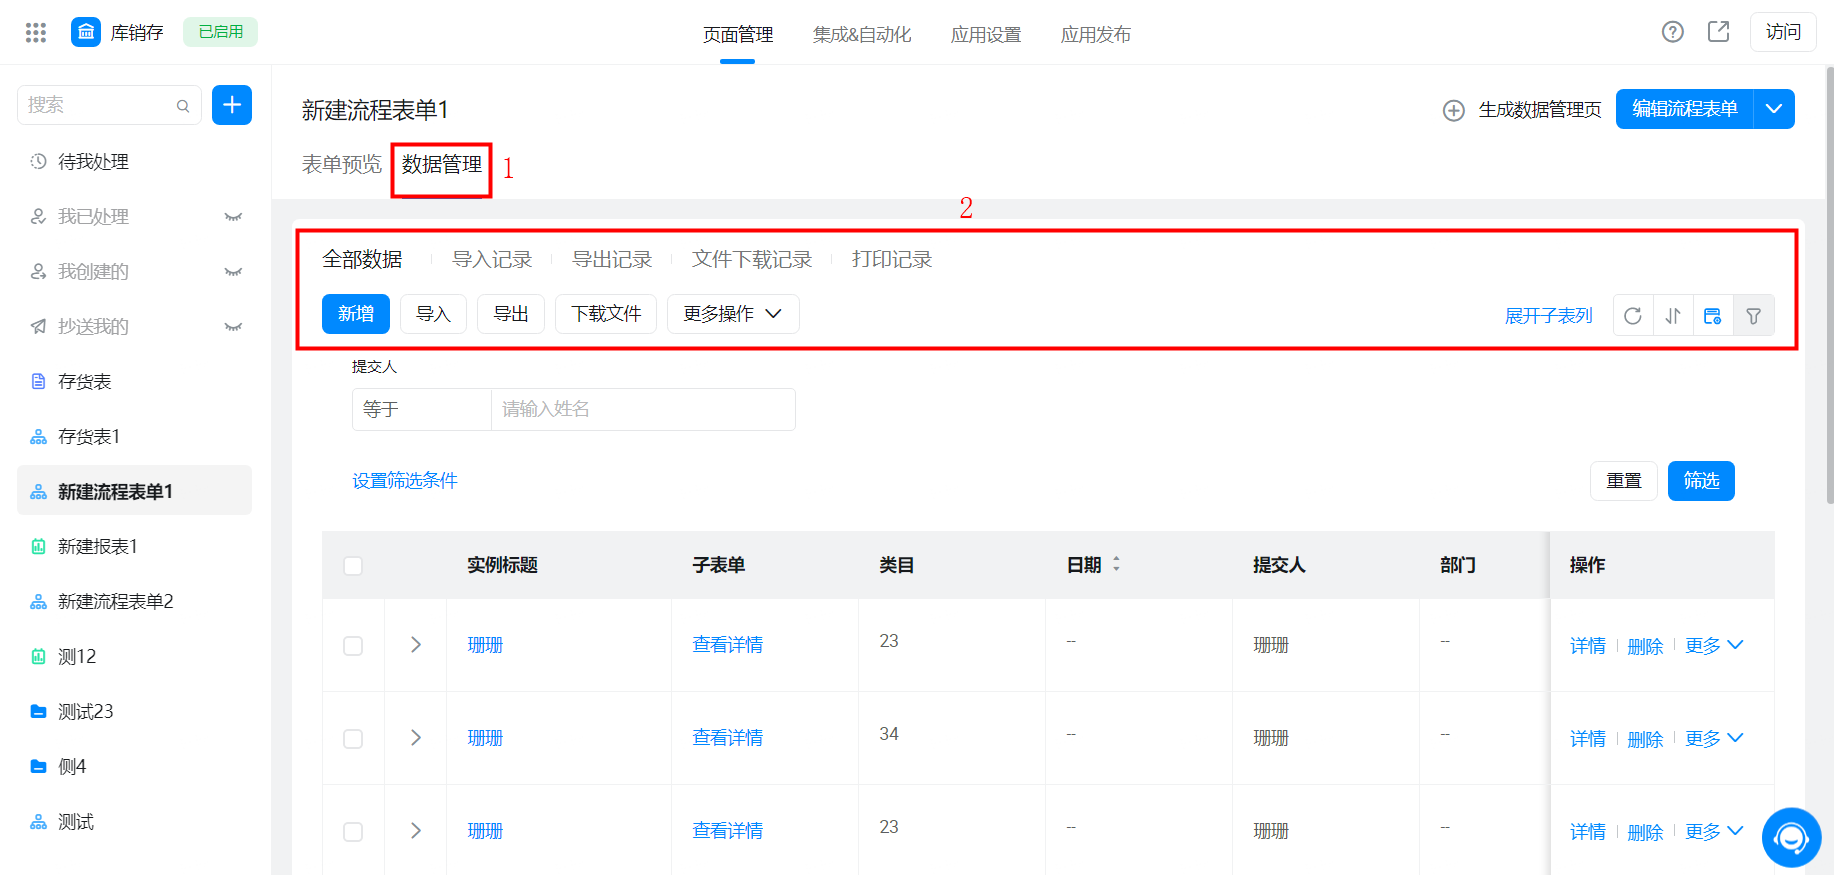
After an employee submits data through a form, administrators with application management permissions canData managementImport, Export, edit, delete, view, and print submitted data. Currently, there are two portals to view data management.
Entry 1: corresponding form/Flow Chart> edit form/Flow Chart> Data Management
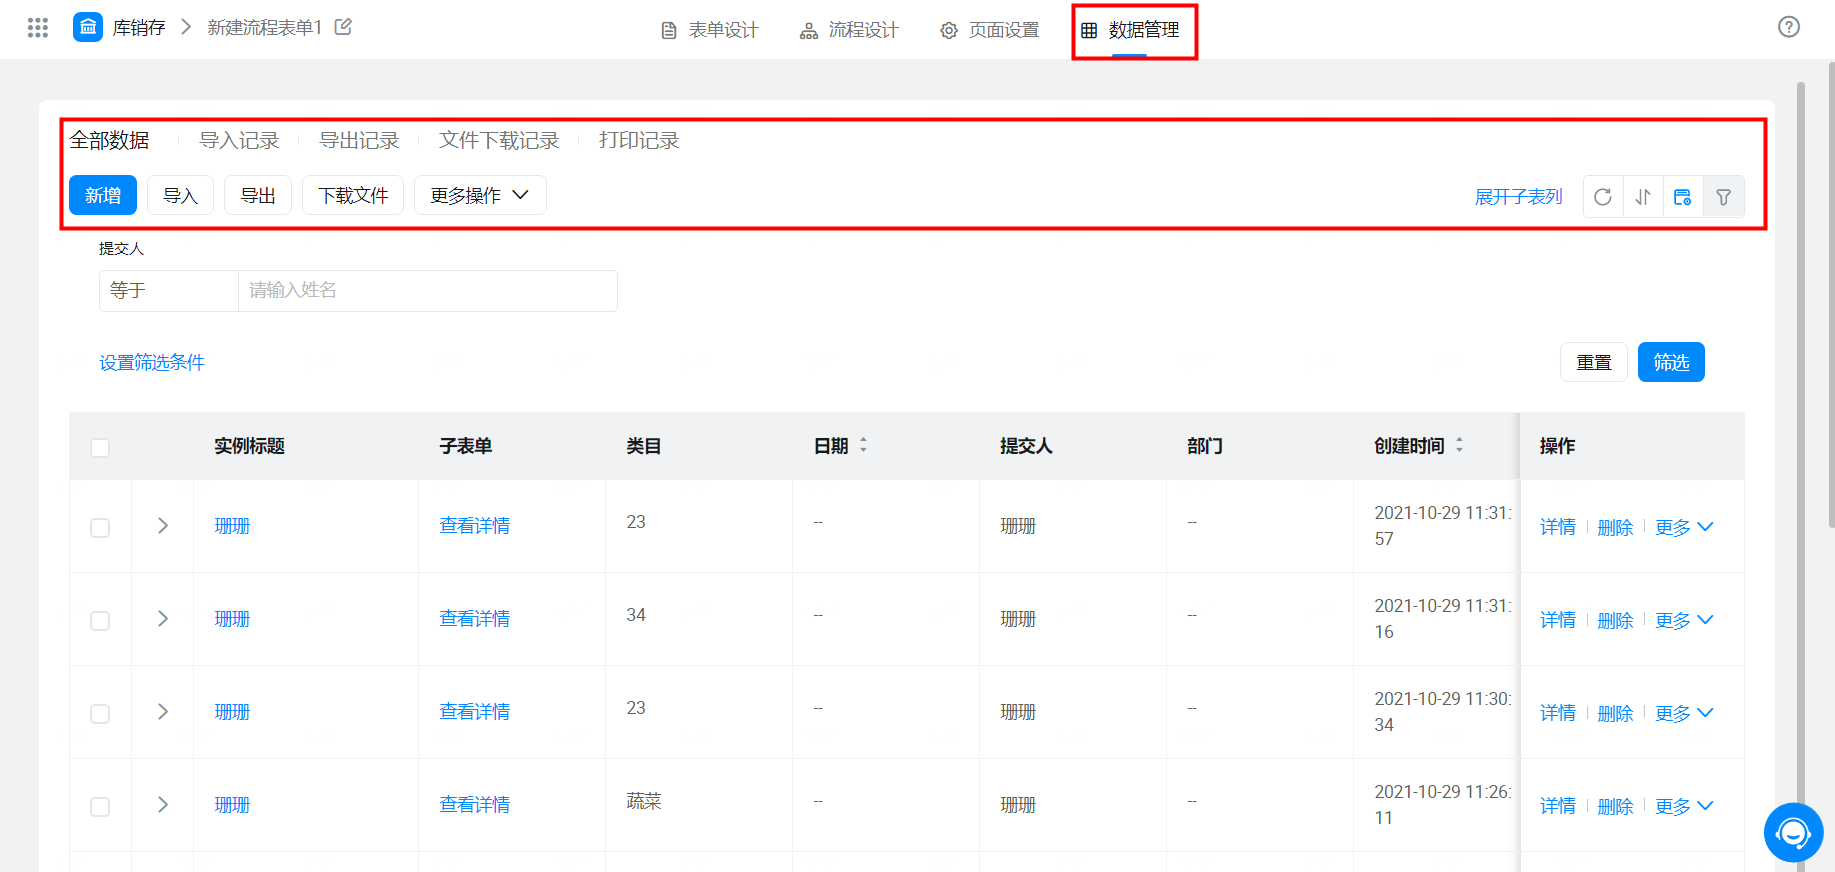
Entry 2: corresponding form/Flow Chart> Data Management
5. Integration & Automation
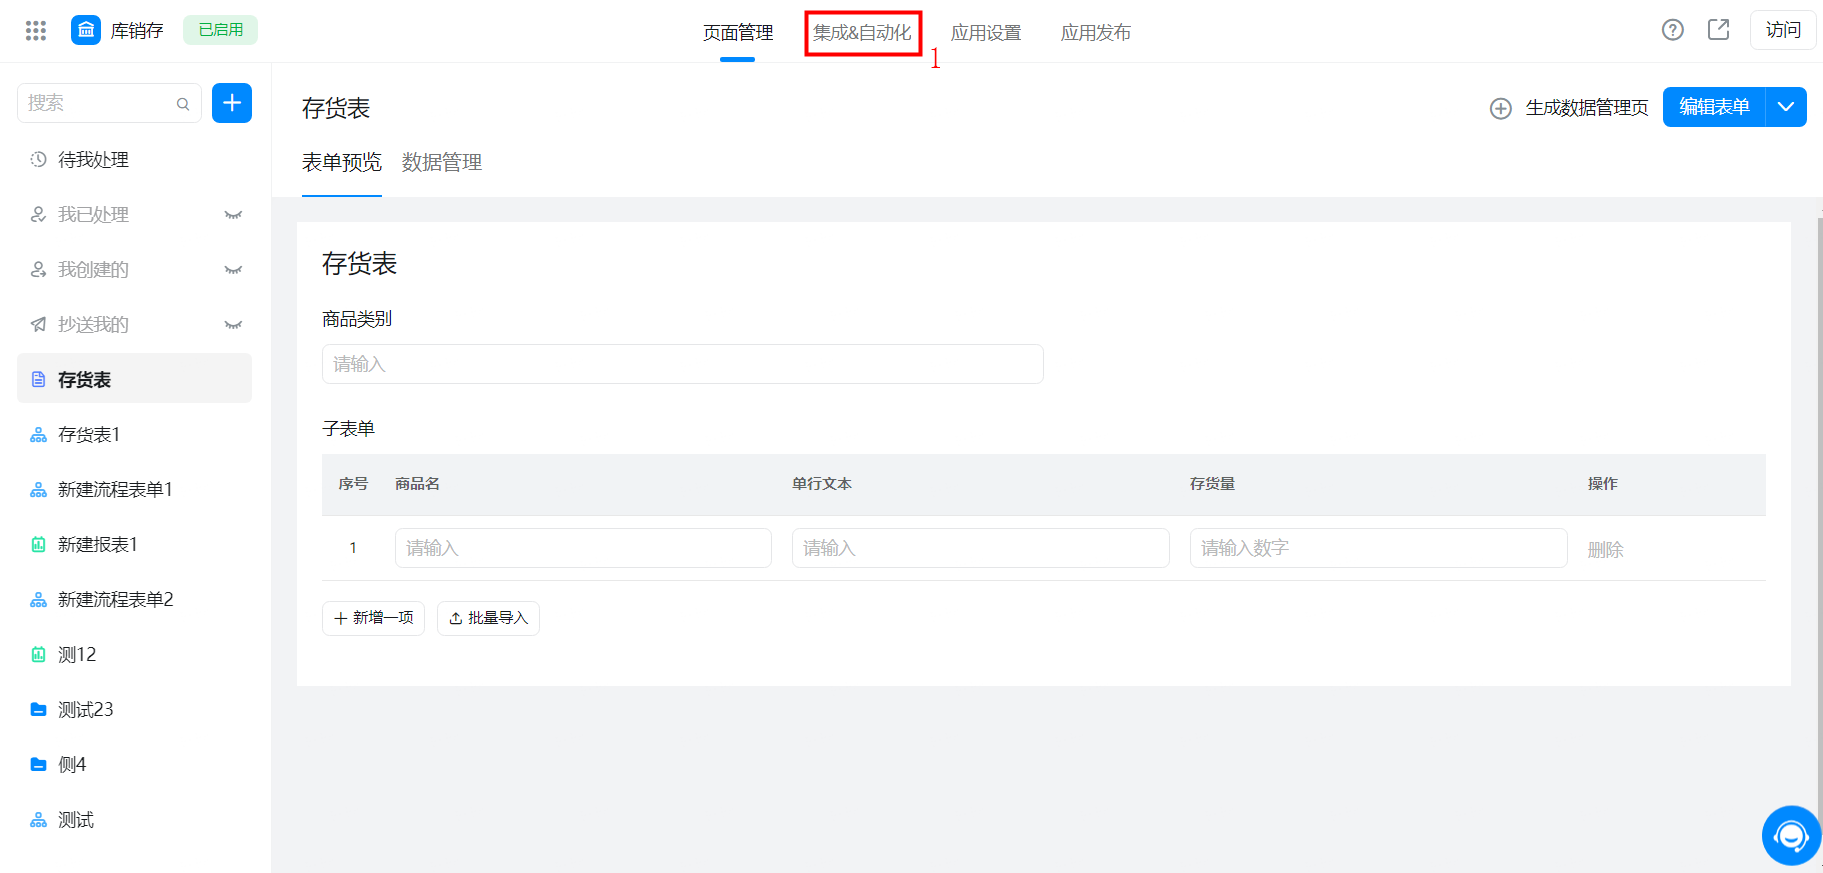
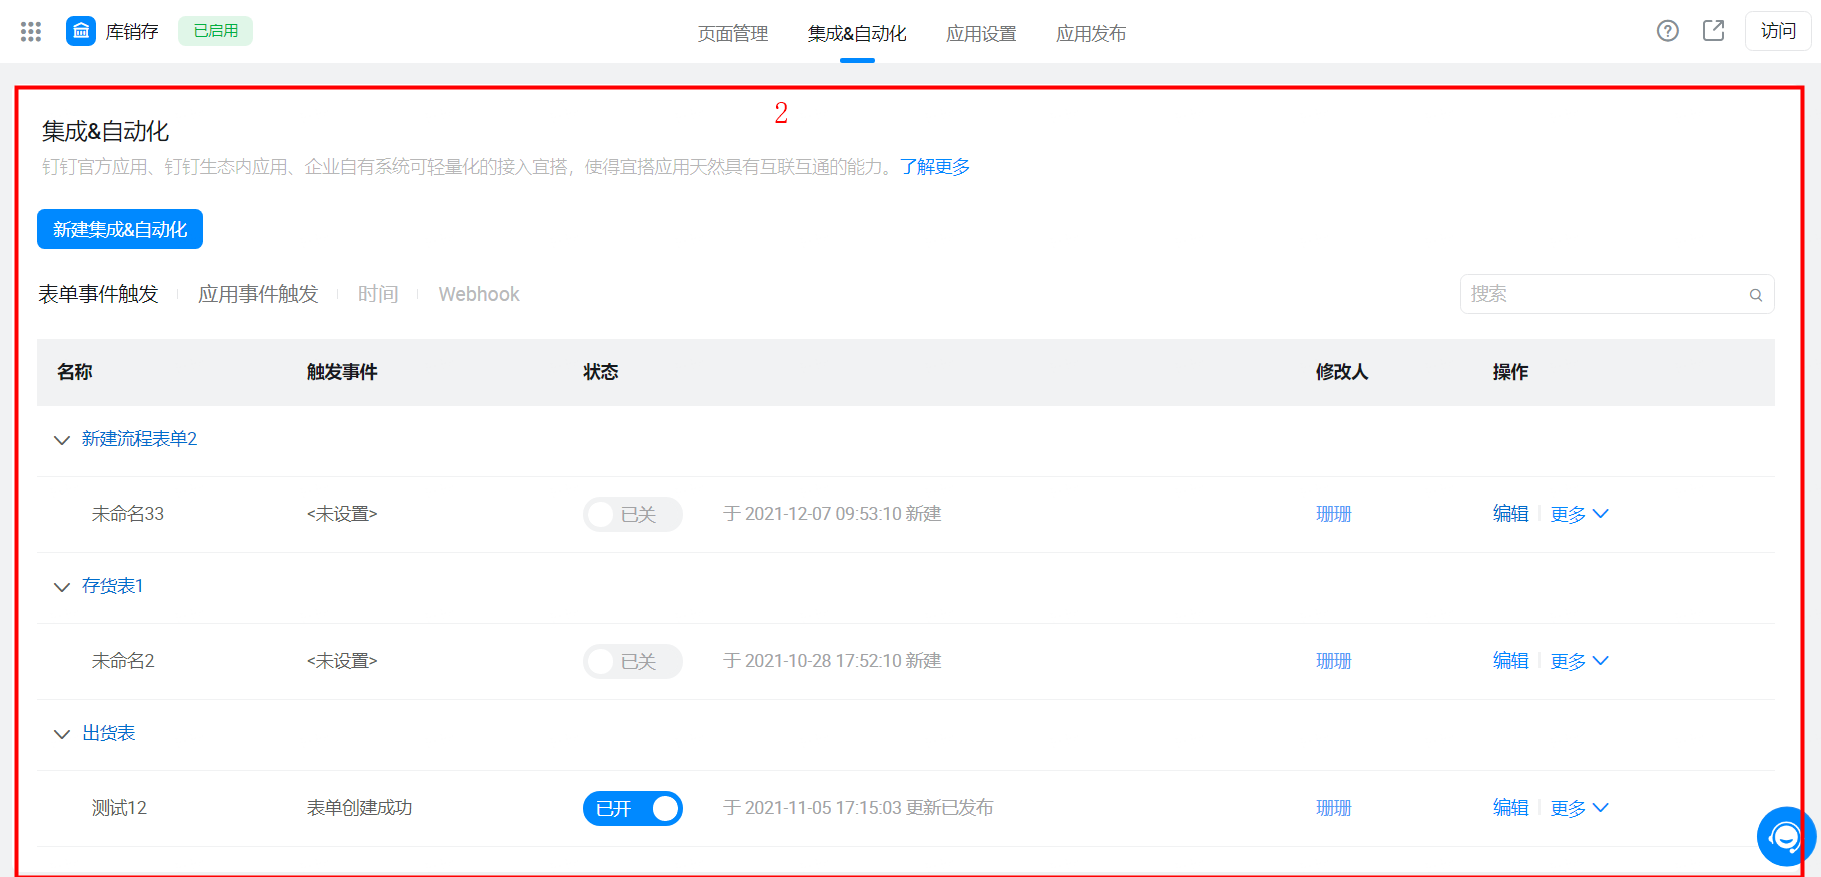
The logic orchestration function has been upgraded as a whole, and DingTalk connectors have been connected at the same time, DingTalk official applications, DingTalk Ecological Applications, and lightweight access YIDA of enterprise-owned systems, YIDA applications are naturally interconnected.
6. Page settings
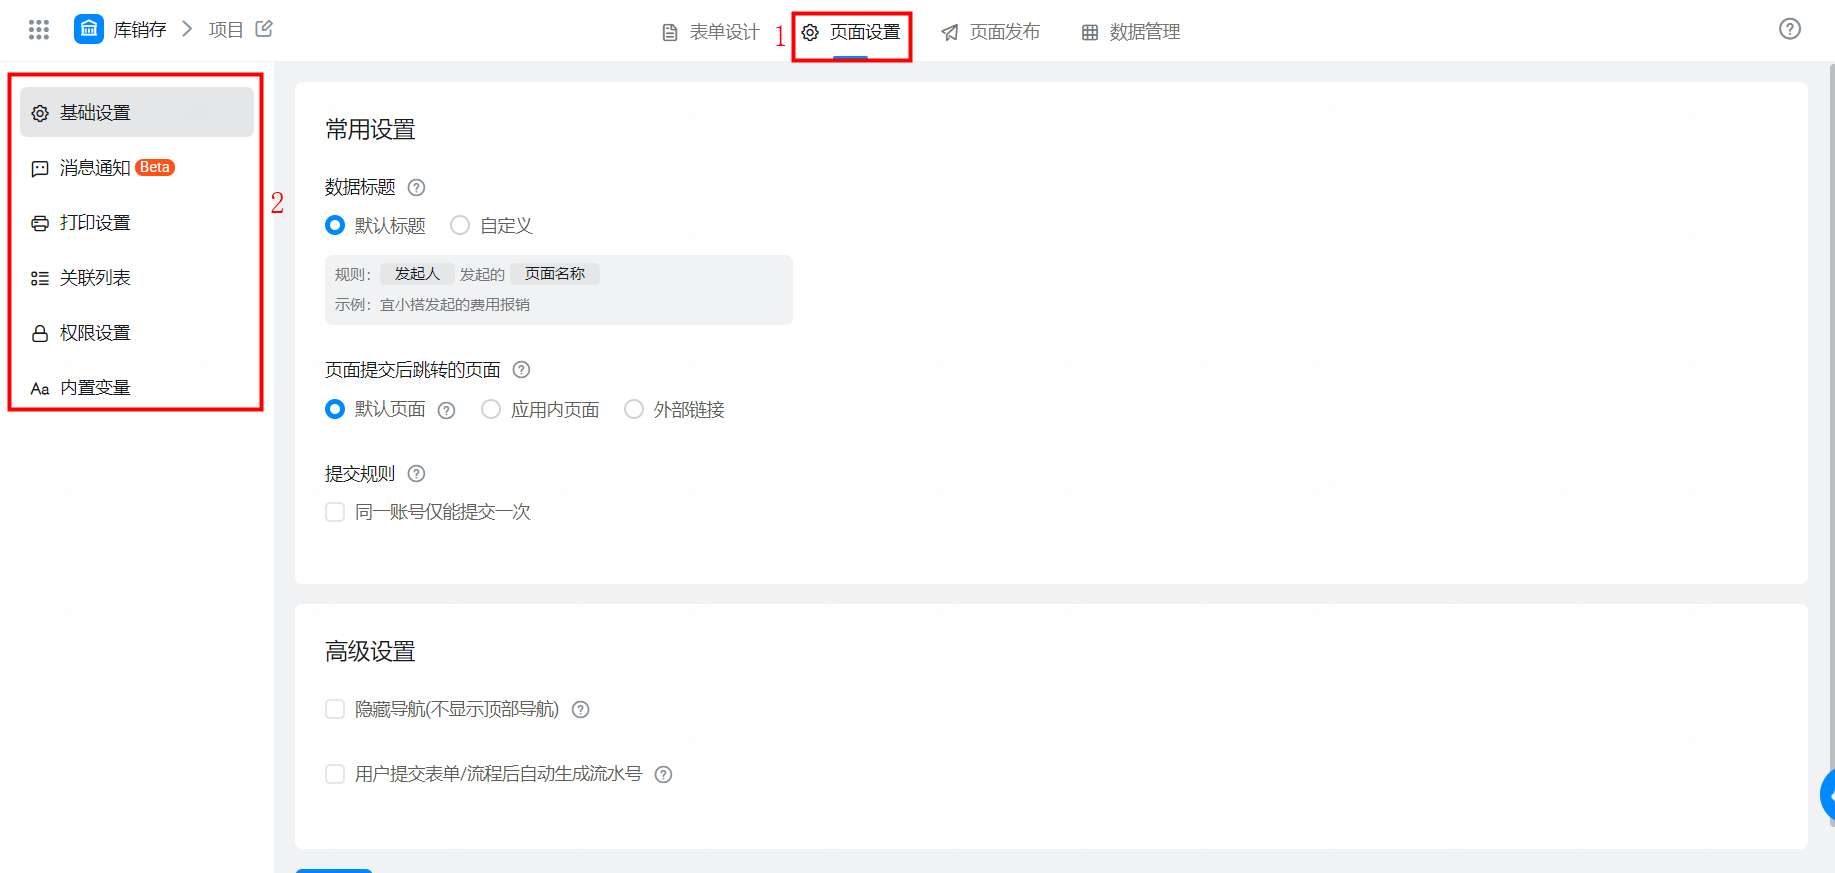
Basic and enhanced feature settings for forms, such as basic settings, message notifications, print settings, association lists, integration automation, and built-in variables
